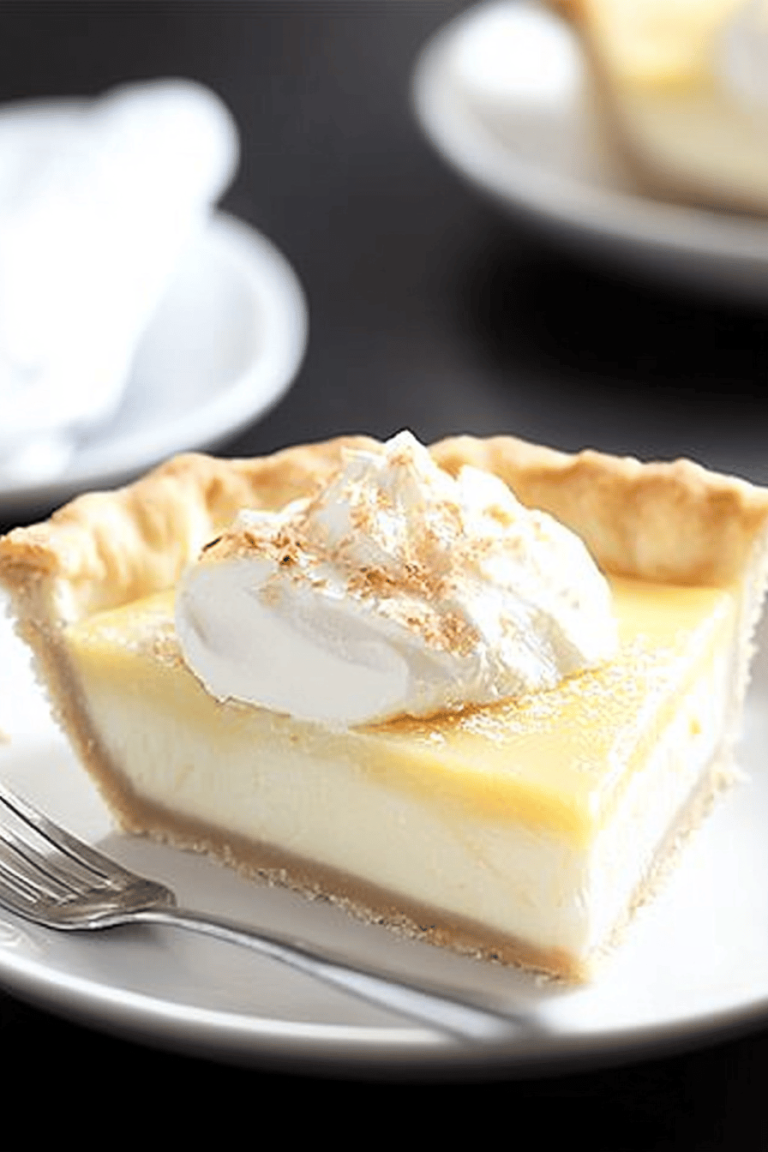
You know those days when a craving hits, and it’s not just any craving, but a *specific* craving? The kind where only something rich, creamy, and utterly decadent will do? That’s usually when I find myself reaching for the ingredients to make this cheesecake Ice Cream. Seriously, it’s become my secret weapon when I need a sweet treat but don’t have the patience (or honestly, the energy) to bake a whole cake. Forget those complicated custard bases or waiting hours for churned ice cream – this magic happens with just a handful of ingredients and a little bit of love. It’s the closest thing to actual cheesecake you can get in ice cream form, and trust me, it’s a total game-changer. My family devours this, and I’m pretty sure your friends and family will too!
What is no-churn cheesecake ice cream?
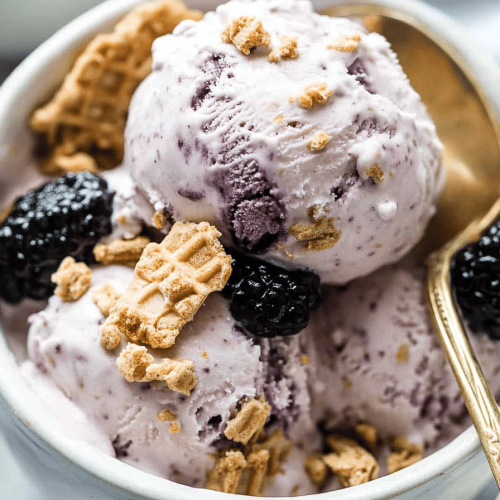
So, what exactly *is* no-churn cheesecake ice cream? Think of it as the best of both worlds, condensed into one unbelievably simple dessert. We’re taking all the tangy, creamy goodness of a classic cheesecake – that unmistakable Cream Cheese flavor, the subtle sweetness, the smooth texture – and transforming it into ice cream without needing an ice cream maker. It’s a clever shortcut that relies on a few key ingredients that whip up into a dreamy, frozen treat. The “no-churn” part is the real star here. It means you can achieve that luscious, melt-in-your-mouth texture without any special equipment, just a mixer and a freezer. It’s essentially a no-bake cheesecake filling that gets frozen solid, but in the most delightful, scoopable way imaginable.
Why you’ll love this recipe?
Oh, where do I even begin with why this cheesecake ice cream is so special? First off, the flavor is just *unreal*. It truly tastes like a bite of creamy, tangy cheesecake, but with that wonderfully cold, refreshing ice cream texture. It’s that perfect balance of sweet and tart that makes your taste buds sing. And the simplicity? It’s almost embarrassing how easy this is. I often whip this up on a whim when that late-night sweet tooth strikes, and it’s usually ready to go in about 15 minutes of active prep time. Plus, it’s surprisingly budget-friendly compared to buying fancy ice cream, using ingredients you probably already have in your pantry and fridge. What I love most, though, is its versatility. You can enjoy it plain, which is divine, or you can swirl in some fruit compote, chocolate chips, or even some cookie crumbles. It’s the ultimate blank canvas for your dessert creativity! It’s also a lifesaver when you want to impress guests without spending all day in the kitchen. Honestly, this is one of those recipes that just *works*, every single time. I’ve made it for barbecues, birthday parties, and just plain Tuesday nights, and it’s always a hit.
How do you make no-churn cheesecake Ice Cream?
Quick Overview
Making this dreamy cheesecake ice cream is incredibly straightforward. You’ll start by whipping up some heavy cream to airy peaks, then gently folding in sweetened condensed milk and cream cheese until it’s all smooth and dreamy. Pour it into a freezer-safe container, and let the magic of the freezer do the rest. No churning, no complicated steps, just pure, unadulterated ice cream bliss. It’s the perfect recipe for when you want maximum flavor with minimum effort, and it proves that you don’t need a fancy machine to make incredible homemade ice cream.
Ingredients
For the Main Batter:
Heavy Whipping Cream: You’ll need about 2 cups. Make sure it’s cold, really cold! This is crucial for getting those nice stiff peaks when you whip it. I always keep a carton in the fridge just for baking and ice cream projects.
Sweetened Condensed Milk: One 14-ounce can. This is the secret to its sweetness and smooth, scoopable texture without needing to make a sugar syrup. I tend to buy the store brand, and it works just perfectly.
Cream Cheese: Two 8-ounce packages, softened. This is non-negotiable for that classic cheesecake flavor! Make sure it’s softened to room temperature so it blends in beautifully without lumps. I prefer full-fat cream cheese for the richest flavor and texture.
Vanilla Extract: 1 teaspoon. This little bit of vanilla rounds out the flavors and adds that classic ice cream note. Good quality vanilla makes a difference!
Lemon Juice: 1 tablespoon (optional, but highly recommended). This really brightens up the cream cheese flavor and gives it that signature tang you expect from cheesecake. Freshly squeezed is best!
For Optional Swirls or Mix-ins:
Fruit Compote: About 1/2 cup of your favorite, like strawberry, raspberry, or blueberry. Homemade or good quality store-bought works!
Chocolate Chips: 1/2 cup. Mini or regular, milk, dark, or white – your choice!
Crushed Graham Crackers or Cookies: About 1/2 cup. Adds a lovely texture and that classic cheesecake base element.
Step-by-Step Instructions
Step 1: Prepare Your Freezer Container
Grab a loaf pan or any freezer-safe container. I like to line mine with parchment paper, leaving some overhang on the sides. This makes it a breeze to lift the ice cream out later. If you don’t have parchment, just make sure your container is well-greased or non-stick.
Step 2: Whip the Cream
In a large, chilled bowl (seriously, pop your bowl in the freezer for 10 minutes beforehand if you can!), whip the cold heavy cream with an electric mixer until stiff peaks form. You want it to hold its shape when you lift the beaters. Be careful not to overmix, or you’ll end up with butter!
Step 3: Blend the Cream Cheese Mixture
In a separate medium bowl, beat the softened cream cheese with the electric mixer until it’s completely smooth and creamy, with no lumps. This is super important for a smooth ice cream. Gradually beat in the sweetened condensed milk, vanilla extract, and lemon juice (if using) until everything is well combined and smooth. It should look like a luscious, thick custard.
Step 4: Fold It All Together
Now, gently fold about a third of the whipped cream into the cream cheese mixture. This lightens it up. Then, carefully fold in the remaining whipped cream until just combined. You want to keep as much air in the whipped cream as possible, so don’t overmix! Just fold until you don’t see any streaks of cream cheese mixture. The batter should be light and airy.
Step 5: Add Your Swirls (Optional)
If you’re adding swirls, dollop your fruit compote or chocolate chips over the ice cream base in the prepared pan. Use a knife or skewer to gently swirl them through the batter, creating beautiful ribbons. Don’t overdo it; just a few gentle swirls will do the trick.
Step 6: Freeze It Solid
Cover the container tightly with plastic wrap, then with foil, or the lid if it has one. Place it in the freezer for at least 6 hours, or preferably overnight, until it’s firm and scoopable. The longer it freezes, the firmer it will get.
Step 7: Scoop and Enjoy!
Once it’s frozen solid, let it sit at room temperature for about 5-10 minutes to soften slightly, making it easier to scoop. Scoop generously into bowls and enjoy the creamy, tangy goodness!
What to Serve It With
This cheesecake ice cream is so divine on its own, but it also plays beautifully with other flavors and textures. For breakfast, I love a small scoop with a drizzle of honey and a sprinkle of fresh berries. It’s like a decadent dessert for your morning! For brunch, it’s absolutely stunning served alongside fresh fruit salad or even a light pastry. Imagine a beautiful presentation with a few mint leaves – it feels so elegant! As a dessert, the possibilities are endless. A warm berry compote is a classic for a reason, but I also love it with a sprinkle of toasted nuts, a drizzle of chocolate ganache, or even crumbled pieces of graham cracker crust for that extra cheesecake vibe. And for those cozy snack times? A simple scoop is pure comfort. Sometimes I’ll even put a scoop between two soft cookies for an instant ice cream sandwich. My kids particularly love it when I add rainbow sprinkles! It’s just so adaptable to whatever you’re in the mood for.
Top Tips for Perfecting Your No-Churn Cheesecake Ice Cream
I’ve made this cheesecake ice cream more times than I can count, and over the years, I’ve picked up a few tricks that really make it shine. First, make sure your cream cheese is truly softened to room temperature. If it’s cold, it won’t blend smoothly, and you’ll end up with little cream cheese bits in your ice cream, which is definitely not the cheesecake experience we’re going for. I’ve learned to leave it out for at least an hour, sometimes two, depending on my kitchen’s temperature. Secondly, when you’re folding the whipped cream into the cream cheese mixture, be gentle! The air in the whipped cream is what makes this ice cream so light and creamy without churning. If you overmix, you’ll deflate all that beautiful fluffiness, and your ice cream will be denser. Think of it like folding clouds together. For the swirls, less is often more. You want to see ribbons of flavor, not a muddy mess. I usually add my swirls in two stages while layering the base for a better distribution. And a little tip I learned after one too many attempts: chill your mixing bowl and beaters before whipping the cream. It makes a world of difference in getting those stiff peaks quickly and efficiently. If you’re worried about it getting too icy in the freezer, try adding a tablespoon of a neutral spirit like vodka. It doesn’t affect the flavor, but it helps lower the freezing point, keeping it a bit softer and more scoopable.
Storing and Reheating Tips
Storing this delicious cheesecake ice cream is pretty straightforward, but a few things can help maintain its best texture. If you plan to finish it within a few days, you can keep it covered tightly at room temperature in its freezer container. For longer storage, I recommend wrapping the top of the ice cream directly with a layer of parchment paper or plastic wrap before putting the lid on. This helps prevent ice crystals from forming on the surface, which can sometimes happen in the freezer. It should stay wonderfully creamy for up to 2 weeks this way. If you’re making it ahead of a party, freeze it solid, and then let it sit at room temperature for about 10-15 minutes before serving to soften it up perfectly. If, by some chance, it gets too hard to scoop, don’t despair! Just let it sit on the counter a bit longer. There’s no reheating needed for ice cream, of course, but the key is patience to let it come back to that perfect, soft-serve consistency.
Frequently Asked Questions
Final Thoughts
Honestly, this no-churn cheesecake ice cream is one of those recipes that makes me feel like a kitchen wizard. It’s so simple, yet the result is so incredibly satisfying and tastes like you spent hours making it. It’s the perfect way to get that cheesecake fix without all the fuss, and it’s just divine on a warm evening or any time you need a little bit of sweet indulgence. I really hope you give this a try; I have a feeling it’s going to become a go-to in your recipe collection just like it has in mine. Don’t forget to let me know in the comments how yours turns out, and what delicious swirls or mix-ins you decide to add! Happy scooping!
Cheesecake Ice Cream
Ingredients
Main Ingredients
- 8 ounces cream cheese at room temperature
- 1 cup granulated sugar
- 0.5 teaspoon salt
- 2 teaspoons pure vanilla extract
- 0.5 cup sour cream
- 1 cup whole milk at room temperature
Instructions
Preparation Steps
- In a medium bowl, add the cream cheese, sugar, and salt. Beat with an electric mixer on medium speed until light and fluffy, about 3 minutes.
- Add the vanilla and the sour cream, and beat for another minute.
- Stir the milk into the cream cheese mixture until completely combined.
- Cover and refrigerate for one to two hours, or overnight, until completely chilled.
- Add the ice cream mixture to your ice cream maker, and process according to manufacturer's directions.