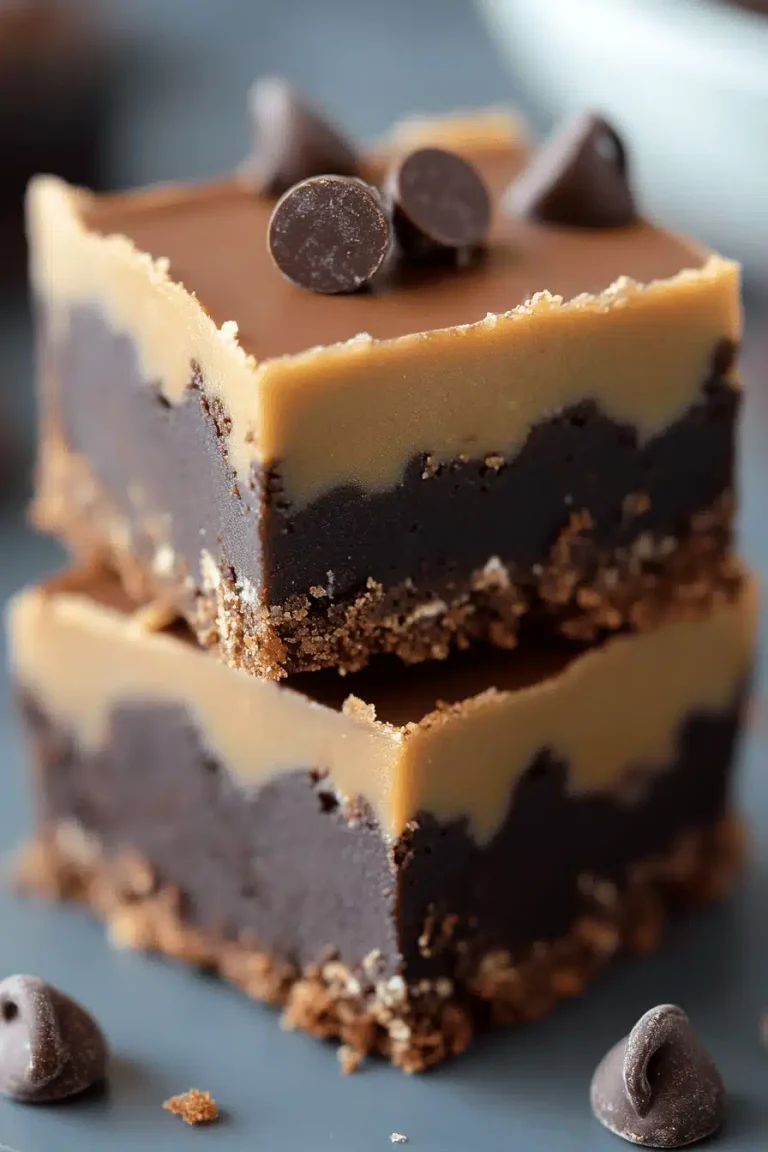
Oh, where do I even begin with this Brownie Refrigerator Cake? This isn’t just a dessert; it’s a hug in cake form, a sweet memory baked (well, not really baked!) into every bite. I remember my grandma making this for us on sweltering summer afternoons when the thought of turning on the oven felt like a cruel joke. The rich, fudgy brownie base, the creamy, dreamy filling, and that irresistible chocolatey topping – it’s pure magic. It’s like a no-bake cheesecake met a dense, gooey brownie and they decided to have the most delicious baby imaginable. Seriously, if you’ve ever been tempted by a decadent chocolate cake but dreaded the whole baking process, you are going to fall head over heels for this brownie refrigerator cake. It’s my absolute go-to when unexpected guests arrive or when that late-night craving hits and I need something amazing *now*. It’s a lifesaver on busy weeknights, and my kids, bless their hearts, ask for this brownie refrigerator cake more often than they ask for anything else. It’s that good, that easy, and that universally loved in my household.
What is a Brownie Refrigerator Cake?
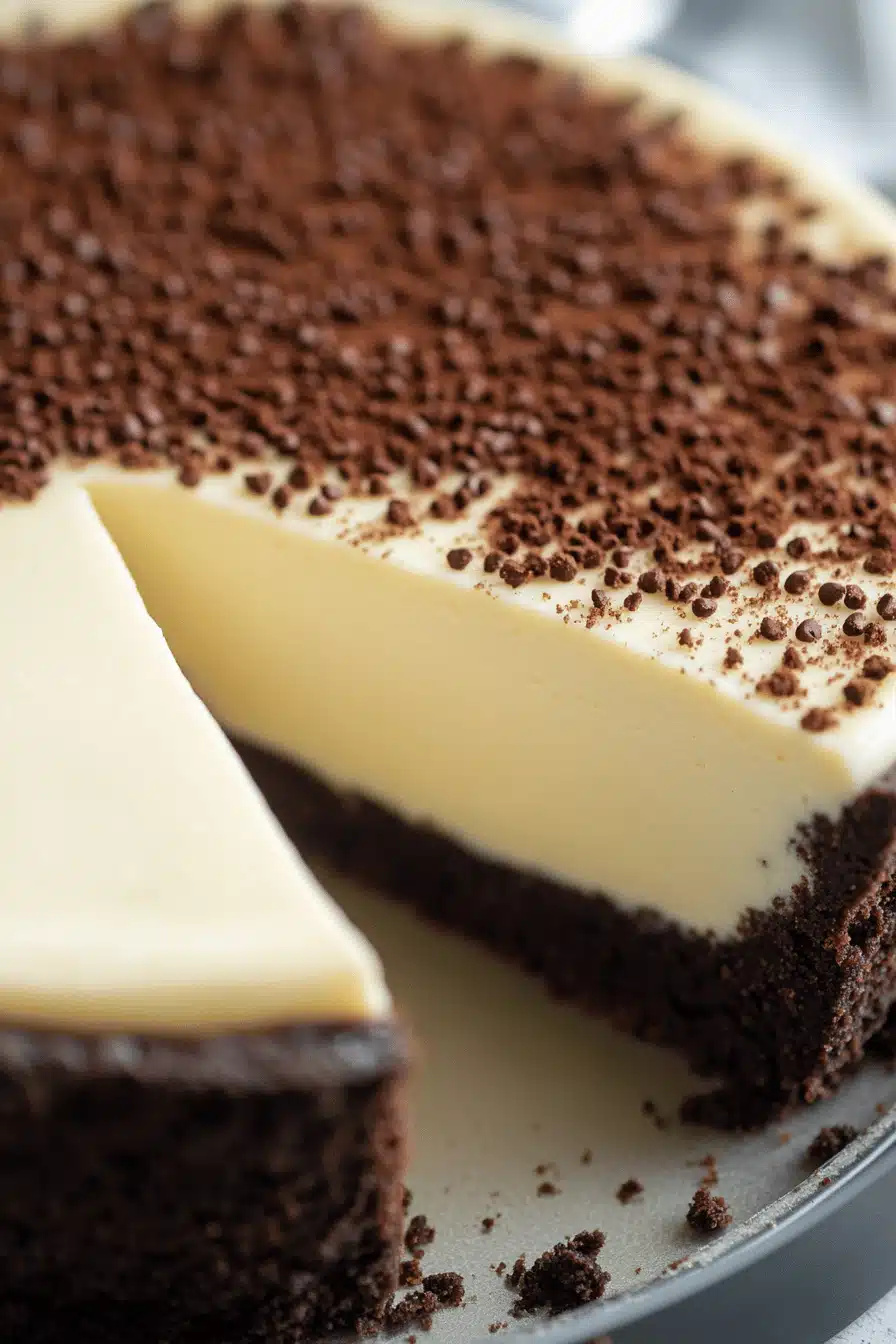
So, what exactly *is* this wondrous creation, this Brownie Refrigerator Cake? It’s exactly what it sounds like, but so much more! Think of it as the ultimate cheat’s way to enjoy the intensely satisfying flavors of a rich, fudgy brownie without ever touching your oven. The “cake” part comes from a no-bake brownie base, usually made from crushed cookies or a quick stovetop mixture that firms up beautifully in the fridge. Then, we layer that with a luxuriously creamy, often cream-cheese or whipped cream-based filling, infused with more chocolatey goodness. The whole masterpiece chills in the refrigerator until it’s perfectly set and ready to slice. It’s essentially a layered dessert that mimics the textures and flavors of a baked brownie but offers a cooler, creamier, and incredibly forgiving experience. The name itself tells you its secret: it’s a brownie-inspired dessert that needs refrigeration to reach its full, glorious potential. It’s simple, it’s ingenious, and it’s utterly delicious.
Why you’ll love this recipe?
Honestly, where do I even start with why this Brownie Refrigerator Cake is pure gold? First and foremost, the FLAVOR. We’re talking deep, dark chocolatey richness that’s intensely satisfying. The brownie base is dense and fudgy, not cakey at all, providing this incredible foundation for the creamy filling. And that filling? It’s a cloud of smooth, dreamy deliciousness that perfectly complements the brownie. It’s the kind of dessert that makes people close their eyes and just savor each bite. Next up, SIMPLICITY. This is where this recipe truly shines. There’s no oven involved, no complicated creaming of butter and sugar, no worrying about perfectly baked layers. You mix, you layer, you chill – and that’s it! It’s genuinely so easy that even a beginner baker can whip this up and feel like a total pro. It’s also incredibly COST-EFFECTIVE. Most of the ingredients are pantry staples or easily found at any grocery store, meaning you can create a show-stopping dessert without breaking the bank. And let’s talk VERSATILITY. While I adore this classic chocolate version, you can easily customize it. Add some raspberries for a bit of tartness, swirl in some Peanut Butter, or even add a hint of coffee to the filling. It’s a fantastic base for so many flavor combinations. What I love most about this Brownie Refrigerator Cake is that it delivers maximum impact with minimal effort. It’s the perfect dessert for those hot summer days when you don’t want to heat up the kitchen, or for those nights when you need a seriously satisfying sweet treat without the fuss of baking. It rivals any baked dessert in terms of sheer deliciousness, and it’s so much easier to get right!
How do I make a Brownie Cake?
Quick Overview
This Brownie Refrigerator Cake is a dream come true for chocolate lovers who crave a decadent dessert without the baking marathon. You’ll start by creating a no-bake brownie base, usually by crushing cookies and binding them with melted butter. While that firms up in the fridge, you’ll whip up a lusciously smooth chocolate filling, often incorporating Cream Cheese for that perfect tangy richness. Then, it’s simply a matter of layering these two components in a springform pan, chilling until firm, and topping with a decadent chocolate glaze or ganache. It’s straightforward, requiring minimal active time, and the result is a stunning, sliceable dessert that tastes like it took hours. The beauty lies in its simplicity and the pure, unadulterated chocolatey goodness it delivers.
Ingredients
For the Main Batter (No-Bake Brownie Base):
You want to use a good quality chocolate cookie for this. Oreos are fantastic, but any chocolate sandwich cookie will work wonders. If you can’t find them, even crushed graham crackers mixed with a good amount of cocoa powder can be a passable substitute in a pinch. Make sure your butter is unsalted so you can control the saltiness yourself.
- 2 cups (about 250g) finely crushed chocolate sandwich cookies (like Oreos)
- 6 tablespoons (85g) unsalted butter, melted
- 2 tablespoons granulated sugar (optional, depending on cookie sweetness)
- Pinch of salt
For the Filling:
This is where the magic happens. Using full-fat cream cheese is non-negotiable for that incredible creamy texture. Make sure it’s softened to room temperature so it blends smoothly without any lumps. I love using good quality cocoa powder here, but you could even melt some good dark chocolate for an extra intense flavor. A splash of vanilla extract is essential for rounding out the flavors.
- 16 ounces (450g) cream cheese, softened
- 1 cup (120g) powdered sugar, sifted
- 1/2 cup (45g) unsweetened cocoa powder, sifted
- 1 teaspoon vanilla extract
- 1/2 cup (120ml) heavy cream, cold
For the Glaze:
A simple chocolate ganache is my go-to. It’s rich, shiny, and adds that perfect finishing touch. You can adjust the cream-to-chocolate ratio for a thicker or thinner glaze. If you want something a bit lighter, a simple dusting of cocoa powder or powdered sugar also works beautifully.
- 4 ounces (115g) semi-sweet or dark chocolate, finely chopped
- 1/4 cup (60ml) heavy cream
- 1 tablespoon unsalted butter (optional, for extra shine)
Step-by-Step Instructions
Step 1: Preheat & Prep Pan
Grab your 8 or 9-inch springform pan. This is crucial because it makes releasing the cake so much easier later on. You don’t need to preheat an oven since this is a no-bake recipe, but I like to give the pan a quick wipe down and ensure it’s clean and dry. Sometimes I’ll even line the bottom with a circle of parchment paper for extra insurance against sticking, especially if I’m worried about my cookies being extra crumbly.
Step 2: Mix Dry Ingredients
If you haven’t already, finely crush your chocolate sandwich cookies. A food processor is your best friend here for an even texture, but you can also put them in a sturdy zip-top bag and bash them with a rolling pin – it’s surprisingly therapeutic! In a medium bowl, combine the crushed cookies, granulated sugar (if using), and salt. Give it a good whisk to make sure everything is evenly distributed.
Step 3: Mix Wet Ingredients
In a separate bowl, pour in your melted butter. Make sure it’s not boiling hot, just nicely melted. Gradually add the melted butter to the dry cookie mixture, stirring until the crumbs are evenly moistened and clump together when pressed. It should look like wet sand. If it seems too dry, add a tiny bit more melted butter, a teaspoon at a time.
Step 4: Combine
Pour this crumbly mixture into your prepared springform pan. Use the bottom of a glass or a flat measuring cup to firmly press the mixture evenly across the bottom of the pan. You want to create a solid, compact base – this is what will hold everything together. Don’t be shy with the pressing! Once pressed, pop the pan into the freezer for about 15-20 minutes while you prepare the filling. This helps it set up nicely.
Step 5: Prepare Filling
Now for that glorious filling! In a large bowl, beat the softened cream cheese with an electric mixer until it’s completely smooth and creamy. Add the sifted powdered sugar and sifted cocoa powder. Beat again until just combined and smooth, scraping down the sides of the bowl as needed. Don’t overmix at this stage; we don’t want to incorporate too much air. Stir in the vanilla extract. In a separate, clean bowl, whip the cold heavy cream until stiff peaks form. Gently fold about half of the whipped cream into the cream cheese mixture to lighten it, then gently fold in the remaining whipped cream until no streaks remain. You’re aiming for a light, airy, yet rich and luscious texture.
Step 6: Layer & Swirl
Retrieve the chilled brownie base from the freezer. Dollop spoonfuls of the chocolate filling over the brownie base. Gently spread the filling evenly to the edges of the pan using an offset spatula or the back of a spoon. Don’t worry if it’s not perfectly smooth; a slightly rustic look can be charming! If you want to add a swirl, you can reserve a little of the filling and color it with a tiny bit of melted chocolate or food coloring, then dollop it on top and swirl gently with a toothpick or knife.
Step 7: Bake
Okay, this is the ‘no-bake’ part, so technically there’s no baking involved! Instead, this brownie refrigerator cake needs to chill. Cover the springform pan tightly with plastic wrap, making sure the wrap doesn’t touch the surface of the filling if possible. Refrigerate for at least 6 hours, or preferably overnight. This is the most important step for allowing the cake to set properly and for the flavors to meld beautifully. Patience is key here!
Step 8: Cool & Glaze
Once the cake is fully set and firm to the touch, it’s time for the glaze! You can make this while the cake is chilling. Gently heat the heavy cream in a small saucepan or in the microwave until it’s just simmering. Pour the hot cream over the finely chopped chocolate in a heatproof bowl. Let it sit for about 5 minutes to soften the chocolate, then whisk until smooth and glossy. If you’re adding butter for extra shine, whisk it in now until melted and incorporated. Let the ganache cool slightly until it’s pourable but not too hot. Carefully remove the sides of the springform pan. Pour the slightly cooled ganache over the chilled cake, letting it drip down the sides. Use an offset spatula to spread it evenly if needed. Let the glaze set for at least 30 minutes in the refrigerator before slicing.
Step 9: Slice & Serve
This is the moment of truth! For the cleanest slices, use a sharp knife dipped in hot water and wiped dry between each cut. This makes sure you get beautiful, sharp edges. Serve chilled. This brownie refrigerator cake is truly a showstopper on its own, but a dollop of whipped cream or a few fresh berries can be a lovely addition if you’re feeling fancy.
What to Serve It With
This incredible Brownie Refrigerator Cake is so versatile, it’s practically begging to be paired with a variety of drinks and occasions. For a simple Breakfast treat (yes, I absolutely count this as acceptable breakfast fare!), a strong, hot cup of black coffee or a creamy latte is just divine. It cuts through the richness beautifully. You could even serve a small sliver with a glass of cold milk for a childhood throwback. For Brunch, it feels a bit more elegant. I love pairing it with a sparkling rosé or a mimosa; the bubbles and fruitiness are a lovely contrast. Present it on a pretty cake stand, maybe with a few raspberries artfully placed around it. As a Dessert, this is where it truly shines. After a hearty meal, a slice of this brownie refrigerator cake is pure indulgence. It pairs wonderfully with a robust red wine like a Zinfandel or a Port. A scoop of good quality vanilla bean ice cream or a drizzle of raspberry coulis is also a winner. And for those Cozy Snacks, when you just need something comforting and delicious? A warm mug of tea, hot chocolate, or even a cozy Irish coffee makes this feel like the ultimate treat. My family has a tradition of having this on movie nights, with everyone grabbing their own square right out of the fridge. It’s pure comfort food!
Top Tips for Perfecting Your Brownie Refrigerator Cake
I’ve made this Brownie Refrigerator Cake more times than I can count, and over the years, I’ve picked up a few tricks that I think really elevate it. For the Zucchini Prep (if you’re opting for a zucchini brownie base, which is a whole other delicious world I might share another time!), the key is squeezing out as much moisture as humanly possible. Grating it on the large holes of a box grater works best, then wrapping it in cheesecloth or a clean kitchen towel and wringing it out like a sponge. Freshness is key, so use zucchini that feels firm and heavy for its size. Now, for the Mixing Advice: the biggest mistake people make with no-bake desserts is overmixing the filling, which can make it heavy or grainy. When folding in the whipped cream, do it gently, in stages. You want to maintain that lightness. You’ll know you’re done when there are no streaks of white cream cheese visible, but it’s still airy. Overmixing the cookie base can make it tough, so just combine until it’s moistened. My Swirl Customization is all about visual appeal. If you want a marbled effect, don’t overdo the swirls! Just a few gentle passes with a toothpick or knife will create beautiful patterns without muddling the colors too much. For Ingredient Swaps, I’ve found that if you’re out of cream cheese, mascarpone cheese can work, but it will be a bit richer and less tangy. For the cookies, if you can’t find chocolate sandwich cookies, dark chocolate wafers or even crumbled brownies (if you happen to have leftover baked ones!) can be used for the base. For Baking Tips, well, since there’s no baking, the equivalent is chilling! Make sure your refrigerator is at the correct temperature. Don’t rush the chilling process; it’s essential for texture and flavor. I also sometimes find that if my fridge is very full, the chill might not penetrate as well, so I’ll position it towards the back where it’s coldest. For Glaze Variations, if you find your ganache is too thick, gently warm a tablespoon more cream and whisk it in. If it’s too thin, let it cool a bit longer, or gently warm it and whisk in a teaspoon of corn syrup for a thicker, glossier finish. I’ve also experimented with adding a shot of espresso to the ganache for a mocha twist – it’s divine!
Storing and Reheating Tips
Properly storing your Brownie Refrigerator Cake is crucial to keep it tasting its best. For Room Temperature storage, it’s generally not recommended for long periods, especially if it has a cream cheese filling, as it can spoil. However, if it’s a very cool day and it’s been only an hour or two since it came out of the fridge, it might be okay for a short while. For Refrigerator Storage, this is where it thrives! Once it’s fully set, keep it covered tightly with plastic wrap or in an airtight container. It will stay delicious for about 3-4 days. The flavors actually deepen overnight, so it often tastes even better on the second day! Check for any signs of spoilage like off smells or mold before serving after a few days. For Freezer Instructions, you can absolutely freeze this! It’s a great way to have it on hand for future cravings. Let the cake set completely in the fridge first. Then, carefully remove the sides of the springform pan. Wrap the entire cake very tightly in a double layer of plastic wrap, followed by a layer of aluminum foil. Freeze for up to 2-3 months. To Thaw, transfer the frozen cake to the refrigerator and let it thaw overnight. The glaze might soften slightly upon thawing, but it should still be delicious. Glaze Timing Advice is important: if you plan to freeze your cake *before* glazing, it’s best to do so. Then, thaw in the fridge and apply the glaze once it’s fully defrosted. If you freeze it already glazed, the glaze might become a bit softer and less defined, but it’s still perfectly edible!
Frequently Asked Questions
Final Thoughts
So there you have it – my absolute favorite Brownie Refrigerator Cake! It’s a dessert that truly embodies simple joy and delivers big on flavor. What I adore about it is how it takes all the incredible satisfaction of a rich, fudgy brownie and makes it accessible to everyone, anytime. It’s the perfect antidote to a busy day, a foolproof crowd-pleaser, and honestly, just a little bit of pure, unadulterated happiness in cake form. If you’re a chocolate lover, or just someone who appreciates a truly delicious dessert that doesn’t require a baking degree, you *have* to give this a try. It’s become such a cherished recipe in my home, and I really hope it becomes one in yours too. If you’re looking for more no-bake wonders, you might also love my No-Bake Lemon Raspberry Cheesecake or my Easy Chocolate Mousse Pie! I can’t wait to hear what you think of this Brownie Refrigerator Cake, so please leave a comment below and let me know how yours turned out! And if you’ve got any special tips or variations you’ve tried, I’d love to hear them. Happy, no-bake creating!

Brownie Refrigerator Cake
Ingredients
Main Ingredients
- 24 ounces brownies crumbled
- 4 ounces instant chocolate pudding mix
- 3 cups milk cold
- 8 ounces cream cheese softened
- 0.5 cups powdered sugar
- 1 teaspoon vanilla extract
- 8 ounces whipped topping thawed
- 0.5 cups chocolate syrup for drizzling
Instructions
Preparation Steps
- In a 9x13 inch baking dish, spread half of the crumbled brownies.
- In a medium bowl, whisk together the instant chocolate pudding mix and cold milk until thickened, about 2 minutes. Pour over the layer of brownies.
- In a separate bowl, beat together the softened cream cheese, powdered sugar, and vanilla extract until smooth.
- Gently fold in the thawed whipped topping into the cream cheese mixture.
- Spread the cream cheese mixture evenly over the chocolate pudding layer.
- Top with the remaining crumbled brownies.
- Drizzle with chocolate syrup.
- Refrigerate for at least 4 hours, or until firm. Slice and serve.