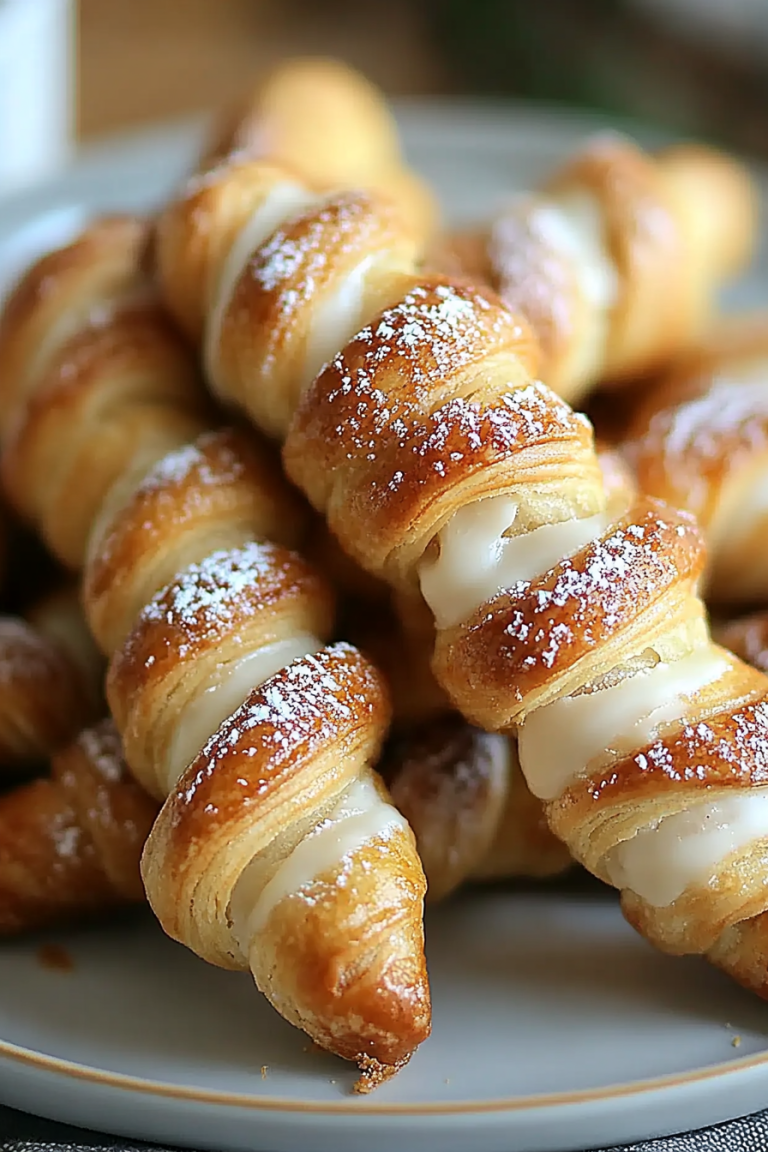
Oh, where do I even begin with these oooey gooey butter bars? If you’ve ever been to St. Louis, chances are you’ve encountered their legendary butter cakes, and these bars are my personal, slightly more manageable, version of that magic. They’re not quite a cake, not quite a brownie, but something wonderfully in between that’s just pure, unadulterated bliss. I remember the first time I tasted one; it was at a family reunion picnic, and it was like sunshine on a plate. The contrast between that slightly crisp edge and the impossibly soft, rich, gooey center just completely won me over. Honestly, if I had to pick just one dessert to take to a potluck or to satisfy a serious sweet tooth on a Tuesday night, this would be it. They’re so simple, yet so decadent, and the smell that fills the house while they bake? Pure comfort. They’ve become a staple in my kitchen, especially around the holidays when everyone’s craving something extra special but nobody has hours to spend baking.
What are Oooey Gooey Butter Bars?
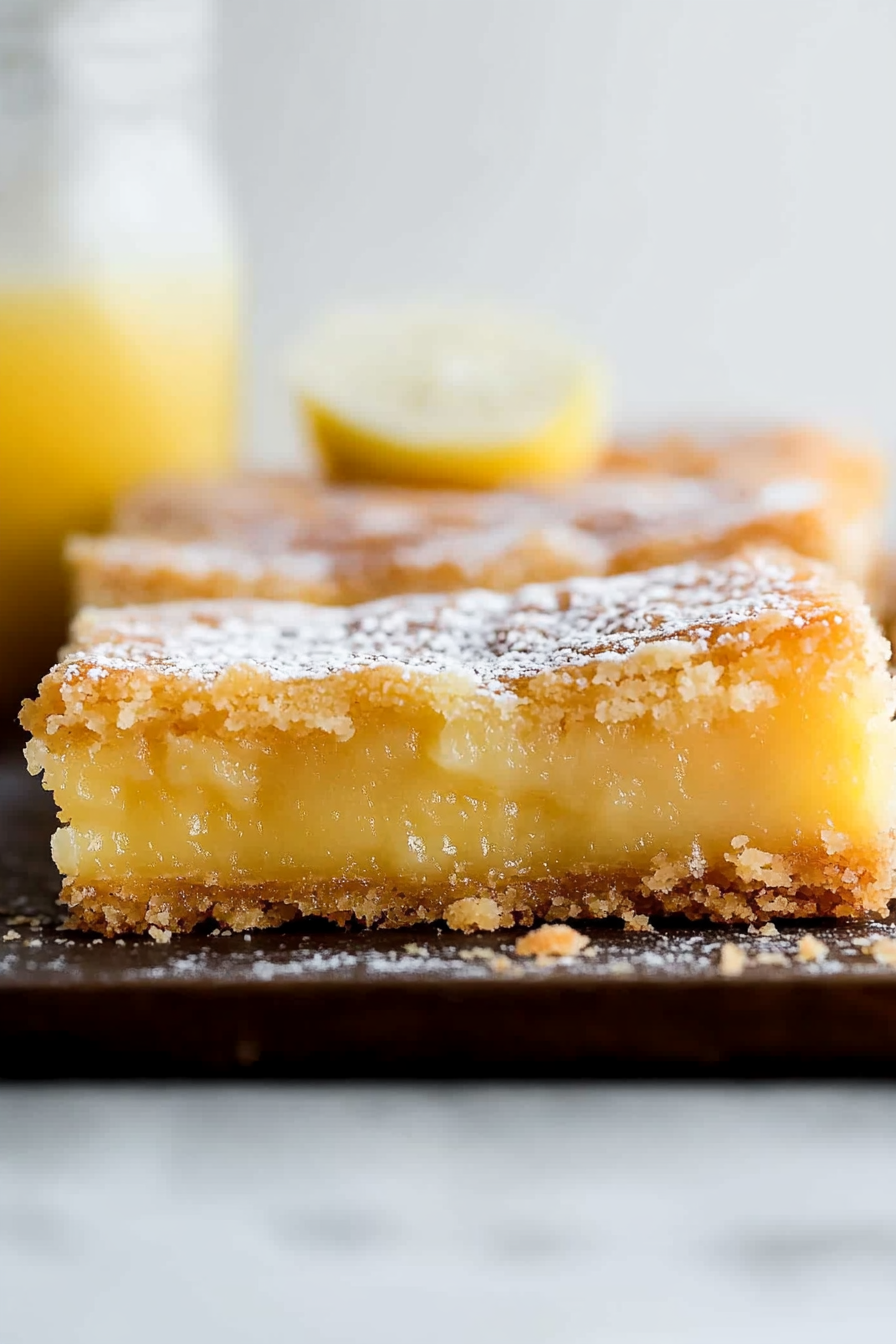
So, what exactly *are* these magical things called oooey gooey butter bars? Think of them as a delightful hybrid, a culinary love child between a shortbread base and a rich, creamy, almost cheesecake-like topping. They hail from the heart of St. Louis, Missouri, where they’re often called “Gooey Butter Cake.” But let’s be honest, cutting a whole cake can be a bit of a production, and these bars are just perfect for sharing (or not, I won’t judge!). The “gooey” part comes from a decadent, Cream Cheese-based filling that bakes up into this incredibly luscious, melt-in-your-mouth texture. The base is a simple, buttery shortbread that’s firm enough to hold everything together but tender enough that it melts on your tongue. Together, they create this symphony of textures and flavors that’s both comforting and incredibly sophisticated. It’s that perfect bite that’s rich, sweet, and just a little bit sinful, but in the best possible way!
Why you’ll love this recipe?
There are so many reasons why this oooey gooey butter bars recipe has earned a permanent spot in my recipe binder, and I’m willing to bet it will in yours too! First and foremost, let’s talk about the flavor. It’s just out of this world! You get that rich, buttery foundation, followed by the utterly irresistible sweet, creamy topping that has a subtle tang from the cream cheese. It’s not overwhelmingly sweet, which I appreciate, but it definitely satisfies any craving you might have. And the simplicity! Honestly, you can whip these up with minimal fuss. I’ve had nights where I needed a dessert in a pinch, and these have been an absolute lifesaver. The ingredients are pretty standard pantry staples, making them wonderfully cost-effective too. No fancy, hard-to-find items needed here! What I love most is their versatility. They’re fantastic on their own, but they’re also perfect served with a dollop of whipped cream or a dusting of powdered sugar. They’re a guaranteed crowd-pleaser, whether you’re serving them at a fancy brunch or just enjoying them with a cup of coffee on a lazy Saturday morning. My kids ask for these all the time, and honestly, they disappear in minutes at my house every single time I make them.
How do I make Oooey Gooey Butter Bars?
Quick Overview
Making these oooey gooey butter bars is surprisingly straightforward. We’ll start by pressing a simple buttery shortbread base into the pan. Then, we’ll whip up a lusciously rich cream cheese filling and spread it right over the top. A quick bake, a little cooling, and you’ve got a batch of pure dessert heaven. It’s a two-part process that comes together beautifully, and the result is truly worth every second. Even if you’re not a seasoned baker, you can absolutely nail this recipe!
Ingredients
For the Main Batter:
1 cup (2 sticks) unsalted butter, softened: Make sure it’s nice and soft, but not melted. This is crucial for getting that perfect shortbread texture. I always use unsalted so I can control the salt level myself.
2 cups all-purpose flour: Standard all-purpose flour works perfectly here. No need for anything fancy!
1 cup granulated sugar: This forms the sweet foundation of our shortbread base.
1 teaspoon vanilla extract: A good quality vanilla extract makes all the difference. It adds that warm, comforting aroma and flavor.
Pinch of salt: Just a little to balance out the sweetness and bring out the flavors.
For the Filling:
1 (8-ounce) package cream cheese, softened: Let this sit on the counter for at least an hour to get really soft. Lumps of cream cheese are not our friend here!
2 large eggs: Room temperature eggs incorporate better into the filling.
1 teaspoon vanilla extract: More of that lovely vanilla goodness!
1 box (16 ounces) confectioners’ sugar, sifted: Sifting is key here to avoid any lumps in your beautiful gooey filling. Don’t skip this step!
For the Glaze (Optional, but highly recommended!):
1 cup confectioners’ sugar: For dusting, or you can make a simple glaze.
1-2 tablespoons milk or cream: If making a glaze, just enough to get a pourable consistency.
A tiny splash of vanilla extract: To enhance the glaze flavor.
Step-by-Step Instructions
Step 1: Preheat & Prep Pan
First things first, preheat your oven to 350°F (175°C). Grab a 9×13 inch baking pan. I like to grease it really well with butter or non-stick spray, and then I usually line it with parchment paper, leaving a little overhang on the sides. This makes lifting the bars out so much easier later on. Trust me, it’s a lifesaver when you’re trying to get those perfect squares!
Step 2: Mix Dry Ingredients
In a medium bowl, whisk together the 2 cups of all-purpose flour and the pinch of salt. Just a quick mix to make sure they’re combined evenly. This seems simple, but it ensures everything gets distributed well later.
Step 3: Mix Wet Ingredients
In a separate, larger bowl, you’ll cream together the 1 cup (2 sticks) of softened unsalted butter and the 1 cup of granulated sugar. Beat this with an electric mixer (or a whisk and some serious arm power!) until it’s light and fluffy. This is where you incorporate air, which gives the base its tender texture. Then, beat in the 1 teaspoon of vanilla extract until it’s fully combined.
Step 4: Combine
Now, gradually add the dry ingredients (from Step 2) to the wet ingredients (from Step 3). Mix on low speed or stir with a wooden spoon until just combined. Don’t overmix! You want a crumbly dough texture. This dough will be thick and a bit stiff; that’s exactly what you’re looking for. It’s meant to be pressed into the pan, not poured.
Step 5: Prepare Filling
In another clean bowl, beat the softened 8-ounce package of cream cheese until it’s smooth and creamy. Again, no lumps! Then, add the 2 large eggs, one at a time, beating well after each addition. Stir in the 1 teaspoon of vanilla extract. Now comes the magic: gradually add the sifted 1 box (16 ounces) of confectioners’ sugar and mix on low speed until everything is just combined and the filling is smooth and luscious. It should look like a thick, dreamy frosting.
Step 6: Layer & Swirl
Take that crumbly dough from Step 4 and press it evenly into the bottom of your prepared 9×13 inch pan. You can use your hands (lightly floured) or the bottom of a measuring cup to get it nice and flat. Don’t worry if it’s not perfectly smooth, it’s a rustic base! Now, gently spread the cream cheese filling (from Step 5) evenly over the shortbread base. You can swirl it a little with a knife if you like, but I usually just smooth it out. It will puff up a bit as it bakes.
Step 7: Bake
Pop the pan into your preheated oven. Bake for 30-40 minutes, or until the edges are golden brown and the center is set but still looks a little gooey. A toothpick inserted near the center should come out with moist crumbs, not wet batter. Ovens can vary, so keep an eye on it towards the end. I often find mine are perfect around the 35-minute mark.
Step 8: Cool & Glaze
This is the hardest part: letting them cool! Remove the pan from the oven and let the bars cool completely in the pan on a wire rack. I know, the temptation is real, but cooling is essential for them to set properly. Once they’re completely cool, you can dust them with confectioners’ sugar or mix up a simple glaze (1 cup confectioners’ sugar, 1-2 tablespoons milk/cream, splash of vanilla, mixed until smooth) and drizzle it over the top. Let the glaze set before cutting.
Step 9: Slice & Serve
Once cooled (and glazed, if you did that step!), use the parchment paper overhang to lift the entire block out of the pan. Transfer it to a cutting board. Slice into squares using a sharp knife. For really clean cuts, wipe your knife between slices. Enjoy these incredibly decadent oooey gooey butter bars!
What to Serve It With
These oooey gooey butter bars are so versatile, they can truly fit into almost any occasion. For a delightful breakfast treat, they’re absolutely divine alongside a steaming mug of strong coffee. The richness of the bar is the perfect contrast to the bold coffee flavor. You can serve them as is, or maybe with a few fresh berries on the side to cut through the sweetness. For a more elegant brunch spread, consider cutting them into smaller, bite-sized squares and arranging them artfully on a platter. They pair wonderfully with a light mimosa or a sparkling rosé. As a dessert, they’re a showstopper! Serve them slightly warm with a scoop of vanilla bean ice cream or a dollop of fresh whipped cream. A drizzle of raspberry sauce is also incredible! And for those cozy, quiet nights when you just need a little something sweet, they are the ultimate comfort snack. Grab a square (or two!), curl up with a good book, and perhaps a glass of milk or a warm cup of tea. My family loves them after a big Sunday dinner; they’re always the first thing to go!
Top Tips for Perfecting Your Oooey Gooey Butter Bars
I’ve made these oooey gooey butter bars more times than I can count, and over the years, I’ve picked up a few tricks that I think make all the difference. For the base, make sure your butter is truly softened, not melted. If it’s too cold, it won’t cream properly with the sugar, and if it’s melted, your base will be greasy and won’t hold its shape. When mixing the base dough, don’t overmix once you add the flour. You just want it to come together; a few streaks of flour are okay. Overmixing develops the gluten, which can make your bars tough instead of tender and crumbly.
When it comes to the filling, the most critical step is ensuring your cream cheese is completely softened. I can’t stress this enough! I’ve learned the hard way that cold cream cheese leads to a lumpy, uneven filling. Also, sifting your confectioners’ sugar is non-negotiable if you want that super smooth, luscious topping. I’ve tried skipping it once, and the texture was just not the same. I’ve also experimented with adding a little almond extract to the filling along with or instead of some of the vanilla, and it gives it a lovely subtle nutty flavor that’s really delicious!
For baking, don’t be afraid if the edges look golden brown and the center still looks a bit soft. That’s the “gooey” part doing its thing! You want it to be set enough to slice, but still incredibly moist. My oven tends to run a little hot, so I’ve learned to start checking mine around the 30-minute mark. If you notice the edges browning too quickly, you can always loosely tent the pan with aluminum foil. For the glaze, consistency is key. You want it thick enough to drizzle but thin enough to spread easily. If it’s too thick, add milk or cream a teaspoon at a time. If it’s too thin, add a bit more confectioners’ sugar.
I’ve also found that using good quality vanilla extract makes a noticeable difference. It really enhances the buttery flavors. And while I usually stick to the recipe, I have experimented with using brown sugar in the base for a slightly richer, caramel-like flavor, and it was delightful! For ingredient swaps, I’ve successfully made a dairy-free version using plant-based butter and cream cheese alternatives, and it turned out surprisingly well, though the texture was slightly different. The key is always good quality ingredients and not overworking the dough!
Storing and Reheating Tips
Now, about storing these beauties. Because of the creamy filling, these oooey gooey butter bars are best stored in the refrigerator. Once they’ve cooled completely, I like to cut them into individual bars and store them in an airtight container. They’ll stay delicious like this for about 3-4 days. If you plan on keeping them longer, you can absolutely freeze them! I usually wrap individual bars (or slices) tightly in plastic wrap, then tuck them into a freezer-safe bag or container. They’ll keep well in the freezer for up to 2-3 months. When you’re ready to enjoy a frozen bar, just let it thaw at room temperature for about 30-60 minutes, or pop it in the microwave for about 10-15 seconds for a quick warm-up. If you’ve glazed them, the glaze might get a little sticky after thawing, but they’ll still taste amazing. I find that for room temperature storage, they are best enjoyed the day they are made or the next day, as the filling can start to weep a little if left out too long in warmer temperatures.
Frequently Asked Questions
Final Thoughts
These oooey gooey butter bars are more than just a dessert; they’re a little piece of happiness that I love sharing with all of you. They’re proof that you don’t need complicated techniques or exotic ingredients to create something truly spectacular. The combination of that tender, buttery base and the impossibly rich, creamy topping is just something special that always brings a smile to people’s faces. They’re perfect for any occasion, from a casual weeknight treat to a show-stopping holiday dessert. I really hope you give these a try, and I can’t wait to hear how they turn out for you! If you love these, you might also enjoy my recipes for [link to another buttery dessert recipe] or my classic [link to a simple cake recipe]. Let me know in the comments below if you try them and what you think – I love hearing your feedback and seeing your creations!

Oooey gooey butter bars
Ingredients
For the Crust:
- 1 cup unsalted butter softened
- 2 cup all-purpose flour
- 1 cup granulated sugar
For the Topping:
- 1 cup unsalted butter melted
- 0.5 cup granulated sugar
- 2 large eggs
- 1 teaspoon vanilla extract
- 1 cup powdered sugar for dusting
Instructions
Preparation Steps
- Preheat oven to 350°F (175°C). Grease and flour a 9x13 inch baking pan.
- In a large bowl, cream together softened butter, flour, and granulated sugar until well combined and crumbly.
- Press the crust mixture evenly into the bottom of the prepared baking pan.
- In a separate bowl, whisk together melted butter, granulated sugar, eggs, and vanilla extract until smooth.
- Pour the topping mixture evenly over the crust.
- Bake for 30-35 minutes, or until the edges are golden brown and the center is set.
- Let cool completely in the pan before cutting. Dust with powdered sugar before serving.