You know those nights? The ones where you stare into the fridge, utterly uninspired, with a rumbling tummy demanding immediate attention? I swear, I have those at least twice a week. And in those moments of culinary despair, my mind always, *always* goes to quesadillas. They’re like the magical, cheesy hug that saves the day. Forget fancy layered cakes or complicated casseroles; for pure, unadulterated comfort and speed, a good quesadilla is hard to beat. It’s the ultimate blank canvas for whatever you’ve got lurking in the fridge, a delicious way to transform leftovers into something totally new and exciting. My kids ask for them constantly, and honestly, so do I! It’s the closest thing we have to a weeknight superhero meal. While the Classic Cheese-only version is a winner, the real magic of quesadilla ideas lies in their incredible versatility. Let me tell you, once you start thinking outside the cheese box, your quesadilla game will be forever changed.
What is a quesadilla?
At its heart, a quesadilla is beautifully simple: a tortilla folded around a filling, usually cheese, and then grilled until warm and melty. The name itself comes from the Spanish word “queso,” meaning cheese, so that’s your foundational element right there! Think of it as a warm, foldable hug of deliciousness. It’s not trying to be a gourmet meal, but it’s certainly capable of hitting all the right flavor notes. The beauty of it is in its unpretentiousness. It’s the ultimate comfort food, a dish that feels both familiar and endlessly adaptable. Whether you’re folding it in half like a crescent moon or using two tortillas like a sandwich, the goal is the same: golden-brown tortilla on the outside, gooey, delicious filling on the inside. It’s the kind of food that makes everyone happy, from picky toddlers to grown-ups who are just tired after a long day.
Why you’ll love this recipe?
Honestly, the reasons I keep coming back to quesadilla ideas are endless, but let me try and break down why I think you’ll become just as obsessed as I am. First off, the flavor explosion. Even with simple ingredients, the combination of warm tortilla, melted cheese, and whatever fillings you choose can be absolutely divine. It’s that satisfying chew of the tortilla, the stretchy pull of the cheese, and then the bursts of flavor from your chosen additions – it’s a symphony for your taste buds! Then there’s the sheer simplicity. I mean, we’re talking minutes, not hours, here. This is a lifesaver on those busy weeknights when the thought of actually cooking feels like climbing Mount Everest. You can literally go from fridge to table in less time than it takes to decide what to watch on TV. And let’s not forget cost-efficiency. Quesadillas are fantastic for using up those bits and bobs in the fridge that might otherwise go to waste. A few tortillas, some cheese, and whatever leftover chicken, beans, or veggies you have? Instant meal. What I love most, though, is the versatility. It’s the ultimate blank canvas. You can go spicy, savory, even a little sweet! It’s perfect for breakfast, lunch, dinner, or a midnight snack. Compared to say, a grilled cheese, it feels a little more substantial and endlessly customizable, making it a staple in my kitchen.
How do I make quesadillas?
Quick Overview
Making a fantastic quesadilla is all about simplicity and getting that perfect melt. You’ll warm your tortillas, layer them with cheese and your chosen fillings, fold, and grill until golden brown and gooey. The key is not to overstuff it, and to cook it over medium heat to ensure the cheese melts completely before the tortilla burns. It’s ridiculously straightforward, and the results are incredibly rewarding.
Ingredients
For the main structure:
8-inch Flour Tortillas (Corn can work too, but they can be more prone to cracking. I find flour gives you that lovely pliable chew).
Shredded Cheese (A blend is always best! Monterey Jack, cheddar, mozzarella, or a Mexican blend are all fantastic. I love mixing a sharp cheddar with a creamy Monterey Jack for the best of both worlds.)
For the Filling (This is where the fun begins!):
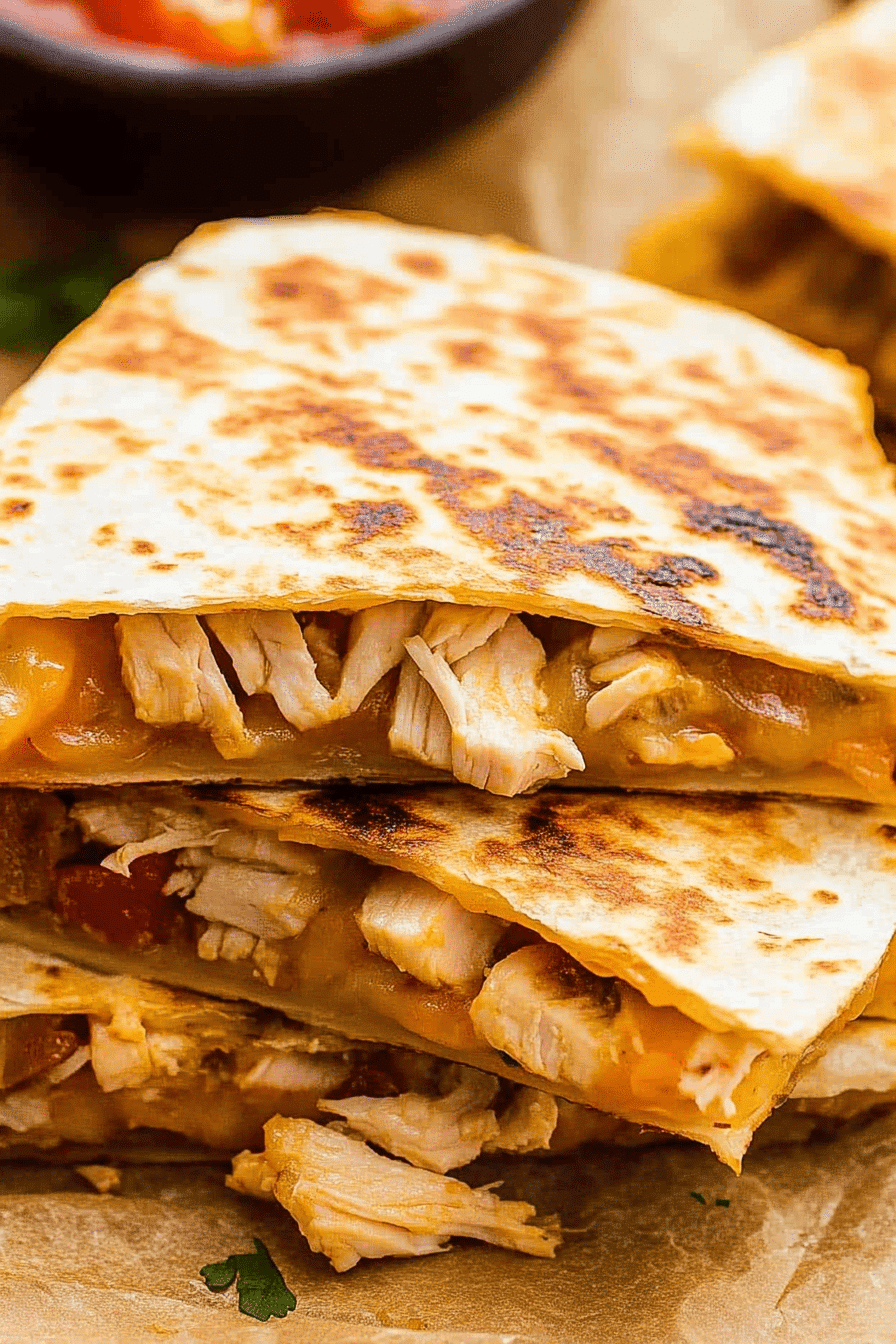
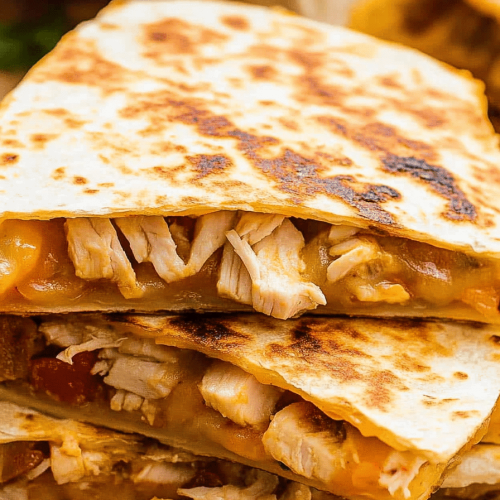
Cooked Chicken or Turkey (Shredded or diced)
Black Beans or Pinto Beans (Rinsed and drained)
Sautéed Veggies (Onions, bell peppers, mushrooms, spinach – whatever you have!)
Corn (Fresh, frozen, or canned)
Diced Tomatoes or Salsa
Avocado slices (Add these towards the end of cooking or on the side to avoid mushiness)
Spiced Ground Meat (Taco seasoned beef or turkey is a classic for a reason!)
Chopped Cilantro (Fresh herbs add so much zing!)
For Grilling:
Butter or Oil (A tablespoon or two for the pan. Butter gives a lovely golden crust and flavor.)
Step-by-Step Instructions
Step 1: Prep Your Pan
Get a non-stick skillet or a cast-iron pan over medium heat. You don’t want it too hot, or the tortilla will burn before the cheese melts. Add about a teaspoon of butter or oil and let it melt and coat the bottom of the pan. Swirl it around.
Step 2: Warm the Tortilla
Lay one tortilla flat in the warm pan. Let it heat for about 30 seconds until it’s pliable and slightly warmed. This helps prevent cracking.
Step 3: Layer the Cheese (One Side!)
Sprinkle a generous layer of shredded cheese over half of the tortilla, leaving a small border around the edge. This is your foundation for holding everything together.
Step 4: Add Your Fillings
Now, add your chosen fillings over the cheese on that same half of the tortilla. Don’t overstuff it! Too many fillings will make it hard to fold and can cause it to leak. Aim for a single, even layer.
Step 5: Fold and Grill
Carefully fold the other half of the tortilla over the filling, creating a half-moon shape. Gently press down with a spatula. Cook for about 3-4 minutes per side, until the tortilla is golden brown and crispy, and the cheese is beautifully melted and gooey. If the tortilla is browning too quickly, turn the heat down a notch.
Step 6: Flip and Finish
Using your spatula, carefully flip the quesadilla over to cook the other side. Cook for another 3-4 minutes, until that side is also golden brown and the cheese is fully melted. You should see some ooey-gooey cheese peeking out!
Step 7: Remove and Rest (Briefly!)
Slide the finished quesadilla onto a cutting board. Let it sit for just a minute – it’s super hot and the cheese needs a moment to settle. This also makes it easier to slice.
Step 8: Slice and Serve
Use a sharp knife or a pizza cutter to slice the quesadilla into wedges. Serve immediately while it’s warm and melty. If you’re feeling fancy, add some toppings!
Step 9: Add Toppings (Optional but Recommended!)
Serve with your favorite toppings like sour cream, salsa, guacamole, pico de gallo, or a squeeze of lime. These really elevate the whole experience!
What to Serve It With
One of the best things about quesadilla ideas is how they play well with so many other dishes. They’re so versatile, you can dress them up or down depending on the meal. For breakfast, I love keeping it simple: a basic cheese quesadilla, maybe with some scrambled eggs or chorizo inside, served with a side of fresh fruit. A steaming cup of coffee is the perfect companion to kick off the morning. For brunch, you can get a little more elegant. Think a blackened chicken quesadilla with corn and black beans, served with a dollop of sour cream and a vibrant pico de gallo. A side of fresh greens with a light vinaigrette rounds it out beautifully. When I’m craving something sweet for dessert (yes, dessert quesadillas are a thing!), I’ll make a dessert version with cream cheese, fruit, and a sprinkle of cinnamon, maybe with a drizzle of honey or chocolate sauce. It’s so much easier than baking a whole cake! And for cozy snacks, it’s hard to beat. A simple cheese and bean quesadilla, warm and comforting, is perfect with a glass of milk or a comforting mug of Hot Chocolate. It’s just so satisfying and hits the spot every time. We often do a “quesadilla bar” on movie nights where everyone can build their own!
Top Tips for Perfecting Your Quesadilla
I’ve been making quesadillas for as long as I can remember, and through countless batches, I’ve picked up a few tricks that I think make all the difference. First off, when it comes to the fillings, less is often more. It sounds counterintuitive, right? But if you pack them too full, the cheese won’t melt properly, and the tortilla can get soggy or tear. Aim for a nice, even layer of fillings that complements the cheese. Speaking of cheese, don’t be afraid to mix your cheeses! A blend of a good melting cheese like Monterey Jack or mozzarella with a sharper cheese like cheddar or pepper jack gives you the best of both worlds – creamy meltiness and great flavor. I also learned the hard way that using pre-shredded cheese often comes with anti-caking agents that can make it a little less gooey. If you have the time, shredding your own cheese makes a noticeable difference in texture. When it comes to cooking, medium heat is your friend. Too high and you’ll get a burnt tortilla and unmelted cheese. Too low and it’ll take forever and might not get that lovely crisp. Listen to the sizzle – it should be a gentle, happy sound, not an aggressive roar. If you’re using veggies, make sure they’re cooked through first. Raw onions or peppers won’t soften enough in the short cooking time of a quesadilla and can be unpleasantly crunchy. For those super crispy edges, a little butter in the pan is key. It browns beautifully and adds amazing flavor. Don’t be afraid to experiment with spices too! A pinch of chili powder or cumin in your cheese mix can really elevate a simple cheese quesadilla. And finally, always let it rest for a minute before slicing. I know it’s tempting to dive right in, but letting it sit helps everything set up just a little, making for cleaner slices and a less messy eating experience. Trust me on this one!
Storing and Reheating Tips
One of the greatest things about quesadillas is how well they store, making them perfect for meal prep or enjoying leftovers. If you’ve got a quesadilla that didn’t quite get devoured (unlikely in my house, but it happens!), let it cool completely before storing. For short-term storage, wrap individual quesadillas tightly in plastic wrap or aluminum foil, or place them in an airtight container. They’ll keep well at room temperature for a couple of hours if you’re planning on eating them soon. For longer storage, the refrigerator is your best bet. They’ll stay delicious for about 3-4 days when stored properly in an airtight container. The key is to prevent them from getting soggy. If you plan on freezing them, this is also a great option for future quick meals. Wrap each cooled quesadilla individually and tightly in plastic wrap, then place them in a freezer-safe bag or container. They should last for up to 2-3 months in the freezer. When it comes to reheating, the goal is to get that crispy tortilla and melty cheese back. The best method is in a skillet over medium-low heat, just like you cooked it originally. You might want to add a tiny bit of butter or oil to the pan for that perfect crisp. Microwave reheating is fast, but it tends to make the tortilla soft and chewy, which isn’t ideal. If you *must* use the microwave, try placing a damp paper towel over the quesadilla to help retain some moisture, but know it won’t be quite the same. For frozen quesadillas, I usually skip the microwave entirely and go straight to the skillet, letting them thaw slightly in the pan as they heat up, or thawing them overnight in the fridge. The glaze, if you’ve added one, is best applied right before serving for the freshest taste and best texture, but if you’re storing, it can often be stored separately and added after reheating.
Frequently Asked Questions
Final Thoughts
So there you have it – my ultimate guide to thinking about quesadilla ideas that go way beyond the basics. I really hope this inspires you to get creative in your own kitchen. It’s such a simple dish, but the potential for flavor and fun is enormous. Whether you’re looking for a quick lunch, a satisfying dinner, or even a sweet treat, a well-made quesadilla is almost always the answer. It’s the kind of recipe that grows with you, adapting to your tastes and whatever you happen to have on hand. Don’t be afraid to experiment with different cheeses, spices, and fillings – that’s where the real magic happens! I’d absolutely love to hear what your favorite quesadilla combinations are. Drop a comment below and tell me your go-to fillings or any amazing variations you’ve come up with. And if you try this out, please let me know how it turns out! Happy cooking, and happy quesadilla making!
Simple Cheesy Quesadillas
Ingredients
Main Ingredients
- 8 flour tortillas flour tortillas
- 4 teaspoons butter for cooking
- 3 cups shredded cheese cheddar, Monterey Jack, or a blend
- 1.5 cups optional filling cooked chicken, seasoned ground beef, or black beans
Instructions
Preparation Steps
- Preheat a large non-stick skillet to medium-high heat. Lightly butter one side of a tortilla and place it butter-side down in the hot pan.
- Sprinkle about 3 tablespoons of cheese, 1/4 cup of your chosen filling (if using), and another 2-3 tablespoons of cheese over one half of the tortilla.
- Fold the tortilla in half over the filling and cook for 2-3 minutes, until the bottom is golden brown and the cheese is starting to melt.
- Flip the quesadilla and cook the other side for another 2-3 minutes, until all the cheese is melted and the tortilla is crisp.
- Remove from skillet, cut into wedges, and serve immediately.