You know those recipes that just feel like a warm hug? The ones that smell like pure comfort and make your entire house smell like a cozy autumn day, even if it’s the middle of July? Well, THIS is one of those recipes for me. My family practically begs for this pumpkin bread year-round, but it truly shines when the leaves start to turn. It’s not just any quick bread; it’s that perfect balance of moist, tender crumb and a hint of spice that just makes everything feel right. Forget those dry, crumbly loaves you might have tried before – this is the pumpkin bread that will have everyone asking for the recipe. It’s like the ultimate upgrade to your grandma’s classic, with a little something extra that makes it truly unforgettable. I always find myself making a double batch around the holidays because one loaf just disappears in minutes!
What is Pumpkin Bread?
So, what exactly makes this pumpkin bread so special? Think of it as your go-to quick bread, elevated. It’s a loaf cake, really, packed with the goodness of pumpkin puree and a beautiful blend of warm spices. The “pumpkin bread” name just sounds so wonderfully homey, doesn’t it? It’s essentially a moist, flavorful cake baked in a loaf pan, making it incredibly easy to whip up for any occasion. It’s not overly sweet on its own, which is a big win in my book, allowing the natural flavors of the pumpkin and spices to really sing. It’s the kind of thing you can serve for breakfast with coffee, as a delightful afternoon snack, or even as a simple, elegant dessert. It’s the culinary equivalent of pulling on your favorite cozy sweater.
Why you’ll love this recipe?
Honestly, where do I even begin? This pumpkin Bread Recipe is a total winner for so many reasons. First off, the FLAVOR is just out of this world. It’s perfectly spiced – not too much, not too little – with that signature warmth from cinnamon, nutmeg, and cloves that just screams autumn. And the texture? Oh my goodness. It’s unbelievably moist and tender, thanks to the secret ingredient that I’ll share in a bit! Beyond the incredible taste, the SIMPLICITY of this recipe is a lifesaver. You don’t need any fancy equipment or complicated techniques. It’s a straightforward mix-and-bake situation, which means less time fussing in the kitchen and more time enjoying the delicious results. It’s also incredibly COST-EFFECTIVE. Most of the ingredients are pantry staples, and even the pumpkin puree is usually quite affordable, especially when it’s in season. Plus, it’s SO VERSATILE. I’ll get into more serving ideas later, but you can dress it up or down depending on your mood. It’s perfect with a simple dusting of powdered sugar, a drizzle of icing, or even just plain. What I love most about this recipe is how it consistently turns out perfectly. I’ve made it countless times, and it’s never let me down, even when I’m rushing. It’s the kind of recipe you can make blindfolded (almost!), and it always gets rave reviews from friends and family. If you’ve ever made my [link to another simple quick bread recipe, e.g., banana bread] before, you’ll find this just as approachable and equally rewarding.
How do I make my famous pumpkin bread?
Quick Overview
The beauty of this pumpkin bread is its effortless assembly. You’ll basically whisk together your dry ingredients, whisk your wet ingredients separately, then combine them gently. A quick swirl of a simple, creamy filling goes in next, and then it bakes to golden perfection. It’s designed to be foolproof, even for beginners. The whole process, from start to finish, takes less than an hour and a half, with most of that being hands-off baking time. It’s the ultimate “set it and forget it” kind of bake when you need a delicious treat without the fuss.
Ingredients
For the Main Batter:
2 ½ cups all-purpose flour: Make sure it’s spooned and leveled, not scooped, to avoid dense bread. I always use unbleached all-purpose flour for the best texture.
1 teaspoon baking soda: This is crucial for that lovely lift and tender crumb.
½ teaspoon salt: Balances the sweetness and enhances the other flavors.
1 teaspoon ground cinnamon: The classic warming spice!
½ teaspoon ground nutmeg: Adds a beautiful depth of flavor.
¼ teaspoon ground cloves: Just a pinch, but it makes a big difference in that spiced aroma.
1 teaspoon ground ginger: For an extra layer of warmth.
1 ½ cups granulated sugar: You can adjust this slightly, but this amount ensures the perfect sweetness.
½ cup unsalted butter, softened: Make sure it’s truly softened, not melted! This helps create a tender crumb.
2 large eggs: At room temperature, they incorporate much better.
1 teaspoon vanilla extract: Pure vanilla extract for the best flavor.
1 (15-ounce) can pumpkin puree: NOT Pumpkin Pie filling. Make sure it’s 100% pure pumpkin. Strain it a little if it seems extra watery; this is key for moisture control.
For the Cream Cheese Swirl (My Secret Weapon!):
4 ounces Cream Cheese, softened: Full-fat cream cheese works best for richness.
¼ cup granulated sugar: Just enough to sweeten the swirl.
1 large egg yolk: This makes the swirl wonderfully creamy and rich.
½ teaspoon vanilla extract: A little extra flavor boost.
For the Simple Glaze:
1 cup powdered sugar: Sifted to ensure a smooth glaze.
2-3 tablespoons milk or heavy cream: Start with 2 tablespoons and add more until you reach your desired drizzling consistency.
½ teaspoon vanilla extract (optional): For an extra hint of flavor.
Step-by-Step Instructions
Step 1: Preheat & Prep Pan
First things first, get your oven preheated to 350°F (175°C). This ensures an even bake from the moment the loaf goes in. Then, grab a standard 9×5 inch loaf pan. I like to grease it really well with butter or baking spray, and then dust it with a little flour. This is a simple step, but it guarantees your beautiful pumpkin bread won’t stick. You can also line it with parchment paper, leaving an overhang on the sides, which makes lifting it out a breeze – a trick I learned after one too many tricky un-molding situations!
Step 2: Mix Dry Ingredients
In a large bowl, whisk together the flour, baking soda, salt, cinnamon, nutmeg, cloves, and ginger. Whisking them together thoroughly before adding the wet ingredients ensures that the leavening agents and spices are evenly distributed throughout the batter. This means no surprises with pockets of baking soda or clumps of cinnamon in your finished loaf. You want that beautiful, uniform flavor in every bite.
Step 3: Mix Wet Ingredients
In a separate medium bowl, cream together the softened butter and granulated sugar until light and fluffy. This usually takes a minute or two with an electric mixer, or a bit longer by hand. Then, beat in the eggs one at a time, ensuring each is fully incorporated before adding the next. Stir in the vanilla extract and the pumpkin puree until everything is just combined. Don’t overmix here; we just want it smooth and uniform. The mixture might look a little separated; that’s totally normal!
Step 4: Combine
Now, it’s time to bring the wet and dry ingredients together. Pour the wet ingredients into the bowl with the dry ingredients. Using a spatula or a wooden spoon, gently fold them together until *just* combined. It’s really important not to overmix at this stage. A few streaks of flour are okay; they’ll disappear as the batter rests and bakes. Overmixing develops the gluten too much, which can lead to a tough, dense loaf. We’re aiming for tender and moist!
Step 5: Prepare Filling
While the batter is resting for a moment, let’s whip up that dreamy cream cheese swirl. In a small bowl, beat together the softened cream cheese and ¼ cup granulated sugar until smooth and creamy. Then, mix in the egg yolk and ½ teaspoon vanilla extract. The egg yolk adds extra richness and helps the swirl set up beautifully. You want this mixture to be smooth and lump-free.
Step 6: Layer & Swirl
Pour about half of the pumpkin batter into your prepared loaf pan. Dollop half of the cream cheese mixture over the batter. Now, carefully pour the remaining pumpkin batter over the cream cheese layer. Dollop the remaining cream cheese mixture on top. Take a knife or a skewer and gently swirl the cream cheese into the pumpkin batter. Don’t over-swirl, or you’ll lose the distinct layers. Just a few gentle passes will create beautiful marble patterns. This is where the magic happens visually!
Step 7: Bake
Pop the loaf pan into your preheated oven. Bake for 50-65 minutes. The exact time will depend on your oven, so it’s good to start checking around the 50-minute mark. You’ll know it’s done when a toothpick inserted into the center comes out clean, or with just a few moist crumbs attached (no wet batter!). If the top starts to get too brown before the center is cooked, you can loosely tent it with aluminum foil.
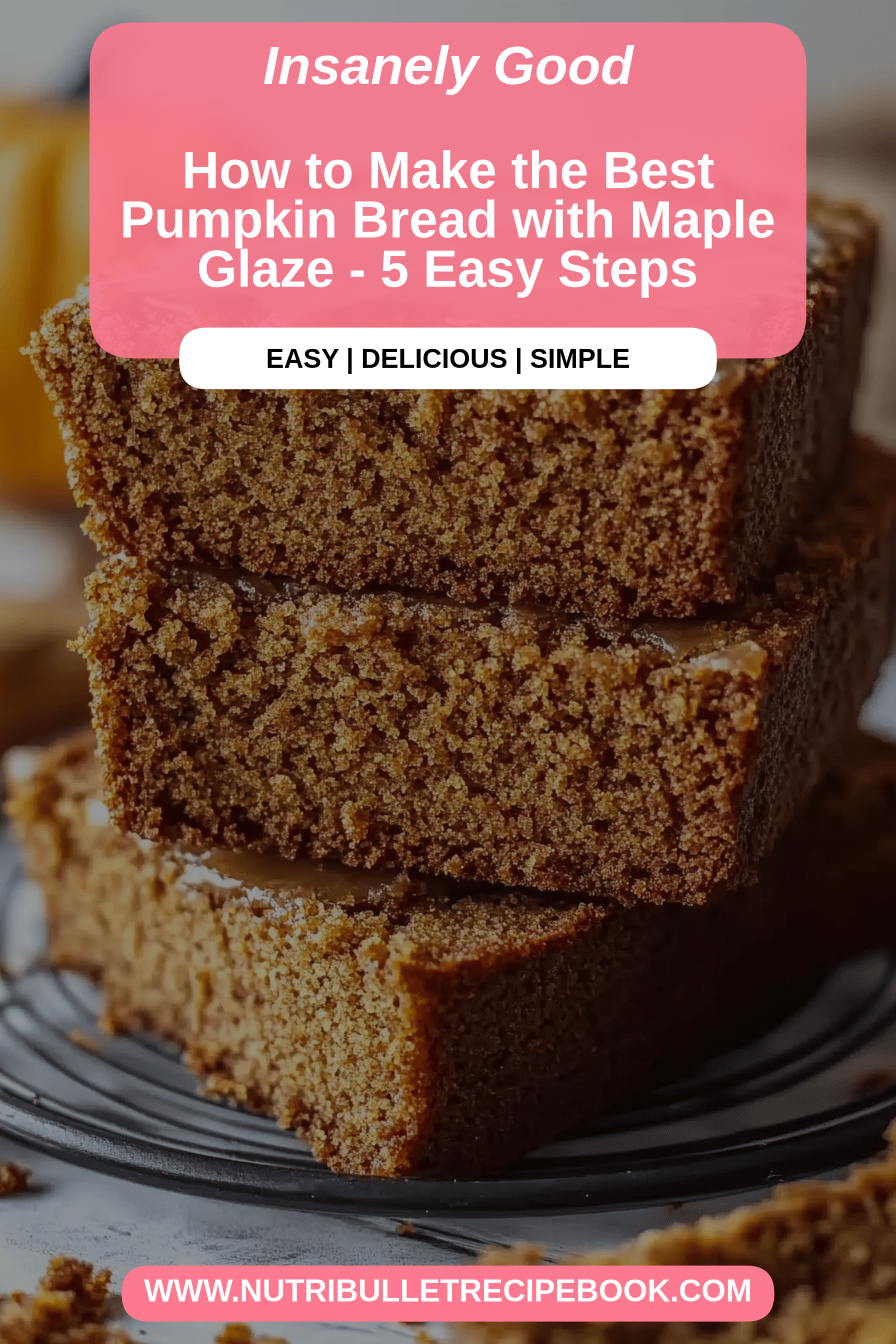
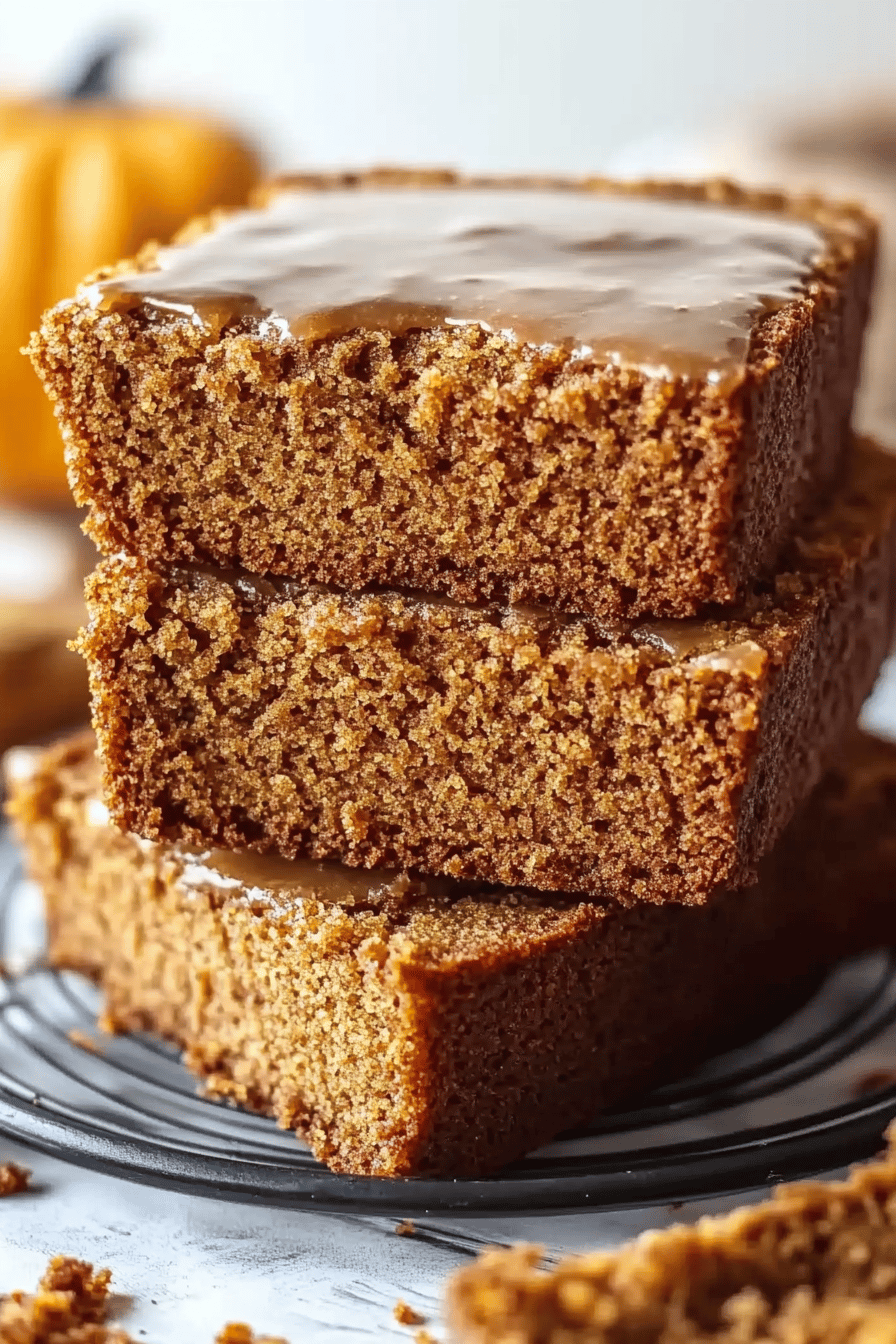
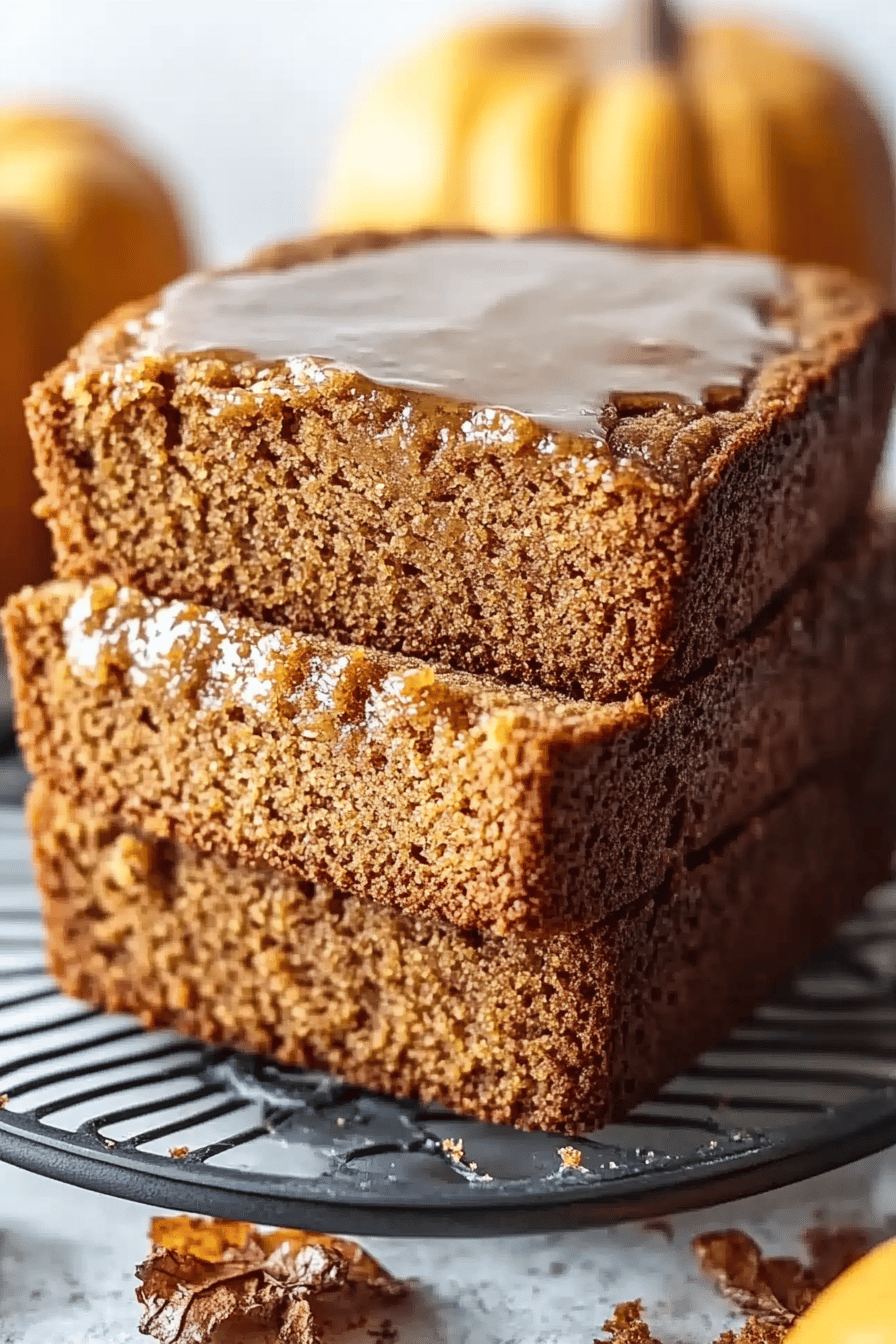
Step 8: Cool & Glaze
Once baked, remove the loaf pan from the oven and let it cool in the pan for about 15-20 minutes. This allows it to set up nicely. Then, carefully invert the loaf onto a wire rack to cool completely. Trying to glaze a warm loaf is a recipe for a melty mess, so patience is key here! Once it’s completely cool, whisk together the sifted powdered sugar, 2 tablespoons of milk (or cream), and vanilla extract (if using). Add more milk, a teaspoon at a time, until you reach a thick but pourable consistency. Drizzle it over the cooled loaf.
Step 9: Slice & Serve
Wait for the glaze to set a bit before slicing. Using a serrated knife works best for clean slices without squishing the loaf. I love serving this pumpkin bread slightly warm or at room temperature. It’s delicious on its own, but even better with a cup of hot coffee or tea. The contrast between the moist cake and the sweet glaze is just heavenly. Enjoy every single bite!
What to Serve It With
This pumpkin bread is so versatile, it fits into almost any meal or snack time! Here are some of my favorite ways to enjoy it:
For Breakfast: Start your day off right! A slice of this pumpkin bread is perfect alongside a steaming mug of coffee or a warm chai latte. I love it toasted lightly, with a whisper of butter. It’s a step up from your everyday toast but still feels totally wholesome and satisfying. My kids always grab a slice on their way out the door for school on colder mornings.
For Brunch: Elevate your brunch spread! This bread looks beautiful on a buffet. Serve it with a dusting of powdered sugar or a light drizzle of the glaze. It pairs wonderfully with fresh fruit salads, yogurt parfaits, or even alongside savory brunch items like scrambled eggs or bacon. A mimosa or a sparkling cider makes a lovely beverage accompaniment.
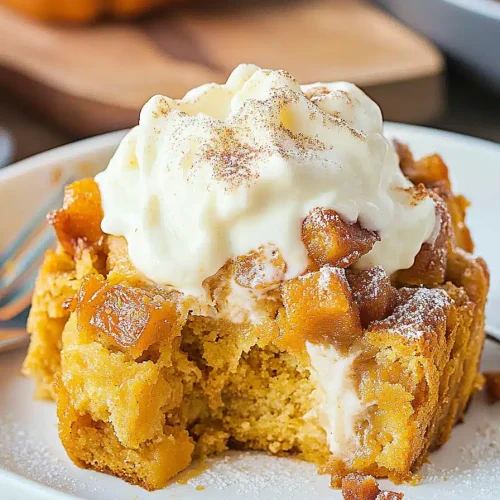
As Dessert: Who says quick bread can’t be dessert? Serve a thicker slice warm, maybe with a dollop of whipped cream or a scoop of vanilla bean ice cream. A drizzle of caramel sauce over the top is also divine. It’s a comforting and elegant way to end a meal without the fuss of a formal cake.
For Cozy Snacks: This is where it truly shines in my house! It’s the perfect treat for that 3 PM slump or a late-night craving. Pair it with a glass of cold milk or a hot chocolate. It’s simple, satisfying, and always hits the spot when you just need something sweet and comforting. It’s a guaranteed crowd-pleaser when friends pop over unexpectedly.
My family’s favorite tradition is having a slice after an evening bonfire in the fall, complete with mugs of hot apple cider. The warm spices in the bread just complement the crisp autumn air perfectly.
Top Tips for Perfecting Your Pumpkin Bread
I’ve made this pumpkin bread more times than I can count, and over the years, I’ve picked up a few tricks that make all the difference. Here are my top tips to ensure your loaf turns out absolutely perfect:
Pumpkin Puree Prep: This is crucial for moisture control! Always use 100% pure pumpkin puree, not pie filling. If your pumpkin puree seems unusually watery, you can strain it by placing it in a fine-mesh sieve lined with cheesecloth for about 15-20 minutes to drain off excess liquid. This prevents a gummy texture and ensures a better crumb structure. Don’t skip this if your pumpkin seems very wet!
Mixing Advice: Remember, when combining the wet and dry ingredients, the key is “just combined.” Seriously, a few flour streaks are your friend here. Overmixing develops gluten, which leads to tough bread. I usually stop mixing as soon as I don’t see any large dry patches of flour. The batter will look a little thick but still pourable, and that’s exactly what you want.
Swirl Customization: For the prettiest swirls, don’t go too deep with your knife or skewer. Just a few passes through the top layer of batter are enough to create that marbled effect. You want distinct ribbons of cream cheese, not a blended mess. You can also add a pinch of cinnamon to the cream cheese mixture for an extra spicy swirl!
Ingredient Swaps: If you’re out of regular milk for the glaze, heavy cream or half-and-half will give you a richer, thicker glaze. For the spices, you can adjust them to your liking. Some people prefer a little more cinnamon or nutmeg. If you love ginger, add an extra ¼ teaspoon. I’ve even seen people add a pinch of cardamom for a floral note, though I usually stick to the classics.
Baking Tips: Every oven is different! My 350°F might be hotter or cooler than yours. If you find your loaves tend to brown too quickly on top, loosely tent the pan with aluminum foil for the last 15-20 minutes of baking. The toothpick test is your best friend: insert it into the thickest part of the loaf, and it should come out with just a few moist crumbs attached, not wet batter. If it comes out completely clean, it might be slightly overbaked.
Glaze Variations: For a thinner glaze, just add more milk, a teaspoon at a time, until you get the consistency you like. For a thicker, more frosting-like glaze, use less liquid or add a bit more powdered sugar. You can also flavor the glaze with a touch of orange zest or a tiny bit of almond extract for a different twist. If you’re not a fan of glaze, a simple dusting of powdered sugar or a sprinkle of cinnamon-sugar just before serving is also delicious.
Storing and Reheating Tips
Proper storage is key to keeping this pumpkin bread moist and delicious for days. Here’s how I handle it:
Room Temperature: Once completely cooled and glazed, I usually store any leftover pumpkin bread at room temperature. Wrap the loaf tightly in plastic wrap or place it in an airtight container. It will stay fresh and moist for about 2-3 days. Make sure it’s fully cooled before wrapping, or condensation can make it soggy.
Refrigerator Storage: If your kitchen is particularly warm, or you want it to last a bit longer, you can store it in the refrigerator. Again, wrap it tightly in plastic wrap or use an airtight container. It should keep well for up to 5 days. The texture might become a little firmer when cold, but it’s easily remedied with a quick reheat.
Freezer Instructions: This bread freezes beautifully, which is great for making ahead of time! If you’re planning to freeze it, it’s best to do so *before* glazing. Wrap the cooled, unglazed loaf very tightly in a layer of plastic wrap, followed by a layer of aluminum foil. You can also slice it and freeze individual slices this way. It will keep its quality for up to 3 months. To thaw, unwrap it and let it come to room temperature on the counter. If you froze slices, you can toast them directly from frozen.
Glaze Timing Advice: I always recommend glazing the bread *after* it has completely cooled. If you glaze it while warm, the glaze will melt and drip off, creating a mess. If you plan to freeze the bread, freeze it *without* the glaze. You can then whip up a fresh batch of glaze and apply it once the thawed bread is at room temperature.
When reheating, a brief zap in the microwave (about 10-15 seconds per slice) or a few minutes in a low oven (around 300°F/150°C) will bring back its lovely moist texture, especially if it’s been refrigerated or thawed from frozen.
Frequently Asked Questions
Final Thoughts
There you have it – my absolute favorite recipe for pumpkin bread! I truly hope you give this a try. It’s more than just a recipe; it’s a little piece of comfort that I love sharing. The way it fills your kitchen with that incredible aroma is just magical, and the tender, moist crumb with that hint of spiced cream cheese swirl is something special. It’s the kind of treat that makes even an ordinary day feel a little bit brighter. If you’re looking for other cozy baking adventures, you might also enjoy my [link to another similar recipe, e.g., spiced apple cake] or my [link to another simple dessert recipe, e.g., quick pear crumble]. I can’t wait to hear what you think of this pumpkin bread! Please leave a comment below to let me know how yours turned out, or share any fun variations you tried. Happy baking, and enjoy every delicious slice!
Pumpkin Bread
Ingredients
Pumpkin Bread
- 2.5 cups all-purpose flour
- 1 teaspoon baking soda
- 0.5 teaspoon salt
- 1 teaspoon ground cinnamon
- 0.5 teaspoon ground nutmeg
- 0.25 teaspoon ground cloves
- 0.5 teaspoon ground ginger
- 1.5 cups granulated sugar
- 2 large eggs
- 0.5 cup vegetable oil
- 1 cup pumpkin puree (not pumpkin pie filling)
- 0.25 cup milk
Maple Glaze
- 1 cup powdered sugar
- 2 tablespoons maple syrup
- 1 tablespoon milk
Instructions
Preparation Steps
- Preheat oven to 350°F (175°C). Grease and flour a 9x5 inch loaf pan.
- In a large bowl, whisk together flour, baking soda, salt, cinnamon, nutmeg, cloves, and ginger.
- In a separate bowl, beat together granulated sugar, eggs, and vegetable oil until well combined.
- Stir in the pumpkin puree and milk until just combined.
- Add the wet ingredients to the dry ingredients and mix until just combined. Do not overmix.
- Pour the batter into the prepared loaf pan.
- Bake for 50-60 minutes, or until a wooden skewer inserted into the center comes out clean.
- Let the bread cool in the pan for 10 minutes before transferring it to a wire rack to cool completely.
- For the glaze, whisk together powdered sugar, maple syrup, and milk until smooth. Drizzle over cooled pumpkin bread.