Oh, where do I even begin with this peanut butter pie? It’s one of those recipes that just feels like a warm hug, you know? I remember the first time I ever made it. I was so nervous because I’d promised to bring dessert to a potluck, and let’s just say my baking track record at the time was… spotty. But this peanut butter pie? It was a total game-changer. It’s so ridiculously creamy and full of that intense peanut butter flavor that just melts in your mouth. Seriously, it’s the kind of dessert that makes people stop mid-bite and ask, “What *is* this magic?!” It’s honestly just as good, if not better, than any fancy chocolate cake or complex tart. This is the real deal, my friends, and it’s surprisingly simple to pull off, even for us mere mortals who occasionally confuse salt for sugar. It’s become my go-to for holidays, birthdays, or just when that late-night sweet craving hits and I don’t want to spend hours in the kitchen.
What is peanut butter pie?
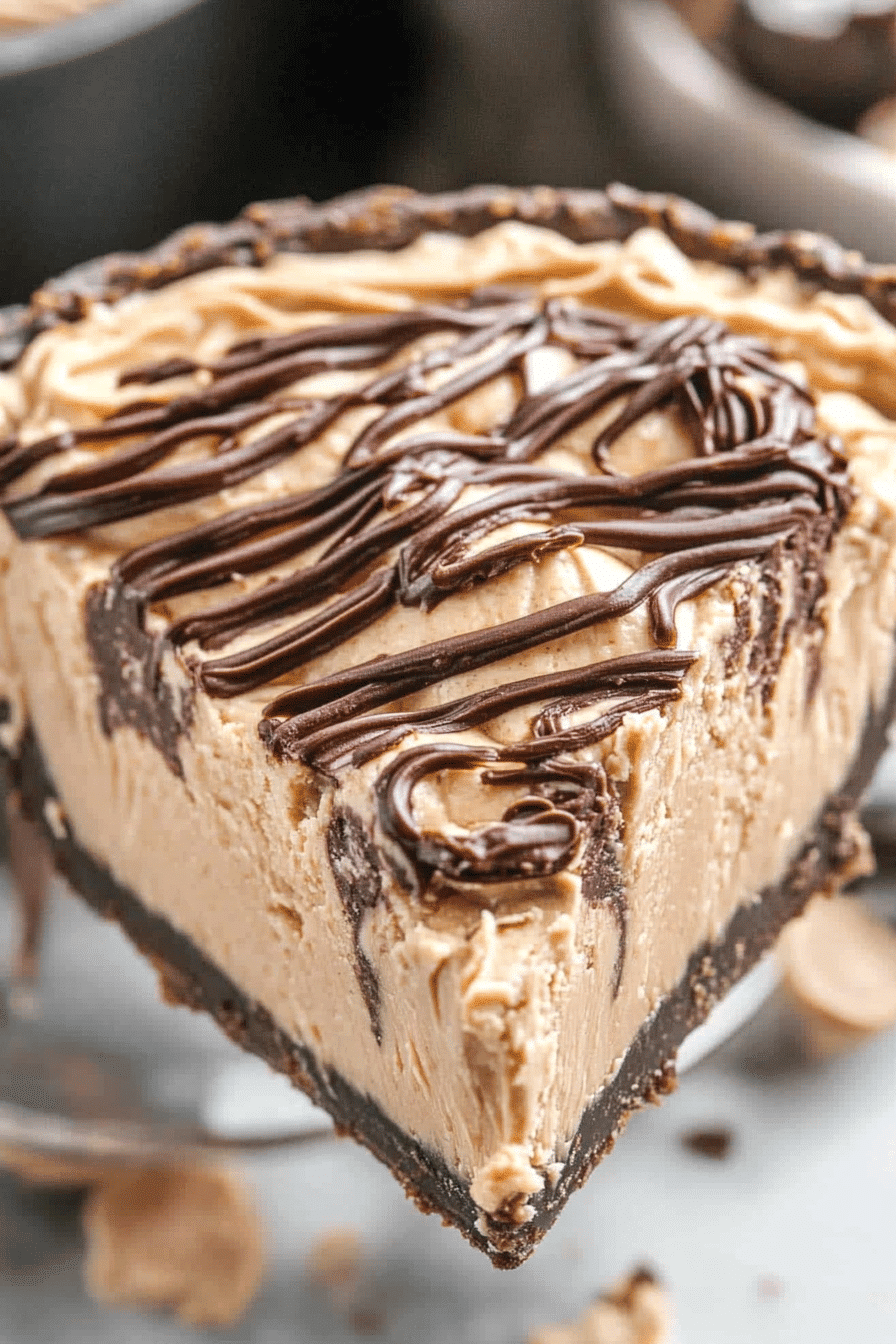
So, what exactly is this glorious concoction we call peanut butter pie? Think of it as the ultimate mash-up of your favorite creamy peanut butter cup and a decadent, no-bake cheesecake. It’s usually built on a sweet, crumbly crust – often made with graham crackers or cookies – that’s then filled with a heavenly, smooth mixture dominated by that unmistakable peanut butter goodness. It’s rich, it’s satisfying, and it’s usually topped with a cloud of whipped cream and maybe even a drizzle of chocolate or more peanut butter. It’s essentially a pure, unadulterated celebration of peanut butter in dessert form. The name itself tells you exactly what you’re getting: pure bliss for peanut butter lovers. It’s not overly complicated, and the beauty of it is its inherent simplicity, which allows that star ingredient – the peanut butter – to truly shine.
Why you’ll love this recipe?
Let me count the ways! Honestly, there are so many reasons why this peanut butter pie has earned a permanent spot in my recipe binder (and my heart!). First off, the *flavor*. It’s just pure, unadulterated peanut butter heaven. It’s got that perfect balance of sweet and salty, creamy and rich, that just makes you want to go back for another slice. If you’re a peanut butter enthusiast like I am, this is basically your dream come true. Beyond the taste, the *simplicity* is a major win. You don’t need any fancy equipment or complicated techniques. Most of the ingredients are probably already in your pantry, making it super *cost-efficient* too. It’s one of those lifesavers when you need to whip up a dessert in a pinch but still want something that feels special. What I love most is its *versatility*. While it’s absolutely divine as is, you can totally play around with it. Add some chocolate chips, swirl in some caramel, or switch up the crust. It’s perfect for impressing guests, but it’s also incredibly comforting for a quiet night in. Plus, my kids ask for this peanut butter pie all the time, which is the ultimate stamp of approval in my book! It’s just a crowd-pleaser, through and through.
How do I make a peanut butter pie?
Quick Overview
This Peanut Butter pie comes together like a dream. You’ll start by creating a simple, buttery crust, then whip up a ridiculously creamy peanut butter filling that’s as easy as stirring a few ingredients together. Once filled and chilled, it firms up into a sliceable delight, often finished with a dollop of whipped cream. The magic here is in the smooth texture and intense peanut butter flavor that requires minimal effort but delivers maximum satisfaction. It’s the kind of dessert that makes you feel like a baking pro, even if you’re just starting out.
Ingredients
For the Crust:
2 cups graham cracker crumbs (about 14-16 full sheets) (about 2 cups)
1/2 cup unsalted butter, melted
1/4 cup granulated sugar
Pinch of salt
For the Filling:
1 (8 ounce) package Cream Cheese, softened
1 cup creamy peanut butter (use your favorite brand – I love Jif or Skippy for this!)
1 cup powdered sugar
1 teaspoon vanilla extract
1 cup heavy whipping cream, cold
For the Topping (Optional but highly recommended!):
1 cup heavy whipping cream, cold
2 tablespoons powdered sugar
1/2 teaspoon vanilla extract
Chocolate shavings or mini peanut butter cups, for garnish
Step-by-Step Instructions
Step 1: Preheat & Prep Pan
First things first, grab a 9-inch pie plate. You’ll want to gently press the crust ingredients into the bottom and up the sides. I like to use the bottom of a measuring cup to get it nice and even. Pop this into the freezer for about 10-15 minutes while you get the filling ready. This helps the crust hold its shape beautifully. No need to pre-bake this crust; it will set up in the fridge as the pie chills.
Step 2: Mix Dry Ingredients
In a medium bowl, combine your graham cracker crumbs, granulated sugar, and a tiny pinch of salt. Give it a good stir with a fork or whisk to make sure everything is evenly distributed. The sugar helps sweeten the crust and the salt just balances out the flavors. This is super simple, but it’s the foundation of that delicious crunch!
Step 3: Mix Wet Ingredients
In a large bowl, beat the softened cream cheese until it’s smooth and creamy. Seriously, make sure it’s softened – no one wants lumps in their pie! Then, add in your peanut butter. Beat them together until they’re fully combined and look like a lovely smooth peanut butter mixture. Add the powdered sugar and vanilla extract, and beat again until it’s all incorporated and looks super smooth and fluffy. Trust me, the smell at this stage is just heavenly.
Step 4: Combine
Now it’s time to bring in the whipped cream. In a separate, clean bowl, whip the cold heavy cream until stiff peaks form. This is key for a light and airy filling! Then, gently fold about half of the whipped cream into the peanut butter mixture. Once that’s mostly combined, fold in the remaining whipped cream. Be gentle! You don’t want to deflate all that air you just whipped in. The goal is a light, fluffy, and luscious filling.
Step 5: Prepare Filling
The filling itself is what we just made in the previous steps! It’s already prepared for the pie. We’ve whipped the cream cheese and peanut butter base, and then lightened it up with fluffy whipped cream. The consistency should be thick and scoopable, but also smooth and airy. This is the part that makes the pie so incredibly decadent and melt-in-your-mouth good. No cooking required!
Step 6: Layer & Swirl
Take your chilled pie crust out of the freezer. Spoon the creamy peanut butter filling into the crust and spread it out evenly using a spatula. You want it to fill the crust right up to the edges. You don’t need to swirl anything here for this particular recipe, as the filling is one uniform, delicious flavor. Just make sure it’s smooth and has a nice, even surface.
Step 7: Bake
Here’s the best part: no baking required for the pie itself! The crust was chilled, and the filling is a no-bake, creamy mixture. The only thing you might bake is if you decide to toast your crust *before* filling, but for this recipe, we’re skipping that step to keep it super simple and light. We’ll just pop the whole pie into the refrigerator to set. Make sure it has plenty of time – at least 4-6 hours, or even better, overnight.
Step 8: Cool & Glaze
The pie needs to chill and set in the refrigerator for at least 4-6 hours, or ideally overnight. This is crucial for the filling to firm up and be sliceable. Once it’s firm, you can prepare your topping. Whip the remaining cold heavy cream with powdered sugar and vanilla extract until stiff peaks form. Dollop or spread this whipped cream over the chilled peanut butter pie. You can also add chocolate shavings or mini peanut butter cups for that extra touch of indulgence. The glaze is best added just before serving to keep the whipped cream looking its best.
Step 9: Slice & Serve
Once your peanut butter pie is perfectly chilled and topped, it’s ready to be sliced and devoured! Use a sharp knife, and I find running it under hot water and drying it before each slice helps get cleaner cuts. Serve it cold, straight from the fridge. It’s fantastic on its own, but a little drizzle of chocolate sauce or a sprinkle of crushed peanuts never hurt anyone! Enjoy the applause.
What to Serve It With
This peanut butter pie is so versatile, it truly fits into any meal or occasion. For a lovely breakfast treat (because who says pie is only for dessert?), I love serving a small slice with a hot cup of black coffee. It’s a surprisingly satisfying way to start the day. If you’re planning a brunch spread, this pie is a showstopper. I like to plate a neat slice with a few fresh berries on the side – the tartness of the berries cuts through the richness beautifully. A mimosa or a sparkling cider would be perfect alongside it. As a classic dessert, it’s a winner every single time. I often serve it after a hearty meal, perhaps with a scoop of vanilla ice cream or a drizzle of warm chocolate ganache. It’s perfect for birthdays or any celebration. And for those cozy snacks when you just need something comforting? A slice of this pie with a tall glass of cold milk is pure, simple bliss. My family has a tradition of having this peanut butter pie on movie nights, and it always makes the evening feel extra special.
Top Tips for Perfecting Your Peanut Butter Pie
I’ve made this peanut butter pie more times than I can count, and I’ve definitely learned a few tricks along the way that I want to share with you! For the crust, make sure your graham cracker crumbs are fine. You can pulse them in a food processor or just crush them really well in a bag. This helps create a solid base. When you mix the crumbs with melted butter, it should resemble wet sand – that’s the perfect consistency to hold together. If your filling seems a little grainy, it’s usually because the cream cheese wasn’t softened enough, or the powdered sugar wasn’t beaten in well. Really take your time with that step! And for the whipped cream, make sure your bowl and whisk are super clean and cold. That’s the secret to getting those lovely stiff peaks. Don’t overmix the filling once you add the whipped cream; you want to keep it airy. If you want to customize, for swirl variations, you could easily fold in some melted chocolate or peanut butter sauce into a portion of the filling before layering it. For ingredient swaps, you can absolutely use cookies other than graham crackers for the crust, like shortbread or even Oreos (omit the sugar in the crust if using sweet cookies). If you’re out of heavy whipping cream, some people have had success with a good quality store-bought whipped topping, but homemade is always best for texture and flavor. And remember, this pie is all about chilling! Don’t rush the cooling process. The longer it has to set in the fridge, the firmer and easier it will be to slice, and the more the flavors will meld together. For the glaze, if it seems too thin, pop it in the fridge for a few minutes to thicken up. If it’s too thick, a tiny splash of milk can help. I learned the hard way that adding the glaze too early can make it soggy, so wait until the pie is firm and ready to be served.
Storing and Reheating Tips
This peanut butter pie is a dream to store, which makes it perfect for making ahead. For room temperature storage, I’d only keep it out for a couple of hours at most, especially if you’ve topped it with whipped cream. It’s best kept chilled. If you need to store leftovers, refrigerator storage is your best bet. Keep it covered tightly in the pie plate with plastic wrap or aluminum foil. It will stay delicious for about 3-4 days, though honestly, it rarely lasts that long in my house! The texture might soften slightly over time, but the flavor remains fantastic. If you want to make it even further ahead, freezer instructions are a good option. You can freeze the pie before adding the whipped cream topping. Wrap it very well in plastic wrap, then a layer of aluminum foil. It should keep well for up to 2-3 months. To thaw, remove it from the freezer and let it sit in the refrigerator overnight. Then, add your fresh whipped cream topping before serving. For the glaze timing, it’s always best to add the whipped cream topping and any garnishes just before you plan to serve the pie, especially if it’s been refrigerated for a while or if it’s going to sit out for a party. This ensures the topping stays fresh and fluffy.
Frequently Asked Questions
Final Thoughts
So there you have it – my absolute favorite peanut butter pie! It’s honestly one of those recipes that’s too good not to share. It’s got that irresistible combination of creamy, dreamy peanut butter flavor and a simple, satisfying texture that just makes everyone happy. It’s proof that you don’t need to be a gourmet chef to create something truly spectacular in your own kitchen. Whether you’re making it for a special occasion or just because you’re craving something incredible, I promise this peanut butter pie will not disappoint. If you love this recipe, you might also enjoy my rich chocolate fudge cake or my no-bake cheesecake – they’re all about that decadent, crowd-pleasing goodness. I can’t wait for you to try this, and I’d love to hear how it turns out for you! Let me know in the comments if you have any variations or tips of your own. Happy baking!

No Bake Peanut Butter Pie
Ingredients
Main Ingredients
- 0.5 package 1/3 less fat cream cheese softened
- 0.33 cup powdered sugar
- 0.33 cup Better 'n Peanut Butter
- 2.5 cups light whipped topping
- 1 crust reduced-fat graham cracker pie crust
For Drizzling
- 2 tablespoons Hershey's chocolate syrup
Instructions
Preparation Steps
- Beat cream cheese and confectioners' sugar together in a medium bowl.
- Mix in Better 'n Peanut Butter and beat until smooth. Fold in whipped topping.
- Spoon into graham cracker pie shell; cover, and refrigerate until firm, at least 2-3 hours.
- Drizzle with chocolate syrup before serving.