Oh, where do I even begin with this no-bake peanut butter pie? It feels like just yesterday I was a kid, watching my mom pull out a store-bought version for birthdays, and thinking, “Wow, that looks so fancy!” Little did I know, years later, I’d have a version of my own that’s not only ten times better but ridiculously simple. This isn’t just a dessert; it’s a hug in a pie dish. It’s that last-minute savior when unexpected guests arrive or when you just absolutely need a creamy, dreamy peanut butter fix without the fuss of turning on the oven. Seriously, if you’re anything like me, sometimes the thought of preheating an oven feels like too much effort, especially when a craving hits. This pie is the answer to those moments. It’s the kind of treat that makes everyone ask for the recipe, and I always get a kick out of seeing their surprised faces when I tell them how little effort it actually took. It’s got that perfect balance – intensely peanut buttery, wonderfully creamy, and with a sweet, crumbly crust that just sings. It’s truly the ultimate no-bake peanut butter pie, and I’m so excited to share it with you!
What is a no bake peanut butter pie?
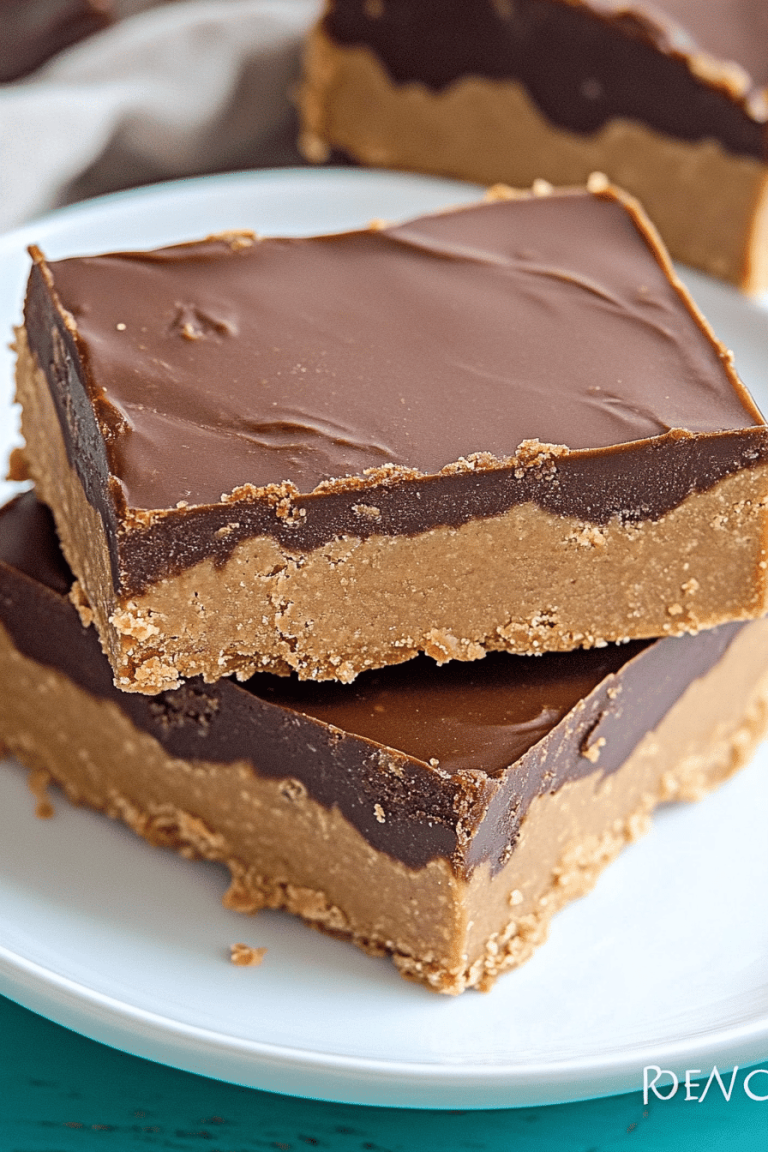
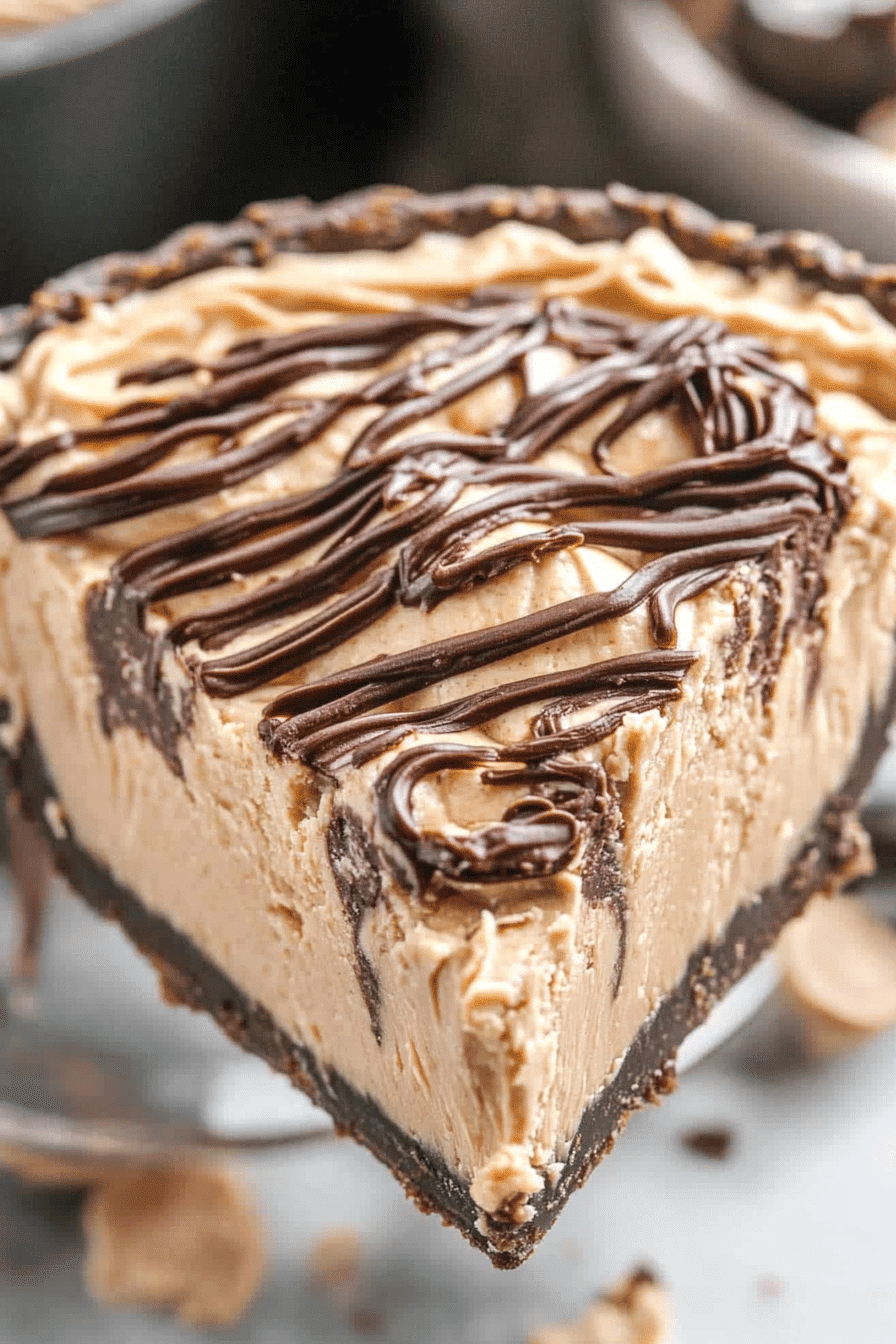
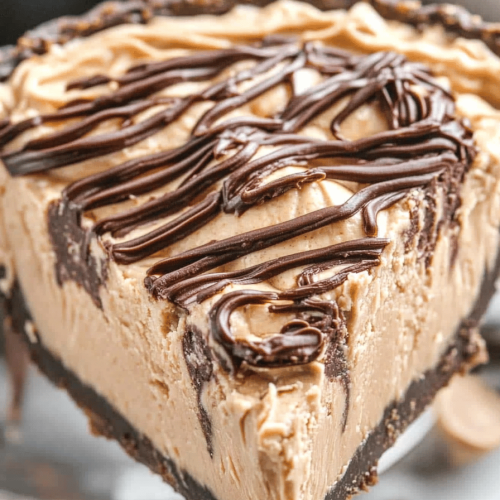
So, what exactly is this magical no-bake peanut butter pie? Think of it as your favorite peanut butter cup transformed into a glorious, sliceable dessert. It’s essentially a rich, velvety smooth peanut butter filling nestled inside a buttery, crumbly crust, all without ever needing to see the inside of an oven. The “no-bake” part is the real star here, making it incredibly accessible for even the most novice bakers. It’s a clever combination of simple ingredients that come together to create something truly spectacular. The name itself, “no-bake peanut butter pie,” says it all – it’s straightforward, no-nonsense, and all about that irresistible peanut butter flavor. There are no complex techniques, no tricky steps; it’s all about layering simple components to create a symphony of textures and tastes. It’s the kind of dessert that feels indulgent and impressive, yet is genuinely easy to pull off. It’s a testament to how delicious simple can be!
Why you’ll love this recipe?
What are some of the reasons why I love this no bake peanut butter pie?flavor. Oh. My. Goodness. It’s pure peanut butter bliss. It’s rich, creamy, and has that perfect balance of sweet and salty that just makes your taste buds sing. It’s not overly sweet, which I appreciate, allowing the natural peanut butter flavor to really shine through. Then there’s the simplicity. This is a lifesaver on busy weeknights or when you’re hosting and don’t want to be stuck in the kitchen. You can whip this up in about 20 minutes (plus chilling time!), and the ingredients are likely already in your pantry. It’s incredibly forgiving, too. I’ve made it on days I felt I had zero cooking mojo, and it still turned out perfectly. Compared to some other desserts, like a traditional baked pie which can be finicky with crusts and fillings, this is a walk in the park. It’s also surprisingly cost-efficientWhat I love about this is its easy to make and the ingredients are pretty standard pantry staples, making it anversatility. You can jazz it up or keep it simple. Want to add some chocolate chips? Go for it! Prefer a different kind of crust? Easy swap! It’s also fantastic for potlucks because it travels well and always gets rave reviews. It’s truly a crowd-pleaser that’s incredibly easy to make. If you’ve ever enjoyed my Easy Chocolate Mousse Pie or my No-Bake Lemon Cheesecake, you’ll appreciate the same effortlessness and fantastic results this peanut butter pie delivers!
How to Make No-Bake Peanut Butter Pie
Quick Overview
Making this no-bake Peanut Butter pie is a breeze! You’ll essentially be whipping up a quick crust, then a luxuriously smooth peanut butter filling, and letting it all set in the fridge. It’s all about combining creamy textures with a satisfying crunch, and the best part is that zero oven time is required. This method ensures a light, airy yet decadent filling that melts in your mouth. It’s perfect for when you’re craving something sweet but don’t want to commit to a full baking project. You’ll be amazed at how professional it looks and tastes with so little effort!
Ingredients
For the Crust:
2 cups graham cracker crumbs (about 14-16 full sheets)
1/4 cup granulated sugar
1/2 cup unsalted butter, melted
For the Filling:
8 ounces Cream Cheese, softened
1 cup creamy peanut butter (use your favorite, natural or conventional works well!)
1 cup powdered sugar (sifted, if you want it extra smooth!)
1 teaspoon vanilla extract
1 1/2 cups heavy whipping cream, cold
For the Topping (Optional but Highly Recommended!):
1/2 cup chocolate chips (milk, semi-sweet, or dark – your choice!)
1 tablespoon coconut oil or butter (helps make it smooth and shiny)
Step-by-Step Instructions
Step 1: Preheat & Prep Pan
While this is a no-bake recipe, we still need to prepare our vessel! Grab a 9-inch pie plate or a springform pan. For a pie plate, simply press the crust mixture evenly into the bottom and up the sides. If you’re using a springform pan, just press it into the bottom. This ensures a beautiful presentation and makes it easy to serve. Don’t worry about preheating an oven; we’re keeping things cool here!
Step 2: Mix Dry Ingredients
In a medium bowl, combine the graham cracker crumbs and granulated sugar. Give them a good stir to make sure they’re well incorporated. This is the base of our delicious crust, and getting these dry elements ready ensures even distribution of flavor and texture.
Step 3: Mix Wet Ingredients
Pour the melted butter into the bowl with the graham cracker and sugar mixture. Stir everything together until all the crumbs are moistened and the mixture resembles wet sand. This is the key to a crust that holds together nicely. Make sure there are no dry spots!
Step 4: Combine
Press the graham cracker mixture firmly and evenly into your prepared pie plate or springform pan. I like to use the bottom of a glass or a measuring cup to really pack it down. This helps prevent the crust from falling apart when you slice the pie. You want a nice, even layer all around.
Step 5: Prepare Filling
In a large bowl, beat the softened cream cheese until it’s smooth and creamy. This is important to avoid any lumps in your filling. Then, add in the peanut butter and powdered sugar. Beat until well combined and fluffy. Stir in the vanilla extract. The mixture will be quite thick at this stage, and that’s exactly what we want for a rich filling.
Step 6: Layer & Swirl
In a separate, clean bowl, whip the cold heavy cream until stiff peaks form. Be careful not to over-whip, or you’ll end up with butter! Gently fold about half of the whipped cream into the peanut butter mixture to lighten it up. Then, fold in the remaining whipped cream until just combined. You want to maintain that airy texture from the whipped cream. Spoon this glorious, fluffy filling into your prepared crust and spread it evenly.
Step 7: Bake
This is the fun part – there’s no baking! Transfer the pie to the refrigerator and let it chill for at least 4-6 hours, or preferably overnight, until it’s firm and set. This chilling time is crucial for the pie to hold its shape and for the flavors to meld beautifully. Patience is key here, though I know it’s tough!
Step 8: Cool & Glaze
Once the pie is thoroughly chilled and firm, you can prepare the optional chocolate glaze. In a small microwave-safe bowl, combine the chocolate chips and coconut oil (or butter). Microwave in 30-second intervals, stirring between each, until the chocolate is melted and smooth. Drizzle this over the top of your chilled pie. You can make pretty swirls or just cover the whole thing. You can also just top it with more whipped cream, chopped peanuts, or even peanut butter cups! Let the glaze set for a few minutes in the fridge.
Step 9: Slice & Serve
When you’re ready to serve, carefully remove the sides of the springform pan if you used one, or simply slice directly from the pie plate. I find a sharp knife dipped in hot water and wiped dry between slices makes for cleaner cuts. Serve chilled and enjoy the pure, unadulterated joy of this incredible no-bake peanut butter pie!
What to Serve It With
This no-bake peanut butter pie is so versatile, it can make any occasion feel special. For a casual breakfast, though I know some people are hesitant about dessert for breakfast (I’m not one of them!), a small sliver alongside a hot cup of coffee is pure indulgence. It’s like a sweet little treat to start the day on a high note. For brunch, I love serving it with a side of fresh berries – the tartness of raspberries or strawberries cuts through the richness beautifully. You can also add a dollop of whipped cream or a sprinkle of chopped nuts for a more elegant presentation. As a decadent dessert, it’s a showstopper. It pairs wonderfully with a glass of milk (classic!) or even a dessert wine for a more grown-up affair. For those extra special occasions, I sometimes add a drizzle of caramel sauce on top. And for cozy snacks, especially on a chilly evening, there’s nothing better than a slice of this pie with a warm mug of hot chocolate. My kids absolutely adore it this way! We also have a family tradition of making it for movie nights – it’s just the perfect comfort food. Honestly, any time you feel like something sweet and satisfying, this pie fits the bill perfectly. It’s the kind of dessert that brings smiles all around!
Top Tips for Perfecting Your No-Bake Peanut Butter Pie
Over the years, I’ve picked up a few tricks that really make this no-bake peanut butter pie shine. For the crust, make sure your graham cracker crumbs are fine. You can achieve this by pulsing them in a food processor or by placing them in a zip-top bag and crushing them with a rolling pin. Nobody wants big chunks of cracker in their crust! And be generous with the melted butter – you want the crumbs to be uniformly moistened, like damp sand. This ensures a crust that holds together beautifully and has a satisfying crispness. When it comes to mixing the filling, the key is truly softened cream cheese. If it’s too cold, you’ll end up with lumps, and nobody wants that! Let it sit on the counter for about an hour, or pop it in the microwave for 15-20 seconds if you’re in a rush. Also, using a good quality creamy peanut butter really makes a difference. I find that classic commercial brands like Jif or Skippy work best for consistency, but if you love natural peanut butter, just make sure it’s well-stirred, and you might need to add a touch more powdered sugar if it’s very runny. For the whipped cream, make sure your bowl and whisk are super clean and that the cream is ice cold. This helps it whip up to stiff peaks much faster and creates a lighter, airier filling. Don’t overmix it; stop as soon as you see those firm peaks forming. When it comes to ingredient swaps, if you don’t have graham crackers, digestive biscuits or even Oreos (minus the filling!) make a fantastic crust. For a touch of richness, you can add a tablespoon of cocoa powder to the crust mixture. If you want to reduce the sweetness slightly, you can add a little less powdered sugar to the filling, but be mindful that it does help with the texture as well. For a dairy-free version, you can use a dairy-free cream cheese alternative and a plant-based whipping cream. I’ve tested this with almond milk in the filling instead of some of the cream and it actually made it even creamier! When it comes to glaze variations, instead of chocolate, you could drizzle melted peanut butter (thinned with a tiny bit of oil), caramel sauce, or even a fruit coulis for a different flavor profile. Some people even like to top it with crushed peanuts or chopped peanut butter cups for extra texture and flavor. This pie is so forgiving; it’s all about making it your own!
Storing and Reheating Tips
One of the best things about this no-bake peanut butter pie is how well it stores. If you happen to have any leftovers (which is rare in my house!), you can easily keep it fresh. For room temperature storage, it’s generally best to keep it chilled, but if you absolutely must leave it out for a short period, cover it loosely with plastic wrap or a pie dome. However, due to the cream cheese and whipped cream, I wouldn’t recommend leaving it out for more than a couple of hours, especially in warmer weather. For refrigerator storage, this is where it truly shines. Cover the pie tightly with plastic wrap or transfer it to an airtight container. It will stay wonderfully fresh in the fridge for about 3-4 days. The textures might change slightly as it sits, becoming a bit firmer, but the flavor remains divine. If you’re making it for a party and need to prepare it ahead of time, this is your best bet! If you’re looking to keep it even longer, freezer instructions are your friend. You can freeze the entire pie (un-glazed, if you plan to glaze after thawing) or individual slices. Wrap it very tightly in a double layer of plastic wrap, followed by a layer of aluminum foil, or place slices in freezer-safe containers. It should keep well in the freezer for up to 1-2 months. When you’re ready to enjoy it, thaw it in the refrigerator overnight. If you froze it un-glazed, you can add your glaze or topping after it has thawed. For the glaze timing advice, it’s usually best to add the glaze just before serving if you’ve kept the pie refrigerated. If you plan to freeze it, it’s often better to freeze it without the glaze and add it once thawed, as the glaze can sometimes crack or change texture upon freezing and thawing. However, if you do freeze it with glaze, just be aware it might not look as pristine upon thawing, but it will still taste delicious!
Frequently Asked Questions
Final Thoughts
So there you have it – my absolute go-to recipe for a no-bake peanut butter pie! It’s honestly one of those recipes that I come back to again and again because it’s just so reliable and always delivers pure joy. The combination of the crisp, buttery crust and the unbelievably creamy, rich peanut butter filling is simply divine. It’s the perfect treat when you’re craving something decadent but don’t have the time or energy for a full baking marathon. Whether you’re serving it at a family gathering, a potluck, or just as a special treat for yourself, it’s guaranteed to be a hit. If you love this recipe, you might also enjoy my No-Bake Chocolate Silk Pie or my incredibly easy Key Lime Pie – they share that same simple-yet-spectacular vibe! I really hope you give this no-bake peanut butter pie a try. I can’t wait to hear how yours turns out and what creative toppings you come up with! Don’t forget to leave a comment below and let me know your thoughts, or share your own tips and variations. Happy pie-making!
No Bake Peanut Butter Pie
Ingredients
Main Ingredients
- 5 oz 1/3 less fat cream cheese (softened)
- 0.33 cup powdered sugar
- 0.33 cup Better n Peanut Butter
- 2.5 cups light whipped topping
- 1 pre-made reduced-fat graham cracker pie crust
- 2 tablespoons Hershey's chocolate syrup for drizzling
Instructions
Preparation Steps
- Beat cream cheese and confectioners' sugar together in a medium bowl.
- Mix in Better 'n Peanut Butter and beat until smooth. Fold in whipped topping.
- Spoon into graham cracker pie shell; cover, and refrigerate until firm, at least 2-3 hours.
- Drizzle with chocolate syrup before serving.