Oh, how I adore these Lemon Cheesecake Bars. They’re that perfect little ray of sunshine on a plate, aren’t they? I remember the first time I made them, it was a sweltering summer afternoon, and the thought of turning on the oven for a whole cake just felt like too much. But I was craving something bright and tangy, something to cut through the heat. So, I rummaged through my pantry and came up with these. Little did I know, I was about to create a recipe that would become a staple in my kitchen, a go-to for potlucks, bake sales, and just those random Tuesday evenings when you need a little pick-me-up. Honestly, they’re so good, they make me forget about my usual obsession with rich chocolate desserts for a good while. They’re like a bright, happy hug in bar form, and trust me, they disappear faster than you can say “more, please!”
What are lemon cheesecake bars?
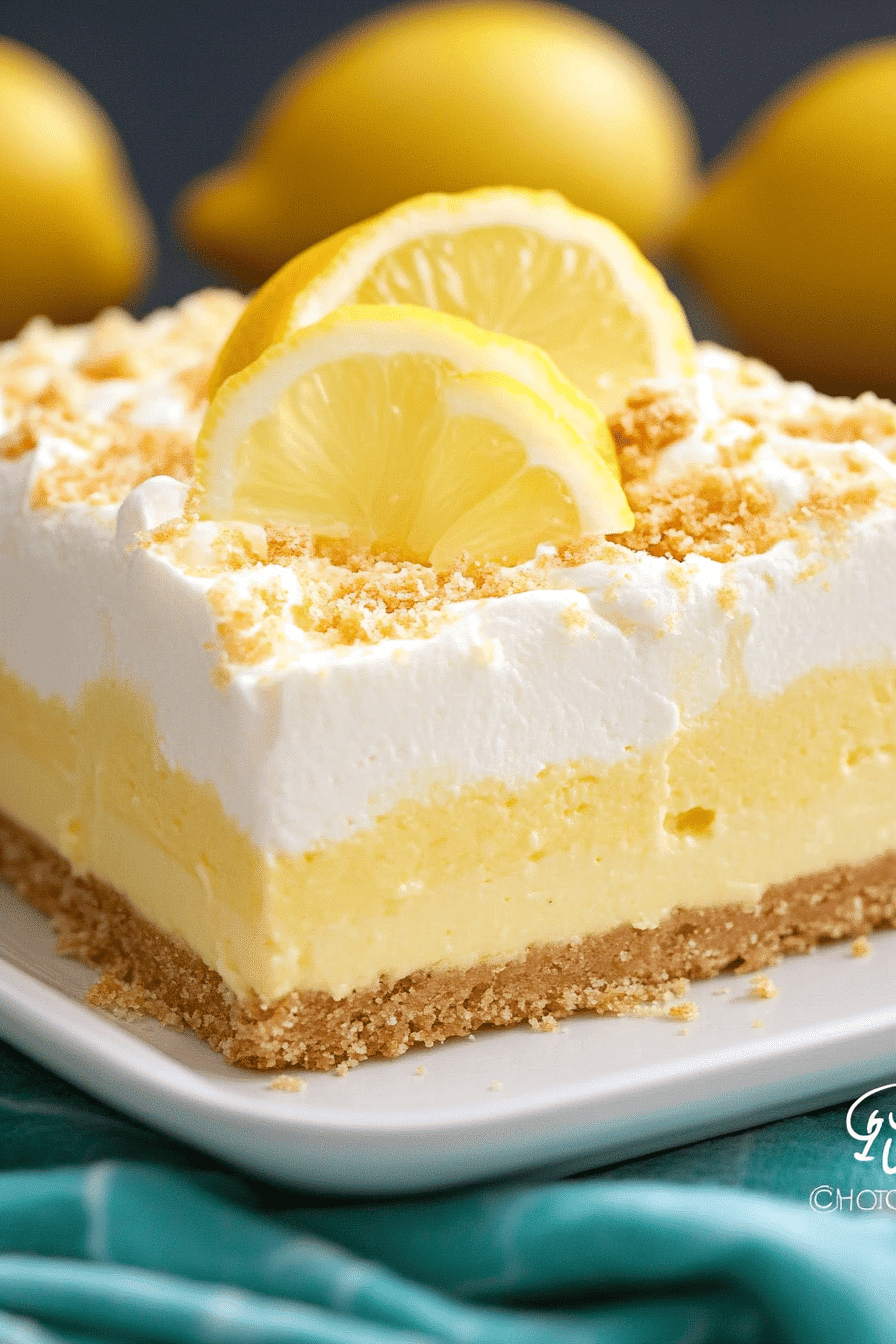
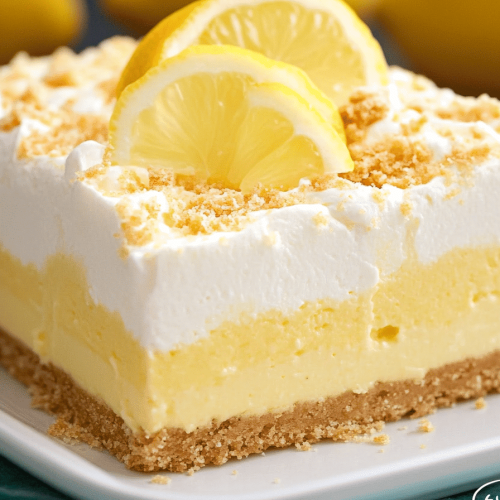
So, what exactly are these magical lemon cheesecake Bars? Think of them as the darlings of the dessert world – a perfect marriage between a classic cheesecake and a wonderfully simple cookie bar. We start with a buttery, crumbly shortbread-like base, something sturdy enough to hold everything together but still delightfully tender. On top of that, we spread a lusciously creamy, tangy lemon filling that just sings with that vibrant citrus flavor. It’s not overly sweet, which is what I love most, allowing the lemon to really shine through. It’s essentially a no-fuss cheesecake experience, all conveniently sliced into easy-to-handle bars. No springform pans, no water baths, just pure, unadulterated lemon-cheesecake goodness that you can grab and enjoy without a fork (though a fork is always welcome!).
Why you’
There are so many reasons why I keep coming back to this recipe, and I just know you’ll fall in love with it too. First off, the flavor is just out of this world. That bright, zesty lemon cutting through the creamy sweetness of the cheesecake filling is pure bliss. It’s refreshing, it’s sophisticated, and it’s incredibly addictive. And let’s talk about simplicity, because who doesn’t love an easy win in the kitchen? These bars are surprisingly straightforward to make. You don’t need any fancy techniques or a degree in pastry. The ingredients are common pantry staples, which is a lifesaver when you get a sudden craving. I also find them to be really budget-friendly, especially compared to buying a whole cheesecake. Plus, their versatility is fantastic! They’re perfect for a quick breakfast treat, a delightful addition to any brunch spread, a crowd-pleasing dessert, or just a comforting snack. What I love most about this recipe is that it always delivers. I’ve made it countless times, and it never fails to impress, whether I’m serving it to my harshest critics (my kids!) or bringing it to a gathering. It’s that reliable, delicious friend in the dessert world.
How do I make lemon cheesecake bars?
Quick Overview
Making these Lemon cheesecake bars is a breeze! You’ll start by creating a simple buttery crust, pressing it into your baking pan, and giving it a quick pre-bake. While that’s happening, you’ll whip up the smooth, tangy lemon cheesecake filling. Once the crust is ready, you pour the filling over, bake until it’s just set, and then let it cool completely before adding a simple glaze. It’s truly that easy, and the minimal effort is rewarded with maximum deliciousness.
Ingredients
For the Crust:
What is all-purpose flour? 2 cups.
1/2 cup granulated sugar
1/4 teaspoon salt
1 cup (2 sticks) unsalted butter, very cold and cut into cubes
For the Filling:
3 (8-ounce) packages Cream Cheese, softened to room temperature
1 cup granulated sugar
2 large eggs, at room temperature
1/4 cup fresh lemon juice (from about 1-2 large lemons)
1 tablespoon finely grated lemon zest (from about 1-2 large lemons)
1 teaspoon vanilla extract
For the Glaze:
1 cup powdered sugar, sifted
2-3 tablespoons fresh lemon juice
Optional: a little extra lemon zest for garnish
Step-by-Step Instructions
Step 1: Preheat & Prep Pan
First things first, preheat your oven to 350°F (175°C). Grab an 8×8 or 9×9 inch baking pan. I like to line mine with parchment paper, leaving a little overhang on the sides. This makes lifting the bars out so much easier later on. Just grease the pan lightly, lay the parchment in, and then grease the parchment too. That way, nothing sticks!
Step 2: Mix Dry Ingredients
In a medium bowl, whisk together the flour, 1/2 cup granulated sugar, and salt. Make sure they’re well combined. This ensures everything is evenly distributed, which is key for a consistent crust.
Step 3: Mix Wet Ingredients
Add the cold, cubed butter to the dry ingredients. Now, this is where it gets fun! You can use a pastry blender, your fingertips, or even a food processor. I personally love using my fingertips because I can feel when it’s just right. You want to cut the butter into the flour mixture until it resembles coarse crumbs, with some pea-sized pieces of butter still visible. Don’t overwork it; those little butter pockets are what make the crust tender and flaky.
Step 4: Combine
Pour the crumbly mixture into your prepared baking pan. Press it down firmly and evenly across the bottom. You can use the bottom of a measuring cup or your hands. Make sure to get it packed down well, especially the corners, so it doesn’t crumble apart later. Pop this into the preheated oven and bake for 15-20 minutes, or until the edges are lightly golden brown. While the crust is baking, let’s get started on the filling!
Step 5: Prepare Filling
In a large bowl, beat the softened cream cheese with the 1 cup of granulated sugar until it’s completely smooth and creamy. This is really important – no lumps allowed! Make sure your cream cheese is truly at room temperature; it makes all the difference for a silky smooth filling. Then, beat in the eggs, one at a time, just until each is incorporated. Don’t overmix at this stage; we don’t want to incorporate too much air. Stir in the fresh lemon juice, lemon zest, and vanilla extract. The mixture should be smooth and beautifully fragrant. I always give it a good scrape down the sides and bottom of the bowl to ensure everything is mixed in.
Step 6: Layer & Swirl
Once the crust has had its little pre-bake and is lightly golden, carefully remove it from the oven. Pour the creamy lemon filling evenly over the hot crust. Smooth the top with a spatula. Now, here’s where you can get a little fancy if you want, but it’s optional! You can gently swirl some extra lemon curd into the top for a more intense lemon flavor and a pretty marbled effect, or just leave it smooth. If you do swirl, use a knife or skewer to make gentle patterns. Be careful not to over-swirl, or the colors will blend too much.
Step 7: Bake
Return the pan to the oven and bake for another 25-35 minutes. You’ll know it’s done when the edges are set, but the center still has a slight jiggle when you gently shake the pan. It will continue to set as it cools. I usually check it around the 25-minute mark, just to be safe. Overbaking can lead to cracks, which we want to avoid!
Step 8: Cool & Glaze
This is probably the hardest part: waiting! Once the bars are baked, remove them from the oven and let them cool completely on a wire rack. This can take a couple of hours. Once they’re at room temperature, cover the pan loosely with plastic wrap and refrigerate for at least 2-3 hours, or preferably overnight. Chilling is crucial for them to firm up properly. For the glaze, whisk together the sifted powdered sugar with 2 tablespoons of lemon juice. Add more lemon juice, a teaspoon at a time, until you reach your desired drizzling consistency. It should be thick enough to coat but still pourable. Drizzle this over the chilled cheesecake bars. If you like, sprinkle a little extra lemon zest on top for decoration.
Step 9: Slice & Serve
Once the glaze has set, use the parchment paper overhangs to lift the entire block of cheesecake bars out of the pan. Place it on a cutting board. For the cleanest slices, use a large, sharp knife that you’ve run under hot water and then dried. Wipe the knife clean between each cut. Slice into squares or bars, and voila! Your beautiful, zesty Lemon Cheesecake Bars are ready to be enjoyed.
What to Serve It With
These Lemon Cheesecake Bars are so versatile, they fit into almost any meal or occasion! For a delightful Breakfast treat, I love pairing them with a strong cup of coffee. The brightness of the lemon cuts through the richness of the coffee beautifully. They’re also wonderful with a side of fresh berries, like raspberries or blueberries, for a little extra pop of color and flavor. If you’re hosting a Brunch, these are a must-have. They add an elegant touch to any spread without demanding too much attention. Serve them alongside other brunch favorites like mini quiches, fruit salads, or even some fluffy pancakes. For an after-dinner delight, they make a fantastic Dessert. I often serve them with a dollop of whipped cream or a small scoop of vanilla bean ice cream. A few fresh mint leaves also make for a pretty garnish. And for those moments when you just need a little something sweet, they’re perfect for Cozy Snacks. Grab a bar and a glass of iced tea or lemonade for a refreshing afternoon pick-me-up. My family loves them as an after-school snack; they’re much healthier than a lot of packaged treats and disappear in minutes!
Top Tips for Perfecting Your Lemon Cheesecake Bars
Over the years, I’ve learned a few tricks that make these Lemon Cheesecake Bars even better. For the crust, always make sure your butter is super cold. This creates steam pockets as it bakes, leading to a more tender and crumbly texture. If you’re like me and love a really firm crust, don’t be afraid to press it down quite firmly into the pan. When it comes to the cream cheese filling, room temperature is your best friend. I can’t stress this enough! Cold cream cheese will lead to a lumpy filling, and no one wants that. I’ve also found that using a combination of lemon juice and zest really amplifies the lemon flavor, giving you that authentic zing. Don’t be tempted to skip the zest! For the baking process, keep an eye on your oven. Ovens can vary, and you want to avoid overbaking, which can lead to a dry, cracked cheesecake. That slight jiggle in the center is your cue that it’s ready to set up as it cools. And for the ultimate silky texture, chilling is non-negotiable. I know it’s hard to wait, but it’s absolutely crucial for the bars to firm up properly. If you’re in a rush, at least 2 hours in the fridge is a minimum, but overnight is truly ideal. For the glaze, I always start with less lemon juice than I think I’ll need and add it gradually. It’s much easier to thin out a glaze than to thicken it! If you accidentally make it too thin, just whisk in a bit more sifted powdered sugar. If you’re looking for a flavor twist, I’ve successfully swapped out some of the lemon juice for lime or even a bit of orange juice for a different citrusy profile.
Storing and Reheating Tips
Keeping these Lemon Cheesecake Bars fresh and delicious is pretty straightforward. For short-term storage, you can leave them at Room Temperature for up to 2 days, as long as your house isn’t too warm. Just make sure to cover them loosely with plastic wrap or an overturned bowl to keep them from drying out. They’ll maintain their best texture this way. If you’re planning to keep them for longer, Refrigerator Storage is your best bet. Store them in an airtight container for up to 5 days. The chill helps them stay firm and prevents the cream cheese from going off. I usually stack them with parchment paper in between layers if I’m storing them in a single container. For longer preservation, these bars freeze wonderfully! Wrap them tightly in plastic wrap, then in aluminum foil, and place them in a freezer-safe bag or container. They’ll keep well in the Freezer Instructions for up to 2 months. To thaw, simply transfer them from the freezer to the refrigerator overnight. The glaze can sometimes get a little sticky when frozen and thawed, so I often prefer to add the glaze after thawing them, especially if they’ve been frozen for a while. For the glaze, I always add it once the bars are completely chilled and firm, usually right before serving or just after they come out of the fridge.
Frequently Asked Questions
Final Thoughts
I really hope you give these Lemon Cheesecake Bars a try. They’re more than just a recipe to me; they’re a little piece of sunshine that I love sharing. They strike that perfect balance of creamy, tangy, and sweet, all wrapped up in a delightful crumbly crust. Whether you’re looking for an easy dessert to impress, a special treat for yourself, or just a way to brighten up your day, these bars are an absolute winner. They’re proof that you don’t need complicated steps to achieve something truly spectacular in the kitchen. If you enjoyed these, you might also love my No-Bake Raspberry Lemon Bars or my classic Homemade Lemon Tart for more citrusy delights! I can’t wait to hear how yours turn out and what you think of them. Please leave a comment below and let me know if you tried them, or if you have any fun variations to share. Happy baking!
Lemon Cheesecake Bars
Ingredients
Crust
- 1.5 cups graham cracker crumbs
- 6 tablespoons butter, melted
- 2 tablespoons granulated sugar
Filling
- 24 ounces cream cheese, softened
- 1 cup granulated sugar
- 2 large eggs
- 0.5 cup sour cream
- 2 tablespoons fresh lemon juice
- 1 teaspoon lemon zest
Instructions
Preparation Steps
- Preheat oven to 350°F (175°C). Line an 8x8 inch baking pan with parchment paper, leaving an overhang on the sides.
- In a medium bowl, combine graham cracker crumbs, melted butter, and 2 tablespoons of sugar. Press evenly into the bottom of the prepared baking pan.
- Bake the crust for 8-10 minutes. Remove from oven and let cool slightly.
- In a large bowl, beat the cream cheese and 1 cup of sugar until smooth.
- Beat in the eggs one at a time, then stir in the sour cream, lemon juice, and lemon zest until well combined.
- Pour the filling over the prepared crust.
- Bake for 25-30 minutes, or until the center is almost set but still slightly jiggly. Do not overbake.
- Let the bars cool completely in the pan on a wire rack, then refrigerate for at least 2 hours before cutting into bars.