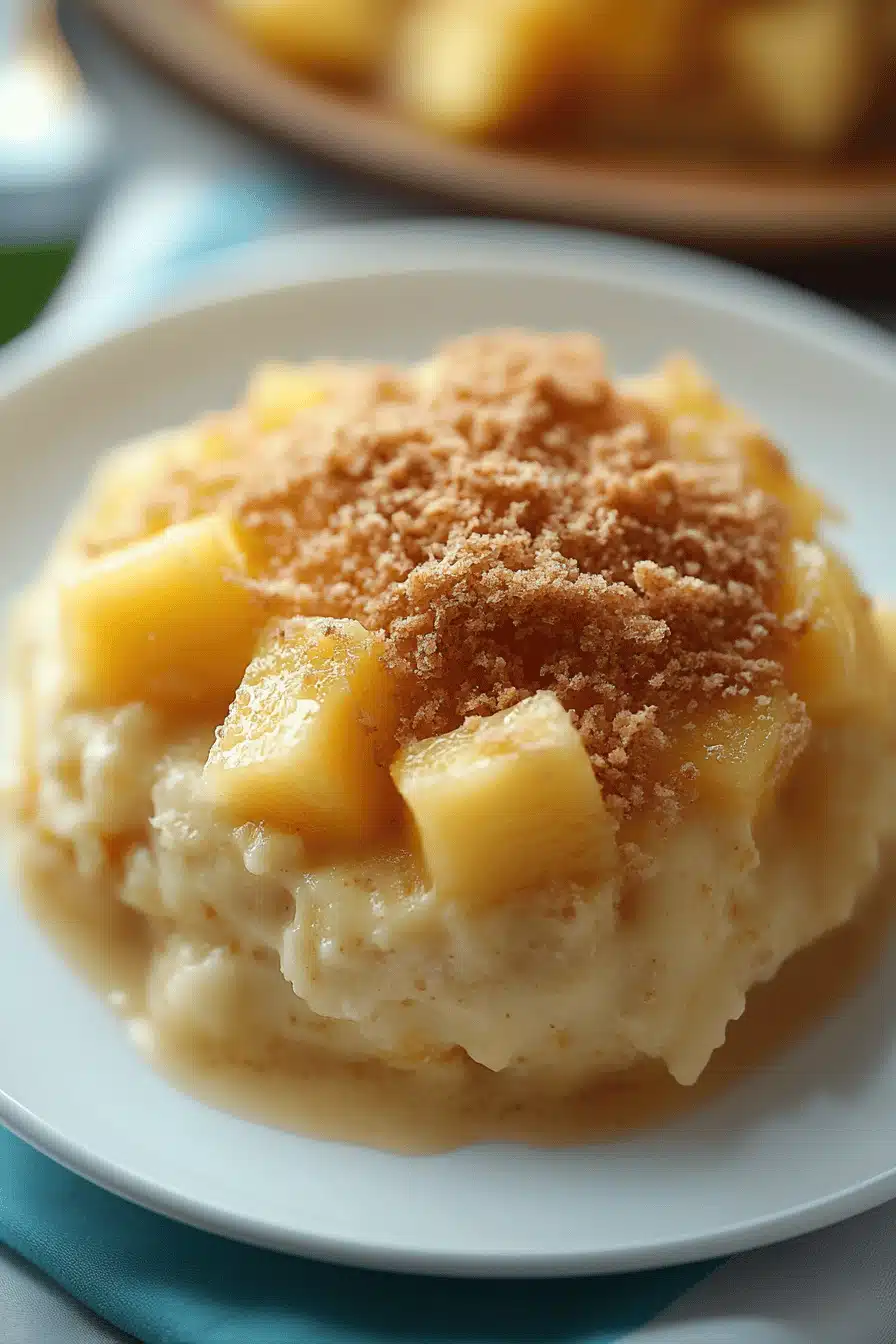
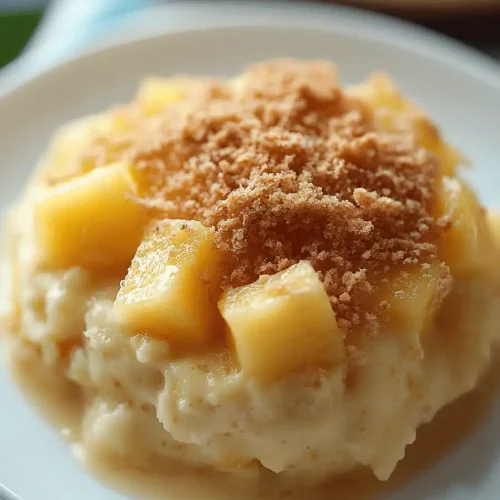
Every summer, I think about the first time I tasted a slice of Jims Pineapple Cheese Pie at Aunt Mara’s kitchen window, with the sun slanting across the table and the garden sprinklers singing outside. The pineapple aroma cut through the heat like a sweet breeze, and the creamy filling made me pause mid-plate to think, “I could eat this every day.” This pie is that sunshine in a crust—bright, creamy, and somehow easy enough to throw together on a weeknight, yet impressive enough to serve to company. I’ve made it countless times, and it still disappears in minutes at my house. It’s a favorite for family dinners, potlucks, and those evenings when you crave something comforting but not overly heavy. Jims Pineapple Cheese Pie is a little retro treasure that somehow fits perfectly into today’s cozy cooking world.

What is Jim’s Pineapple Cheese Pie?
Think of Jims Pineapple Cheese Pie as a gentle mashup between a cheesecake and a fruity custard pie, with a sturdy graham crust that remembers its bakery days but stays make-ahead friendly. It’s essentially a two-part love letter: a velvety cream-cheese base folded with pineapple for brightness, and a pineapple swirl tucked into the center so you get bright pockets of sweetness in every bite. The name itself carries a memory—a nod to a kind neighbor named Jim who swapped recipes with us one summer, and whose pineapple-cheese signature became our family’s go-to dessert. This pie isn’t fussy; it’s approachable enough for a weeknight dessert, yet special enough to serve when guests pop by. The balance of tangy Cream Cheese, tropical pineapple, and a lightly sweet glaze is what keeps me coming back year after year. Jims Pineapple Cheese Pie tastes like a hug in a slice.
Why you’ll love this recipe?
What I love most about Jims Pineapple Cheese Pie is how the flavors wake up your senses without weighing you down. It’s creamy and tangy in harmony, with a bright pineapple note that keeps things lively. What’s more, the process is forgiving and friendly, so you don’t need to be a pastry pro to get great results. This pie is a crowd-pleaser that you can pull together in under an hour of hands-on time, plus chilling. It’s also economical—the ingredients are pantry-friendly and you can scale up or down depending on the party. And there are so many little opportunities to personalize it: you can boost the pineapple with a quick compote, add a splash of coconut, or switch up the glaze for a citrusy zing. What I love most about this recipe is that it feels special without demanding every last minute of your evening. Jims Pineapple Cheese Pie is a warm, inviting slice of nostalgia with a modern ease that fits busy lives.
- Flavor: The tang of cream cheese meets sunny pineapple, with a hint of vanilla and a kiss of glaze that pulls everything together. It’s not overly sweet, which makes room for a bright finish that lingers in your memory long after the last bite.
- Simplicity: You’ll find the steps straightforward, and the crust comes together quickly. I’ve found that keeping the cream cheese at room temperature and draining the pineapple well are the tiny tricks that save you from a lumpy filling or soggy crust.
- Cost-efficiency: What is the best way to measure cost-efficiency?What makes this pie so good?
- Versatility: Adjust the glaze, swap in coconut or pineapple chunks, or add a citrus zest for a different vibe. It’s a forgiving recipe that invites your personality to shine.
How to Make Jims Pineapple Cheese Pie
Quick Overview
We start with a sturdy graham-cracker crust, pressed into a pie pan and baked just enough to set the base. While the crust cools, you whip a luscious cream-cheese batter, then fold in drained crushed pineapple for that tropical brightness. A separate pineapple filling—made with fresh pineapple, a touch of sugar, lemon juice, and a quick cornstarch slurry—gets swirled into the batter before the whole thing heads to the oven. After baking until just set, the pie cools completely and is finished with a glossy pineapple glaze. The result is a light, creamy slice with charming pineapple pockets and a glossy finish that looks as good as it tastes. Trust me, this is a pie you’ll want to make again and again—especially when you’re short on time but crave something extraordinary.
Ingredients
For the Crust:
- 2 cups graham cracker crumbs
- 1/4 cup granulated sugar
- 6 tablespoons unsalted butter, melted
For the Main Batter:
- 8 oz cream cheese, softened to room temperature
- 1/2 cup granulated sugar
- 1/4 cup sour cream (or Greek yogurt for extra tang)
- 2 large eggs
- 1 teaspoon vanilla extract
- 1/2 cup crushed pineapple, well drained
For the Filling:
- 1 cup crushed pineapple with juice
- 2 tablespoons granulated sugar
- 1 teaspoon lemon juice
- 1 tablespoon cornstarch dissolved in 1 tablespoon water
For the Glaze:
- 1/2 cup pineapple juice
- 1 cup powdered sugar, sifted
- Optional: 1/2 teaspoon lemon zest or a splash of vanilla
Notes from the kitchen: I always drain the pineapple really well and pat it dry with a clean towel. That step keeps the crust from getting soggy, which is essential for a pie that looks as good as it tastes. If you’re short on time, you can use crushed pineapple packed in juice and skip the extra lemon juice in the filling—the tang will come primarily from the cream cheese and glaze, which keeps things bright enough.
Step-by-Step Instructions
Step 1: Preheat & Prep Pan
Preheat your oven to 350°F (175°C). Lightly grease a 9-inch pie pan or line it with parchment if you like a cleaner crust edge. This is the moment when your kitchen starts smelling like home, and I always think of how Jim’s kitchen smelled the first time I watched him swirl a spoon through the batter. The crust gets its own little workout here, so give it a quick, even press into the pan and set it aside while you mix the filling.
Step 2: Mix Dry Ingredients
In a small bowl, combine the graham cracker crumbs and sugar. The texture should resemble wet sand—tiny clumps that hold together when you press them. I’ve learned that to get the perfect crust, you want an even distribution of crumbs and a uniform coat of butter. If your crumbs are coarse, run them through the processor again for a moment so there are no big pockets. This step matters because a consistent crust gives you that satisfying snap when you cut into the pie later.
Step 3: Mix Wet Ingredients
Beat the cream cheese with the sugar until it’s smooth and creamy, about 2–3 minutes. Add the sour cream, then the eggs one at a time, mixing just until incorporated. You don’t want to overmix here or you’ll incorporate too much air, which can lead to cracks or a weepy finish. Stir in the vanilla and the drained crushed pineapple, letting its aroma wake up the bowl. This is where Jims Pineapple Cheese Pie starts becoming something you can’t wait to taste.
Step 4: Combine
Pour the warm crust into the pan and press to set. If you’ve got a shallow crust, you might want to bake it for 6–8 minutes first, just to set the butter and help it hold its shape. Now, whisk the main batter in a separate bowl until smooth, then fold in an extra handful of crushed pineapple for bursts of sweetness. The batter should be glossy and velvety; think a satin sheen rather than a dull finish. The flavors come together here, and I always smile when I see the pale swirl starting to form.
Step 5: Prepare Filling
In a small saucepan, combine the crushed pineapple with the sugar and lemon juice. Bring to a simmer, then add the cornstarch slurry and cook for 1–2 minutes until it thickens into a glossy, jammy ribbon. Cool completely before using. You want the filling to hold its shape without being gloopy, and cooling it ensures the swirl stays pretty once baked. I love the way the pineapple fills the kitchen with its tropical perfume as it thickens.
Step 6: Layer & Swirl
Spread a thin layer of the cream-cheese batter into the cooled crust. Drop spoonfuls of the pineapple filling over the batter and swirl with a knife or skewer to create ribbons and pockets of pineapple that peek through the surface. Then pour the remaining batter over the top and gently swirl again to create a marbled look. The visual payoff is as pleasing as the flavor—little sunbursts of pineapple in every slice.
Step 7: Bake
Bake at 350°F (175°C) for about 35–40 minutes, or until the center is set with a slight jiggle. The edges should be pale and the center just shy of firm. If the top starts to brown too quickly, cover loosely with foil for the last 5–10 minutes to prevent scorching. My trick is to give the pan a gentle tilt mid-bake to ensure even heating and prevent hot spots from creating cracks in the surface. When you pull it out, the house will smell like sunshine and vanilla—you’ll want to slice a tiny wedge for “quality control,” of course.
Step 8: Cool & Glaze
Let the pie cool completely at room temperature, then refrigerate for at least 2 hours so the slices hold their shape. For the glaze, whisk pineapple juice into the sifted powdered sugar until you reach a pourable consistency. If you’re in a hurry, a thicker glaze cakey enough to set quickly is perfectly fine; if you want a glassier finish, add a touch more juice. Drizzle over the top in slow, even strokes to create a glossy, sunlit finish. The glaze is the finishing kiss on Jims Pineapple Cheese Pie—shiny, fruity, and just a touch tart to balance the sweetness.
Step 9: Slice & Serve
When it’s time to serve, chill the pie for another 30 minutes so it’s easy to portion. Use a sharp knife that’s warmed under hot water and wiped clean between slices for clean cuts. I love serving this with a dollop of lightly whipped cream and a few sparks of lemon zest. The layers and swirls really reveal themselves when you cut into it, and the first bite feels like a summer afternoon—bright, creamy, and a little nostalgic. This is the kind of dessert that invites stories—like the time my cousin mistook the glaze for frosting and licked the plate clean—so I always keep a spare slice ready for laughter and seconds.
What to Serve It With
This pie shines as a dessert, but it’s also a fantastic finish to a brunch or a lighter lunch. Here are my favorite pairings and presentation ideas, organized by occasion:
For Breakfast: A fresh cup of coffee or a plate of yogurt and granola alongside a chilled slice makes for a bright, satisfying start. If you’ve got a moment, top a slice with a spoonful of coconut yogurt and a few pineapple-tiney shavings for extra tropical sunshine.
For Brunch: Present slices on a simple white plate with a mint leaf and a light dusting of lemon zest. Serve with sparkling water or a peachy iced tea. The cool creaminess of the pie balances well with a lightly citrusy beverage, and you’ll see guests returning to the dessert table simply to repeat the first bite.
As Dessert: This is where Jims Pineapple Cheese Pie truly shines. A scoop of vanilla Ice Cream or a dollop of whipped cream on top elevates the creaminess, while a few pineapple chunks on the side echo the filling. A light lemon glaze drizzle helps cut through the richness and keeps the finish bright.
For Cozy Snacks: Warm a slice briefly in the microwave and finish with a tiny splash of salted caramel sauce for a salt-sweet contrast. It sounds odd, but trust me—this is a winner when you’re curling up with a blanket and a good movie.
Family traditions play huge here, and I’ve watched my kids chase the last sliver with a grin that says, “Please, can we have more?” The way the pie holds its shape after chilling never fails to impress, and the glaze gives it that glossy, professorial finish that makes everyone ask for seconds—even the guests who swear they don’t like pineapple pie. Jims Pineapple Cheese Pie is a celebration in a slice, and it tastes like the simplest happiness you can capture in a dessert.
Top Tips for Perfecting Your Jims Pineapple Cheese Pie
Here are practical tips I’ve learned after making this pie hundreds of times. They’ll keep you from overthinking and help you nail the texture and flavor every single time.
Crust Prep: Make sure the butter is evenly distributed through the crumbs and press it firmly into the pan. A crust that’s too loose will crumble, which is charming in a rustic pie but not practical here. If your crust looks dry, a touch more melted butter will bring it together without making it greasy. I like to bake the crust just until the edges start to turn golden, then cool completely before adding the filling. That extra minute makes a big difference in keeping the crust crisp.
Mixing Technique: Don’t overbeat the cream cheese once the eggs go in. Overmixing adds air, which can cause cracking or a gappy center. Mix until just combined, then fold in the pineapple gently. If you’re using Greek yogurt for tang, fold it in last so it doesn’t thin the batter too much. When in doubt, test a small dollop of the batter on the counter—the texture should hold its shape, not be runny.
Swirl Customization: The swirl is all about visual appeal and pockets of pineapple. Use a toothpick or knife to create a marbling pattern that resembles sunlit waves. If you love crisper edges, reserve a tiny bit of batter to paint a clean border around the crust before you swirl the filling in. This guarantees a neat, attractive finish without fighting gravity during baking.
Ingredient Swaps: If you want a lighter version, swap in low-fat cream cheese and a touch less sugar, but don’t eliminate the pineapple entirely—its brightness is the entire point. You can also use crushed pineapple packed in juice (not syrup) for a more balanced sweetness. For a coconut twist, add toasted coconut flakes to the filling or sprinkle them on top after glazing. The key is to avoid overloading the filling with extras that could weigh it down.
Baking Tips: Oven temperatures vary, so start checking around the 32-minute mark. If you see the edges browning too quickly, tent the pie with foil and continue. Center jiggle is your friend—if it wiggles just the right amount, you’re done. A slight center wobble means it will set further as it cools. If you’re using a dark pan, reduce the temperature by 25°F because those pans absorb heat more efficiently.
Glaze Variations: The glaze is optional, but I love it for the gloss and the extra pineapple kick. If you want a brighter finish, add a teaspoon of lemon zest to the glaze. For a deeper pineapple flavor, swap a portion of the pineapple juice for pineapple rum or coconut water. You’ll still get that glossy finish, with a little extra aroma to entice guests before they even bite.
Over the years I’ve learned that the best versions of Jims Pineapple Cheese Pie balance sweetness with tang. Too much sugar dulls the pineapple and masks the cream-cheese tang; too little and the glaze can feel sharp. My advice: taste as you go, and trust your palate. This is a recipe that rewards intuition and a little patience, and after a few trials you’ll be gliding through steps on autopilot, humming your favorite tune, and smiling at how a simple pineapple swirl can taste like sunshine.
Storing and Reheating Tips
Storing Jims Pineapple Cheese Pie is simple, and reheating can sometimes make the leftovers even better. Here’s how I handle it to keep the texture just right.
Room Temperature: If you plan to eat within a day, you can keep the pie covered on the counter for up to 2 hours, then refrigerate. The cream cheese filling can soften a bit at room temperature, which some people prefer, but I find the chill helps the flavors stay cohesive and the slices slice nicely.
Refrigerator Storage: Store slices in an airtight container or wrap in plastic wrap to prevent the glaze from absorbing odors. It will stay fresh for 3–4 days with minimal loss in texture. If you’re packing leftovers for a lunch, give the slice a quick chill beforehand so it travels nicely and doesn’t melt in transit too quickly.
Freezer Instructions: You can freeze baked slices for up to 2 months. Wrap each slice tightly in plastic wrap and place in a freezer bag. Thaw overnight in the fridge and re-glaze if desired for a fresh finish. Freezing can soften the glaze a bit, but the filling remains creamy and bright when thawed properly.
Glaze Timing Advice: If you’re freezing, skip the glaze and add it after thawing. If you glaze before freezing, the glaze can crack slightly or separate. I’ve learned to glaze after refrigerating or reheating the slice so the shine remains intact and the texture stays smooth and glossy.
Personally, I find that Jims Pineapple Cheese Pie still tastes wonderful on day two, especially after it has chilled overnight and the flavors have fully married. The pineapple brightness deepens with time, and the cream cheese keeps its velvet bite. It’s a pie you can batch-make and enjoy over a few days, which is perfect for a busy family that loves dessert but hates the last-minute rush to bake something special.
Frequently Asked Questions
Final Thoughts
Jims Pineapple Cheese Pie is a recipe I keep reaching for because it feels like a small act of love you serve with a smile. It’s a pie that begs to be shared—a slice makes a conversation start, a bowl of ice cream becomes a duet, and a simple glaze suddenly feels like a celebration. The best part is that it respects your time while delivering the warmth of a family gathering. It’s a recipe I’ve cooked through seasons, adapted for different quirks, and handed down as a memory you can taste. If you’re craving something sweet, sunny, and soul-satisfying, this is a perfect place to start. I’d love to hear how your Jims Pineapple Cheese Pie turns out—tell me about any tweaks you tried or a little memory you baked into the crust. Happy baking!
Jims Pineapple Cheese Pie
Ingredients
Crust
- 1.5 cups graham cracker crumbs
- 2 tablespoons granulated sugar
- 5 tablespoons unsalted butter, melted
Filling
- 16 ounces cream cheese, softened
- 0.75 cup granulated sugar
- 0.5 cup pineapple juice
- 2 teaspoons vanilla extract
- 2 large eggs
- 1 cups pineapple chunks, drained
Instructions
Preparation Steps
- Preheat oven to 325 degrees Fahrenheit. Mix graham cracker crumbs, sugar, and melted butter until evenly moistened; press into a 9-inch pie pan and bake for 8 minutes. Let crust cool.
- Beat cream cheese and sugar until smooth. Add pineapple juice, vanilla, and eggs; blend until creamy. Stir in pineapple chunks.
- Pour filling into crust and bake 35-40 minutes until set with a slight jiggle. Cool completely, then refrigerate for at least 4 hours before serving.