There’s a recipe I reach for when the clock’s ticking and the house smells like a cozy Sunday kitchen—the moment when I realize dinner doesn’t have to be a drama to pull off. Cheesy Ranch Chicken is the kind of dish that fills the house with warmth and makes everyone pause to plate seconds. It’s not fancy in a fuss-with-ingredients way; it’s honest, hearty, and incredibly forgiving. Picture tender chicken rolled around a creamy ranch-cheese filling, then kissed with a golden, tangy crust that sighs with every bite. It’s almost like comfort on a plate, and yet it’s simple enough to make on a Monday. I always say this is a lifesaver on busy nights, the kind of dish you can prep ahead, bake, and still have a moment to pour a glass of wine before the kids finish their homework.
What is Cheesy Ranch Chicken?
Cheesy Ranch Chicken is essentially a chicken breast that’s been tucked with a creamy, cheesy filling and finished with a ranchy, crunchy coating. Think of it as a hybrid between a classic stuffed chicken and your favorite ranch-seasoned casserole, but in compact, handheld portions. The name comes from the star players—ranch seasoning and gooey cheese—that make the filling pop with flavor, while the outer crust stays tender and lightly crisp. It’s a friendly, approachable dish: think roll-ups or roulades rather than a fussy roulade, and you’ll see how easy it is to pull off. The concept is simple: flatten the chicken, spread a luscious filling, roll it tight, coat it, bake until bubbling and bronzed, then finish with a drizzle or glaze that lifts the ranch flavor to a new level. The result is something the family will crave again and again, without spending hours standing over the stove.
Why you’ll love this recipe?
What I love most about Cheesy Ranch chicken is how it feels fancy without being fussy. It’s the kind of dish that gives you a little show-stopping moment—golden edges, steam rising, a ring of melted cheese around each bite—without any drama in the kitchen.
- Flavor: The combination of creamy cheese, tangy ranch, and a lightly seasoned crust is addictive. It’s got that comforting, familiar ranch kick with a punch of cheesiness that keeps you coming back for more.
- SimplicityWhat is a good dish to make for a weekend dinner?
- Cost-efficiency: What is the best way to measure cost-efficiency?: Your ingredients come together with budget-friendly dairy and pantry staples. You can stretch a few chicken breasts into generous portions with the filling, and you’ll still be under a friendly budget.
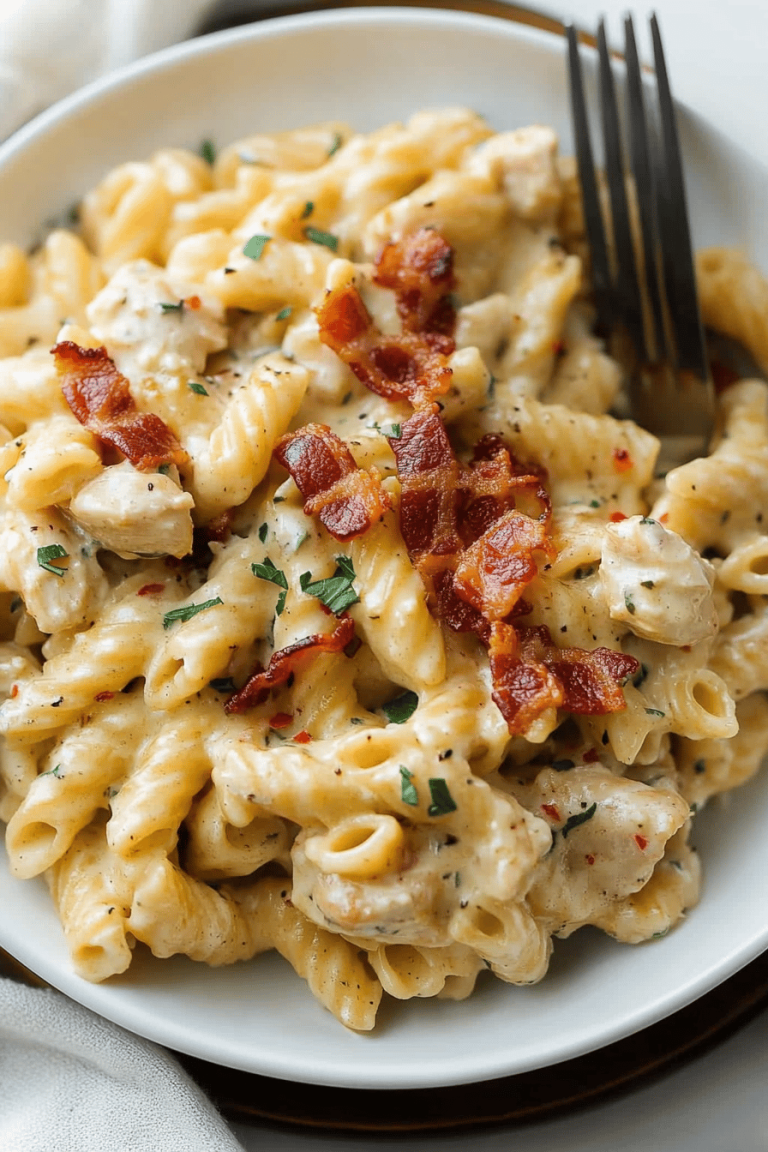
- Versatility: Leftovers are fantastic in wraps, salads, or just reheated with a side of veggies. You can customize the filling with spinach, sun-dried tomatoes, or crumbled bacon for variety.
- Make-ahead magic: The filling can be prepared ahead, and the roll-ups can sit chilling in the fridge until you’re ready to bake. This is my trick when I know a busy evening is coming.
This dish pairs beautifully with bright greens, roasted vegetables, or a simple pilaf, and the ranch-peppered crust makes it a crowd-pleaser whether you’re feeding kids who love cheese or adults who crave a little nostalgia. If you’ve ever enjoyed a slice of stuffed chicken cutlet from a fancy restaurant, you’ll feel right at home with Cheesy ranch chicken in your own kitchen.
Quick Overview
In a nutshell, you’ll flatten the chicken, spread a creamy cheese-ranch filling across the center, roll it up tightly, dip the rolls in a simple batter, and bake them until the coating is crisp and the cheese inside is molten. A final glaze or drizzle of ranch ties everything together, keeping the center tender and the outer layer beautifully golden. The beauty is in the balance: a little tang from the ranch, a lot of comfort from the cheese, and just enough bite from the crust to keep things exciting.
Ingredients
For the Main Batter:
- 1 cup buttermilk (or whole milk) for dipping and tenderness
- 1 cup all-purpose flour
- 1/2 cup breadcrumbs (panko for extra crunch, optional)
- 1 teaspoon garlic powder
- 1 teaspoon onion powder
- 1/2 teaspoon paprika
- Salt and pepper to taste
- 2 tablespoons olive oil or melted butter (for richness in the coating)
For the Filling:
- 8 ounces cream cheese, softened
- 1 cup shredded cheddar cheese
- 1/2 cup shredded mozzarella (optional for extra stretch)
- 2–3 tablespoons ranch dressing or ranch seasoning (adjust to taste)
- 2 tablespoons finely chopped chives or green onions (optional)
- Salt and pepper to taste
For the Glaze:
- 1/2 cup ranch dressing
- 1 tablespoon honey or maple syrup (for a hint of sweetness)
- A pinch of lemon juice to brighten
Step-by-Step Instructions
Step 1: Preheat & Prep Pan
Heat your oven to 400°F (200°C). Lightly grease a baking dish with oil or butter so the rolls don’t stick. If you like a little extra caramelization, line the bottom with parchment and grease that parchment—yes, it helps a lot with clean-up and browning.
Step 2: Pound & Flatten the Chicken
Place the chicken breasts between two sheets of plastic wrap and gently pound them to an even thickness, about 1/4 inch. This is where the magic begins: even thickness means everything cooks evenly and the filling stays centered. I always tell myself to go easy—you don’t want to tear the meat, just even it out.
Step 3: Mix Dry Ingredients
In a shallow dish, whisk together the flour, breadcrumbs (if using), garlic powder, onion powder, paprika, and a generous pinch of salt and pepper. This will be your outer crust, so seasoning here matters just as much as inside.
Step 4: Mix Wet Ingredients
In another bowl, whisk the buttermilk with a splash of ranch dressing. This is your binding, the tangy partner to the dry mix. If you’re using just milk, a quick splash of lemon juice can help mimic the tang of buttermilk.
Step 5: Prepare Filling
In a bowl, beat the cream cheese until it’s smooth, then fold in the cheddar, mozzarella, ranch dressing, chives, and a pinch of salt and pepper. The filling should be thick and creamy—almost like a cheese mousse. Taste it; if you want it punchier, whisk in a bit more ranch seasoning.
Step 6: Layer & Roll
Spread a generous line of filling down the center of each flattened chicken breast. Fold in the sides and roll tightly from one end to the other, securing with a couple of toothpicks if needed. You want a neat, compact log so the filling doesn’t ooze out during baking.
Step 7: Coat & Bake
Dip each chicken roll in the wet mixture, then roll in the dry mixture until well coated. Place seam-side down in your prepared dish. If you like a lighter crust, brush with a little more olive oil instead of coating once more in the dry mix. Bake for 25–30 minutes, until the chicken reaches 165°F (74°C) and the coating is golden and crisp.
Step 8: Cool & Glaze
Let the rolls rest for 5 minutes after removing from the oven. Stir together the glaze ingredients until smooth. Drizzle a little over the top or serve on the side for dipping. A quick brush of the glaze right after they come out helps the crust stay glossy and adds a subtle sweetness that plays beautifully with the ranch tang.
Step 9: Slice & Serve
Slice each roll into thick medallions to reveal the molten cheese and creamy center. Plate with a bright herb salad or lightly roasted vegetables. The steam will carry that irresistible aroma—cheese, ranch, and just a hint of roasted garlic from the crust.
What to Serve It With
This dish shines with a few bright, well-chosen sides. I love balancing the richness with something crisp and fresh, and I always keep a little color on the plate to keep things exciting.
For Breakfast: Reimagine leftovers as morning bites. Dice the chicken into small cubes, toss with soft scrambled eggs, and a pinch more ranch for a savory breakfast hash. Serve with warm toast and a quick avocado slice on the side for a breakfast that somehow tastes indulgent without feeling heavy.
For Brunch: Slice the roulades and arrange them on a platter with cherry tomatoes, cucumber ribbons, and a lemony herb salad. Pair with sparkling water or a light white wine if you’re entertaining, and add a side of diced fruit to keep it light and refreshing.
As Dessert: This is a playful nod, not a literal dessert pairing. If you’re feeding a crowd that loves sweet-salty contrasts, set out a tiny tasting board with a dab of honey-roasted nuts and a small bowl of vanilla yogurt or a light fruit compote. The contrast is surprising and delightful, but Cheesy Ranch Chicken remains a savory main—the pastry-like glaze can be swapped for a sweeter drizzle if you’re feeling whimsical.
For Cozy Snacks: Leftover medallions make incredible snack bites. Re-warm gently in a skillet with a splash of water to create steam, then crisp the edges in a hot pan for a quick, satisfying midnight bite. A quick dollop of sour cream mixed with a little chive makes a comforting dip.
Top Tips for Perfecting Your Cheesy Ranch Chicken
These aren’t huge changes, but they make a noticeable difference when you’re cooking for the first time or trying to get that exact balance you crave.
Chicken Prep: Pound to an even thickness so the center cooks through without overcooking the edges. If you’re new to rolling, use plastic wrap to keep the chicken steady as you roll. It’s a little technique that saves you from tearing the meat.
Mixing Advice: When you mix the filling, don’t overbeat the cream cheese; you want it silky, not whipped. If your filling looks a touch too thick, a teaspoon of milk or ranch dressing can loosen it enough to spread easily without making it runny.
Swirl Customization: To create a prettier, more marbled look, reserve a small portion of the filling and drizzle a thin line down the center before rolling. A light swirl of extra cheddar on top just before baking also adds a color contrast that’s irresistible in photos and on the plate.
Ingredient Swaps: Swap mozzarella for pepper jack for a little extra heat, or swap the cream cheese for ricotta if you want a lighter center. If you don’t have ranch seasoning, you can blend 1 teaspoon each dried dill, garlic powder, onion powder, and a pinch of cayenne with the other spices. It’ll taste like your favorite ranch dip—but inside a chicken roll.
Baking Tips: If your oven runs hot, check the rolls at 22 minutes. You want a golden crust but not a dry center. If you’re baking side-by-side with other dishes, you can tent with foil for the last 5–7 minutes to avoid over-browning while the inside finishes cooking.
Glaze Variations: For a stronger glaze, whisk together ranch dressing with a little Dijon or hot sauce to bring some kick. A maple-balsamic glaze instead of honey can give a sweet-sour finish that’s surprisingly complementary with the ranch.
Lessons Learned: I once forgot to secure the rolls with toothpicks and watched the filling start to escape mid-bake. It still tasted great, but the presentation suffered. Don’t skip that part if you’re new to roulades. And always rest the meat a few minutes before slicing—the juices settle and the cheese re-stabilizes, making each slice perfect.
Storing and Reheating Tips
What I love about Cheesy Ranch Chicken is how forgiving it is for next-day meals. You won’t lose flavor; you just gain convenience.
Room Temperature: If you’re serving it fresh, it’s best enjoyed within two hours of coming out of the oven. After that, it’s still tasty, but the texture changes a bit as the cheese tightens and the crust softens.
Refrigerator Storage: Store leftovers in an airtight container for up to 3 days. Reheat gently in a 350°F (175°C) oven for 12–15 minutes, or in the microwave in short bursts to avoid drying out the centers.
Freezer Instructions: You can freeze uncooked rolls? Not ideal because the cheese filling can separate. If you’re freezing after baking, wrap tightly and freeze for up to 2 months. Thaw in the fridge overnight and reheat in a low-temperature oven until warmed through.
Glaze Timing Advice: Freeze with glaze on? Not ideal—the glaze can crystallize. It’s best to glaze after reheating or reheat and add glaze just before serving for that fresh, glossy look.
[Include tested methods and quality indicators. 200-250 words.]
Frequently Asked Questions
Final Thoughts
There’s something so satisfying about Cheesy Ranch Chicken—the way the cheese oozes when you slice, the ranch’s bright tang against the melt-in-your-mouth center, and that crust that crackles just enough to remind you you’re eating something special. It’s become a kitchen staple in our home, a recipe I reach for when friends pop by with little notice or when I’m feeding a full house on a busy weeknight. If you’ve got kids who love cheese and grown-ups who love a little nostalgia, this is the dish that checks all the boxes. It’s forgiving, adaptable, and, most importantly, it tastes like a hug in the middle of a hectic day. I’ve tested it with almond milk in the glaze because I was curious—surprisingly, it made the glaze creamier and a touch sweeter without losing the ranchy bite. Trust me on this one: start with the base recipe, and you’ll discover a dozen delicious tweaks you’ll actually want to try. Happy baking, friends—and can’t wait to hear how yours turns out!
If you enjoyed this Cheesy Ranch Chicken, leave a comment with your favorite filling tweak or glaze variation. I love seeing how you make it your own, and I’m always curious about the small changes that become your new family tradition. If you snap a photo, share it—I’ll be cheering you on from my kitchen counter. And if you’ve got a friend who loves comfort food that’s a little lifted by personality and a lot of cheese, send them this post. May your oven be warm, your kitchen smell amazing, and your dinner plates full of happy leftovers. Happy baking!
Cheesy Ranch Chicken
Ingredients
Main Ingredients
- 1.5 pounds boneless skinless chicken breasts
- 1 packet ranch seasoning mix
- 0.25 cup milk
- 0.25 cup sour cream
- 0.25 cup cream cheese, softened
- 0.5 cup shredded cheddar cheese
- 1 tablespoon olive oil
- 0.5 teaspoon garlic powder
- 0.25 teaspoon salt
- 0.25 teaspoon black pepper
Instructions
Preparation Steps
- Preheat oven to 375 degrees Fahrenheit and grease a baking dish.
- In a bowl, whisk together ranch seasoning, milk, sour cream, and cream cheese until smooth.
- Coat the chicken with the creamy mixture and arrange in the prepared dish.
- Sprinkle shredded cheddar on top and bake for 25 minutes, then broil for 1 to 2 minutes to melt and lightly brown the cheese.