You know those desserts that just make you *feel* something? The ones that whisper of happy memories and cozy evenings? This banana pudding cheesecake is one of those for me. It’s like a warm hug on a plate. Growing up, banana pudding was always the star of our Sunday dinners. My grandma made it with those Nilla wafers that got just the right amount of soft, and the custard was so smooth you could practically drink it. Now, imagine taking that nostalgic flavor and marrying it with the decadent richness of a classic cheesecake. Yep, that’s exactly what this banana pudding cheesecake is! It’s not quite a pie, not quite a cake, but a glorious hybrid that totally steals the show. I’ve made a TON of cheesecakes in my day, and while I love a good New York style, this one has a special place in my heart. It’s surprisingly simple to whip up, and the flavor combination? Absolutely divine.
What is banana pudding cheesecake?
So, what exactly is this magical creation? Think of it as the best of both worlds. We’re taking the creamy, tangy foundation of a classic cheesecake – that luscious, smooth texture that just melts in your mouth – and infusing it with all the comforting flavors of banana pudding. That means ripe bananas, a hint of vanilla, and often a subtle nod to those iconic vanilla wafer cookies, either in the crust or swirled throughout. It’s not a baked custard pie, nor is it a layered dessert in a trifle dish. Instead, it’s a rich, dense, and utterly satisfying cheesecake that tastes unmistakably like your favorite banana pudding, but with that satisfying cheesecake density. It’s the kind of dessert that makes people close their eyes in pure bliss after the first bite.
Why you’ll love this recipe?
I have a banana pudding cheesecake recipe and I have to say that I love it. I’m not kidding. I’m obsessed. Iflavor is just out of this world. You get that sweet, ripe banana goodness perfectly balanced with the slight tang of Cream Cheese. It’s not overly sweet, which I really appreciate, making it perfect for any time of day. And then there’s the simplicity. I know cheesecake can sound intimidating, but this recipe is designed to be approachable. You don’t need a water bath or any fancy techniques. It’s pretty foolproof, which is a huge win in my book, especially on busy weeknights when I still want to make something special. Plus, it’s quite cost-efficient. The ingredients are all pretty standard pantry staples or easily found at any grocery store. You don’t need expensive exotic fruits or rare spices.versatility! While it’s fantastic as is, I’ve had fun playing with it. Sometimes I add a swirl of caramel, or top it with toasted pecans. It’s wonderful served cold, but I also love it slightly warmed for an extra gooey treat. Compared to a traditional banana cream pie or a layered banana pudding, this cheesecake offers a richer, more substantial dessert experience, while still keeping those comforting, familiar flavors. What I love most about this is that it feels incredibly indulgent without requiring a ton of effort. It’s my go-to for potlucks, holidays, or just when I need a serious dessert fix.
How to Make Banana Pudding Cheesecake
Quick Overview
The magic of this banana pudding cheesecake lies in its straightforward approach. We start with a simple, buttery crust, then whip up a luscious, banana-infused cheesecake batter. The key is to layer in some banana slices and maybe a touch of pudding mix or cooked pudding for that authentic banana pudding flavor and texture. It bakes up to a beautifully creamy consistency, and then it’s just a matter of chilling it to perfection. What makes this method special is how it captures those beloved banana pudding notes in a format that’s both impressive and surprisingly easy to achieve. No fuss, just pure deliciousness!
Ingredients
For the Main Batter:
You’ll need about 2 1/2 cups of crushed vanilla wafer cookies for the crust – don’t skimp on quality here, they make a big difference! I usually buy a box or two and crush them in a food processor until they’re fine crumbs. For binding, you’ll want 1/2 cup (1 stick) of unsalted butter, melted. Make sure it’s good quality butter; it really enhances the flavor. For the cheesecake itself, you’ll need three 8-ounce packages of full-fat cream cheese, softened to room temperature. Seriously, don’t rush this step; lumpy cheesecake is a sad cheesecake! You’ll also need 1 1/4 cups of granulated sugar for sweetness, 3 large eggs, also at room temperature (this helps everything combine smoothly), and 1 teaspoon of pure vanilla extract. I always use pure vanilla extract; it has a depth of flavor that imitation just can’t match. And for that creamy texture, you’ll need 1/2 cup of sour cream, full-fat is best for richness.
For the Filling:
This is where we amp up the banana flavor! You’ll need about 2-3 ripe bananas, mashed. I like to use bananas that are quite spotty; they’re sweeter and have a more intense flavor. Make sure they’re mashed well, with just a few small lumps for texture if you like. About 1/4 cup of instant banana pudding mix also adds a wonderful flavor and helps with that classic pudding texture. If you can’t find banana flavored, you can use vanilla pudding mix and a little extra banana extract or even a touch of cinnamon. We’ll also need a small amount of all-purpose flour, about 2 tablespoons, to help thicken the filling slightly and prevent it from becoming too runny.
For the Glaze:
A simple glaze really elevates this dessert. You’ll need about 1 cup of powdered sugar, sifted to avoid lumps. For the liquid, I use 2-3 tablespoons of milk, but you can also use heavy cream for a richer glaze, or even a little bit of banana liqueur if you’re feeling fancy. A tiny splash of vanilla extract, about 1/4 teaspoon, complements the other flavors beautifully. Some people like to add a few drops of yellow food coloring to mimic the pudding color, but I usually skip it.
Step-by-Step Instructions
Step 1: Preheat & Prep Pan
First things first, get your oven preheated to 325°F (160°C). This is a crucial temperature for cheesecake; too hot and it’ll crack, too cool and it won’t set properly. Grab a 9-inch springform pan. I like to lightly grease the bottom and sides with butter or cooking spray. This helps ensure your beautiful cheesecake releases cleanly. Sometimes, I even line the bottom with parchment paper for extra insurance – it’s a little extra step but so worth it when it comes time to unmold.
Step 2: Mix Dry Ingredients
In a medium bowl, combine your crushed vanilla wafer crumbs and the granulated sugar for the crust. Give them a good stir to make sure the sugar is evenly distributed throughout the crumbs. This will help create a cohesive and flavorful crust.
Step 3: Mix Wet Ingredients
Pour the melted butter into the dry crumb mixture. Stir until all the crumbs are moistened and the mixture resembles wet sand. It should hold together when you squeeze it in your hand. If it seems a bit too dry, you can add another tablespoon or two of melted butter.
Step 4: Combine
Press the crumb mixture evenly into the bottom of your prepared springform pan. I like to use the bottom of a measuring cup or a flat-bottomed glass to get a nice, firm, even layer. Make sure to go up the sides just a little bit if you want a slight edge. Pop this crust into the freezer while you prepare the filling; this helps it firm up before baking.
Step 5: Prepare Filling
In a large bowl, beat the softened cream cheese with an electric mixer on medium speed until it’s completely smooth and creamy. Scrape down the sides of the bowl as needed. Gradually add the granulated sugar and continue beating until well combined and fluffy. Don’t overbeat here, just until smooth. Add the eggs, one at a time, beating on low speed just until each egg is incorporated. You really don’t want to whip too much air into the batter, as this can lead to cracks. Stir in the sour cream and vanilla extract until just combined. Finally, gently fold in the mashed bananas and the instant banana pudding mix. Be careful not to overmix at this stage; just gently fold until everything is incorporated.
Step 6: Layer & Swirl
Carefully spoon about half of the cheesecake batter over the chilled crust. Then, arrange a layer of thinly sliced ripe banana over the batter. Spoon the remaining cheesecake batter over the banana slices. If you like, you can add a few more banana slices on top and gently swirl them into the batter with a knife or skewer. Don’t over-swirl, you just want a nice marbled effect. This adds pockets of banana flavor throughout the cheesecake.
Step 7: Bake
Place the springform pan on a baking sheet (this catches any potential drips and makes it easier to handle). Bake for 55-65 minutes, or until the edges are set and the center is still slightly jiggly when you gently shake the pan. It should look set but not firm like a cake. My oven runs a little hot, so I always start checking around the 50-minute mark. If the top starts to brown too much, you can loosely tent it with foil.
Step 8: Cool & Glaze
Once baked, turn off the oven and leave the oven door slightly ajar (prop it open with a wooden spoon). Let the cheesecake cool in the oven for about an hour. This slow cooling process is key to preventing cracks. Then, remove it from the oven and let it cool completely on a wire rack. Once fully cooled, cover it loosely with plastic wrap and refrigerate for at least 6 hours, or preferably overnight. This allows the cheesecake to firm up and the flavors to meld beautifully. While it’s chilling, whisk together the powdered sugar, milk, and vanilla extract for the glaze until smooth. If it’s too thick, add a tiny bit more milk; if it’s too thin, add more powdered sugar. Once the cheesecake is chilled and firm, drizzle the glaze over the top. Let the glaze set slightly before slicing.
Step 9: Slice & Serve
To get clean slices, use a thin, sharp knife dipped in hot water and wiped dry between each cut. Serve chilled. The combination of the creamy cheesecake, sweet bananas, and the slight tang from the cream cheese is just heavenly. It looks beautiful with the swirls and the glaze, and the aroma is incredible!
What to Serve It With
This banana pudding cheesecake is pretty much a showstopper on its own, but if you’re looking to round out a meal or add some extra flair, I’ve got a few ideas. For breakfast, though it might sound decadent, a small sliver with a strong cup of coffee is surprisingly delightful. The sweetness is balanced by the coffee, and it just feels like a special morning treat. For a lovely brunch, I love to serve it alongside some fresh berries – raspberries and blueberries offer a nice tart contrast. A simple sprinkle of mint leaves can also add a touch of freshness and color. When serving it as a formal dessert, I sometimes accompany it with a dollop of freshly whipped cream or even a small scoop of vanilla bean Ice Cream. The cool creaminess of the ice cream against the rich cheesecake is divine. And for those cozy snack moments, just a plain slice is perfect. Maybe with a glass of milk or a warm mug of tea. My family loves it after dinner, especially during cooler months. My personal favorite? A warm slice with a drizzle of salted caramel sauce – the salty-sweet combination is pure magic.
Top Tips for Perfecting Your Banana Pudding Cheesecake
Over the years, I’ve learned a few tricks that make this banana pudding cheesecake turn out absolutely perfect every single time. First, about the banana prep: make sure your bananas are ripe, almost overripe, for the best flavor. Mashing them well is key for even distribution, but I sometimes leave a few small chunks for texture, which I personally love. For mixing advice, the cardinal rule of cheesecake is *do not overmix*. Especially once you add the eggs. Overmixing incorporates too much air, which can lead to cracks and a less dense, almost soufflé-like texture. Beat the cream cheese until smooth, then add sugar, then eggs one at a time on low speed, and finally fold in the other ingredients gently. For swirl customization, don’t go crazy with the swirling. A few gentle pulls with a knife or skewer will create beautiful marbling without muddying the colors. You want distinct ribbons of banana flavor, not a uniform greyish color. If you’re looking for ingredient swaps, you can absolutely use graham crackers or even Shortbread Cookies for the crust if vanilla wafers aren’t your favorite, just adjust the butter accordingly. For the filling, while instant pudding mix is easy, you could also make a quick homemade banana custard to fold in for an even richer flavor. When it comes to baking tips, the slow cooling in the oven is non-negotiable for me. It’s the best defense against cracks. Also, every oven is different, so learn your oven’s quirks. If it tends to brown too quickly, use that foil tent. For glaze variations, if you want a thinner glaze for a more delicate finish, just add more liquid. If you prefer a thicker, pipeable glaze, use less liquid or more powdered sugar. You could even stir in a little cream cheese to the powdered sugar and milk for a cream cheese glaze – talk about extra decadence!
Storing and Reheating Tips
Storing this amazing banana pudding cheesecake properly is key to enjoying it over a few days. If you happen to have any leftovers (which is rare in my house!), keep it covered tightly with plastic wrap or in an airtight container. At room temperature, I’d only leave it out for a couple of hours maximum, especially if your kitchen is warm, as the dairy in the cheesecake can spoil. For refrigerator storage, it will keep beautifully for about 4-5 days. Just make sure it’s well-covered to prevent it from absorbing other odors in the fridge. The texture actually improves as it chills, becoming even creamier and more set. If you want to make it even further in advance, you can freeze it. For freezer instructions, wrap the completely chilled cheesecake tightly in a layer of plastic wrap, then a layer of aluminum foil. It can stay frozen for up to 2-3 months. Thaw it slowly in the refrigerator overnight before serving. For the glaze timing advice, it’s always best to add the glaze right before you plan to serve it, especially if you’re refrigerating or freezing it, as the glaze can sometimes get a bit sticky or watery over time. If freezing, I usually add the glaze *after* thawing the cheesecake.
Frequently Asked Questions
Final Thoughts
Seriously, if you’re looking for a dessert that’s both comforting and a little bit special, you’ve got to give this banana pudding cheesecake a try. It’s the perfect blend of nostalgia and decadence, and it’s way easier than you might think. I’ve had friends tell me they’ve made it for parties and people go absolutely wild for it. It’s one of those recipes that just brings a smile to everyone’s face. If you love this one, you might also enjoy my classic creamy vanilla bean cheesecake or my no-bake banana cream pie for more banana-y goodness! I can’t wait to hear what you think. Please let me know in the comments below how yours turns out, and if you try any fun variations! Happy baking, everyone!
Banana Pudding Cheesecake
Ingredients
Crust
- 2.5 cups vanilla wafer crumbs
- 0.375 cup unsalted butter, melted
- 2 tablespoons granulated sugar
Cheesecake Filling
- 3 packages cream cheese, softened
- 1 cup powdered sugar
- 1 teaspoon vanilla extract
- 2 cups heavy whipping cream, cold
- 1 package instant banana pudding mix
- 2 cups milk
Topping
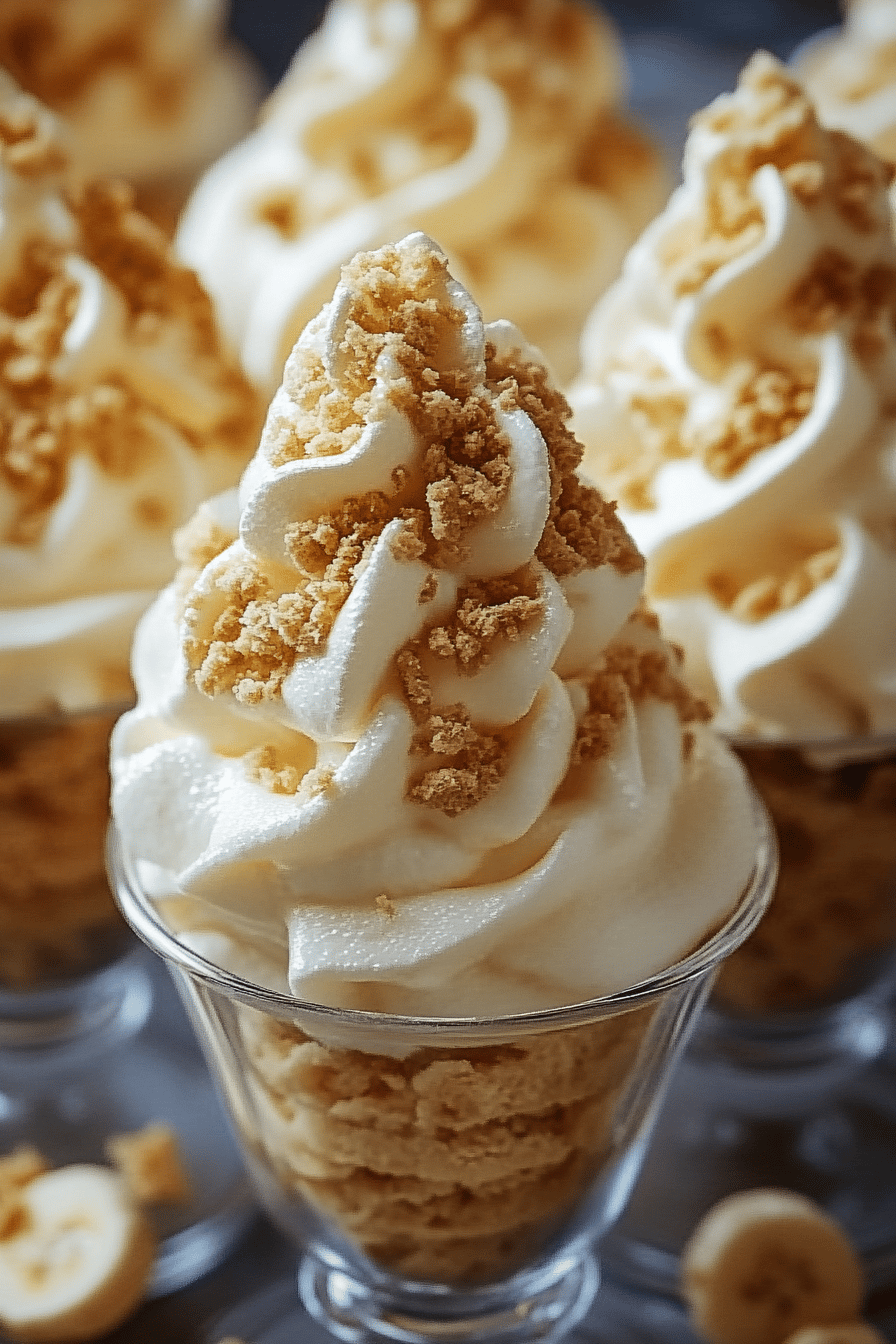
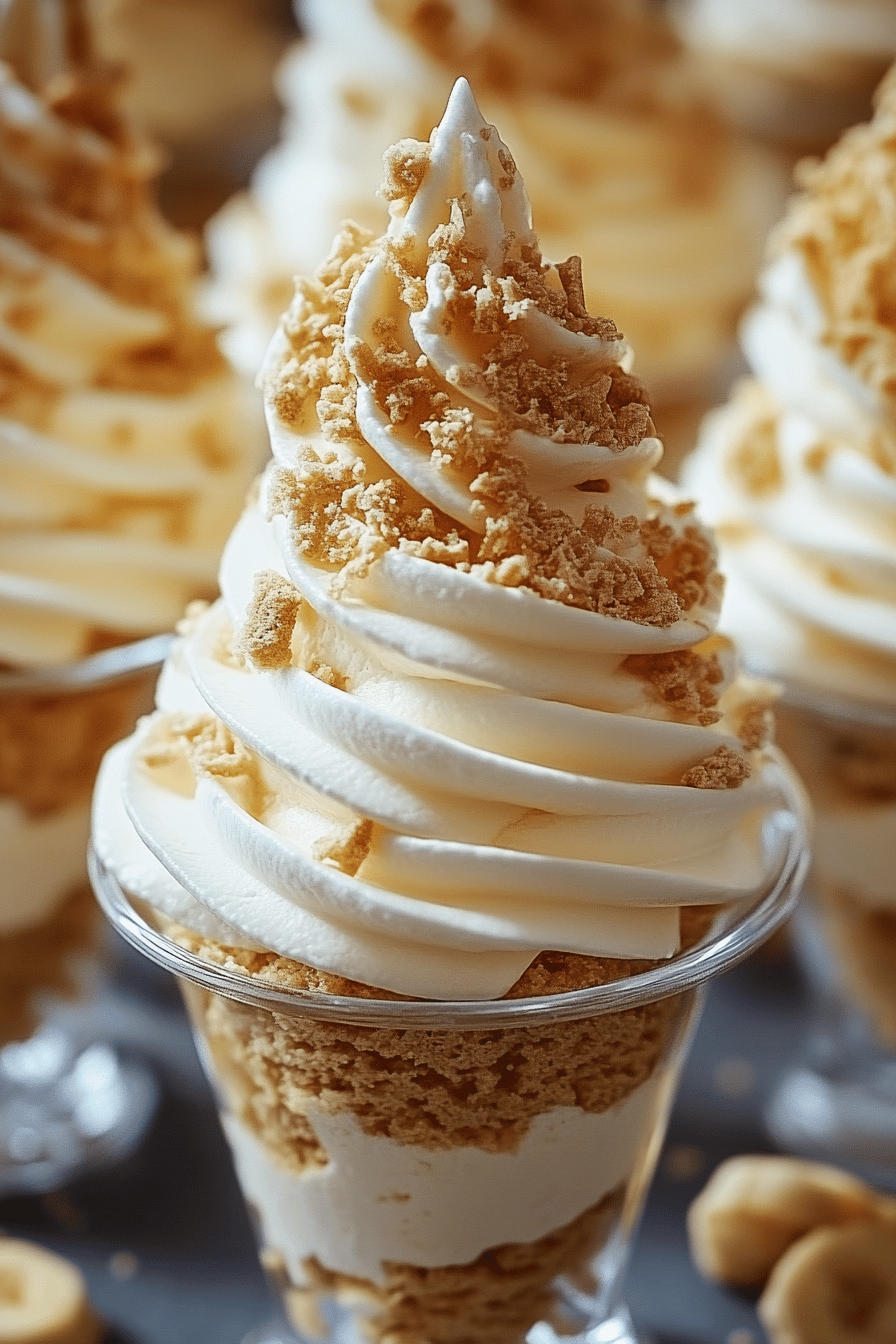
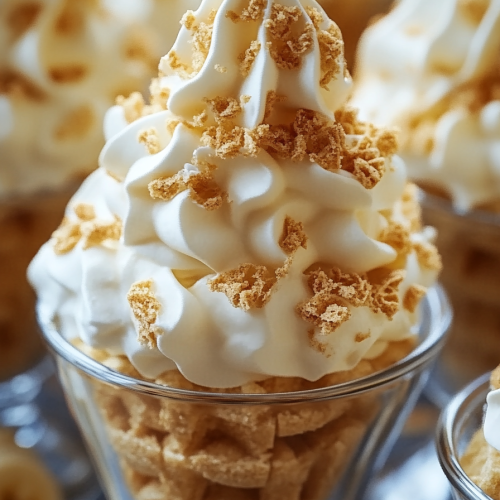
- 1 cup whipped cream, for topping
- 0.5 cup sliced bananas
- 0.25 cup crushed vanilla wafers
Instructions
Preparation Steps
- In a medium bowl, combine vanilla wafer crumbs, melted butter, and granulated sugar. Press firmly into the bottom of a 9-inch springform pan.
- In a large bowl, beat cream cheese until smooth. Gradually add powdered sugar and vanilla extract, mixing until well combined.
- In a separate bowl, whip heavy cream until stiff peaks form. Gently fold whipped cream into the cream cheese mixture.
- In another bowl, whisk together instant banana pudding mix and milk until smooth. Let it sit for a few minutes to thicken.
- Gently fold the thickened banana pudding into the cream cheese mixture.
- Pour the cheesecake filling over the prepared crust and spread evenly.
- Cover and refrigerate for at least 4 hours, or until firm.
- Before serving, top with whipped cream, sliced bananas, and crushed vanilla wafers.