Oh, you guys! If there’s one thing that instantly transports me back to cozy family gatherings and spontaneous get-togethers, it’s a perfectly made cheese ball. It’s not just a snack; it’s a hug in appetizer form. I remember my Grandma making these for every holiday, and the way it would disappear so fast was always a testament to how utterly delicious it was. This isn’t your average, run-of-the-mill cheese ball, though. This one has a little something extra, a secret I’ve tinkered with over the years to make it truly spectacular. It’s the kind of recipe that feels like a warm blanket on a chilly evening, and honestly, it’s my absolute lifesaver when I need a crowd-pleasing dish without a ton of fuss. Forget those complicated charcuterie boards; sometimes, all you need is a glorious, creamy cheese ball and some good crackers. Trust me, once you try this, it’ll become your go-to, too.

What is a cheese ball?
So, what exactly is this magical creation? At its heart, it’s a delightful blend of creamy, savory cheeses and a few secret ingredients that give it a flavor profile that’s just out of this world. Think of it as the ultimate dip, but in a beautiful, sculpted ball that’s way more fun to dig into. It’s essentially a party starter, a conversation piece, and, let’s be honest, a way to make everyone think you’re a culinary genius with minimal effort. The name “cheese ball” might sound simple, but the experience of eating it is anything but. It’s a textural delight, with a smooth, rich interior and a lovely coating that adds another layer of yum. It’s the kind of dish that doesn’t need fancy explanations; it just speaks for itself through its incredible taste and the sheer joy it brings to any table.
Why you’ll love this recipe?
Honestly, where do I even begin with why I adore this cheese ball recipe? First off, the flavor is absolutely divine. It hits all the right notes: creamy, tangy, a little bit sharp, and just perfectly seasoned. It’s not overly complicated, which is a huge plus in my book. I’ve tried so many recipes over the years, and some are just way too much work for the payoff. This one strikes the perfect balance. It’s surprisingly simple to whip up, even on a busy weeknight when you need something impressive in a hurry. Plus, it’s incredibly budget-friendly! The ingredients are staples you probably already have in your fridge or can grab without breaking the bank, which is always a win. What I love most is its versatility. You can serve it with literally anything – crackers, veggies, bread, you name it. It’s fantastic for game days, holiday parties, or just a cozy night in. I’ve even made mini versions for individual servings, and they were a huge hit! Unlike some other cheese dips that can be a bit one-dimensional, this cheese ball has a depth of flavor that keeps you coming back for more. It’s the perfect blend of comfort and elegance, making it a true star in my recipe repertoire.
How do I make cheese balls?
Quick Overview
This cheese ball is all about bringing together simple, wonderful ingredients to create something truly special. The process is straightforward: you’ll cream together your cheeses until they’re perfectly smooth, then mix in those flavor boosters. Shape it, coat it, and that’s pretty much it! It’s designed to be as easy as possible, so you can spend less time in the kitchen and more time enjoying your guests (or just enjoying it yourself!). The beauty of this method is how it ensures a creamy, delightful texture every single time. No complicated steps, just pure, unadulterated cheesy goodness.
Ingredients
For the Main Batter:
8 ounces Cream Cheese, softened (this is key for a super smooth texture!)
4 ounces sharp cheddar cheese, finely shredded (I love a good sharp cheddar for that kick)
4 ounces Gruyère cheese, finely shredded (Gruyère adds this incredible nutty depth)
1/4 cup finely chopped fresh chives (for that lovely hint of oniony freshness)
1 tablespoon Worcestershire sauce (don’t skip this, it’s a flavor powerhouse!)
1/2 teaspoon garlic powder (just a touch for warmth)
1/4 teaspoon smoked paprika (adds a subtle smokiness)
Pinch of cayenne pepper (optional, but I like the tiny bit of heat!)
For the Coating:
1/2 cup finely chopped toasted pecans or walnuts (toasting them makes all the difference!)
1/4 cup finely chopped crispy bacon bits (oh yes, bacon!)
2 tablespoons finely chopped fresh parsley (for color and freshness)
For Serving:
Assorted crackers, pretzels, baguette slices, or fresh vegetable sticks
Step-by-Step Instructions
Step 1: Prepare Your Cheeses
Make sure your cream cheese is truly softened. I usually leave it out on the counter for at least an hour before I start. If you’re in a rush, you can gently microwave it in 10-second bursts, but be careful not to melt it! Shred your cheddar and Gruyère cheeses finely; this helps them incorporate smoothly into the cream cheese, preventing any lumps. A food processor with a shredding attachment makes this super quick!
Step 2: Mix the Cheese Base
In a medium bowl, add the softened cream cheese. Using an electric mixer (a hand mixer or stand mixer works great), beat the cream cheese until it’s light and fluffy. This step is crucial for achieving that wonderful creamy texture. Don’t rush it!
Step 3: Incorporate the Flavor
Add the shredded cheddar and Gruyère cheeses to the cream cheese. Continue mixing until everything is well combined and you have a smooth, cohesive mixture. Now, stir in the finely chopped chives, Worcestershire sauce, garlic powder, smoked paprika, and cayenne pepper (if using). Mix until everything is just combined. Overmixing at this stage can make the cheese ball greasy, so be gentle.
Step 4: Shape the Ball
This is where it starts to look like a proper cheese ball! You can do this with your hands (lightly greased or covered with plastic wrap if you prefer) or with two spoons to form a rough ball shape. Make sure to pack it gently so it holds its shape but isn’t too dense. If the mixture is too soft to handle, pop it in the refrigerator for about 15-20 minutes to firm up a bit.
Step 5: Prepare the Coating
While your cheese ball is chilling (if needed), prepare your coating. In a shallow dish or on a plate, combine the finely chopped toasted pecans or walnuts, crispy bacon bits, and fresh parsley. Give it a good mix. Toasting the nuts beforehand really brings out their flavor and gives them a lovely crunch. You can toast them in a dry skillet over medium heat for a few minutes until fragrant, or in a 350°F (175°C) oven for about 5-7 minutes.
Step 6: Coat the Cheese Ball
Once your cheese ball is firm enough to handle, gently roll it in the coating mixture, pressing lightly so the nuts, bacon, and parsley adhere. Ensure it’s evenly coated all around. You can also use a spatula to carefully press the coating onto the ball if it seems to be falling off.
Step 7: Chill and Set
Wrap the cheese ball tightly in plastic wrap and refrigerate for at least 1 hour. This allows the flavors to meld together and the cheese ball to firm up nicely, making it easier to serve and ensuring it holds its shape. The longer it chills, the better it gets, honestly!
Step 8: Serve and Enjoy!
Unwrap your beautiful cheese ball, place it on a serving platter, and surround it with your favorite dippers. It’s ready to be devoured!
What to Serve It With
Oh, the possibilities are endless when it comes to what to pair with this amazing cheese ball! It’s so versatile, it truly fits into any occasion. For a relaxed breakfast or brunch, I love serving it with some toasted sourdough or a simple, crusty baguette. It’s a little unconventional for breakfast, I know, but the savory notes are just perfect with a cup of coffee. For a more formal brunch, I might present it with an assortment of delicate crackers and maybe some fresh fruit like grapes or apple slices. As a dessert, it’s surprisingly satisfying! After a hearty meal, a small portion with some fig jam and wafer cookies is absolutely divine. But my absolute favorite time to serve it is for cozy snacks. Think game nights, movie marathons, or just when you need a little pick-me-up. I always have a stash of sturdy crackers, some crunchy pretzels, and a colorful array of veggie sticks like carrots, celery, and bell peppers. My kids are obsessed with dipping their mini pretzel twists into it; they disappear in minutes! It’s that kind of comfort food that just makes everyone happy.
Top Tips for Perfecting Your Cheese Ball
I’ve made this cheese ball more times than I can count, and over the years, I’ve picked up a few little tricks that I think really elevate it. First, about the cheese: always use block cheese and shred it yourself. Pre-shredded cheese has anti-caking agents that can make your cheese ball a bit grainy. Taking that extra minute to shred it yourself makes a world of difference in smoothness. For the cream cheese, it absolutely MUST be softened to room temperature. If it’s cold, you’ll end up with lumps, and nobody wants a lumpy cheese ball! I’ve learned this the hard way, believe me. When you’re mixing everything, don’t overdo it, especially after adding the shredded cheeses. Just mix until combined. Overmixing can warm the cheeses too much and make the mixture greasy, which is not what we want at all. For the coating, toasting your nuts is non-negotiable for me. It brings out their flavor and adds a delightful crunch that contrasts perfectly with the creamy cheese. I usually toast them in a dry skillet over medium heat for a few minutes, stirring constantly, until they’re fragrant and lightly golden. Keep an eye on them, they can burn quickly! If you’re not a fan of nuts, you can try a coating of finely chopped fresh herbs, or even a mix of everything bagel seasoning. For a spicier kick, I sometimes add a little extra cayenne or a pinch of red pepper flakes to the cheese mixture itself. And if your cheese ball is too soft to shape, don’t panic! Just pop it in the fridge for 15-20 minutes. It’s a lifesaver. Finally, I always recommend chilling it for at least an hour before serving. This not only firms it up but also allows all those wonderful flavors to meld together beautifully. It’s worth the wait, I promise!
Storing and Reheating Tips
One of the best things about this cheese ball is how well it stores, making it perfect for making ahead of time. If you’ve got leftovers (which is rare in my house!), or if you’ve made it a day in advance, here’s how to keep it fresh. For serving the same day, once it’s coated and shaped, it can sit at room temperature for about 1-2 hours if it’s not too hot. Beyond that, or if you want to store it longer, it’s best to keep it in the refrigerator. Wrap it tightly in plastic wrap or place it in an airtight container. It will stay delicious in the fridge for about 3-4 days. The flavors actually get even better after a day! When you’re ready to serve it again, just take it out of the fridge about 20-30 minutes before you plan to dig in to let it soften slightly. I don’t typically reheat this cheese ball, as it’s meant to be served chilled or at room temperature. However, if you’re feeling adventurous and want to try warming it up slightly (perhaps for a fondue-like experience, though it won’t be exactly the same), you could gently warm it in a double boiler or microwave on low power in very short bursts, stirring frequently. But honestly, its creamy texture is at its best when it’s chilled. For storing, I usually avoid adding the coating until just before serving if I’m making it more than a few hours ahead, as the nuts can sometimes soften in the fridge. But if you do coat it, just make sure it’s well-wrapped.
Frequently Asked Questions
Final Thoughts
Seriously, if you’re looking for a guaranteed crowd-pleaser that’s also incredibly easy to make, this cheese ball is it. It’s the kind of recipe that brings people together, sparks conversation, and just makes any gathering feel a little more special. It’s got that perfect balance of creamy, savory goodness that is just irresistible. I truly believe that food is about connection and creating memories, and this cheese ball has been a part of so many happy moments in my family. I encourage you to give it a try; I have a feeling it’ll become a favorite in your kitchen too! If you loved this cheese ball, you might also enjoy my recipe for Creamy Spinach Artichoke Dip or my Homemade Everything Bagel Crackers, which would be perfect alongside it. Don’t forget to leave a comment below and let me know how yours turned out, or if you have any fun variations! I can’t wait to hear all about it. Happy snacking!
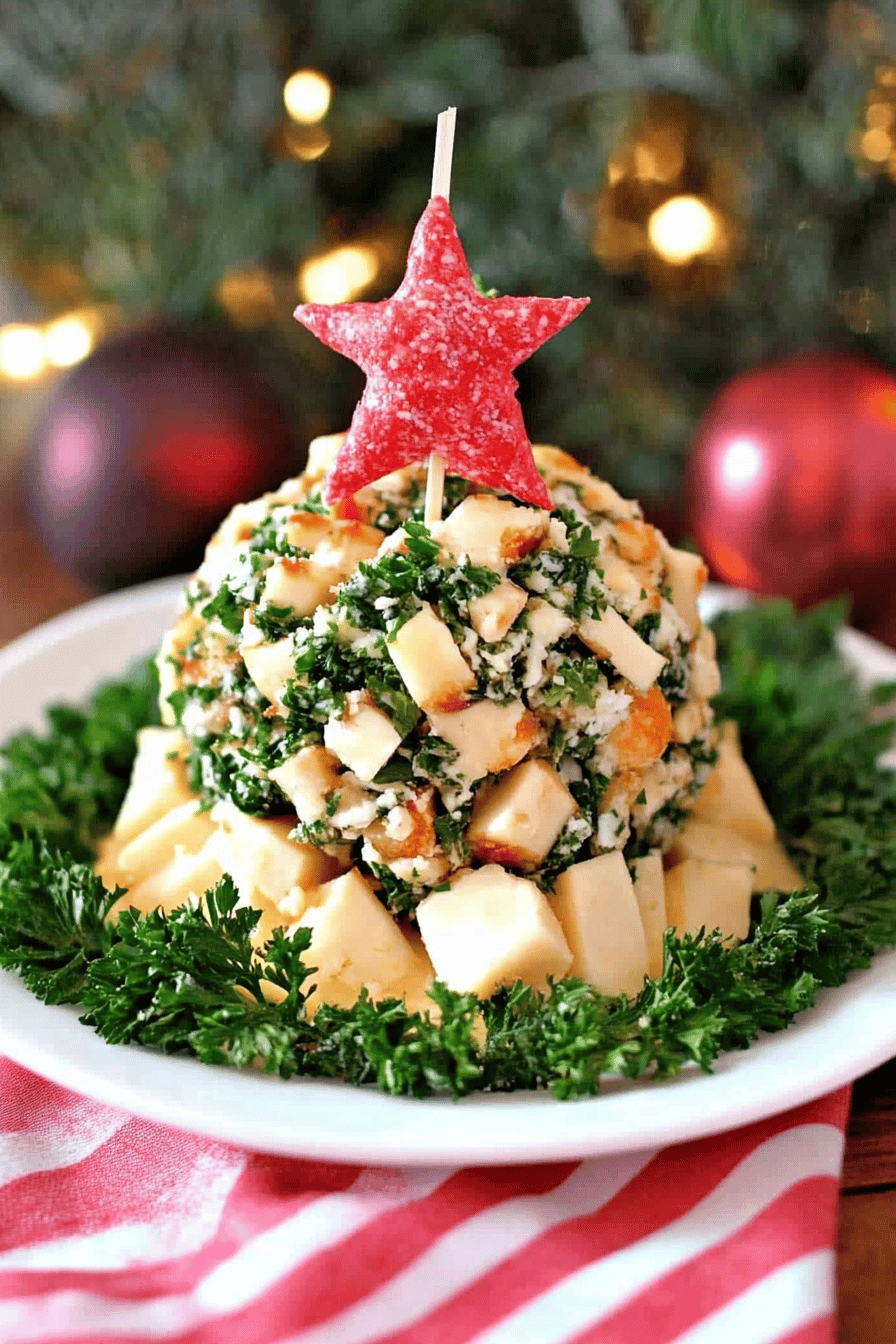

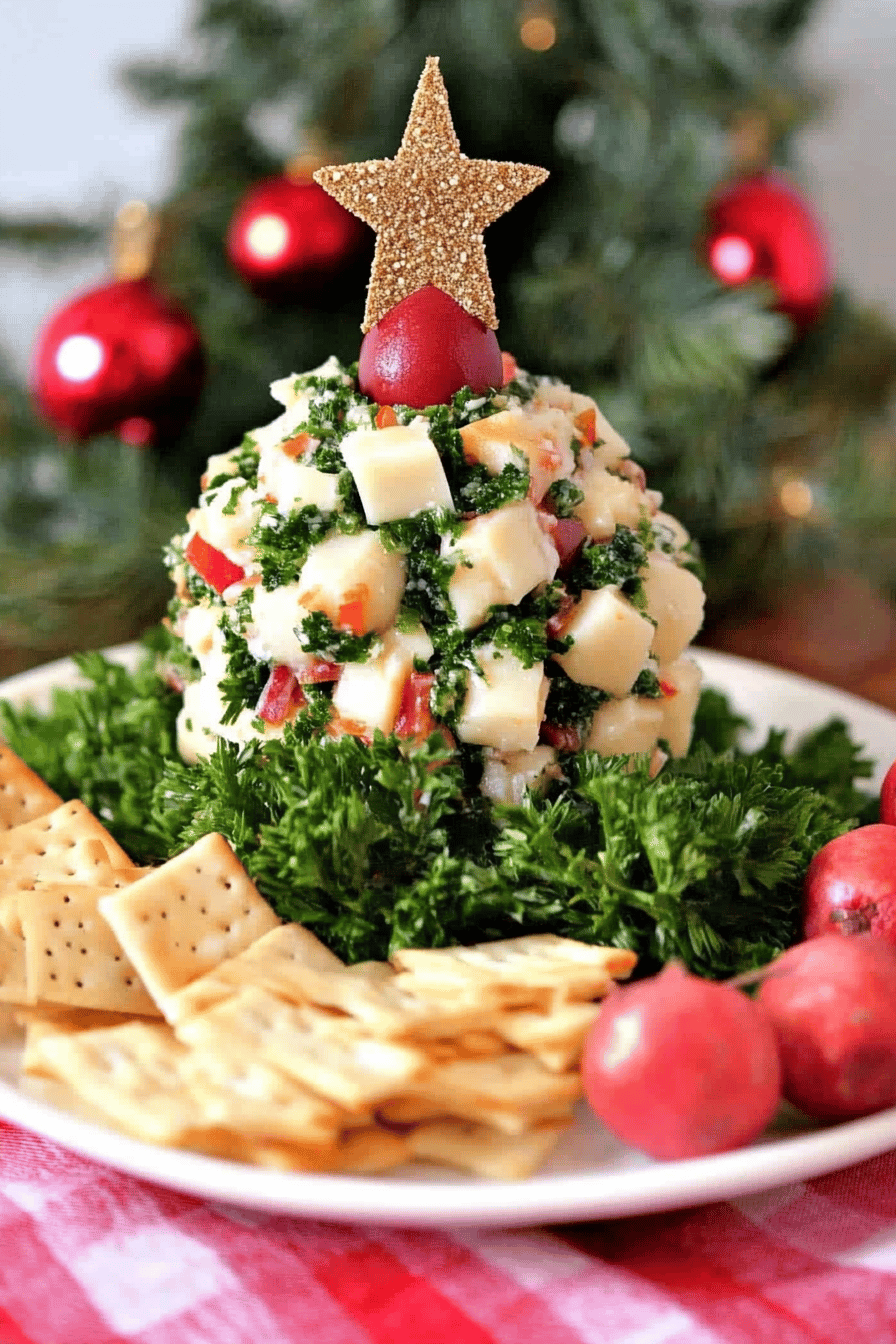
Christmas Tree Cheese Ball
Ingredients
Main Ingredients
- 226.8 ounces cream cheese softened
- 1 cup cheddar cheese shredded
- 0.5 cup Parmesan cheese grated
- 2 tablespoons ranch seasoning mix
- 0.25 cup fresh parsley chopped
- pretzel sticks for the trunk
- pimento stuffed olives for garnish (optional)
Instructions
Preparation Steps
- In a medium bowl, combine the softened cream cheese, shredded cheddar cheese, grated Parmesan cheese, and ranch seasoning mix.
- Mix until well combined. You can use a hand mixer or mix by hand.
- Stir in the chopped fresh parsley.
- Transfer the cheese mixture to a sheet of plastic wrap. Shape the mixture into a cone or Christmas tree shape.
- Wrap the cheese ball tightly in the plastic wrap and refrigerate for at least 1 hour to firm up.
- Before serving, unwrap the cheese ball and place it on a serving platter. Insert pretzel sticks at the bottom for the trunk.
- Garnish with pimento stuffed olives or other desired toppings if desired.
- Serve with crackers, vegetable sticks, or your favorite dippers.