You know those nights? The ones where a craving hits you like a tidal wave, and you just NEED something sweet, but the thought of preheating the oven, mixing ingredients, and waiting for a whole batch of cookies to bake feels like climbing Mount Everest? Yeah, I know those nights *all too well*. It’s usually around 9:30 PM, the kids are finally asleep, and I’m sneaking a moment of quiet. That’s precisely when this cookie dessert dip saves the day. It’s ridiculously simple, tastes like pure bliss, and honestly, it’s become my go-to when I want that cookie-baked-goodness flavor without all the fuss. Think of it as all the best parts of your favorite chocolate chip cookie, but in a dippable, spoonable form. It’s way more satisfying than just eating chocolate chips straight from the bag, and way less effort than baking actual cookies. This recipe is truly a lifesaver!
What is a cookie dessert dip?
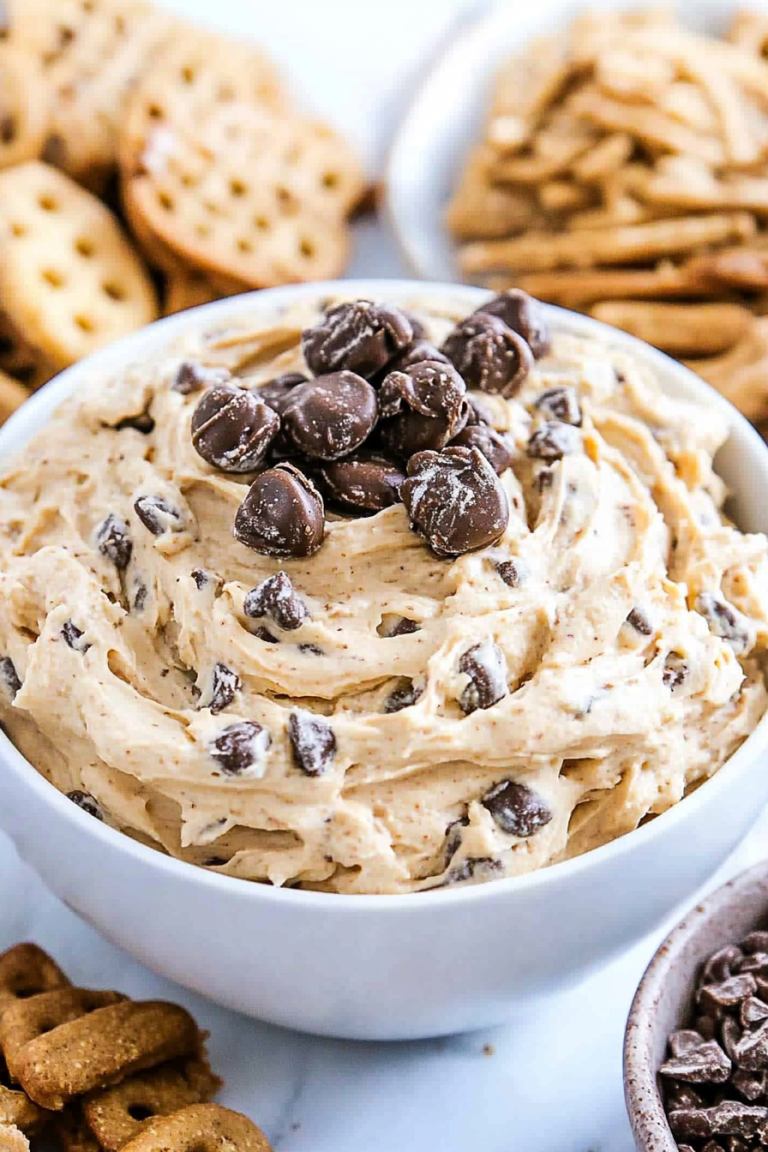
So, what exactly is this magical concoction I’m raving about? At its heart, cookie dessert dip is exactly what it sounds like: a luscious, spoonable dip that captures the comforting, irresistible flavor of your favorite cookies, usually chocolate chip, but we can get creative! It’s not quite frosting, and it’s definitely not cake batter, but it lives in that glorious space in between. Imagine a rich, creamy base, studded with those perfect little pockets of chocolate and maybe a hint of vanilla and brown sugar – that’s the essence of it. The “dip” part means it’s perfect for scooping up with a spoon, a graham cracker, a fruit slice, or even a mini cookie. It’s essentially an edible hug in a bowl, designed for maximum enjoyment with minimum effort. The name is straightforward because, well, the recipe is just that straightforward – pure joy, delivered directly to your taste buds.
Why you’ll love this recipe?
Honestly, where do I even begin? There are so many reasons why this cookie dessert dip has earned a permanent spot in my recipe rotation. First off, the FLAVOR. Oh my goodness, the flavor. It’s like someone bottled up that warm, gooey, just-out-of-the-oven chocolate chip cookie aroma and taste. It hits all the right notes: sweet, buttery, with that lovely caramelized brown sugar undertone, and of course, those melty chocolate chips. It’s intensely satisfying without being overly rich or cloying. Then there’s the SIMPLICITY. I’m talking minutes here, not hours. No complicated creaming of butter and sugar, no precise flour measurements that could go wrong. It’s the kind of recipe you can whip up on a whim when a craving strikes, or when unexpected guests pop over. It’s also incredibly COST-EFFECTIVE. Most of the ingredients are pantry staples that you probably already have on hand. You don’t need fancy, expensive ingredients to make something this delightful. And the VERSATILITY! This is where it truly shines. While it’s phenomenal on its own, you can dip almost anything into it. It’s like the ultimate crowd-pleaser. What I love most about this recipe, beyond all of that, is the feeling it evokes. It brings me back to childhood, to baking with my mom, to those simple moments of pure happiness. It’s comfort food at its finest, and knowing I can recreate that feeling so easily is just the best.
How do I make a cookie dip?
Quick Overview
This cookie dessert dip is all about speed and simplicity. You’ll basically be creating a luscious, creamy base, folding in your favorite cookie-inspired mix-ins, and then letting it chill just enough to set. It’s a no-bake wonder, relying on a few key ingredients coming together to create something truly special. The magic happens in just a few stirs, making it the perfect weeknight treat or last-minute dessert solution.
Ingredients
For the Main Batter:
2 cups softened cream cheese (this is the secret to that unbelievably creamy texture!) – Make sure it’s truly softened, not just slightly warm. It makes a world of difference in how smoothly everything combines. I usually leave my cream cheese out on the counter for about an hour before I plan to start mixing.
1/2 cup unsalted butter, softened – Just like the cream cheese, soft butter is crucial for a smooth base. If you forget to soften it, you can gently microwave it in 10-second bursts, but be careful not to melt it completely.
1 cup powdered sugar – This gives it that fine, silky sweetness without any grittiness. Sifting it beforehand can help prevent lumps, especially if your sugar has been sitting for a while.
1/4 cup packed light brown sugar – This adds that wonderful depth of flavor, that hint of molasses that makes it taste so much like real cookies.
1 teaspoon vanilla extract – Use good quality vanilla if you can; it really does make a difference in the overall flavor profile.
1/4 teaspoon salt – Just a pinch to balance the sweetness and enhance all those lovely flavors.
For the Filling (My Favorite Chocolate Chip Version):
1 cup semi-sweet chocolate chips – I love semi-sweet because they offer a nice balance of sweet and slightly bitter. You could also use milk chocolate or dark chocolate chips, or even a mix! Mini chocolate chips distribute a bit better throughout the dip.
2 tablespoons chopped pecans or walnuts (optional) – These add a lovely crunch and nutty flavor. If you’re not a fan of nuts, just skip them! The dip is still amazing without them.
1/4 cup crumbled cookie pieces (like Oreos or shortbread) – This is where you can really amp up the cookie flavor! I often use crumbled shortbread for a buttery boost, or finely crushed Oreos for a cookies-and-cream vibe.
For the Glaze (Optional, but oh-so-good!):
1/4 cup powdered sugar
1-2 tablespoons milk (or a dairy-free alternative like almond milk)
1/2 teaspoon vanilla extract
Step-by-Step Instructions
Step 1: Preheat & Prep Pan
Okay, so for this dip, we actually don’t need to preheat an oven or prep a pan in the traditional baking sense! The “prep” here is more about getting your ingredients ready to go. Make sure your cream cheese and butter are nice and soft. I usually take them out of the fridge about an hour before I plan to make the dip. This is really the only “waiting” part, and it’s totally worth it for that smooth, lump-free texture.
Step 2: Mix Dry Ingredients
In a medium bowl, I like to whisk together the powdered sugar, packed light brown sugar, and salt. This helps distribute everything evenly and breaks up any little clumps of sugar that might have formed. It ensures that when we add them to the wet ingredients, they’ll incorporate smoothly without creating pockets of pure sugariness.
Step 3: Mix Wet Ingredients
In a large bowl, beat the softened cream cheese and softened butter together with an electric mixer until they are completely smooth and creamy. You want it to look light and fluffy, with no streaks of butter or cream cheese remaining. This is the foundation of our delicious dip, so take your time and make sure it’s perfectly combined. Then, beat in the vanilla extract.
Step 4: Combine
Gradually add the dry ingredients (the sugar and salt mixture from Step 2) to the wet ingredients. Beat on low speed at first, then increase to medium speed. Continue mixing until everything is just combined and the mixture is smooth and luscious. Be careful not to overmix at this stage. Overmixing can sometimes make cream cheese-based desserts a bit too stiff, and we want that lovely, yielding texture.
Step 5: Prepare Filling
Now for the fun part – the mix-ins! Gently fold in the chocolate chips, chopped nuts (if using), and crumbled cookie pieces. I like to use a spatula for this part. You want to fold them in just enough to distribute them evenly throughout the dip. You don’t want to crush them too much; we want to still have those distinct textures and bursts of flavor.
Step 6: Layer & Swirl
This step is more about presentation and creating that visual appeal that makes you excited to dive in! You can spoon the dip directly into a serving bowl as is, or if you want to get a little fancy (and it’s still super easy!), you can swirl in a few extra chocolate chips or cookie crumbles on top. Sometimes I’ll even drizzle a little extra melted chocolate on top for a decadent touch. Think of it as decorating the surface!
Step 7: Bake
Good news! There’s no baking involved for the dip itself! The ingredients are essentially “cooked” by being combined into a smooth, creamy mixture. The chilling process will firm it up slightly, but that’s it. No ovens, no timers, no fuss!
Step 8: Cool & Glaze
While not strictly “baking,” you do want to let this dip chill for at least 30 minutes before serving. This allows the flavors to meld together beautifully and the dip to firm up just enough so it holds its shape on a spoon. If you’re adding the glaze, whisk together the powdered sugar, milk (start with 1 tablespoon and add more if needed for desired consistency), and vanilla extract until smooth. It should be pourable but not too thin. Drizzle this over the chilled dip right before serving.
Step 9: Slice & Serve
Since it’s a dip, you won’t be slicing it! Instead, spoon it into your favorite serving bowl. It’s best served chilled or at cool room temperature. Provide plenty of dippers – graham crackers, pretzels, fruit slices, or even mini cookies are fantastic choices. Let everyone dig in and enjoy!
What to Serve It With
This cookie dessert dip is a chameleon; it adapts to any occasion! For a simple Breakfast treat, I love pairing it with some fresh strawberries or a side of your favorite granola for added crunch. The sweetness of the dip is surprisingly lovely with a hot cup of coffee – it feels like a decadent little indulgence to start the day. For a more elegant Brunch spread, I’ll serve it in a pretty glass dish with a variety of fresh fruits like melon, berries, and kiwi slices. It looks so festive and always gets rave reviews. It’s a wonderful alternative to a heavy cake or pie. As a Dessert, it’s the ultimate showstopper. Think after-dinner indulgence: pile on extra chocolate chips or a drizzle of caramel sauce. It’s perfect served with shortbread cookies, pretzels, or even just a spoon for pure, unadulterated enjoyment. For those Cozy Snacks, this is my absolute go-to. It’s the perfect companion for a movie night or a relaxing evening curled up with a book. I love serving it with apple slices, graham crackers, or even those little mini vanilla wafers. My family has a tradition of making this after school on Fridays, and we all just grab our favorite dipper and dig in together. It’s pure, simple joy.
Top Tips for Perfecting Your Cookie Dessert Dip
After making this cookie dessert dip more times than I can count, I’ve picked up a few little tricks that I think make it even better. First, regarding the softened cream cheese and butter: I cannot stress this enough! If they’re not soft enough, you’ll end up with a lumpy dip, and nobody wants that. I’ve learned this the hard way when I was in a rush and only left them out for 15 minutes. It’s just not the same. For the mixing, use an electric mixer if you have one. It makes achieving that super smooth, creamy texture so much easier than trying to do it by hand. If you’re doing it by hand, make sure your ingredients are *very* soft. When it comes to the mix-ins, don’t go overboard. You want enough to add flavor and texture, but not so much that the dip becomes too chunky or dry. I usually aim for about a cup to a cup and a half of total mix-ins. If you’re looking for Swirl Customization, sometimes I’ll save a few tablespoons of the plain dip mixture and swirl that back in with some cocoa powder or a touch of espresso powder for a marbled effect. It looks fancy but is super easy. For Ingredient Swaps, if you’re not a fan of chocolate chips, try white chocolate chips, peanut butter chips, or even some chopped up candy bars! For a nut-free version, just omit the nuts and perhaps add a bit more cookie crumble or chocolate chips. Baking Tips? Well, thankfully, there are no baking tips needed for the dip itself! But if you were to adapt this into cookies, that’s a whole other story. Glaze Variations are endless! You can add a tiny bit of cocoa powder to the glaze for a chocolate glaze, or even a few drops of food coloring if you’re making it for a party. Sometimes, I skip the glaze altogether and just dust the top with a little extra powdered sugar or some cinnamon. My biggest lesson learned was about chilling time. While you can eat it right away, letting it chill for at least 30 minutes really does let those flavors meld and the texture firm up perfectly.
Storing and Reheating Tips
This cookie dessert dip is pretty forgiving, but there are a few things I’ve learned to keep it tasting its best. Storing it at Room Temperature isn’t ideal for very long, especially if it’s warm out. I’d say it’s good for about 2 hours maximum if it’s not too warm. Beyond that, it’s best to move it to the fridge. For Refrigerator Storage, I usually transfer any leftovers to an airtight container. It stays wonderfully fresh in the fridge for about 3 to 4 days. The texture might firm up a bit more in the fridge, but that’s usually a good thing! If it gets too firm, just let it sit out at room temperature for about 15-20 minutes before serving again. For Freezer Instructions, this dip freezes surprisingly well! I’ll transfer it to a freezer-safe container, press some plastic wrap directly onto the surface to prevent ice crystals, and then put the lid on. It should last in the freezer for about 1 to 2 months. To Thaw, just move it to the refrigerator overnight. It might need a good stir once it’s thawed, and you might want to let it sit out for a bit to soften up to the perfect consistency. Glaze Timing Advice is important: if you plan on storing leftovers, I highly recommend adding the glaze *after* you’ve brought the dip back to serving temperature. The glaze can sometimes get a little sticky or separate if stored for too long, so it’s best applied fresh. If you do freeze it, definitely wait to glaze until after thawing and bringing it back to room temp.
Frequently Asked Questions
Final Thoughts
There you have it! This cookie dessert dip is more than just a recipe to me; it’s a little slice of happiness that’s always there when I need it. It’s proof that you don’t need complicated techniques or a ton of time to create something truly delicious and satisfying. The ease with which it comes together, combined with that incredible, familiar cookie flavor, makes it a winner every single time. I really hope you give this a try, especially on those nights when you’re craving that sweet cookie comfort but don’t want the whole baking ordeal. If you love this, you might also enjoy my No-Bake Peanut Butter Cup Dip – another super easy treat! I can’t wait to hear what you think of this cookie dessert dip, or what delicious variations you come up with. Please leave a comment below and share your thoughts, or even rate the recipe if you feel so inclined! Happy dipping!

cookie dessert dip
Ingredients
Main Ingredients
- 8 ounces cream cheese (softened)
- 1 cup powdered sugar
- 0.5 cup creamy peanut butter
- 1 stick unsalted butter (softened)
- 1.5 cups oats
- 0.33 cup milk
- 0.5 cup brown sugar
- 1 teaspoon vanilla extract
- 1 teaspoon sea salt
- 1 cup semi-sweet chocolate chips
- 1 cup M&M’s
Instructions
Preparation Steps
- In a medium mixing bowl, blend together powdered sugar and cream cheese using an electric mixer until smooth, about 2-3 minutes.
- Add in peanut butter, unsalted butter, oats, milk, brown sugar, vanilla, and sea salt. Mix until smooth.
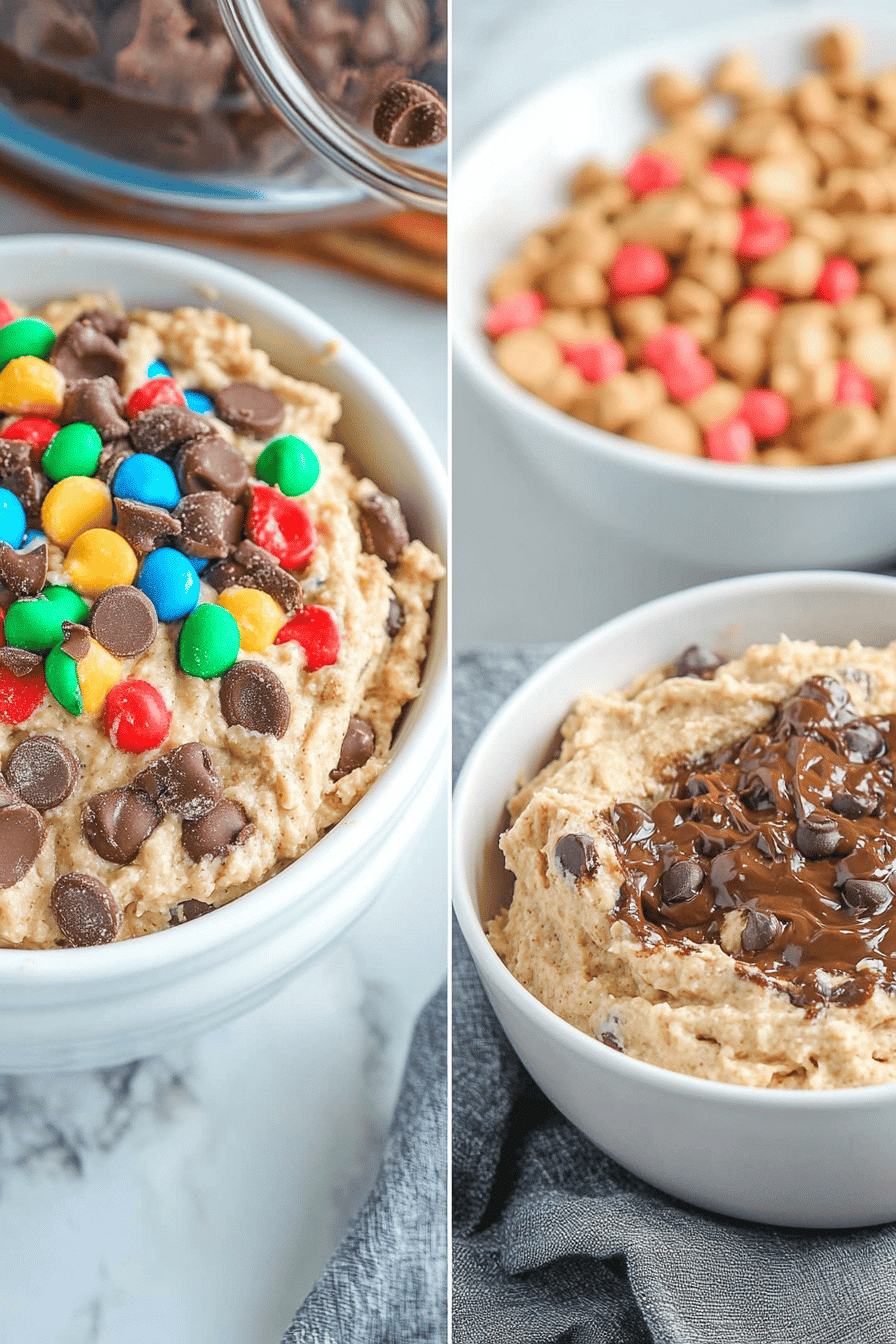
- Fold in chocolate chips and M&M’s, reserving a small handful for garnish. Mix well using a rubber spatula.
- Cover and refrigerate the dip for at least 30 minutes to chill.
- When ready to serve, transfer to a serving bowl and top with reserved chocolate chips and M&M’s.