You know those days? The ones where the world feels a little too much, and all you crave is a little something sweet, a little something comforting, and a little something with a kick? Yeah, me too. And on those days, I don’t reach for a complicated cake or a fussy tart. I reach for my absolute favorite, no-bake wonder: Spicy Whiskey Balls. These little bites of heaven are my go-to for holiday cookie platters, impromptu gatherings, or honestly, just when I need a little pick-me-up after tucking the kids into bed. They’re a bit like a grown-up truffle, a bit like a no-bake cookie, and a whole lot of delicious. If you’ve ever loved a classic no-bake cookie, imagine that, but with a sophisticated depth of flavor and a gentle warmth that just… sings. I’ve made them for countless potlucks, and they always disappear faster than I can restock the platter. Seriously, people ask for this recipe constantly, and I’m finally sharing my tried-and-true method with you!
What are some Spicy Whiskey Balls?
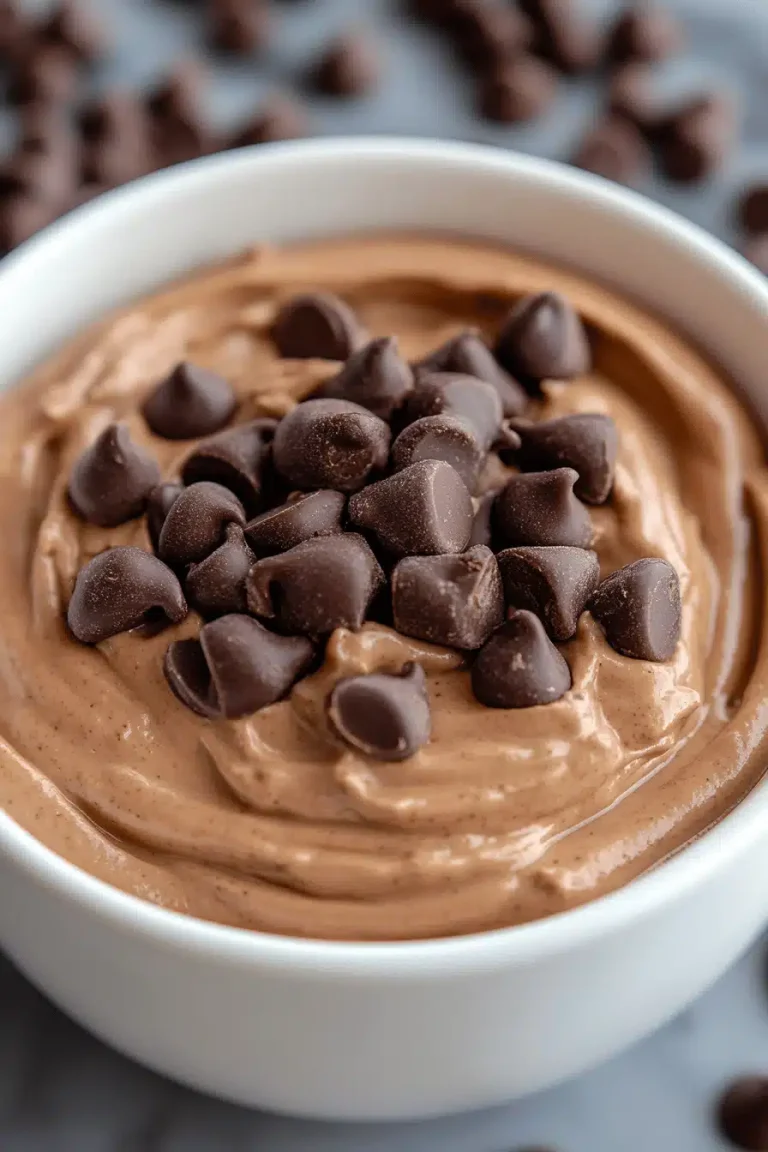
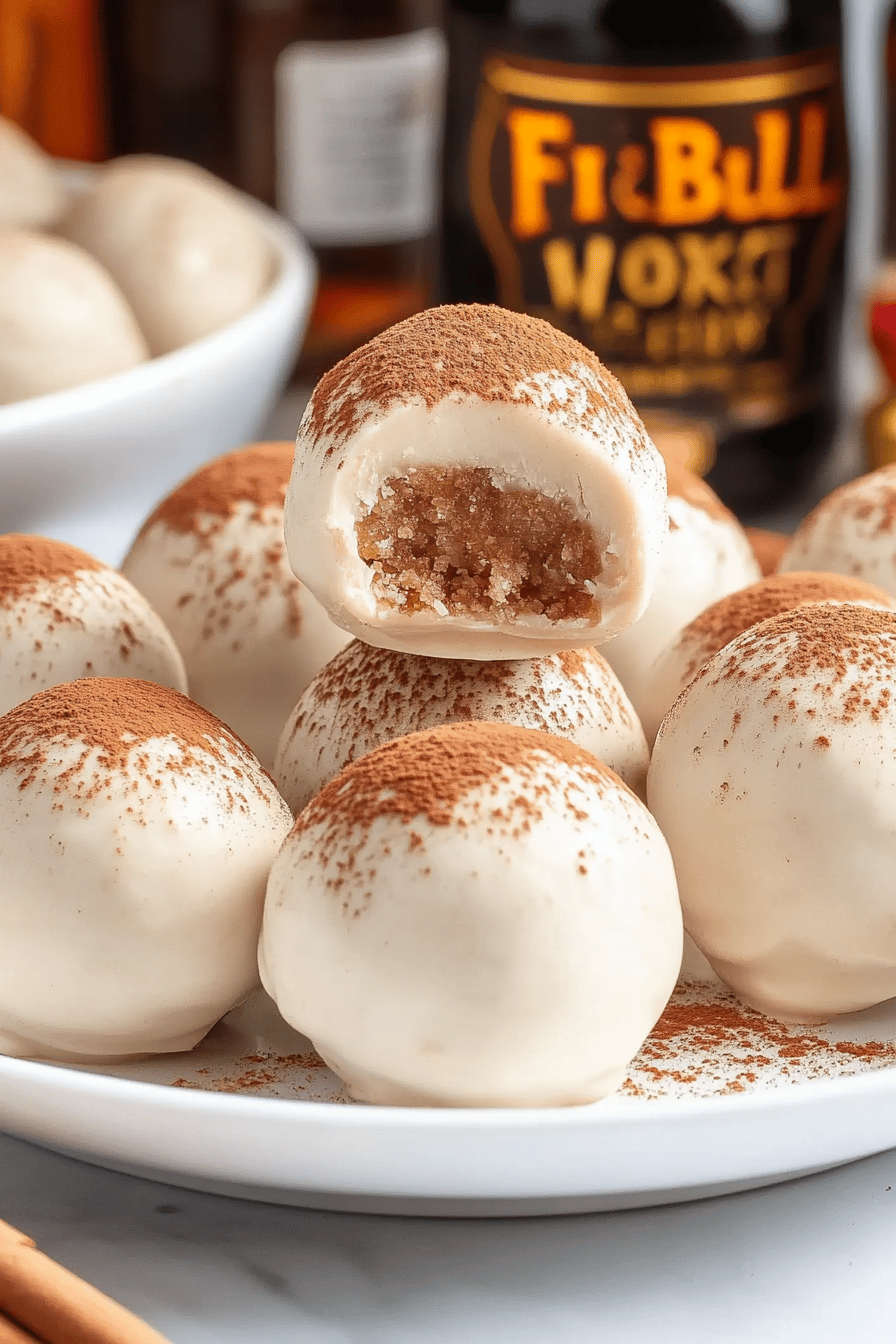
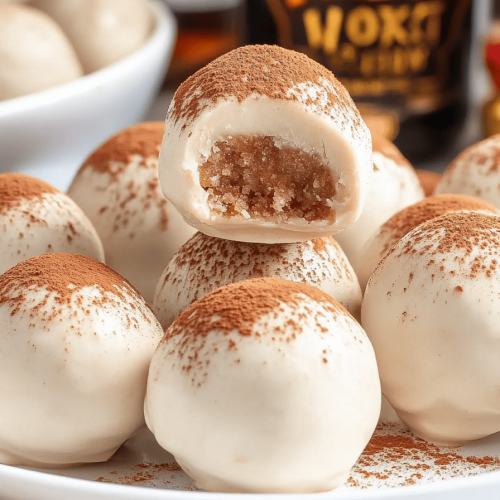
So, what exactly are these magical little spheres? Think of them as the ultimate indulgence without the fuss. They’re a no-bake confection, meaning no oven required, which is a lifesaver during busy seasons. The base is typically made from crushed cookies or graham crackers, mixed with cocoa powder, sugar, a touch of butter, and then, the star of the show, a generous splash of whiskey. But here’s where my “spicy” comes in – a hint of cinnamon and sometimes a whisper of nutmeg or allspice to really make those flavors pop. We roll them into little balls and then, for that extra touch of decadence, they’re often dipped in melted chocolate or rolled in toppings like chopped nuts or sprinkles. The name itself, “Spicy Whiskey Balls,” hints at their unique character: a warm, comforting sweetness with a subtle, grown-up boozy undertone and that lovely, lingering spice. They’re not just a treat; they’re an experience in every bite.
Why you’ll love this recipe?
What are some of the best things about Spicy Whiskey Balls?flavor is out of this world. It’s that perfect balance of rich cocoa, sweet undertones, and the complex warmth of the whiskey and spices. The spices aren’t overpowering; they just enhance everything, giving it a cozy, inviting aroma and taste. And the whiskey? It adds a depth that you just can’t replicate with other ingredients. It’s smooth, sophisticated, and totally addictive. Then there’s the simplicity. This is truly a “dump and stir” kind of recipe, which is why I turn to it so often. You don’t need any fancy equipment or advanced baking skills. It’s genuinely forgiving, which is a huge plus for any home cook. Plus, they’re incredibly cost-effective. The ingredients are pantry staples for most people, and you can make a huge batch without breaking the bank, which is fantastic for feeding a crowd or stocking up for the holidays. What I love most about this recipe, though, is its versatility. You can tweak the spices, swap out the cookie base, experiment with different liquors (though whiskey is my favorite!), and change up the coatings. It’s a recipe that grows with you and your tastes. Compared to a traditional baked cookie that requires cooling racks and precise oven temperatures, these are so much more forgiving and adaptable, making them my go-to for those moments when you need a delicious treat in a hurry.
How do I make Spicy Whiskey Balls?
Quick Overview
The beauty of these Spicy Whiskey Balls is their straightforward approach. You’ll essentially be creating a rich, slightly sticky mixture by combining crushed cookies, cocoa, sugar, and butter, then infusing it with your chosen whiskey and a warming blend of spices. Once combined and cooled slightly, you’ll roll them into bite-sized spheres. The final flourish often involves a decadent dip in melted chocolate. It’s a process that takes just minutes to mix and then a little patience while they chill and firm up. This method ensures a delightful texture and allows the flavors to meld perfectly, resulting in a treat that’s both comforting and excitingly complex. No baking means no waiting for dough to chill or cakes to rise – just pure, delicious simplicity.
Ingredients
For the Main Batter:
3 cups finely crushed chocolate sandwich cookies (like Oreos, about 30 cookies) – I find the regular ones work best for texture and flavor, but you can experiment! Make sure they’re *finely* crushed; pulse them in a food processor until they resemble coarse crumbs. This is key for a smooth texture.
1/2 cup unsweetened cocoa powder – Use a good quality one for the best deep chocolate flavor. Dutch-processed gives a richer, darker color and smoother taste.
1 cup powdered sugar – This ensures a super smooth texture and sweetness without grittiness.
1/2 cup (1 stick) unsalted butter, melted – Melt it gently; don’t let it get too hot or it can affect the texture.
1/4 cup whiskey – Your favorite! I prefer a smooth bourbon or rye, but any decent whiskey will do. Don’t use anything too harsh. Some people like to use a splash of rum or even Kahlua for a different twist, but whiskey gives it that classic depth.
1 teaspoon ground cinnamon
1/4 teaspoon ground nutmeg (optional, but I love it!)
Pinch of salt – This really balances the sweetness and enhances the chocolate flavor.
For the Filling (Optional, but Recommended!):
4 oz Cream Cheese, softened – This makes the center extra creamy and decadent.
1/4 cup powdered sugar
1-2 tablespoons whiskey (or a splash of milk/cream if you prefer not to add more alcohol to the center)
1/4 teaspoon vanilla extract
For the Glaze/Coating:
12 oz semi-sweet chocolate chips – Good quality chips melt beautifully. You can also use chopped chocolate bars.
1 tablespoon coconut oil or vegetable oil – This helps the chocolate melt smoothly and achieve a nice gloss.
Optional: Chopped toasted pecans, walnuts, sprinkles, or shredded coconut for rolling.
Step-by-Step Instructions
Step 1: Preheat & Prep Pan
While this recipe is no-bake, we’ll need a place for our finished balls to firm up. Line a baking sheet or a large platter with parchment paper or wax paper. This prevents them from sticking and makes them easy to handle once they’re chilled. You don’t need to preheat an oven for this part, but having your surface ready is crucial for the next steps.
Step 2: Mix Dry Ingredients
In a large mixing bowl, combine the finely crushed chocolate sandwich cookies, unsweetened cocoa powder, powdered sugar, ground cinnamon, nutmeg (if using), and a pinch of salt. Whisk them together thoroughly to ensure everything is evenly distributed. This step is important to avoid pockets of unmixed ingredients, especially the cocoa and sugar, which can lead to a less uniform flavor and texture in your final spicy whiskey balls.
Step 3: Mix Wet Ingredients
In a separate, smaller bowl or a liquid measuring cup, whisk together the melted butter and the 1/4 cup of whiskey. Make sure the butter isn’t piping hot, just nicely melted. If you’re adding the cream cheese filling, this is also where you’d prepare that separately: beat the softened cream cheese with powdered sugar, vanilla, and the tablespoon of whiskey (or milk/cream) until smooth and creamy.
Step 4: Combine
Pour the wet ingredients (butter/whiskey mixture) into the bowl with the dry ingredients. Stir with a sturdy spoon or a spatula until everything is well combined and a thick, dough-like consistency forms. It should hold together when you press it. Be careful not to overmix at this stage; just mix until no dry spots remain. If the mixture seems too dry and crumbly, you can add a tiny bit more melted butter, a teaspoon at a time. If it seems too wet, you can add a tablespoon or two more of finely crushed cookies. The goal is a consistency that’s easy to roll without being sticky.
Step 5: Prepare Filling
If you’re adding the cream cheese filling, now is the time to prepare it. In a small bowl, beat the softened cream cheese with the powdered sugar until smooth and creamy. Stir in the 1-2 tablespoons of whiskey (or milk/cream) and the vanilla extract. You want a thick, pipeable consistency. You can scoop small amounts (about 1/2 teaspoon) of this filling and place it aside if you plan to stuff the whiskey balls.
Step 6: Layer & Swirl (if stuffing)
If you’re stuffing your spicy whiskey balls, take about a tablespoon of the cookie mixture and flatten it in your palm. Place a small dollop (about 1/2 teaspoon) of the cream cheese filling in the center. Gently fold the cookie mixture around the filling, sealing it completely, and then roll it into a smooth ball. If you’re not stuffing, simply take about a tablespoon of the cookie mixture and roll it between your palms until it forms a smooth ball. Place the rolled balls onto your prepared parchment-lined baking sheet.
Step 7: Bake
Oops! I mean, *Chill*! These are no-bake! Place the baking sheet with the rolled balls into the refrigerator for at least 30 minutes, or into the freezer for about 15 minutes, until they are firm to the touch. This chilling step is crucial before dipping them in chocolate; it prevents the balls from falling apart and helps the chocolate set up nicely.
Step 8: Cool & Glaze
Once chilled and firm, melt your semi-sweet chocolate chips with the coconut oil (or vegetable oil) in a heatproof bowl. You can do this in the microwave in 30-second intervals, stirring well between each, or over a double boiler on the stovetop. Stir until the chocolate is completely smooth and glossy. Working one or two at a time, dip each chilled spicy whiskey ball into the melted chocolate, using a fork or a toothpick to ensure it’s fully coated. Lift the ball out and tap gently on the side of the bowl to let excess chocolate drip off. Place the dipped balls back onto the parchment-lined baking sheet. If you’re adding toppings like nuts or sprinkles, do so immediately after dipping, while the chocolate is still wet. Let the chocolate set completely; this will happen relatively quickly in a cool room, or you can pop them back into the fridge for a few minutes to speed it up.
Step 9: Slice & Serve
Once the chocolate has set firm, your Spicy Whiskey Balls are ready to be enjoyed! You can serve them right off the parchment paper. They are best served chilled or at cool room temperature. If you’ve rolled them into smaller bite-sized pieces, they make perfect little treats to pop in your mouth. For a more elegant presentation, arrange them on a platter or in mini cupcake liners. They are ready to be devoured!
What to Serve It With
These Spicy Whiskey Balls are so versatile, they fit into almost any occasion! For Breakfast, I sometimes make a slightly less boozy version and serve a couple alongside a strong cup of coffee and maybe some fresh berries. The hint of chocolate and spice is a lovely way to start the day if you’re feeling decadent. For Brunch, they’re a fantastic addition to a dessert table or even as a sweet bite after a savory meal. I like to arrange them on a tiered stand with other pastries. They pair wonderfully with a mimosa or a sparkling rosé. As Dessert, they are, of course, divine. I often serve them after a rich chocolate cake or a hearty meal; they’re like a little concentrated burst of flavor. A small plate of these with an espresso or a glass of dessert wine is pure bliss. And for Cozy Snacks, this is where they truly shine. On a chilly evening, curled up with a good book, a mug of Hot Chocolate (or, let’s be honest, a glass of whiskey), and a couple of these spicy whiskey balls is my idea of perfect comfort. My family also loves them during holiday movie marathons – they’re easy to grab and eat without a fork, making them perfect for casual snacking.
Top Tips for Perfecting Your Spicy Whiskey Balls
Over the years, I’ve learned a few tricks that make these Spicy Whiskey Balls absolutely perfect every single time. First, regarding the cookie prep: don’t just chop them; really pulverize them. A food processor is your best friend here, creating fine crumbs that bind together smoothly. If you don’t have one, you can put the cookies in a sturdy zip-top bag and crush them with a rolling pin until they’re as fine as possible. For mixing advice, I always emphasize not overmixing once the wet and dry ingredients are combined. You want a cohesive dough, but overworking it can make the balls tough or oily. Mix just until it comes together. If your mixture seems too dry and won’t hold its shape, add melted butter or a tiny splash of whiskey, one teaspoon at a time. For swirl customization, if you’re adding the cream cheese filling, make sure your filling isn’t too runny. A firmer filling is easier to enclose and won’t seep out as much. For a beautiful effect, try to ensure the cookie dough completely seals around the filling. When it comes to ingredient swaps, I’ve had great success using gingersnap cookies for a more intense spice profile, though the chocolate flavor will be less pronounced. For the liquor, while whiskey is my favorite, a good dark rum or even brandy can work beautifully. If you don’t drink alcohol, you can substitute with strong brewed coffee or extra vanilla extract for flavor depth, but it won’t have that distinct boozy warmth. For baking tips (or rather, chilling tips!), make sure your balls are firm before dipping. A slightly softer ball will melt more easily into the chocolate. If your chocolate seems too thick, add a tiny bit more coconut oil. If it seems too thin, you might need to let it cool a little before dipping. For glaze variations, if you want a darker, richer coating, use dark chocolate chips. For a sweeter, milder coating, milk chocolate works too, though it’s often a bit softer. You can also experiment with white chocolate for a visual contrast, but be aware it can be trickier to work with. A dusting of cocoa powder or cinnamon after dipping can also be a lovely alternative to a full chocolate coating.
Storing and Reheating Tips
Proper storage is key to keeping these Spicy Whiskey Balls delicious. At room temperature, they are best enjoyed within 3-4 days. Keep them in an airtight container to prevent them from drying out or absorbing any unwanted odors from your kitchen. Make sure they are fully cooled and the chocolate coating is firm before sealing the container. For refrigerator storage, they’ll last a bit longer, typically up to 7-10 days. The cooler temperature helps preserve their freshness, especially if you’ve used a cream cheese filling. Again, an airtight container is essential. When you want to enjoy them from the fridge, I find letting them sit at room temperature for about 15-20 minutes softens them up perfectly, bringing out the best texture and flavor. For freezer instructions, these hold up remarkably well for up to 2-3 months. The best way to freeze them is to place them in a single layer on a baking sheet until solid, then transfer them to a freezer-safe airtight container or a heavy-duty zip-top bag, separating layers with parchment paper if needed. To thaw, transfer them from the freezer to the refrigerator overnight. Avoid thawing them at room temperature, as this can cause condensation and affect the chocolate coating. For the glaze timing advice, if you plan to freeze them, it’s generally best to dip them in chocolate *after* thawing, or ensure your chocolate coating is very robust. However, if they are well-chilled and the chocolate is good quality, they can often be frozen with the glaze intact. For room temperature or refrigerator storage, adding the glaze *after* chilling the balls is the standard and recommended method to ensure a smooth finish.
Frequently Asked Questions
Final Thoughts
There you have it – my go-to recipe for Spicy Whiskey Balls. I truly believe this is one of those recipes that will become a staple in your kitchen, just like it has in mine. It’s that perfect blend of comfort, indulgence, and just a hint of grown-up fun. The way the warm spices play with the rich chocolate and the subtle kick of whiskey is something truly special, and the fact that you don’t even need to turn on your oven makes it a lifesaver when time is tight. I can’t wait for you to try them and experience that moment when you take your first bite and feel that wave of deliciousness. If you’re a fan of no-bake treats or looking for a unique addition to your holiday baking list, these are an absolute must-try. For those who love this kind of rich, decadent treat, you might also enjoy my recipe for Rich Chocolate Fudge or my Easy Peanut Butter Truffles, which offer similar flavor profiles with different textures. I’d absolutely love to hear how your Spicy Whiskey Balls turn out! Please leave a comment below with your thoughts, any fun variations you tried, or just to let me know they disappeared as quickly as they do at my house. Happy making!
Spicy Whiskey Balls
Ingredients
Main Ingredients
- 8 ounce cream cheese room temperature
- 0.5 teaspoon cinnamon
- 15.25 ounce box of vanilla cake mix Betty Crocker Super Moist brand
- 1 ounces Fireball whiskey more to desired flavor
- 16 ounce package of vanilla almond bark white
- Ground cinnamon for garnish
Instructions
Preparation Steps
- Heat treat the cake mix: Add the cake mix to a medium-sized heat-safe bowl. Microwave for two to three 30-second intervals, stirring after each interval, until it reaches 165 degrees. Allow the cake mix to cool completely.
- Line two large baking sheets with parchment paper or a silicone mat. Set aside.
- In a large mixing bowl, add the room-temperature cream cheese and ground cinnamon. Beat on medium-high speed with a handheld mixer for 1-2 minutes until light and fluffy.
- Add the vanilla cake mix and one ounce of Fireball whiskey to the cream cheese mixture. Beat for an additional 1-2 minutes. Add more Fireball whiskey to reach the desired flavor, beating an additional 1-2 minutes until fully combined.
- Cover the bowl with plastic wrap and refrigerate for 2 hours.
- Using a 1-inch cookie scoop, scoop out a level scoop and roll it in the palm of your hands to make a smooth ball. Place the ball onto one of the prepared baking sheets. Repeat until all balls are rolled.
- Heat the vanilla almond bark according to package directions (microwave in 30-second increments, stirring between), until smooth.
- Using a fork, dip a chilled Fireball Whiskey ball into the melted vanilla almond bark, coating all sides. Tap the fork on the side of the bowl to remove excess almond bark.
- Place the coated ball onto the second parchment paper-lined baking sheet and sprinkle the top with a pinch of ground cinnamon.
- Repeat until all Fireball whiskey balls are coated and sprinkled with cinnamon.
- Refrigerate the baking sheet of coated balls for at least 30 minutes to chill and firm up.