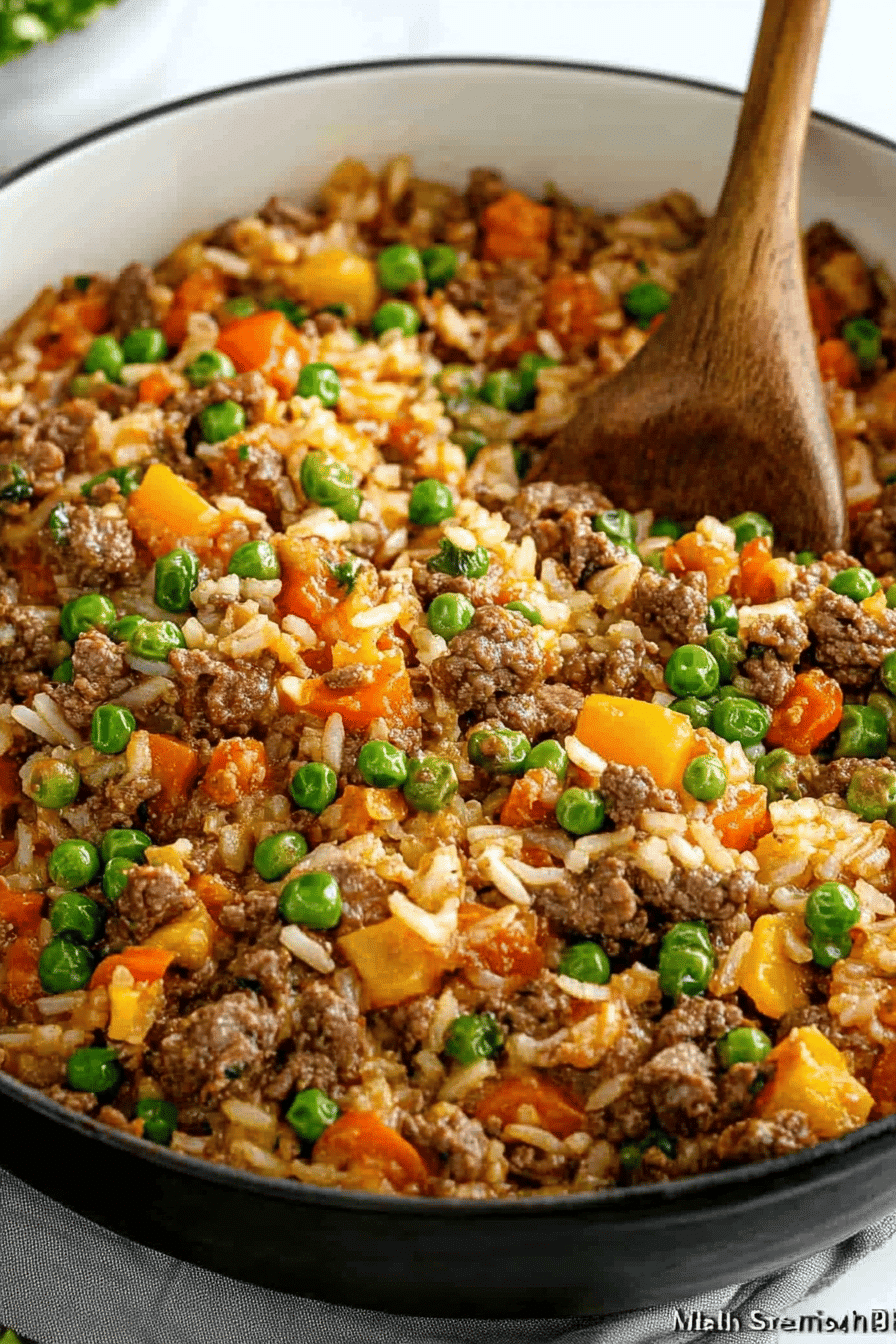
Oh, you guys. I am SO excited to finally share this with you! This Spanish Rice Recipe isn’t just a dish; it’s a hug in a bowl. It’s the kind of thing my grandma used to make, and the aroma alone would fill our tiny kitchen, making everyone’s stomach rumble. I swear, the moment I start sautéing the onions and garlic, my kids come running, asking “Is it ready yet?!” It’s that good. Forget those bland, mushy versions you might have had elsewhere; this one has a beautiful, slightly firm texture, a rich tomato flavor, and just the right amount of savory goodness. It’s honestly my go-to when I want something comforting and delicious without spending hours slaving away. Think of it as the ultimate comfort food, but with a vibrant personality all its own, a little cousin to a perfect risotto but so much more forgiving!
What is Spanish rice?
So, what exactly *is* this magical Spanish rice? At its heart, it’s a simple rice dish cooked in a flavorful broth, usually with tomatoes, onions, and a blend of spices. The name “Spanish rice” is a bit of a misnomer in some culinary circles; it’s more commonly known as “Arroz Rojo” in many Latin American countries, and its roots are deeply embedded in traditional home cooking. It’s not just plain rice; it’s rice that’s been coaxed into becoming something more. The grains are usually separate and fluffy, infused with the savory notes of the broth and the sweet tang of tomato. It’s the kind of side dish that can transform a simple weeknight meal into something truly special. It’s humble, it’s delicious, and it’s incredibly versatile!
Why you’ll love this recipe?
Honestly, there are so many reasons why this Spanish rice recipe has become a staple in my kitchen, and I just know you’re going to fall in love with it too. First off, the **flavor** is out of this world. It’s savory, a little sweet from the tomato, with a subtle warmth from the spices that just sings. It’s the kind of flavor that makes you close your eyes and savor every bite. Then there’s the **simplicity**. I know, I know, sometimes rice dishes can seem intimidating, but this one? This one is a lifesaver on busy nights. The steps are straightforward, and the ingredients are all pantry staples. You don’t need any fancy equipment, just a good pot and a little patience. It’s also incredibly **cost-efficient**. Rice, beans, canned tomatoes – these are some of the most budget-friendly ingredients you can find, making this a fantastic option for feeding a crowd without breaking the bank. And let’s talk about **versatility**! This Spanish rice is a chameleon. It’s the perfect partner for grilled chicken or fish, it’s divine alongside enchiladas, and honestly, I’ve even caught myself eating it straight from the pot as a hearty snack! It pairs beautifully with my favorite black bean recipe, making for a quick and satisfying vegetarian meal. What I love most about this particular recipe is how consistently it turns out perfectly fluffy and flavorful. It’s the kind of recipe you can make with your eyes closed after the first few times.
How do I make Spanish rice?
Quick Overview
Making this Spanish rice is wonderfully straightforward. We’ll start by toasting the rice to give it a lovely, nutty flavor and texture, then sautéing aromatics, simmering it in a rich tomato-chicken broth mixture, and letting it steam to perfection. The key is to get the right ratio of liquid to rice and to avoid disturbing it too much while it cooks. This method ensures each grain is separate and infused with all that delicious flavor. It’s a forgiving recipe, which is exactly what we need after a long day!
Ingredients
For the Rice Base:
2 tablespoons olive oil (or vegetable oil if that’s what you have on hand)
1 ½ cups long-grain white rice (like Basmati or Jasmine – avoid instant rice here, it gets too mushy!)
½ medium yellow onion, finely chopped
2 cloves garlic, minced
1 (8-ounce) can tomato sauce
2 cups low-sodium chicken broth (or vegetable broth for a vegetarian version)
½ teaspoon salt, or to taste
¼ teaspoon black pepper
For Optional Flavor Boosters (Highly Recommended!):
½ teaspoon ground cumin
¼ teaspoon dried oregano
A pinch of cayenne pepper for a tiny bit of warmth (optional)
½ cup frozen peas or corn (added in the last 10 minutes of cooking)
For Garnish (Optional):
Fresh cilantro, chopped
Lime wedges
Step-by-Step Instructions
Step 1: Toast the Rice
Grab a medium-sized, heavy-bottomed pot or Dutch oven. Add the olive oil and heat it over medium heat. Once the oil is shimmering, add the rice. Stir it around constantly for about 3-5 minutes, until the rice grains start to look a little opaque and smell faintly nutty. This toasting step is crucial for texture; it helps the grains stay separate and prevents them from becoming gummy. Don’t let it burn, just get it golden!
Step 2: Sauté Aromatics
Push the toasted rice to one side of the pot. Add the finely chopped onion to the empty side and cook for about 3-4 minutes until it starts to soften and become translucent. Then, add the minced garlic and cook for another minute until fragrant. Be careful not to burn the garlic – it can happen quickly! If you’re adding cumin, oregano, or cayenne, you can stir them in now with the aromatics for a minute to bloom their flavors.
Step 3: Add Tomato and Broth
Pour in the can of tomato sauce and stir everything together, scraping up any bits from the bottom of the pot. Let it cook for about a minute, allowing the tomato sauce to deepen in color slightly. Now, pour in the chicken broth. Add the salt and pepper. Give it a good stir to combine everything.
Step 4: Bring to a Simmer
Bring the mixture to a rolling boil over medium-high heat. Once it’s boiling, give it one last good stir, then reduce the heat to the lowest setting your stove can manage. Cover the pot tightly with a lid. This is where the magic happens – the rice will absorb all that glorious flavor.
Step 5: Simmer and Steam
Let the rice simmer, undisturbed, for about 15-18 minutes. Resist the urge to peek or stir! If you’re adding frozen peas or corn, gently stir them in during the last 5-10 minutes of cooking. They’ll cook right in the steam. Once the time is up, turn off the heat and let the pot sit, still covered, for another 5-10 minutes. This steaming time is just as important as the simmering time for perfectly cooked rice.
Step 6: Fluff and Serve
Carefully remove the lid. Use a fork to gently fluff the rice, separating the grains. You should have beautiful, colorful, and fluffy Spanish rice! Taste and adjust seasoning if needed. Serve hot, garnished with fresh cilantro and a squeeze of lime, if you like. It’s truly a dish that smells as amazing as it tastes!
What to Serve It With
This Spanish rice is honestly a superstar side dish, but its versatility means it can anchor an entire meal. For **breakfast**, I love a small dollop alongside scrambled eggs and a side of crispy bacon. It’s a little unconventional, but the savory rice is surprisingly delightful in the morning. When it comes to **brunch**, this rice is perfect alongside pulled pork or even some simple fried plantains. It adds color and substance to the plate, making it feel a bit more elegant. As a **dessert**? Okay, hear me out! While not a traditional dessert, a small, warm portion can be incredibly comforting, especially with a light dusting of powdered sugar and a dollop of whipped cream – it’s a guilty pleasure that satisfies a sweet craving without being too heavy. And for those **cozy snacks** or light dinners, it’s unbeatable. Serve it with seasoned black beans for a complete vegetarian meal, alongside grilled Chicken Breasts marinated in lime and chili, or even as the base for a quick burrito bowl with some shredded lettuce, salsa, and a dollop of sour cream. My family also adores it with simple pan-seared tilapia; the flavors just complement each other so well. I’ve even served it with leftover shredded rotisserie chicken mixed in, turning it into a quick one-pot meal that my kids devour!
Top Tips for Perfecting Your Spanish Rice
I’ve made this Spanish rice recipe countless times, and through the years, I’ve picked up a few tricks that really make a difference. For starters, the **rice itself** is key. Using long-grain white rice is non-negotiable for me. Brands like Basmati or Jasmine work beautifully because their starches are less prone to making the rice gummy. Absolutely avoid parboiled or instant rice – they just don’t yield the right texture. When you’re **toasting the rice**, don’t rush it! That golden hue and slightly toasty aroma are signs of developing nutty flavor and ensuring the grains stay separate. I usually do this for at least 3-5 minutes, just watching carefully so it doesn’t burn. For the **sautéing of the aromatics**, mince your garlic finely. I like to give it a good smash with the side of my knife first, then mince it. This helps release its flavor more effectively. If you’re adding spices like cumin or oregano, toasting them briefly with the garlic and onions really wakes them up and intensifies their aroma and taste. When it comes to the **liquid ratio**, it’s usually 1 part rice to about 1.3 cups of liquid (broth plus tomato sauce). However, always check your rice package for specific recommendations, as brands can vary slightly. Using low-sodium broth is a good idea so you can control the saltiness better. Don’t stir the rice while it’s simmering or steaming! Seriously, I know it’s tempting, but stirring breaks down the starch and makes the rice clumpy. Trust me on this one. I learned that the hard way! If you want to add vegetables like peas or corn, I’ve found that adding them frozen during the last 5-10 minutes of cooking is perfect. They thaw and cook in the steam without becoming mushy. For **flavor variations**, I sometimes add a bay leaf to the broth while it simmers, or a pinch of smoked paprika for a deeper, smoky note. You can also swap out some of the chicken broth for a bit of vegetable broth if you want a slightly lighter flavor. The **glaze** (if you’re thinking about serving it with one, though this recipe stands perfectly on its own!) is usually not part of traditional Spanish rice, but if you wanted to add a finishing touch, a drizzle of lime juice and some fresh cilantro is absolutely essential for me. It brightens everything up beautifully.
Storing and Reheating Tips
The best part about this Spanish rice is how well it stores and reheats. If you have any leftovers (which is rare in my house!), let it cool down completely before storing. For **room temperature storage**, I’d say it’s best enjoyed within a couple of hours; it’s not ideal to leave rice out for too long. When it comes to **refrigerator storage**, this is where it shines. Transfer the cooled rice to an airtight container. It should keep well for 3-4 days. I’ve found that glass containers are great for reheating as they distribute heat evenly. For **freezer instructions**, you can absolutely freeze this Spanish rice! Let it cool completely, then portion it into freezer-safe containers or heavy-duty freezer bags. It will last for about 2-3 months. Make sure to remove as much air as possible from the bags to prevent freezer burn. When you’re ready to reheat, the best way is often to gently warm it on the stovetop over low heat with a tablespoon or two of water or broth, stirring occasionally until heated through. This helps rehydrate the grains. You can also reheat it in the microwave, covered, in 30-second intervals, stirring between each, until it’s hot. For the **glaze timing**, if you are planning on serving with a lime and cilantro dressing, I’d recommend adding that fresh just before serving, whether it’s a leftover portion or a newly made batch. The fresh herbs and citrus are best enjoyed immediately.
Frequently Asked Questions
Final Thoughts
So there you have it, my absolute favorite Spanish rice recipe! It’s a dish that’s close to my heart, and I truly hope it becomes a beloved part of your cooking repertoire too. It’s more than just rice; it’s about comfort, family, and the simple joy of a delicious, home-cooked meal. The way the flavors meld together, the satisfying texture, and its incredible versatility make it a true kitchen hero. If you love this recipe, you might also enjoy my recipe for authentic Mexican red beans or my quick and easy chicken fajitas, as they pair wonderfully. Give this Spanish rice a try, and I promise, you won’t be disappointed. I can’t wait to hear how yours turns out in the comments below – and please, share any variations or family twists you come up with! Happy cooking, my friends!
Spanish rice recipe
Ingredients
Main Ingredients
- 1.5 cup long-grain white rice
- 2 cup chicken broth
- 1 can diced tomatoes 14.5 ounce can, undrained
- 0.5 cup onion chopped
- 0.5 cup green bell pepper chopped
- 2 tablespoon olive oil
- 1 teaspoon chili powder
- 0.5 teaspoon cumin
- 0.25 teaspoon garlic powder
- 0.5 teaspoon salt
- 0.25 teaspoon black pepper
Instructions
Preparation Steps
- Heat olive oil in a large pot or Dutch oven over medium heat.
- Add chopped onion and green bell pepper. Cook until softened, about 5-7 minutes.
- Stir in the rice, chili powder, cumin, garlic powder, salt, and pepper. Cook for 1-2 minutes, stirring constantly, until the rice is lightly toasted.
- Pour in the chicken broth and add the can of diced tomatoes (undrained). Stir to combine.
- Bring the mixture to a boil, then reduce heat to low, cover, and simmer for 20-25 minutes, or until the rice is tender and the liquid is absorbed.
- Remove from heat and let stand, covered, for 5 minutes before fluffing with a fork.