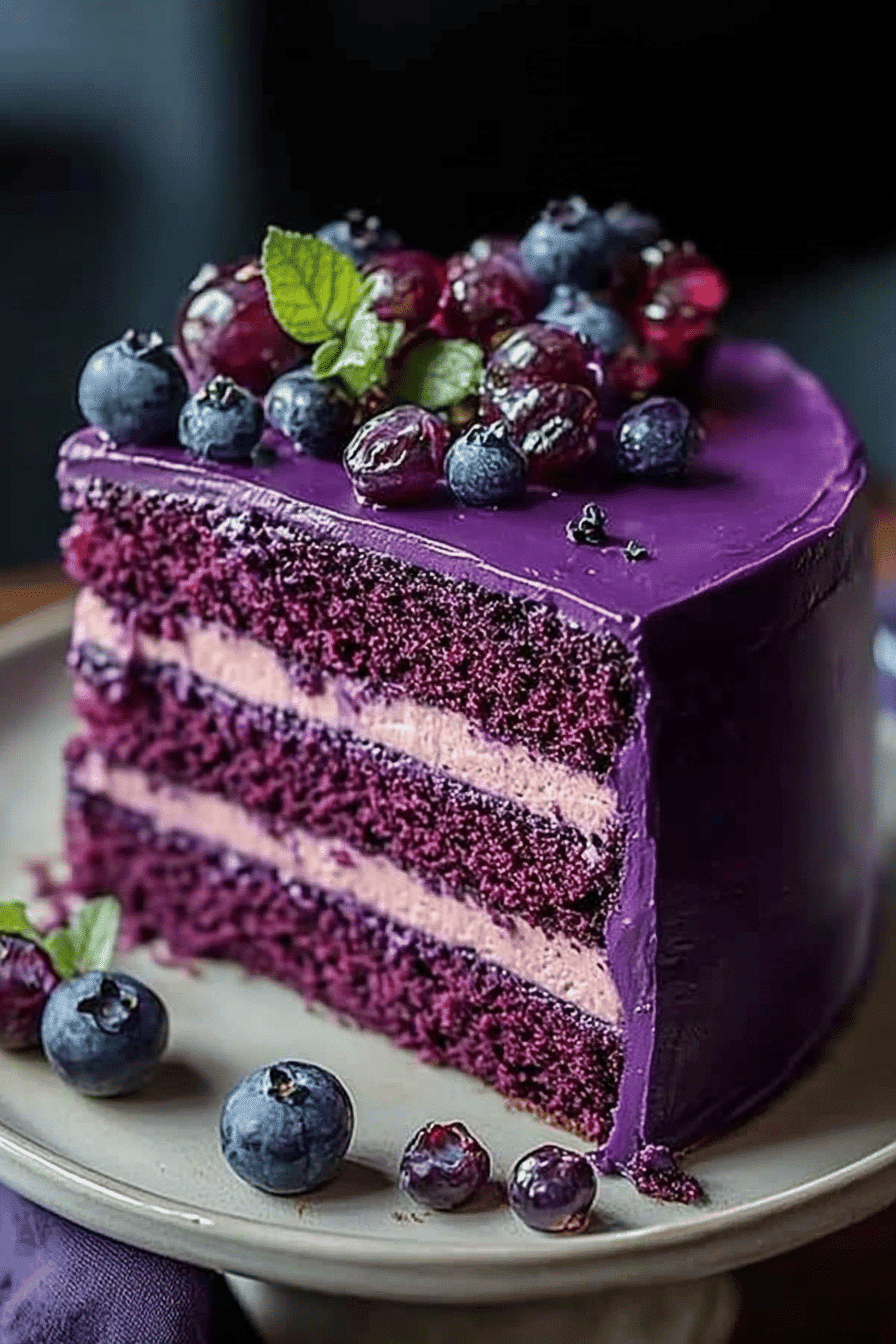
Oh, this purple velvet cake… it’s one of those recipes that just feels like a warm hug. Every time I pull it out of the oven, the whole house fills with this incredible aroma, and I instantly think of cozy Sunday afternoons when I was a kid. My grandma used to make a Red Velvet cake that was legendary, but for me, this purple velvet cake is something special. It’s got that same tender crumb and rich flavor profile, but with a vibrant twist that just makes you smile. If you’re looking for a cake that’s both stunning and ridiculously delicious, something that feels like a special occasion but is surprisingly doable on a weeknight, then you’ve landed in the right spot. It’s like a dream come true for anyone who loves a good cake, and honestly, it rivals even the fanciest bakery versions.

What is purple velvet cake?
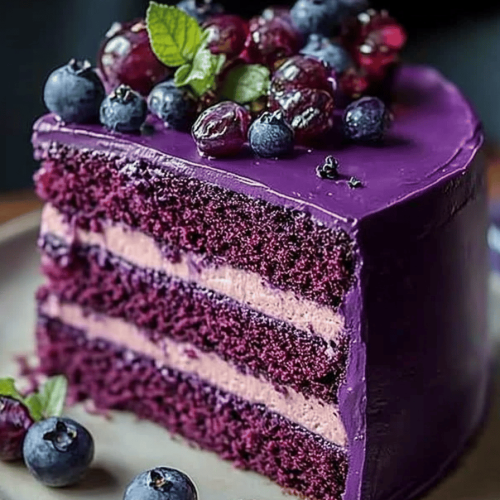
So, what exactly is this “purple velvet cake”? Think of it as the sophisticated, slightly playful cousin of the classic red velvet. It’s essentially a wonderfully moist and tender cake that gets its signature hue from a touch of purple food coloring and sometimes, if you’re feeling extra fancy, a hint of natural coloring like ube or blueberry extract. The “velvet” part comes from the super fine, smooth texture that you get from using cake flour and the perfect balance of ingredients. It’s not just about the color, though! It has this subtle tang from buttermilk and a whisper of cocoa that deepens the flavor without making it taste overwhelmingly chocolatey. It’s a cake that’s meant to be enjoyed, savored, and shared. It’s the kind of dessert that makes people ooh and aah before they even take a bite, and trust me, the taste delivers on that initial wow factor.
Why you’ll love this recipe?
I just know you’re going to fall head over heels for this purple velvet cake, and here’s why. First off, the flavor is absolutely out of this world. It’s not overly sweet, which I love. The cake itself has this delicate, almost floral note from the vanilla, a slight tang from the buttermilk that keeps it light and moist, and just a hint of cocoa powder that adds depth. It’s perfectly balanced. Then there’s the texture – it’s impossibly tender and smooth, truly like velvet. It literally melts in your mouth.
And don’t even get me started on how surprisingly easy it is to make! I used to think cakes like this were reserved for master bakers, but this recipe is so straightforward. You mix the dry, mix the wet, combine them, and voila! No complicated steps, no weird ingredients you can’t find at your local grocery store. This is a lifesaver on busy nights when you need a guaranteed crowd-pleaser.
Plus, it’s incredibly cost-efficient. The ingredients are all pantry staples, making it an affordable way to impress your friends and family. And talk about versatile! While it’s divine on its own, it’s also amazing with a simple Cream Cheese frosting, a light vanilla buttercream, or even just a dusting of powdered sugar. It’s like a blank canvas for your sweet creations. Compared to other specialty cakes, this purple velvet cake gives you maximum impact with minimal fuss and expense. What I love most about this recipe is that it makes me feel like a baking rockstar every single time, without any of the stress. It’s that perfect balance of looking impressive and being totally achievable for any home cook.
How do I make purple velvet cake?
Quick Overview
Making this purple velvet cake is a breeze! We’re talking about a simple two-bowl method. You’ll whisk your dry ingredients together in one bowl, your wet ingredients (including that beautiful purple hue!) in another, and then gently combine them until just mixed. That’s it for the cake batter! We’ll then bake it until it’s perfectly tender, let it cool, and then whip up a quick, dreamy glaze to pour over the top. The whole process feels really manageable, and the results are always stunning. You don’t need any fancy equipment, just your usual kitchen tools. It’s designed to be foolproof, so you can focus on enjoying the process and the delicious outcome.
Ingredients
For the Main Batter:
You’ll need all-purpose flour, but if you want that extra tender crumb, I highly recommend using cake flour. It makes a noticeable difference! Make sure it’s sifted for the lightest texture. Granulated sugar for sweetness, unsweetened cocoa powder – just a little bit to give it that depth without making it a chocolate cake. Baking soda and baking powder for lift, salt to balance the flavors. Then for the wet ingredients: unsalted butter, softened so it creams beautifully. Eggs, which add richness and structure. Vanilla extract for that classic cozy flavor. Buttermilk is key here; it reacts with the baking soda to give us that amazing tender crumb and slight tang. And of course, our star: good quality purple food coloring. I usually use gel coloring as it’s more concentrated, so you don’t need much to get a vibrant shade without watering down the batter. You can experiment with natural purple extracts too, like ube, but sometimes they can alter the flavor profile slightly.
For the Filling:
For a simple yet elegant filling, I often opt for a luscious cream cheese frosting. You’ll need cream cheese, softened to room temperature (this is crucial for a smooth frosting!), unsalted butter, also softened, powdered sugar that’s been sifted to avoid lumps, and a splash of vanilla extract. Some people like a thinner filling, almost like a custard, and for that, you could easily make a simple vanilla pudding or a pastry cream. For this particular recipe, the cream cheese frosting is my go-to because it complements the cake’s subtle sweetness so perfectly.
For the Glaze:
A simple glaze is what really seals the deal and makes this cake look extra special. We’ll use powdered sugar, again sifted for smoothness. A little bit of milk or heavy cream to get the right consistency – start with a tablespoon and add more as needed. Vanilla extract for flavor. And for that extra touch of purple magic, you can add a tiny drop of purple food coloring if you want the glaze to match the cake perfectly, or keep it white for a lovely contrast. The trick with the glaze is to get it to a pourable but not too thin consistency. You want it to drizzle beautifully down the sides without running off completely.

Step-by-Step Instructions
Step 1: Preheat & Prep Pan
First things first, let’s get our oven ready. Preheat it to 350 degrees Fahrenheit (175 degrees Celsius). While that’s heating up, grab your cake pans. I usually use two 8-inch round pans. Grease them generously with butter or non-stick spray, and then lightly dust them with flour or cocoa powder, tapping out any excess. This step is super important to prevent your beautiful cake from sticking. Some people like to line the bottom with parchment paper circles, which is an extra step but guarantees easy release. I learned this trick after a few cakes got stuck when I was younger – never again!
Step 2: Mix Dry Ingredients
In a large bowl, whisk together your flour (I always use cake flour if I have it for that extra tender crumb!), granulated sugar, cocoa powder, baking soda, baking powder, and salt. Whisking them together really well ensures that all the leavening agents and salt are evenly distributed, which means your cake will rise evenly and have a consistent flavor. Make sure there are no lumps of cocoa powder hiding in there. It should look like a uniform, pale brown mixture.
Step 3: Mix Wet Ingredients
In a separate medium bowl, cream together the softened butter and granulated sugar until light and fluffy. This is where you incorporate air, which helps make the cake tender. Next, beat in the eggs one at a time, making sure each is fully incorporated before adding the next. Then, stir in the vanilla extract and your purple food coloring. I like to add the food coloring with the wet ingredients so it distributes evenly. Start with a few drops and add more until you achieve your desired vibrant purple shade. It’s so satisfying to see that color come to life!
Step 4: Combine
Now, we’re going to combine the wet and dry ingredients. Alternately add the dry ingredients and the buttermilk to the butter mixture, beginning and ending with the dry ingredients. So, add about a third of the dry ingredients, mix until just combined, then add half of the buttermilk, mix, then another third of the dry, mix, the remaining buttermilk, mix, and finally the last of the dry ingredients. Mix until *just* combined. It’s really important not to overmix here! Overmixing develops the gluten in the flour, which can lead to a tough cake. A few streaks of flour are okay; they’ll disappear as the cake bakes. The batter should be smooth and a beautiful vibrant purple.
Step 5: Prepare Filling
While the cake layers are baking, let’s whip up that dreamy cream cheese filling. In a medium bowl, beat the softened cream cheese and softened butter together until they are super smooth and creamy. There should be no lumps! Gradually add the sifted powdered sugar, mixing on low speed at first (to avoid a powdered sugar cloud) until it’s all incorporated. Add the vanilla extract and beat on medium-high speed until light and fluffy. If it’s too thick, you can add a tiny splash of milk or cream. If it’s too thin, add a bit more powdered sugar. You want it spreadable but not runny.
Step 6: Layer & Swirl
Once the cakes are baked and have cooled in their pans for about 10-15 minutes, gently invert them onto a wire rack to cool completely. This is crucial; trying to frost a warm cake is a recipe for disaster! Once they’re fully cooled, place one cake layer on your serving plate or cake stand. Spread a generous layer of the cream cheese filling evenly over the top. Then, carefully place the second cake layer on top. If you want to create a swirl effect on the top, you can do that with the frosting, or you can simply frost it smoothly.
Step 7: Bake
Bake the cakes for about 30-35 minutes, or until a wooden skewer or toothpick inserted into the center comes out clean. Ovens can vary, so keep an eye on them. If the tops start to brown too quickly, you can loosely tent them with foil. The smell that fills your kitchen during this stage is just heavenly – pure comfort!
Step 8: Cool & Glaze
After the cakes are baked, let them cool in the pans for about 10-15 minutes before inverting them onto a wire rack to cool completely. Trying to frost a warm cake is a disaster waiting to happen, trust me on this! While the cakes are cooling, prepare the glaze. In a small bowl, whisk together the sifted powdered sugar, milk (or cream), and vanilla extract. Add the food coloring if you’re using it. Whisk until smooth and you have a nice drizzly consistency. It should be thick enough to coat the back of a spoon but thin enough to pour. Once the cakes are completely cool, drizzle the glaze over the top, letting it drip down the sides.
Step 9: Slice & Serve
Once the glaze has set slightly, it’s time to slice into this beauty! Use a sharp knife for clean cuts. The inside should reveal that gorgeous purple hue and a soft, moist crumb. Serve at room temperature for the best flavor and texture. It’s perfect on its own, but a little dollop of whipped cream or a scoop of vanilla ice cream never hurt anyone!
What to Serve It With
This purple velvet cake is so versatile, it’s a welcome guest at any gathering! For a delightful breakfast treat, I love pairing a slice with a strong cup of black coffee or a creamy latte. The richness of the cake is a lovely contrast to a bold coffee.
When it comes to brunch, it’s practically a showstopper. Imagine serving a slice alongside fresh berries and a glass of sparkling rosé or a mimosa. The vibrant purple color just screams celebration, and it looks stunning on a brunch spread. It’s elegant without being fussy.
As a dessert, well, it’s in its natural habitat! It’s divine served after a hearty meal. I often pair it with a raspberry coulis for a pop of tartness, or a rich chocolate ganache for those who really want to indulge. A scoop of good quality vanilla bean ice cream is also a classic for a reason – the contrast in temperature and flavor is sublime.
And for those cozy, quiet evenings when you just need something sweet, this cake is perfect. It’s comforting and satisfying. Enjoy it with a warm cup of herbal tea or a glass of milk. My kids, bless their hearts, always ask for seconds of this cake, especially when they see that beautiful purple color. It’s a simple pleasure that always brings smiles to our table.
Top Tips for Perfecting Your Purple Velvet Cake
After making this purple velvet cake countless times, I’ve picked up a few tricks that really make a difference.
Zucchini Prep: Wait, zucchini? Oh, I am so sorry! I think my brain went to my other favorite recipe. For THIS purple velvet cake, the key is really in the Flour and Leavening. Make sure your cake flour is fresh. If you only have all-purpose flour, you can make it work by spooning it into the measuring cup and leveling it off, rather than scooping directly. Also, ensure your baking soda and baking powder are not expired; they are crucial for that tender, velvety texture.
Mixing Advice: The biggest mistake people make is overmixing the batter. Once the wet and dry ingredients are combined, just mix until you don’t see any dry flour streaks. A few tiny lumps are fine! Overmixing will develop the gluten and result in a tough, dense cake, which is the opposite of velvet! I always stop mixing as soon as it looks *just* combined.
Swirl Customization: While this recipe doesn’t have a swirl pattern in the batter itself, if you’re getting fancy with your filling or glaze, the key is to work quickly and not over-manipulate. For swirls in frosting, use a spatula to create gentle motions. For the glaze, let it set for a few minutes before drizzling to ensure it’s not too runny and creates defined lines.
Ingredient Swaps: Buttermilk is ideal, but if you don’t have any, don’t fret! You can make a quick substitute by adding 1 tablespoon of white vinegar or lemon juice to 1 cup of milk and letting it sit for 5-10 minutes. It will curdle slightly and act just like buttermilk. For the food coloring, gel is best for vibrancy without affecting the batter consistency. If you’re using liquid, you might need more, but be cautious not to add too much as it can alter the flavor and texture.
Baking Tips: Always preheat your oven properly. I use an oven thermometer to ensure my oven is actually at the temperature it says it is. Place your cake pans in the center of the oven for even baking. If your oven tends to have hot spots, you might need to rotate the pans halfway through baking. For doneness, the toothpick test is your best friend. Make sure it comes out clean, with no wet batter attached. A few moist crumbs are okay, but not wet batter!
Glaze Variations: The beauty of this glaze is its simplicity. If it’s too thick, add a teaspoon of milk at a time until it reaches your desired drizzle consistency. If it’s too thin, add more sifted powdered sugar a tablespoon at a time. For a tangier glaze, you can use cream cheese instead of milk, creating a more frosting-like consistency. You could also add a bit of lemon zest or a different extract like almond for a unique flavor twist.
Storing and Reheating Tips
Proper storage is key to keeping this delicious purple velvet cake tasting its best.
Room Temperature: If your cake is frosted with a buttercream or cream cheese frosting and you plan to eat it within a day or two, it’s perfectly fine to store it at room temperature. Make sure it’s covered well with a cake dome or plastic wrap to prevent it from drying out. It stays wonderfully moist for about 2-3 days this way.
Refrigerator Storage: For longer storage, or if you live in a warm climate, the refrigerator is your best bet. Store the cake in an airtight container or tightly wrapped in plastic wrap. It can last for about 4-5 days in the fridge. When you’re ready to serve it after refrigeration, I always recommend letting it sit out at room temperature for about 20-30 minutes before slicing. This allows the frosting and cake to soften up to their optimal texture and flavor.
Freezer Instructions: This cake freezes surprisingly well! If you need to store it for a longer period, either unfrosted or fully frosted, wrap it tightly in a layer of plastic wrap, followed by a layer of aluminum foil. It can be kept in the freezer for up to 2-3 months. To thaw, remove the foil and plastic wrap and let it thaw slowly in the refrigerator overnight. Then, bring it to room temperature as mentioned above before serving.
Glaze Timing Advice: If you’re freezing the cake, it’s often best to freeze it unfrosted and then make the glaze fresh when you’re ready to serve. However, if it’s frosted, the glaze should hold up okay in the freezer. If you’re storing it at room temperature or in the fridge, apply the glaze just before serving for the best appearance and texture.
Frequently Asked Questions
Final Thoughts

There you have it – my beloved purple velvet cake! It’s more than just a dessert; it’s a little piece of joy that brings color and smiles to any table. I truly hope you give this recipe a try. It’s proof that you don’t need to be a pastry chef to create something truly spectacular. The tender crumb, the subtle, delightful flavor, and of course, that gorgeous purple hue make it a winner every single time. If you loved this cake, you might also enjoy my Chocolate Raspberry Swirl Cake or my Lemon Blueberry Loaf for more colorful and delicious baking adventures.
I can’t wait to hear how your purple velvet cake turns out! Please share your thoughts, any creative twists you tried, or just how much everyone loved it in the comments below. Your feedback and photos always make my day!
Happy baking, friends!
Purple Velvet Cake
Ingredients
Cake Ingredients
- 3 cups all-purpose flour
- 2 cups granulated sugar
- 0.75 cup unsweetened cocoa powder
- 2 teaspoons baking soda
- 1 teaspoon salt
- 2 large eggs
- 1 cup buttermilk
- 0.5 cup vegetable oil
- 2 teaspoons vanilla extract
- 0.25 cup purple food coloring gel or liquid
- 1 tablespoon white vinegar
Cream Cheese Frosting Ingredients
- 1 cup unsalted butter, softened
- 8 ounces cream cheese, softened
- 4 cups powdered sugar
- 2 teaspoons vanilla extract
- 1 tablespoon milk or cream optional, for consistency
Instructions
Cake Preparation
- Preheat oven to 350°F (175°C). Grease and flour two 9-inch round cake pans.
- In a large bowl, whisk together flour, sugar, cocoa powder, baking soda, and salt.
- In a separate bowl, whisk together eggs, buttermilk, oil, and vanilla extract. Add the purple food coloring and whisk until evenly combined.
- Add the wet ingredients to the dry ingredients and mix until just combined. Do not overmix.
- In a small bowl, stir together the white vinegar and 0.5 cup of hot water. The mixture will fizz.
- Gently fold the vinegar mixture into the cake batter.
- Pour the batter evenly into the prepared cake pans.
- Bake for 30-35 minutes, or until a wooden skewer inserted into the center comes out clean.
- Let the cakes cool in the pans for 10 minutes before inverting them onto a wire rack to cool completely.
Frosting Preparation
- In a large bowl, beat together the softened butter and cream cheese until smooth and creamy.
- Gradually add the powdered sugar, beating until well combined and smooth. Add vanilla extract.
- If the frosting is too thick, add milk or cream, 1 tablespoon at a time, until desired consistency is reached.
Assembly
- Once the cakes are completely cool, place one cake layer on a serving plate. Spread a layer of frosting over the top.
- Top with the second cake layer and frost the top and sides of the entire cake.
- Decorate as desired. Chill until ready to serve.