You know those days when a serious craving hits, the kind that whispers “cake, now!” but the thought of preheating the oven, measuring flour, and waiting feels like climbing Mount Everest? Yeah, I have those days more often than I’d like to admit! That’s precisely why this no bake coconut cake recipe is my absolute holy grail. It’s ridiculously simple, comes together in a flash, and tastes like a warm hug on a cool evening. Forget those fussy layered cakes that take hours; this is your shortcut to pure, unadulterated coconut bliss. It’s honestly so easy that even my little niece, who’s more interested in sprinkles than stirring, can help make it. If you’ve ever loved a classic pound cake or a rich chocolate Sheet Cake, prepare to fall head over heels for this tropical delight. It’s a true lifesaver for last-minute guests or when you just need a little sweet something without the fuss.
What is no bake coconut cake?
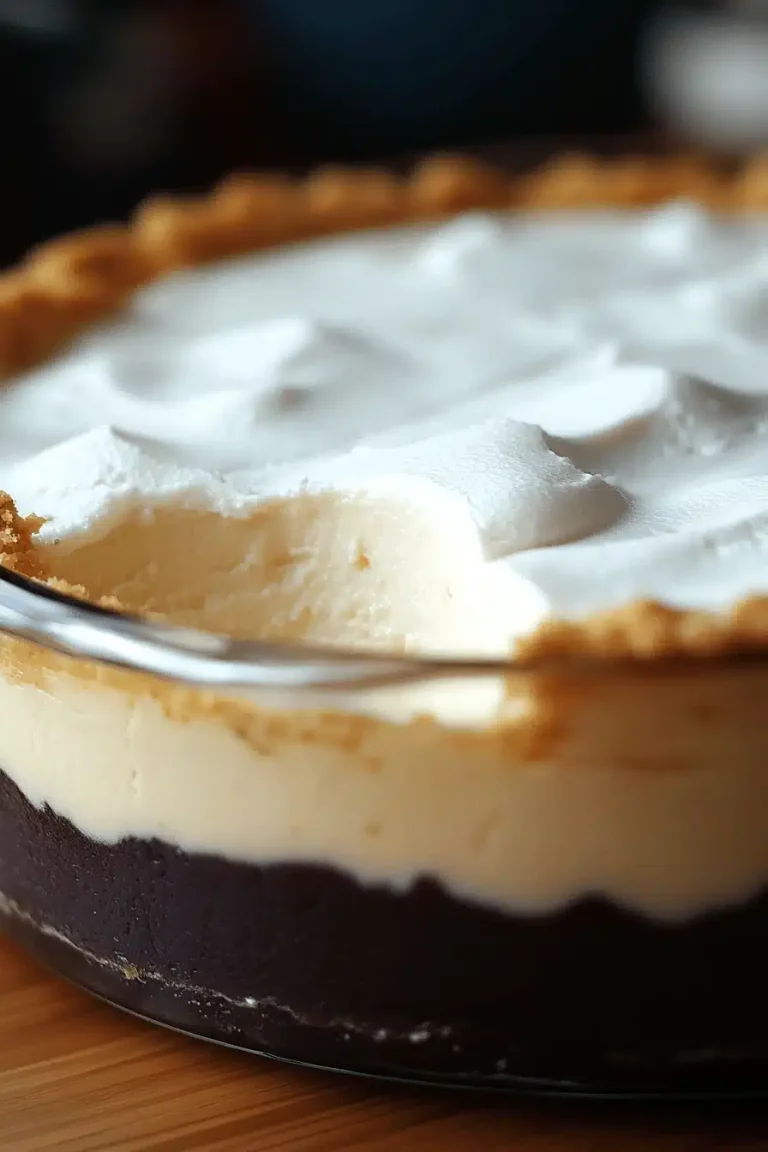
So, what exactly *is* this magical no bake coconut cake? Think of it as a delightful deconstructed cake, but in the best possible way. Instead of baking, we’re creating a wonderfully creamy, coconut-infused filling that’s held together by a simple, crushed cookie or graham cracker crust. It’s essentially a luscious, no-fuss cheesecake meets pudding meets cake hybrid, all starring that irresistible tropical flavor of coconut. There’s no oven involved, which means no worrying about cracking or overbaking. The “cake” part comes from the creamy texture and the fact that it’s served in cake-like portions, often topped with whipped cream and toasted coconut flakes. It’s the kind of dessert that feels fancy enough for a special occasion but is so incredibly easy you’ll want to whip it up on a Tuesday just because. It’s a celebration of coconut in its simplest, most delicious form.
Why you’ll love this recipe?
There are so many reasons why this no bake coconut cake has become a staple in my kitchen, and I just know you’re going to fall in love with it too. First off, the flavor is absolutely divine. It’s this perfect harmony of sweet, creamy coconut that’s both comforting and a little bit exotic. It’s not overly sweet, which I really appreciate – you can really taste the coconut goodness without it being cloying. Then there’s the simplicity. Seriously, if you can crush a cookie and stir a few things together, you can make this. It takes mere minutes to assemble, and then it just chills in the fridge doing its thing. This is a lifesaver on busy nights when the dessert mood strikes unexpectedly! And let’s talk about cost-efficiency. The ingredients are super budget-friendly, making it an easy way to impress without breaking the bank. Plus, it’s incredibly versatile. I often find myself tweaking it based on what I have on hand, adding a splash of rum or a bit of lime zest for a different twist. What I love most, though, is the pure joy it brings. It’s the kind of dessert that makes people close their eyes and smile with the first bite. It’s so much easier than many traditional cakes, and in my opinion, often just as satisfying, if not more so, when you’re craving that pure coconut flavor without the effort. It’s a true crowd-pleaser that always gets rave reviews!
How do I make no bake coconut cake?
Quick Overview
This no bake coconut cake is all about minimal effort for maximum flavor. We’re talking about a simple crushed cookie crust, a dreamy, creamy coconut filling, and a luscious glaze to finish it off. You’ll mix up the crust, press it into your pan, then whip together the filling ingredients until smooth and decadent. Pour that over the crust, chill until firm, and then top with a sweet glaze. It’s so straightforward, it’s almost therapeutic after a long day. The best part? No oven required, meaning it’s a perfect make-ahead option and ideal for those hot summer days when you don’t want to turn on the stove.
Ingredients
For the Crust:
2 cups finely crushed graham crackers or vanilla wafers (about 10-12 full graham crackers or 24-30 wafers) – Make sure they’re crushed really fine, almost like sand! This helps it hold together well. You can use a food processor for this, or just pop them in a zip-top bag and go to town with a rolling pin. My kids love this part!
1/2 cup unsalted butter, melted – Don’t skimp on the butter; it’
2 tablespoons granulated sugar – Just a little sweetness to complement the coconut.
For the Filling:
1 (8 ounce) package Cream Cheese, softened to room temperature – This is key for a super smooth filling. If it’s too cold, you’ll get lumps, and nobody wants lumpy cake!
1 (14 ounce) can sweetened condensed milk – This is what makes it wonderfully sweet and creamy without needing any extra sugar.
1 cup full-fat coconut milk (from a can, NOT the carton you drink) – This is where all that lovely coconut flavor comes from. Shake the can well before opening and make sure it’s the full-fat kind for the best texture.
1/2 cup shredded sweetened coconut, plus more for topping – I love using the sweetened kind for extra flavor, but if you prefer less sweet, you can use unsweetened and maybe add a touch more sugar to the filling.
1 teaspoon vanilla extract – A classic for a reason, it enhances all the other flavors.
1/4 teaspoon salt – Just a pinch to balance the sweetness.
For the Glaze:
1 cup powdered sugar – Sifted is best to avoid lumps.
2-3 tablespoons coconut milk or heavy cream – You want to achieve a pourable, but not too thin, consistency. Add it a tablespoon at a time.
1/2 teaspoon vanilla extract – For a little extra flavor boost.
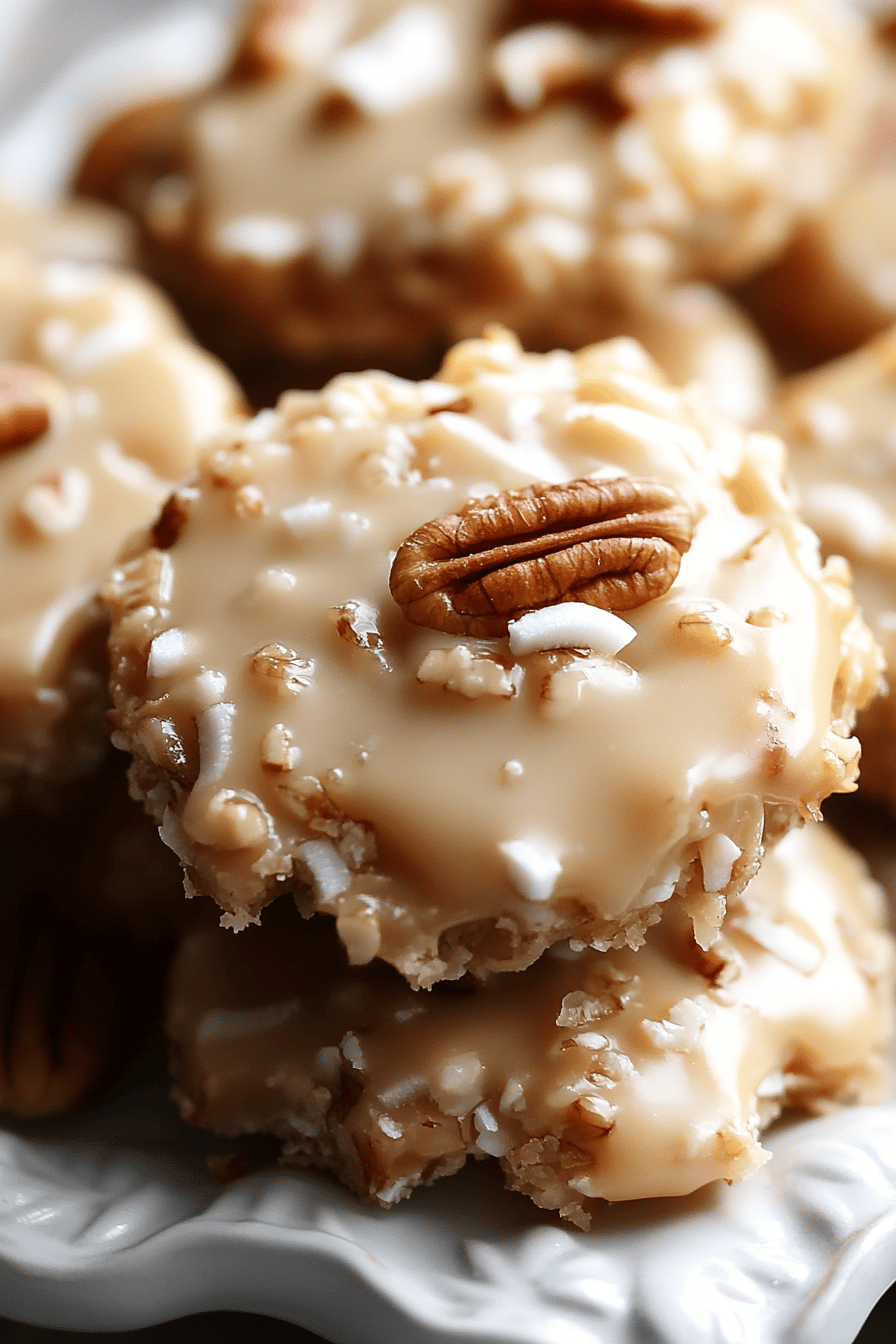
Optional: Toasted coconut flakes for garnish – This is a MUST in my book for texture and visual appeal!
Step-by-Step Instructions
Step 1: Preheat & Prep Pan
Grab an 8×8 inch or 9-inch round baking dish or springform pan. While this isn’t getting baked, you still want to prep your pan. Lightly grease it with a bit of cooking spray or butter. This will help the cake slide out cleanly later. Set it aside.
Step 2: Mix Dry Ingredients
In a medium bowl, combine your finely crushed graham crackers or vanilla wafers, granulated sugar, and melted butter. Stir everything together until all the crumbs are moistened and the mixture resembles wet sand. This is your crust base!
Step 3: Mix Wet Ingredients
In a separate large bowl, beat the softened cream cheese with an electric mixer until it’s completely smooth and creamy. This is super important to avoid any lumps. Then, gradually beat in the sweetened condensed milk until well combined.
Step 4: Combine
Add the full-fat coconut milk, shredded sweetened coconut, vanilla extract, and salt to the cream cheese mixture. Beat on low speed until just combined and smooth. Be careful not to overmix at this stage; we want a lovely, thick, creamy consistency. Give it a little taste – if you’re feeling bold, this is where you could add a tiny pinch more salt if needed!
Step 5: Prepare Filling
You’ve already prepared the filling in Step 4! It should be thick, creamy, and wonderfully fragrant with coconut. The goal here is a smooth, luscious texture that will set up beautifully in the fridge. If it seems a little too stiff, you can add another tablespoon of coconut milk, but be cautious not to make it too runny.
Step 6: Layer & Swirl
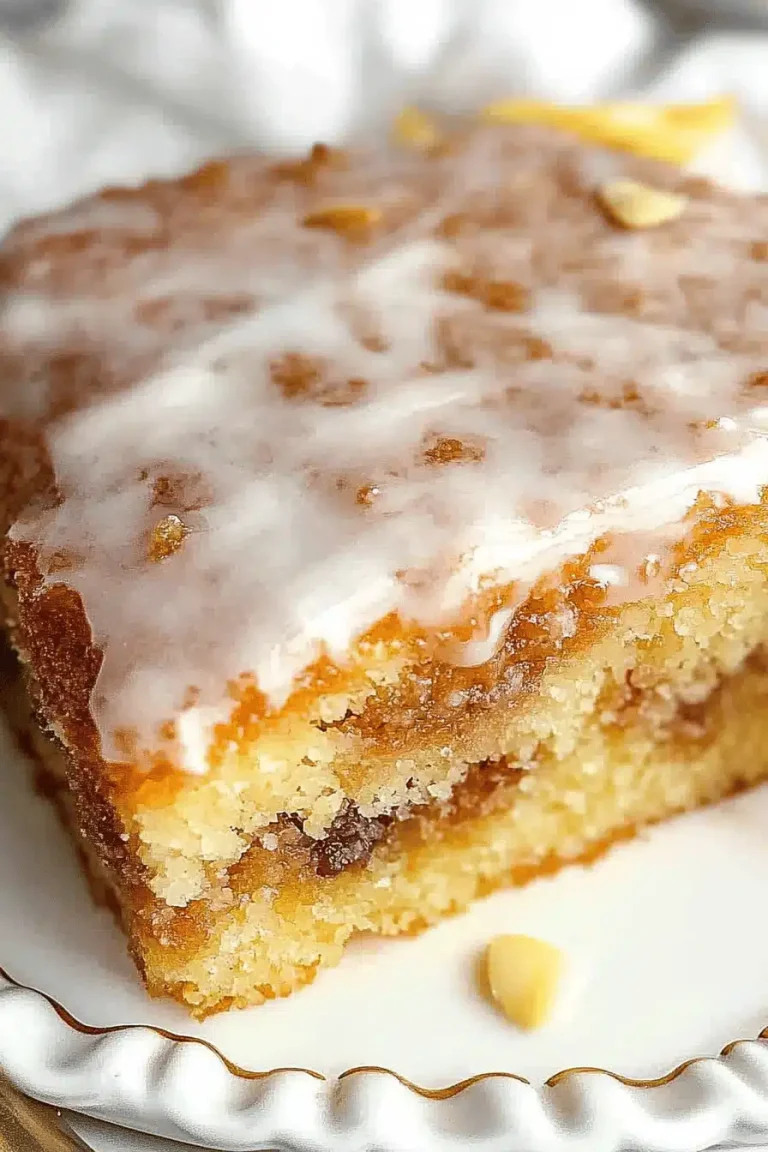
Press the crumb mixture evenly into the bottom of your prepared baking dish or pan. Use the bottom of a glass or a measuring cup to get it nice and compact. Then, pour the creamy coconut filling over the crust, spreading it evenly with a spatula. For an extra touch, sprinkle some extra shredded coconut over the top before chilling, or save it all for garnish later.
Step 7: Bake
This step is the easiest part – there’s no baking! Just cover the pan tightly with plastic wrap or a lid and place it in the refrigerator. You’ll want to chill it for at least 4-6 hours, or preferably overnight, until the filling is firm and set.
Step 8: Cool & Glaze
Once the cake is firm and ready to go, take it out of the fridge. In a small bowl, whisk together the powdered sugar, 2 tablespoons of coconut milk (or cream), and vanilla extract until smooth and pourable. If it’s too thick, add another tablespoon of liquid until you reach your desired drizzling consistency. Drizzle this glaze over the top of the chilled cake. If you like, sprinkle toasted coconut flakes over the glaze while it’s still wet.
Step 9: Slice & Serve
Let the glaze set for about 10-15 minutes. Then, carefully slice the no bake coconut cake into squares or wedges. I find a sharp knife dipped in hot water and wiped dry between cuts gives the cleanest slices. Serve immediately and watch it disappear!
What to Serve It With
This no bake coconut cake is wonderfully adaptable, making it perfect for any meal or occasion. For a simple breakfast treat, a small slice paired with your morning coffee is pure bliss. The subtle sweetness and creamy texture are just the thing to ease into the day. If you’re planning a weekend brunch, elevate it by serving it alongside fresh berries like raspberries or blueberries. The tartness of the berries cuts through the richness of the cake beautifully. For a more elegant presentation, plate a slice with a dollop of whipped cream and a few extra toasted coconut flakes. As a dessert, it’s fantastic on its own, but it also pairs wonderfully with a scoop of vanilla bean Ice Cream or a light fruit sorbet. My family’s favorite way to enjoy it as a dessert is with a dusting of extra powdered sugar and a side of fresh, juicy pineapple. For cozy snacks, especially on a warm afternoon, a generous slice with a tall glass of iced tea or even a cold glass of almond milk is incredibly satisfying and refreshing. I’ve even had friends serve it with a tiny drizzle of caramel sauce when they want to get extra fancy, and it was divine! It’s truly a dessert that plays well with others and stands beautifully on its own.
Top Tips for Perfecting Your No Bake Coconut Cake
Over the years, I’ve learned a few tricks that really make this no bake coconut cake shine. When it comes to the crust, crushing your graham crackers or cookies *really* finely is key. If they’re too chunky, the crust can be crumbly. I usually pulse mine in a food processor until they’re like coarse sand. Don’t be afraid to really pack that crust down into the pan; a dense crust means less chance of it falling apart when you slice. For the filling, the most crucial step is ensuring your cream cheese is truly at room temperature. Cold cream cheese will lead to lumps, no matter how hard you beat it. I’ve learned to leave it out for at least an hour, sometimes two, especially in a cooler kitchen. When mixing the wet and dry ingredients for the filling, mix until *just* combined. Overmixing can sometimes make the filling a little too soft or even slightly gummy, and we want that perfect, smooth, firm texture that holds its shape. If you’re not a fan of the pre-made glaze, I’ve experimented a lot with alternatives. A simple dusting of powdered sugar is lovely, or you could make a quick ganache with white chocolate and coconut milk for a richer topping. My kids love it when I swirl a tablespoon of jam, like raspberry or strawberry, into the coconut filling just before pouring it into the crust – it adds a lovely fruity dimension and a beautiful visual pop! Regarding chilling, patience is a virtue here. While 4-6 hours will work in a pinch, letting it chill overnight is truly the best way to ensure it’s perfectly firm and easy to slice. Rushing this step is the number one mistake people make. If you’re looking to add extra coconut flavor without extra sugar, consider adding a teaspoon of coconut extract to the filling – just be careful, it’s potent!
Storing and Reheating Tips
Storing this delicious no bake coconut cake is usually straightforward, as it’s meant to be kept chilled anyway. If you have any leftovers (which is rare in my house!), they’ll keep perfectly at room temperature for about 2 hours, but after that, it’s best to get it into the fridge. For refrigerator storage, make sure it’s well-covered with plastic wrap or in an airtight container. It will stay wonderfully fresh and delicious for about 3-4 days. I’ve found that the texture is actually best on the second day, after the flavors have had a chance to really meld together. If you plan to freeze this, which I’ve done successfully, it’s important to do it *before* adding the glaze. Wrap the chilled, un-glazed cake very tightly in a layer of plastic wrap, followed by a layer of aluminum foil, or place it in a freezer-safe airtight container. It can be frozen for up to 2 months. To thaw, transfer the cake from the freezer to the refrigerator overnight. Once it’s fully thawed, then you can add your glaze and any toppings. This also means you can make the cake ahead of time and just glaze it the day you plan to serve it, which is a great strategy for parties. Remember, since it’s a no-bake dessert, it’s sensitive to heat, so always store it in a cool place.
Frequently Asked Questions
Final Thoughts
Honestly, this no bake coconut cake is more than just a recipe for me; it’s a little slice of happiness that’s always there when I need it. It’s the kind of dessert that proves you don’t need hours in the kitchen or complicated techniques to create something truly delicious and impressive. The way that creamy coconut filling just melts in your mouth, paired with that slightly crisp, buttery crust – it’s just pure perfection. It’s the ultimate “craving solver” and a guaranteed crowd-pleaser that always brings smiles. If you’re a coconut lover, or even if you’re just looking for a simple, satisfying dessert that won’t heat up your kitchen, you absolutely have to give this a try. I think you’ll find yourself reaching for it time and time again, just like I do. If you enjoy this recipe, you might also love my No Bake Lemon Raspberry Cheesecake or my Quick Chocolate Mousse – they’re in a similar vein of easy, delicious, no-fuss desserts! I can’t wait to hear what you think, and if you try it, please let me know in the comments how it turned out and any fun twists you added! Happy no-baking!
no bake coconut cake
Ingredients
Main Ingredients
- 2 boxes instant vanilla pudding (3.4 oz size)
- 3 cups milk cold
- 1 tsp coconut extract
- 1 cup sweetened coconut flakes
- 2 containers whipped topping 8 oz size, thawed
- 21 pieces full-sized graham crackers
- 0.5 cup toasted coconut
Instructions
Preparation Steps
- In a large bowl, whisk together the vanilla pudding mix, milk and coconut extract for about 1 to 2 minutes until the pudding mix is dissolved and the mix has thickened.
- Add the coconut flakes and stir.
- Fold in one 8oz container of thawed whipped topping until well-mixed.
- Line the bottom of a 9x13-inch baking dish or pan with 8 to 9 graham crackers. You can break the graham crackers apart to make sure the whole bottom is covered.
- Spoon about half the pudding mixture over the graham crackers and smooth it out with a spoon or spatula.
- Layer another 8 to 9 graham crackers over the pudding mix, then cover those with the other half of the pudding mixture.
- Do one more layer of graham crackers then spread the second 8oz container of thawed whipped topping over the top.
- Refrigerate for at least 4 hours, but chilling overnight is best.
- Sprinkle the toasted coconut on top, and serve chilled.