Oh, where do I even begin with this no-bake cheesecake? It’s one of those recipes that feels like a secret weapon in my kitchen. You know those nights when a serious sweet craving hits, but the thought of turning on the oven feels like too much work? Or maybe you’ve got unexpected guests arriving and need a showstopper dessert in a hurry? This is my go-to. It’s so ridiculously simple, yet it delivers this incredibly rich, creamy, and satisfying cheesecake experience without ever needing to preheat the oven. Honestly, it rivals any baked version I’ve ever had, and the fact that it’s a no-bake cheesecake makes it a lifesaver for busy moms like me. My kids devour it, my friends rave about it, and they’re always shocked when I tell them how easy it is. It’s like magic in a springform pan, and I’m so thrilled to share it with you today.
What is no bake cheesecake?
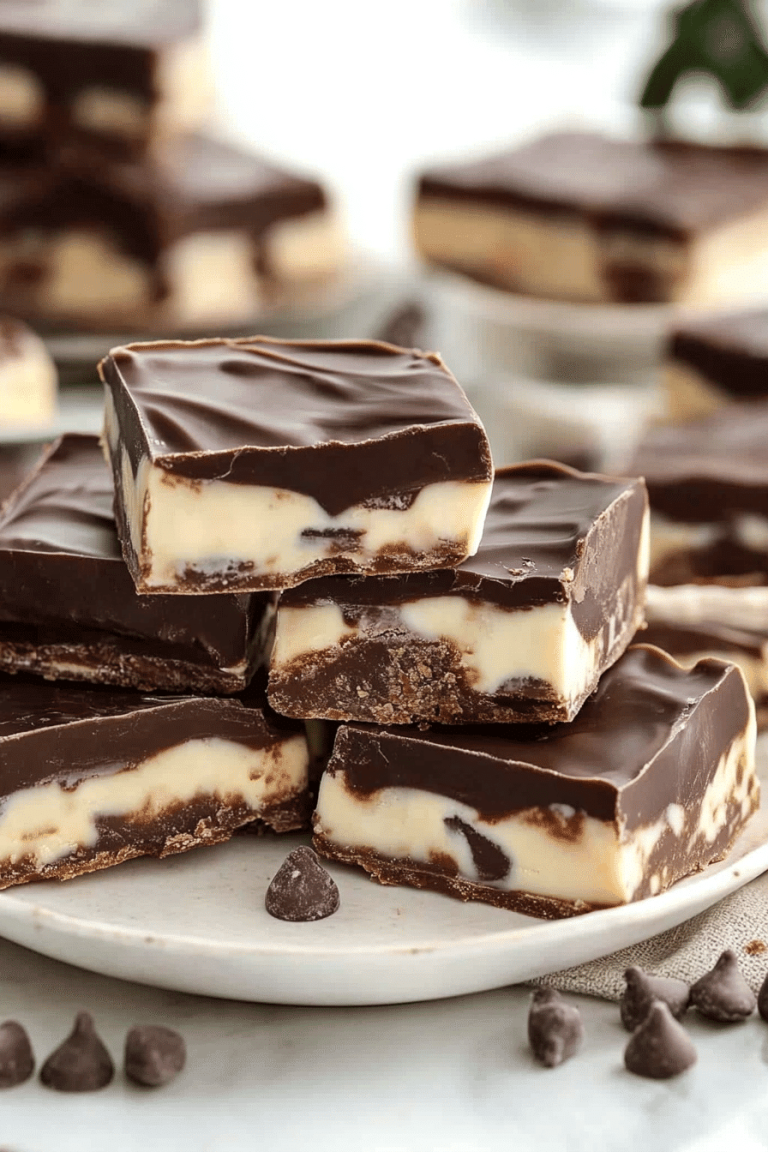
So, what exactly *is* a no-bake cheesecake? Think of it as the chill cousin to the traditional baked cheesecake. Instead of relying on eggs and an oven to set the filling, this version uses a combination of Cream Cheese, sweetened condensed milk, and sometimes a bit of heavy cream or lemon juice to create that signature thick, luscious texture. The crust is usually a simple mix of crushed cookies and butter, pressed into the pan and chilled until firm. It’s essentially a decadent dessert that skips the baking part entirely, which is pure genius, right? The name itself says it all – no oven required! It’s the ultimate in dessert convenience without sacrificing an ounce of flavor or that satisfying, creamy cheesecake bite. It’s a concept that has saved me countless times and has become a permanent fixture in my recipe rotation.
Why you’ll love this recipe?
Honestly, where do I even start with why this no-bake cheesecake is a winner? For starters, the flavor is absolutely divine. It’s got that classic tang from the cream cheese, balanced perfectly with the sweetness from the condensed milk, and a bright hint of lemon that just makes everything sing. It’s rich, it’s smooth, and it’s utterly irresistible. But the real magic? The sheer simplicity. You can whip up the crust in minutes, and the filling comes together even faster. There’s no fussing with water baths or worrying about cracks. It’s genuinely foolproof, which is a huge deal for me. And let’s talk about cost-effectiveness! The ingredients are all pantry staples or easily found at any grocery store, making it a wonderfully budget-friendly way to impress. Plus, its versatility is fantastic. Serve it plain, top it with fresh berries, drizzle with chocolate sauce, or even add a swirl of fruit puree – the possibilities are endless. What I love most about this no-bake cheesecake is that it always delivers. It’s a consistent crowd-pleaser that requires minimal effort and maximum deliciousness. It’s like the perfect shortcut to dessert heaven, and who doesn’t want that?
How do I make no bake cheesecake?
Quick Overview
This no-bake cheesecake is all about speed and simplicity. You’ll start by crushing cookies to form a buttery crust, which then gets chilled to firm up. While that’s happening, you’ll whip up a super creamy filling using just a few key ingredients. Once your crust is ready, you’ll pour in the luscious filling, give it a final chill in the refrigerator, and then it’s ready to be topped and devoured! It’s a straightforward process that takes mere minutes of active prep time, making it perfect for any day of the week.
Ingredients
For the Crust:
2 cups finely crushed graham cracker crumbs (about 14-16 full gra
1/4 cup granulated sugar
1/2 cup unsalted butter, melted
*Tip: You can use digestive biscuits or even Shortbread Cookies for a different flavor profile. Just make sure they’re finely crushed – no one likes biting into a big chunk of cookie!
For the Filling:
2 (8-ounce) packages cream cheese, softened to room temperature
1 (14-ounce) can sweetened condensed milk
1/4 cup fresh lemon juice
1 teaspoon vanilla extract
*Note: Using full-fat cream cheese is crucial for the best texture and flavor. Make sure it’s truly softened – this makes a world of difference in achieving a smooth filling without lumps.
For the Topping (Optional, but highly recommended!):
Fresh berries (strawberries, blueberries, raspberries)
Whipped cream
Chocolate sauce or caramel sauce
*This is where you can really play! A simple dusting of powdered sugar is also lovely.
Step-by-Step Instructions
Step 1: Preheat & Prep Pan
Grab a 9-inch springform pan. You don’t need to preheat your oven for this recipe, but you do need to get your pan ready. Lightly grease the sides of the springform pan with a little butter or non-stick spray. This helps ensure your cheesecake releases beautifully without sticking.
Step 2: Mix Dry Ingredients
In a medium bowl, combine the graham cracker crumbs and granulated sugar. Give them a good stir with a whisk or a fork to ensure the sugar is evenly distributed. This step ensures your crust has a nice, uniform sweetness.
Step 3: Mix Wet Ingredients
In a large bowl, beat the softened cream cheese with an electric mixer (or a sturdy whisk and some elbow grease!) until it’s completely smooth and creamy, with no lumps. Gradually beat in the sweetened condensed milk until it’s well combined. Then, add the fresh lemon juice and vanilla extract. Beat until everything is just combined and the mixture is thick and smooth. Be careful not to overmix here; you just want it incorporated.
Step 4: Combine
Pour the melted butter into the graham cracker mixture. Stir with a fork until all the crumbs are moistened and resemble wet sand. This is the perfect consistency – it should hold together when you press it.
Step 5: Prepare Filling
Pour the cream cheese mixture into the prepared springform pan over the crust. Use a spatula to spread the filling evenly, smoothing the top. You want a nice, flat surface for your toppings.
Step 6: Layer & Swirl
Press the crumb mixture firmly and evenly into the bottom of the prepared springform pan. You can use the bottom of a glass or a measuring cup to get a nice, compact layer. Make sure to bring the crumbs slightly up the sides if you like a more defined edge.
Step 7: Bake
Cover the springform pan tightly with plastic wrap. Place it in the refrigerator and chill for at least 6 hours, or preferably overnight. This chilling time is crucial for the cheesecake to set properly. The longer it chills, the firmer and more sliceable it will be.
Step 8: Cool & Glaze
Once the cheesecake is firm, carefully remove the sides of the springform pan. You can run a thin knife around the edge before releasing the clasp if you’re worried about sticking. If you’re adding any toppings like sauces or chocolate shavings, now’s the time to do it! If using fresh fruit, it’s best added just before serving.
Step 9: Slice & Serve
For the cleanest slices, use a sharp knife dipped in hot water and wiped dry between each cut. Serve chilled. Enjoy every creamy, delicious bite!
What to Serve It With
This no-bake cheesecake is so versatile, it can be dressed up or down for any occasion. For breakfast (yes, breakfast!), I love a small slice with a strong cup of black coffee. It’s like a little sweet treat to start the day that feels decadent but isn’t overwhelming. For a more leisurely brunch, I’ll often top it with a vibrant mix of fresh berries – think raspberries, blueberries, and sliced strawberries – arranged artfully. A dollop of lightly sweetened whipped cream alongside is always a hit. As a dessert, it truly shines. A drizzle of rich chocolate ganache or a swirl of salted caramel sauce takes it to a whole new level of indulgence, perfect after a hearty meal. And for those cozy nights when you just need something sweet and comforting, a simple serving with a glass of milk or even a cup of hot cocoa is pure bliss. My family also loves when I make a simple berry compote to spoon over the top – it adds a lovely tartness that cuts through the richness beautifully. It’s the kind of dessert that makes any meal feel special, from a casual weeknight dinner to a full-blown holiday celebration.
Top Tips for Perfecting Your No-Bake Cheesecake
After making this no-bake cheesecake more times than I can count, I’ve picked up a few little tricks that I think really make a difference. First off, the cream cheese: it absolutely *must* be at room temperature. I can’t stress this enough! If it’s cold, you’ll end up with a lumpy filling, and no one wants that. Take it out of the fridge at least an hour, or even two, before you plan to make it. When you’re mixing the filling, don’t go overboard with the electric mixer once the condensed milk and lemon juice are in. Just mix until everything is combined. Overmixing can sometimes make the filling a bit too soft. For the crust, I find that pressing it firmly into the pan is key. I use the bottom of a flat glass for this, and I make sure to go all the way around and slightly up the sides. This helps create a sturdy base that holds its shape. If you’re worried about it sticking, a light spray of cooking oil on the sides of the pan *before* you press the crust in can help. For the chilling time, please, please be patient! I know it’s tempting to dig in after just a couple of hours, but it really needs that full 6-hour minimum, ideally overnight, to set up properly and achieve that perfect sliceable texture. If you’re using fresh lemon juice, make sure it’s *freshly squeezed*. Bottled lemon juice just doesn’t have the same bright flavor. And for the toppings, if you’re going with fruit, I always add it right before serving. Placing fruit on too early can sometimes make the cheesecake a little watery, especially with berries that can release juices.
Storing and Reheating Tips
This no-bake cheesecake is wonderfully forgiving when it comes to storage, which is another reason I love it so much. If you happen to have any leftovers (which is rare in my house!), you can store them covered tightly with plastic wrap at room temperature for a few hours. However, for best quality and to ensure it stays firm, I always recommend refrigerating it. In the refrigerator, an uncut no-bake cheesecake will keep well for about 3 to 4 days. Make sure it’s completely covered to prevent it from absorbing any odors from other foods. I usually just press plastic wrap directly onto the surface of the cheesecake, then add another layer of foil or plastic wrap over the top of the springform pan. If you want to freeze portions, that’s totally doable! Wrap individual slices very tightly in plastic wrap, then in aluminum foil, and freeze them for up to 1 to 2 months. When you’re ready to enjoy a frozen slice, let it thaw in the refrigerator overnight. For a whole cheesecake you’ve frozen, thaw it in the refrigerator for at least 24-48 hours before serving. It’s best not to add any fresh fruit toppings before freezing, as they can get mushy. For glazed cheesecakes, it’s usually best to add the glaze after thawing, or just before serving if it’s been refrigerated.
Frequently Asked Questions
Final Thoughts
So there you have it – my absolute favorite no-bake cheesecake recipe! It’s a dessert that truly embodies ease without compromising on incredible flavor. The creamy, tangy filling nestled on a buttery, crisp crust is just pure perfection, and the fact that you don’t need to turn on your oven makes it a year-round winner. Whether you’re hosting a last-minute gathering, looking for a simple treat to satisfy a sweet tooth, or just want to impress your family with minimal fuss, this recipe has you covered. It’s one of those recipes that I find myself coming back to again and again because it’s so reliable and always brings smiles. If you love this easy no-bake cheesecake, I think you’ll also adore my no-bake chocolate peanut butter bars – another super simple treat that’s always a hit! I really hope you give this cheesecake a try. I can’t wait to hear how yours turns out and what delicious toppings you decide to use! Happy dessert making!

No Bake Samoa Cheesecake
Ingredients
Crust
- 2.5 cups Oreo crumbs (from about 25 Oreos, leave filling in the Oreos)
- 5 tablespoons unsalted butter, melted
Cheesecake Filling
- 24 oz cream cheese, room temperature
- 0.5 cup sugar
- 0.25 cup packed light brown sugar
- 1 teaspoon vanilla extract
- 0.5 teaspoon coconut extract
- 1 cup caramel sauce, divided
- 1 cup vanilla wafer cookies, broken in half
- 0.75 cup toasted sweetened coconut flakes
- 1 cup heavy whipping cream, cold
- 0.5 cup powdered sugar
Topping
- 0.25 cup mini chocolate chips
- 0.25 cup toasted sweetened coconut flakes
- 3 oz semi-sweet chocolate chips
- 0.25 cup heavy whipping cream, cold
- Caramel sauce, for drizzling
Instructions
Prepare the Crust
- Line a 9-inch springform pan with parchment paper on the bottom and grease the sides.
- In a small bowl, combine the Oreo crumbs and melted butter. Press the mixture firmly into the bottom and up the sides of the prepared springform pan.
- Place the crust in the refrigerator while you prepare the filling.
Make the Cheesecake Filling
- In a large mixer bowl, beat the cream cheese, sugar, and brown sugar until smooth and well combined.
- Add the vanilla extract, coconut extract, and 1/2 cup of caramel sauce. Mix until well combined and smooth.
- Gently fold in the broken vanilla wafer cookies and toasted coconut flakes into the cream cheese mixture.
- In a separate large mixer bowl, whip the cold heavy whipping cream and powdered sugar on high speed until stiff peaks form.
- Carefully fold the whipped cream into the cream cheese mixture in two additions until just combined.
- Spread about 1/3 of the cheesecake filling evenly over the crust. Drizzle with about 1/4 cup of the remaining caramel sauce and gently swirl with a knife, being careful not to go through the crust.
- Repeat the layering with another 1/3 of the cheesecake filling and another 1/4 cup of caramel sauce, swirling again.
- Add the remaining cheesecake filling and spread into an even layer. Cover the cheesecake and refrigerate for at least 4-5 hours, or until firm.
Finish and Serve
- Carefully remove the cheesecake from the springform pan and place it on a serving platter. Sprinkle with mini chocolate chips and additional toasted coconut flakes.
- To make the chocolate ganache, place the semi-sweet chocolate chips in a heatproof bowl. Heat the remaining 1/4 cup of heavy whipping cream until it just begins to boil, then pour it over the chocolate chips. Let it sit for 2-3 minutes, then whisk until smooth.
- Drizzle the chocolate ganache and remaining caramel sauce over the top of the cheesecake. Serve immediately.