I still remember the soft morning light hitting the kitchen tiles as I waited for my mom to stir that big, gleaming pot on the stove. The air would fill with vanilla and a hint of butter, and the only decision I had to make was whether to lick the spoon or wait for the pan to cool just a minute longer. That sweetness—the way it wrapped around a bowl of cereal and laughed with a childhood appetite—is exactly what I’m chasing with Neapolitan Krispie Treats. They’re like a trip through a memory lane bakery, but they come together with a wink and a smile in under an hour. If you grew up loving Rice Krispie treats, you’ll see the familiar, comforting base—only this time we layer it in vanilla, strawberry, and chocolate, the way Neapolitan Ice Cream flirts with a trio of flavors. It’s incredible flavor, it’s surprisingly easy, and it’s a total crowd-pleaser. This is the kind of recipe that disappears in minutes at my house, especially when my kids catch the scent of cocoa and strawberry butter mingling in the air.
What are Neapolitan Krispie treats?
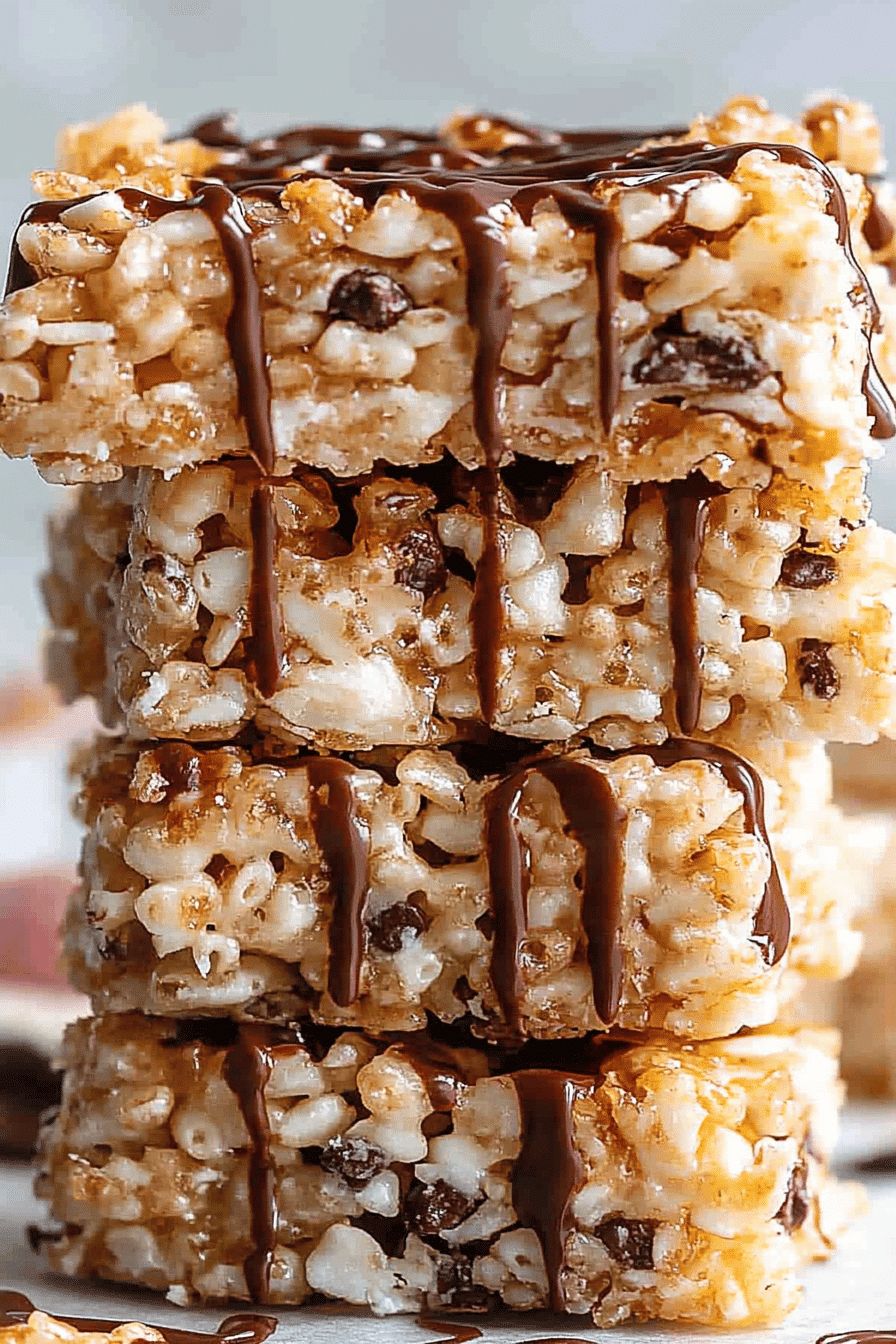
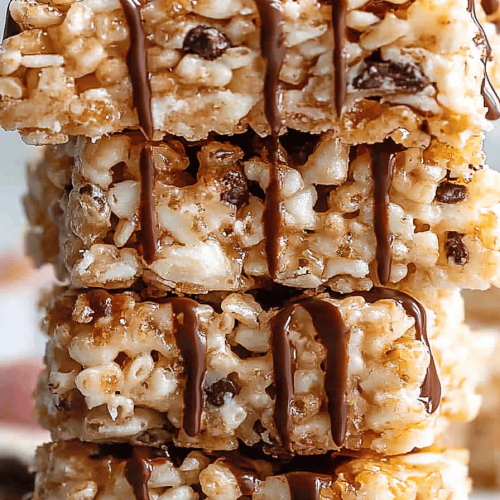
Think of Neapolitan Krispie Treats as the grown-up, three-flavor cousin of the classic Rice Krispies dessert you grew up with. It’s essentially the same fluffy, chewy base—marshmallows melted with butter, folded into crisp Rice Krispies—but we split the mix into three color-flavored swirls: vanilla (the creamy white), strawberry (a cheerful pink), and chocolate (deep and rich). The name nods to the Neapolitan trio of flavors that show up in gelato and cakes: vanilla, strawberry, and chocolate. I love calling them Neapolitan because it instantly evokes a rainbow of memories, a spoonful of Sunday afternoons, and a little kitchen theatre where you slice through three ribbons in a single square. It’s all comfort and play rolled into one neat tray that you can cut into squares for sharing—or keep all to yourself for a stealth-y after-school treat.
Why you’ll love this recipe?
What I love most about Neapolitan Krispie Treats is how they feel both nostalgic and modern at the same time. They hold onto the familiar, beloved texture of the classic Rice Krispies base, but the three-flavor swirl makes every bite a tiny celebration. Here are a few reasons you’ll reach for this recipe again and again:
- Flavor:The vanilla’s lush creaminess, the strawberry’s bright fruitiness, and the chocolate’s cozy richness come together in a balanced,
- Simplicity: This is a “weeknight victory” kind of treat. You melt, mix, swirl, press, and set. No oven required. It’s the perfect “I’ve got five minutes, I’ve got five ingredients, I’ve got a hungry family” recipe.
- Cost-efficiency: What is the best way to measure cost-efficiency? Staples—Rice Krispies, marshmallows, butter—do most of the heavy lifting, and you can swap in what you already have on hand (a few mixed-up pantry items go a long way).
- Versatility: The base is so forgiving. If you’re not in the mood for strawberry, swap it for raspberry, or do a double-vanilla layer. You can even use dark chocolate for a more dramatic contrast.
What I’ve learned along the way is that these treats travel well for potlucks, bake sales, and school snack days. They also freeze nicely, which is invaluable when you want a quick bite for a late-night craving. If you’re into other no-bake confections, you might enjoy my Strawberry-Blueberry Rice Krispie Bars or the Triple Chocolate Rice Krispie Treats for more flavors to play with. This recipe isn’t just a dessert; it’s a little ritual that makes the kitchen feel like a warm hug.
How to Make Neapolitan Krispie Treats
Quick Overview
We start by melting butter and marshmallows to make a glossy, sticky pool, then we fold in crispy Rice Krispies. The magic happens as we divide the warm marshmallow mixture into three bowls and flavor each one: a white vanilla, a pink strawberry, and a rich chocolate. After you press these three layers into a lined pan, you swirl them together to create pretty ribbons. The whole thing firms up as it cools, and then you drizzle or drizzle-and-dip with a simple glaze. It’s not fussy, it looks like you spent hours on it, and the taste is pure nostalgic joy in every bite.
Ingredients
For the Main Batter:
- 6 cups Rice Krispies cereal
- 10 oz marshmallows (about 40 large marshmallows) or 4 cups mini marshmallows
- 3 tablespoons unsalted butter
- 1/2 teaspoon vanilla extract (optional for extra depth)
- A pinch of salt
For the Filling:
- Vanilla portion: 1 teaspoon vanilla extract (keeps the white layer bright)
- Strawberry portion: 2 tablespoons strawberry puree or jam plus a few drops of red gel food coloring (optional but pretty)
- Chocolate portion: 2 tablespoons cocoa powder whisked into 1–2 tablespoons melted dark chocolate or a small amount of extra butter to help it melt smoothly
- Optional embellishment: tiny pinch of freeze-dried strawberry bits for a real pop
For the Glaze:
- 1/2 cup white chocolate chips, melted with 1 teaspoon coconut oil or butter
- 1/2 cup dark or semi-sweet chocolate chips, melted for drizzle
- Optional strawberry glaze: 2 tablespoons strawberry jam thinned with 1 teaspoon water
Step-by-Step Instructions
Step 1: Preheat & Prep Pan
No oven needed here, but you do want a clean stage. Line an 8-by-8-inch baking pan with parchment paper, leaving a little overhang on the sides so you can lift the bars out neatly. Lightly grease the parchment with a bit of butter to keep things from sticking. If you’re in a rush, you can skip the parchment and simply grease the pan well—it’ll just make cleanup a touch more effort.
Step 2: Mix Dry Ingredients
In a large bowl, add the Rice Krispies and a pinch of salt. I always give the cereal a little stir to break up any clumps—it helps the marshmallow coating stick evenly. This is your crunchy foundation, so don’t skip giving it a little air before the fun begins.
Step 3: Mix Wet Ingredients
In a heavy-bottomed pot over low heat, melt the butter. When it’s melted, add the marshmallows and stir gently until they’re completely melted and glossy. If you’re using vanilla, drop it in now. This is the part of the kitchen where you’ll catch that comforting, toasty-mallow aroma that makes you want to pause and take a big inhale.
Step 4: Combine
Pour the warm marshmallow mixture over the bowls of Rice Krispies and stir with a wooden spoon or spatula until every crisp is coated. The mixture should be thick, gluey, and shiny—perfect for shaping. If you see any dry bits, fold a little more warm marshmallow into the bowl until everything’s coated and glossy.
Step 5: Prepare Filling
Divide the hot mixture into three bowls immediately after turning off the heat. In the vanilla portion, add the vanilla extract and keep it pale. In the strawberry portion, whisk in the strawberry puree and a touch of color if you want a brighter pink. In the chocolate portion, whisk in the cocoa powder and melted chocolate. You want each portion to be glossy and cohesive, not stringy. If the strawberry layer stiffens, keep the bowl warm over the pot with a tiny bit of steam from the main bowl, but don’t overheat it or you’ll melt the other layers too much.
Step 6: Layer & Swirl
Spread the vanilla layer as the first stripe in the pan, then top with the strawberry stripe, finishing with the chocolate stripe. I like to use a spatula to create three broad bars that run lengthwise. Now comes the fun part: using a skewer, knife blade, or the tip of a spoon, swirl gently through the layers to create pretty ribbons without blending everything into one color. You’re aiming for a marbled look, not a uniform mix. If you want more pronounced stripes, the trick is to layer more thickly on the bottom and keep a lighter touch as you swirl.
Step 7: Bake
There’s no oven involved in this recipe, so there’s no real bake. Instead, you’ll let the bar set. Press the mixture down firmly with a flat spatula so the layers pack tight and won’t crumble when sliced. At this point, you can simply let it rest at room temperature for about 60–90 minutes, or speed things up by chilling it in the fridge for 30 minutes. The goal is a firm, cohesive slab that’s easy to slice into neat squares. If you’re in a hurry, a quick chill does wonders for clean, sharp edges.
Step 8: Cool & Glaze
If you’ve waited for the bars to set, you’re ready to glaze. Melt the white chocolate with a teaspoon of coconut oil until glossy, then drizzle in a crisscross pattern over the top. Do the same with the dark chocolate for a rich contrast. If you’re using the strawberry glaze, brush or dab a few ribbons across the top for a rosy accent. Let the glaze set for about 15–20 minutes before slicing to ensure clean, shiny squares. The glaze is optional, but I think a light gloss makes the colors pop and gives that professional-looking finish.
Step 9: Slice & Serve
Lift the slab from the pan using the parchment overhang, then slice into generous squares. I usually cut into 16 pieces for a party tray, but you can opt for smaller bites if you’re feeding a crowd. The contrast of vanilla, strawberry, and chocolate is mesmerizing—every bite reveals a stripe or two, not one flat blanket of flavor. Serve at room temperature so the marshmallow stays chewy and the glaze hasn’t set too hard. My kids love these with a cold glass of milk, and I love that they’re easy to portion for school lunches or afternoon tea with a friend.
What to Serve It With
Neapolitan Krispie Treats shine on their own, but they’re extra delightful when paired with the right accompaniments. Here are ideas for different moments:
For Breakfast: A gentle companion to a mug of strong coffee, or tucked into a lunchbox as a sweet, not-too-heavy start to the day. I love a small plate with a dollop of yogurt and a scattering of fresh berries to balance the sweetness.
For Brunch: Slice into thinner bars and plate with citrus zest, a drizzle of orange honey, and a side of berries. A glass of cold brew or a light sparkling beverage keeps this treat feeling celebratory rather than decadent.
As Dessert: Serve with a scoop of vanilla bean ice cream and a few candied nuts for crunch. If you’re entertaining, a few mint sprigs and a dusting of espresso powder on the tray makes it feel a little fancier without extra effort.
For Cozy Snacks: Keep a plate or two in the fridge for after-dinner cravings. The contrast of cool, chewy bars against a hot mug of cocoa becomes a little ritual—one bite and you’ll understand why they’re a lifesaver on busy nights.
Personally, I’ve found that keeping a stash in the refrigerator means I can pull out a square after everyone goes to bed and pretend I planned a fancy dessert. It rarely lasts that long, though—my kids, my partner, and I all reach for just one more bite. It’s a small indulgence that tastes like home.
Top Tips for Perfecting Your Neapolitan Krispie Treats
These tips come from a lot of trial-and-error in my little kitchen, where I learned to balance texture, color, and that glossy finish you see in glossy magazines. Here’s how I keep every batch consistently wonderful:
Rice Krispies Prep: Toasting the cereal lightly in a dry pan for 1–2 minutes before mixing can deepen the flavor. Let it cool completely before folding into the marshmallow mix. If you want extra crunch, add a tablespoon of chopped toasted nuts to the vanilla layer.
Mixing Mastery: Don’t rush the melted marshmallow. If you pull it off the heat too soon, you’ll end up with a dull, stiff mixture. If it’s a touch too loose, your bars won’t hold their shape. Aim for a glossy, cohesive mass that clings to the spatula like a dream.
Swirl Patterns: For the most striking marbling, scoop the three portions into the pan in long, parallel lines and then swirl with a butterknife gently. If you over-swirl, you’ll lose the separate stripes—so keep your strokes light and intentional.
Ingredient Swaps: Swap in a dairy-free butter substitute and marshmallows if you’re dairy-free, but know that the texture may shift slightly. If you use a lower-fat marshmallow, you might need a touch more cereal to get the same chew. For a gluten-free version, confirm that your Rice Krispies are certified gluten-free and avoid cross-contamination.
Baking Tips: While there’s no real baking in this recipe, giving the marshmallow mixture a gentle heat before adding the cereal can help everything come together more smoothly, especially if you’re doing extra flavors. If your kitchen is warm, allow a little extra time for the bars to set in the fridge to prevent sliding when you lift the parchment.
Glaze Variations: The glaze should be a gentle sheen, not a hard shell. If it’s too thick, whisk in a few drops of milk or a touch of neutral oil. If you want brighter color, a few drops of gel food coloring can help without altering the flavor.
Mistakes I’ve made along the way? Overheating the chocolate portion can seize the mixture, and rushing the set can leave you with crumbly edges. The fix is simple: re-warm the marshmallow blend gently and press again. It’s a forgiving recipe if you give it a little patience. This is the kind of treat that rewards you for taking it easy and letting it set properly.
Storing and Reheating Tips
Storage makes or breaks the texture after a day or two, so here are my go-to methods that keep Neapolitan Krispie Treats delicious from snack time to after-dinner tomorrow:
Room Temperature: Store in an airtight container with parchment between layers for up to 2 days. Keep the glaze lightly set to avoid sticky fingerprints on the surface. If your kitchen is warm, you can wrap each square individually in parchment to prevent sticking.
Refrigerator Storage: In a single layer or with parchment between layers, they’ll stay fresh for about 5–7 days. The chill helps the gluey marshmallow set and makes the slices even cleaner to cut. Bring to room temperature for 15–20 minutes before serving for the best texture.
Freezer Instructions: Wrap bars tightly in plastic wrap, then place in a freezer bag. They’ll keep for up to 2 months. Thaw in the fridge overnight, then let come to room temperature for 15–20 minutes before serving. The texture remains chewy and the flavors stay bright after thawing.
Glaze Timing Advice: If you know you’ll be freezing, skip the glaze or apply it after thawing. Freezing can dull the shine of a thick glaze, but a light drizzle after thawing keeps the look fresh. If you’re storing in the fridge, the glaze will stay glossy longer, but you’ll want to re-drizzle slightly before serving to refresh the finish.
Consistency is destiny with these treats: the more you set them, the better they slice, so be patient. I’ve found that a full hour at room temperature or a 30-minute chill makes all the difference in achieving clean, pretty edges.
Frequently Asked Questions
Final Thoughts
Whenever I pull a tray of Neapolitan Krispie Treats from the fridge and set it on the coffee table, the room fills with whispers of delight. The vanilla creaminess, the bright strawberry, and the chocolate depth all speak to different sides of my family—comfort, celebration, and a touch of indulgence. These bars are the kind of recipe that invites stories: “Remember when we topped them with rainbow sprinkles?” or “This is my go-to after-dinner treat when we have guests.” They’re flexible, forgiving, and endlessly shareable. If you try them, I’d love to hear which layer surprised you the most, or what swirl pattern you ended up loving. Leave a comment, rate the recipe, and tell me about your own flavor twists. And if you snap a photo, share it—nothing makes me happier than seeing your kitchen come to life with Neapolitan Krispie Treats. Happy baking!
Neapolitan Krispie Treats
Ingredients
Main Ingredients
- 0.25 cup unsalted butter
- 16 ounces mini marshmallows
- 6 cups crispy rice cereal
- 0.5 cup unsweetened cocoa powder
- 0.5 cup strawberry gelatin powder
- 0.25 cup powdered sugar
- 0.25 cup marshmallow cream (fluff)
Instructions
Preparation Steps
- Line a 9x13 inch dish with parchment paper and set aside.
- In a large saucepan over medium heat, melt butter. Stir in marshmallows until completely melted and smooth. Remove from heat and mix in cocoa powder. Fold in crispy rice cereal until evenly coated. Press into the bottom of the prepared pan.
- In a separate bowl, beat together marshmallow cream and powdered sugar until fluffy. Spread this marshmallow layer evenly over the cooled chocolate layer.
- In a clean pot, melt butter again and stir in marshmallows until melted. Add strawberry gelatin powder and mix until fully dissolved. Fold in an additional 2 cups of cereal and spread the strawberry layer over the marshmallow layer. Chill until set. Cut into bars and serve.