Oh, you guys. I am SO excited to share this recipe with you today. Seriously, if there’s one dessert that always makes me feel like I’ve accomplished something truly special without breaking a sweat, it’s these mixed berry trifles. They’re just… magic. I remember the first time I made them for a family gathering. My Aunt Carol, who is famously hard to impress when it comes to sweets, took one bite and her eyes just lit up. She said, and I quote, “This is what dessert dreams are made of.” And honestly? She wasn’t wrong. These layered beauties are a little bit cake, a little bit cream, and a whole lot of pure, unadulterated joy. Think of it like a deconstructed berry shortcake, but somehow even more elegant and, dare I say, easier to assemble. If you’ve ever been intimidated by making a fancy-looking dessert, please, let these mixed berry trifles be your gateway drug. They look impressive, they taste out-of-this-world delicious, and they come together surprisingly quickly. It’s the kind of dessert that makes people ooh and aah, but you’ll be doing a little happy dance in your kitchen because you know how simple it actually was. It’s my go-to for potlucks, birthdays, or just when I need a serious mood booster. I’ve made them so many times, I’ve practically got the layering down to an art form!
What are mixed berry trifles?
So, what exactly are these glorious concoctions? At their heart, mixed berry trifles are all about layers. We’re talking about fluffy cake pieces, luscious cream, and a burst of fresh, juicy berries, all nestled together in a beautiful glass dish. The name “trifle” itself comes from the English tradition of using up leftover cake or biscuits, which I just love because it feels so homey and resourceful. But these aren’t just scraps; they’re carefully chosen components that come together to create something spectacular. Imagine a cloud of light vanilla custard or whipped cream, interspersed with cubes of soft sponge cake or pound cake, all soaked in a little bit of berry juice or liqueur (optional, of course!). And then, the star of the show: a generous helping of mixed berries, fresh and vibrant. It’s a dessert that plays with textures and flavors – the soft cake, the smooth cream, the slightly tart berries. It’s not just a dessert; it’s an experience in a bowl or a dish. The beauty of it is that it doesn’t have to be fussy. You can use store-bought cake, your favorite homemade recipe, or even good quality pound cake. The real magic happens when you get those layers just right.
Why you’ll love this recipe?
Okay, let’s talk turkey. Why should you make *my* mixed berry trifles? Well, for starters, the flavor is just out of this world. You get the sweet, pillowy cake, the cool, creamy custard or whipped cream, and then that bright, slightly tangy pop from the mixed berries. It’s a symphony of tastes and textures that just works. Seriously, it’s addictively good. What I also adore about this recipe is its sheer simplicity. I know, I know, it looks like it took hours to assemble, right? But trust me, it’s surprisingly quick. The components can even be prepped ahead of time, making assembly a breeze when you’re ready to serve. And let’s not forget cost-efficiency! You can use ingredients you likely already have in your pantry or can pick up without breaking the bank. Berries are often on sale, and a good pound cake or even vanilla cake mix is super affordable. Compared to some fancy store-bought desserts or elaborate cakes, this is a lifesaver for your wallet. Plus, it’s incredibly versatile. Don’t have mixed berries? Use strawberries and blueberries! Not a fan of custard? Whipped cream is your best friend. You can even add a hint of citrus zest to the cream or a splash of berry liqueur to the cake for an extra grown-up touch. It’s the kind of recipe that adapts to what you have on hand and what your family loves. Honestly, the biggest reason I love it is the reaction I get. It’s a showstopper without the stress, and that’s gold in my book. It’s perfect for when you’re craving something sweet and special but don’t have the time or energy to bake a whole cake from scratch.
How do I make mixed berry trifles?
Quick Overview
Making these mixed berry trifles is all about building delicious layers. We’ll start by getting our cake ready – either baking it from scratch or using your favorite store-bought option. Then, we’ll whip up a dreamy, creamy component, usually a light custard or a stable whipped cream. The stars of the show, the mixed berries, get a quick maceration to release their juices and sweetness. Finally, it’s all about artfully layering these components in a pretty glass dish, allowing the flavors to meld together. The beauty is in its simplicity; it’s more about assembly than complex cooking techniques. It truly is a dessert that looks more complicated than it is!
Ingredients
For the cake layers: For the cake layers: For the cake layers: For the cake layers: For the cake layers: For the cake layers:
You’ll need about 1 pound cake or a similar-density cake, like a sturdy vanilla or sponge cake. I often find that day-old cake works even better because it holds its shape. If you’re baking from scratch, a simple vanilla or yellow Cake Recipe is perfect. Just make sure it’s cooled completely before you start cutting it up. The key is a cake that won’t turn to mush when it soaks up a little liquid.
For the Creamy Filling:
Here’s where you can customize! My favorite is a simple vanilla pastry cream, made with egg yolks, sugar, cornstarch, milk, and vanilla. It’s rich and decadent. Alternatively, you can make a stabilized whipped cream by whipping heavy cream with a little powdered sugar and vanilla, and then adding a touch of gelatin or Cream Cheese to help it hold its shape. For a simpler, lighter option, just a good quality whipped cream works beautifully, especially if you’re serving it right away. You’ll need about 2 cups total of your chosen cream mixture.
For the Berry Layer:
This is where the flavor explosion happens! You’ll want about 4 cups of fresh or frozen mixed berries. Think strawberries, blueberries, raspberries, blackberries – whatever looks best at the market or is in your freezer. If using frozen, let them thaw slightly. I like to toss them with about 2 tablespoons of sugar and a squeeze of lemon juice to really bring out their natural sweetness and create a lovely berry syrup. This step is crucial for that burst of fruity goodness.
Optional additions: A splash of berry liqueur (like Chambord) or a little orange zest can add an extra layer of flavor to the cake or the cream, respectively.
Step-by-Step Instructions
Step 1: Prepare Your Cake
If you’re using a store-bought cake, simply cut it into roughly 1-inch cubes. If you baked your own, make sure it’s completely cooled. You can slice it into layers and then cut those slices into cubes, or just cube the entire cake once cooled. The size doesn’t have to be exact, as they’re going to be tucked into layers.
Step 2: Prepare the Berries
In a medium bowl, gently combine your mixed berries with the sugar and lemon juice. If you’re using a bit of liqueur, now’s the time to stir it in. Let this mixture sit for at least 15-20 minutes. This process is called macerating, and it helps soften the berries slightly and draws out their delicious juices, creating a wonderful syrup that will soak into the cake.
Step 3: Prepare Your Creamy Filling
If you’re making pastry cream, follow your favorite recipe. Typically, this involves whisking egg yolks with sugar and cornstarch, then tempering it with hot milk and cooking it until thickened. Once thickened, stir in vanilla extract, cover with plastic wrap pressed directly onto the surface to prevent a skin from forming, and let it cool completely. If you’re making whipped cream, whip your heavy cream with powdered sugar and vanilla until stiff peaks form. If you’re stabilizing it, follow your chosen method for that. Ensure your cream filling is chilled.
Step 4: Assemble the Trifles (This is the fun part!)
Grab a beautiful glass trifle bowl or individual parfait glasses. Start with a layer of cake cubes at the bottom. Don’t be afraid to pack them in a little, but leave some airy spaces. Spoon a generous layer of your berry mixture over the cake, making sure to get some of that lovely syrup. Next, add a thick layer of your creamy filling. Repeat these layers: cake, berries, cream. Continue until you’ve used up your ingredients or reached the top of your dish. Aim for at least 2-3 layers of each component for a really impressive look.
Step 5: Chill and Let Flavors Meld
Once assembled, cover the trifle bowl tightly with plastic wrap. It’s best to let it chill in the refrigerator for at least 2-4 hours, or even overnight. This is crucial! It allows the cake to soften slightly from the berry juices and cream, and all those wonderful flavors to meld together into a harmonious bite. Don’t skip this step; it makes a huge difference.
Step 6: Garnish and Serve
Just before serving, you can add a final flourish. A few extra fresh berries on top, a dollop of whipped cream, or even a sprig of mint can make it look extra special. If you’ve used individual glasses, you can garnish each one. Slice into generous portions and enjoy the smiles!
Step 7: Slice & Serve
When it’s time to serve, you want to cut down through all those beautiful layers. Use a sharp knife for clean slices, especially if you’re using a large trifle bowl. Serve immediately after uncovering and garnishing. The contrast of the chilled dessert with a warm afternoon or a cozy evening is just divine.
What to Serve It With
These mixed berry trifles are incredibly versatile and fit into almost any occasion. For a delightful breakfast or brunch, I love serving them in smaller individual glasses alongside a freshly brewed pot of coffee or a light sparkling wine. The fruit and cream are light enough to not feel heavy in the morning, and they just look so elegant on a brunch spread. They’re a fantastic alternative to a heavy pastry when you want something special but not overwhelming. For a more formal dessert setting, I’ll often serve a generous slice after a rich meal. It acts as a wonderful palate cleanser with its bright berry flavors and creamy texture. A nice dessert wine or even just a good quality decaf coffee is a perfect pairing here. And for those cozy, unplanned snack attacks? My kids absolutely devour these. I’ll just grab a spoon and dig in right from the bowl, perhaps with a glass of cold milk. It’s the perfect sweet treat when you’re curled up on the couch with a good book or watching a movie. Honestly, they’re so good, they don’t really need anything else, but I’ve found they also pair wonderfully with a light shortbread cookie on the side for an extra crunch, or a sprinkle of toasted slivered almonds for a bit of nutty texture.
Top Tips for Perfecting Your Mixed Berry Trifles
Over the years, I’ve picked up a few tricks that make these trifles consistently amazing. First, about the berries: if you’re using frozen berries, don’t be tempted to microwave them to thaw. Let them thaw naturally in the bowl with the sugar and lemon juice. This way, you get that beautiful, slightly syrupy liquid that infuses the cake so wonderfully. If you just heat them, you often end up with watery, mushy berries that don’t have the same impact. For the cake, I always stress using a cake that’s at least a day old. Freshly baked cake can be too soft and might disintegrate too much when you’re layering. Pound cake or a dense yellow cake is really your best bet. When it comes to the creamy filling, I’ve experimented a lot! My go-to pastry cream is fantastic, but it does take a bit more time. If I’m in a real pinch, a good quality store-bought whipped topping (the kind you buy in a tub) mixed with a little vanilla extract is a surprisingly decent substitute, especially for a casual get-together. Just make sure it’s well-chilled! For assembly, don’t just blindly dump. Think about the visual appeal. Try to get a nice even layer of cake, then a good distribution of berries (and that glorious syrup!), followed by a smooth layer of cream. You want to see those distinct layers when you cut into it. If you’re using individual glasses, you can even do smaller, more delicate layers. I also learned the hard way that chilling is non-negotiable. If you try to serve it right after assembling, the flavors haven’t had a chance to marry, and the cake will be too firm. At least 2-4 hours is my minimum. For ingredient swaps, don’t be afraid to get creative! If you’re not a fan of berries, you could try a mix of chopped stone fruits like peaches and plums in the summer. Or even some chocolate cake cubes with a chocolate pudding and some cherries – a Black Forest trifle! The possibilities are endless, and that’s part of why I love this recipe so much. It’s a canvas for your own delicious creations. And finally, for the glaze effect that some people love – if you want your berries to look extra glossy, you can gently warm up a tablespoon of the berry syrup with a teaspoon of cornstarch until it thickens slightly, then brush it over the top layer of berries. It gives them a beautiful sheen.
Storing and Reheating Tips
One of the things I love about these mixed berry trifles is how well they store. Because they have layers of cake and cream, they actually get *better* after a day! For room temperature storage, it’s really best to avoid it if possible, as the cream can spoil, and the cake can become soggy. I always aim to serve my trifles within a few hours of assembly, or at most, by the end of the day. If you have leftovers, or if you’ve made it ahead of time, refrigerator storage is your best bet. Cover the trifle bowl very tightly with plastic wrap, pressing it down to create a good seal. This prevents it from absorbing any odors from other foods in the fridge and keeps it fresh. They’ll stay delicious in the refrigerator for about 2-3 days. The cake will become more tender, and the flavors will continue to meld beautifully. For freezer instructions, I don’t typically recommend freezing trifles, especially if they contain dairy-based cream, as the texture can change significantly upon thawing. The cream might curdle, and the cake can become quite mushy. However, if you absolutely must, you could try freezing individual portions in airtight containers, but be prepared for a textural difference. The best way to ensure the glaze stays perfect is to add it just before serving if you’re worried about it becoming too liquidy. If you’ve added the berry syrup during assembly, it will have already soaked in nicely by the time you’re ready to serve it from the fridge.
Frequently Asked Questions
Final Thoughts
So there you have it, my friends – my absolute favorite mixed berry trifles! I truly believe this recipe is a winner because it hits all the right notes: it’s incredibly delicious, visually stunning, and surprisingly easy to pull off. It’s the kind of dessert that makes everyone feel special, whether you’re serving it at a fancy dinner party or just enjoying a slice on a Tuesday night. The way the soft cake, the luscious cream, and the bright, tangy berries come together is just pure bliss. If you’re someone who loves a good dessert but doesn’t want to spend all day in the kitchen, this is your recipe. I really hope you give these mixed berry trifles a try. I have a feeling they might just become a new favorite for you and your family too. If you do make them, please, please let me know how they turn out! I love hearing about your baking adventures and seeing your creations. Leave a comment below or tag me on social media – I can’t wait to see your beautiful trifles! Happy baking!
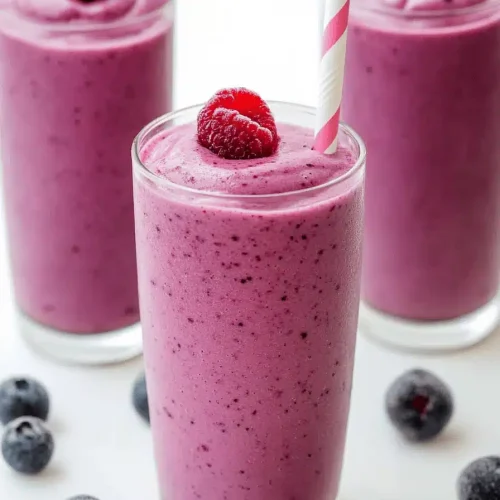
Mixed Berry Trifles
Ingredients
Berry Layer
- 2 cups mixed berries fresh or frozen, thawed
- 2 tablespoons granulated sugar
Cream Layer
- 3.4 ounces vanilla instant pudding mix
- 2 cups milk cold
- 1 cup whipped topping thawed
Crumb Layer
- 1 cup crumbled shortbread cookies
Instructions
Preparation Steps
- In a medium bowl, gently toss the mixed berries with granulated sugar. Let sit for 5 minutes to allow the juices to release.
- In a separate bowl, whisk together the vanilla instant pudding mix and cold milk until smooth and thickened, about 2 minutes.
- Gently fold the thawed whipped topping into the thickened pudding until well combined.
- To assemble, spoon a layer of crumbled shortbread cookies into the bottom of 6 individual serving glasses or jars.
- Next, add a layer of the berry mixture over the cookie crumbs.
- Top the berries with a generous spoonful of the cream mixture.
- Repeat the layers: cookie crumbs, berries, and cream mixture, ending with cream on top.
- Garnish with a few extra berries and a sprinkle of cookie crumbs if desired.
- Chill for at least 30 minutes before serving to allow the flavors to meld.

