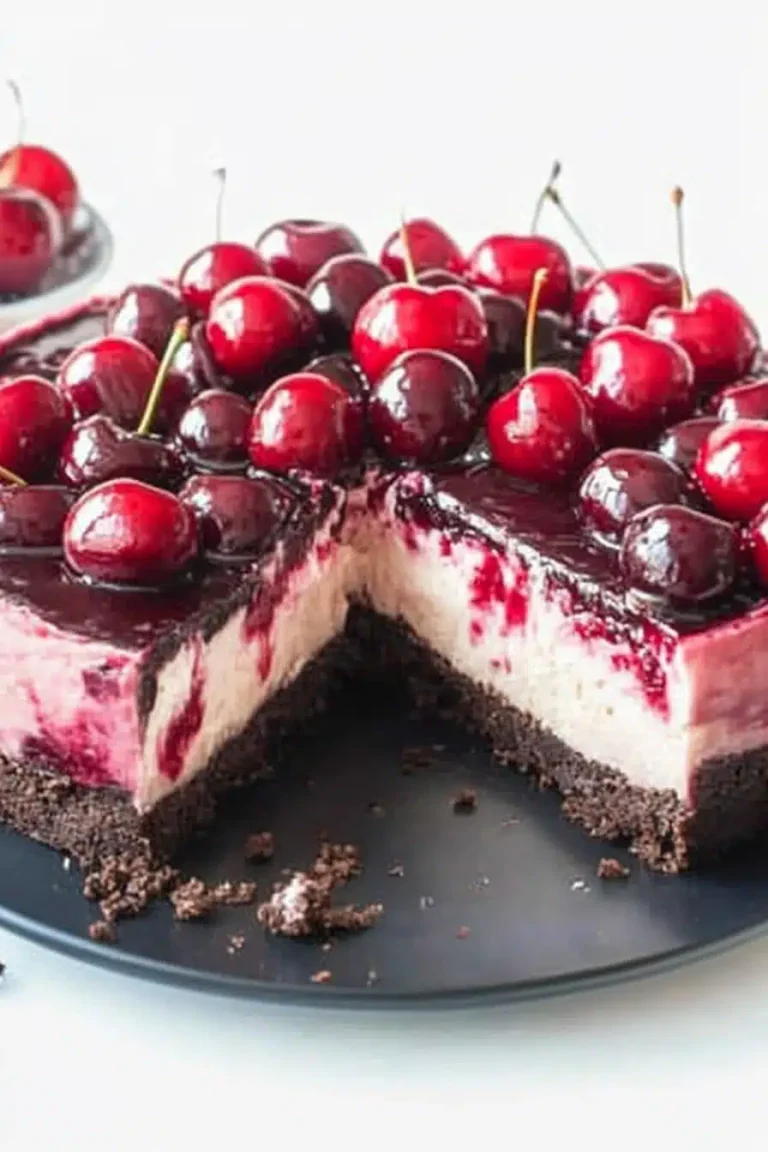
Okay, friend, lean in. I’m about to share something truly special with you. It’s a recipe that has saved me more times than I can count, something that looks fancy but is ridiculously easy, and frankly, it’s pure magic in miniature form. We’re talking about my absolute favorite Mini chocolate cheesecake. Is it good to eat it all? recipe. Forget the whole cake drama; these little gems are perfect for when you need a serious chocolate fix without the fuss. They’re ideal for parties because they’re so easy to serve, but honestly, they’re just as wonderful for a quiet night in with a cup of tea. I remember the first time I made these for a book club meeting. Everyone was raving, asking for the recipe, and I just smiled, because it felt like my little secret. They’re kind of like the decadent cousins of muffins, but oh-so-much-richer. If you’ve ever craved that creamy, dreamy cheesecake texture but wanted it in a more manageable, utterly adorable size, you’ve come to the right place.
What is a mini chocolate cheesecake?
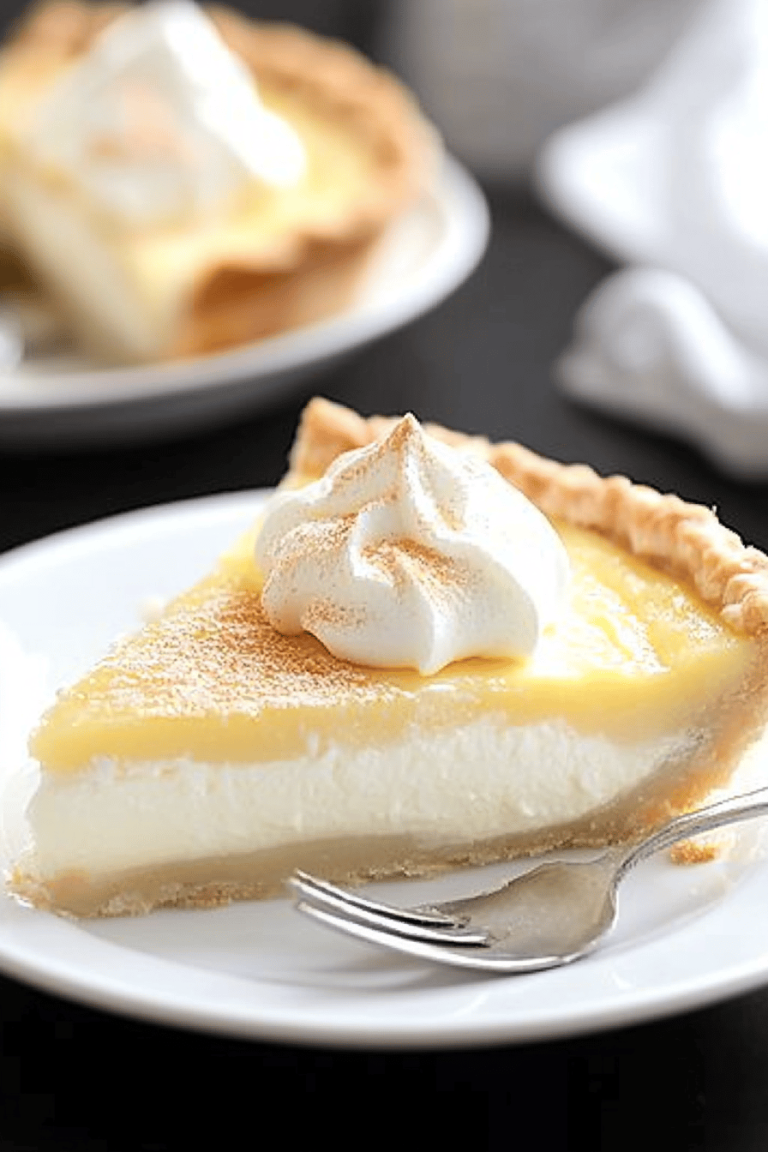
So, what exactly is a mini chocolate cheesecake? Well, it’s pretty much what it sounds like! Instead of baking one big cheesecake, we’re making lots of little ones, usually in muffin tins. They have all the glorious components of a classic cheesecake: a rich, creamy filling made with Cream Cheese, sugar, and eggs, often flavored with vanilla and, in this case, plenty of good quality cocoa powder or melted chocolate to give it that deep, satisfying chocolatey punch. The crust is usually a simple graham cracker or cookie crumb base that gets pressed into the bottom of each little wrapper. Think of them as individual servings of pure indulgence. They’re incredibly satisfying without being overwhelming, and the best part? You get that perfect ratio of creamy filling to crisp crust in every single bite. It’s essentially cheesecake, miniaturized for maximum joy and minimum commitment – though trust me, you’ll want more than one!
Why you’ll love this recipe?
Why is there so many reasons for this article?mini chocolate cheesecake recipe is my absolute favorite, and I’m sure you’ll fall in love with it too. First off, the flavor. Oh, the flavor! It’s that classic, comforting cheesecake taste, but amplified by the deep, rich notes of chocolate. It’s not overly sweet, which I really appreciate; the chocolate really shines through, giving it a sophisticated edge. Then there’s the simplicity. I know “cheesecake” can sound intimidating, but these mini ones are surprisingly straightforward. There’s no water bath to worry about, no cracking to stress over. You just mix, fill, and bake. It’s genuinely one of the easiest desserts I make, and it always impresses. For anyone looking for a budget-friendly yet impressive dessert, this is it. The ingredients are pretty standard pantry staples, and you don’t need a ton of them to create something truly special. And talk about versatility! You can dress these up or down. Serve them plain for a simple treat, or get creative with toppings like fresh berries, whipped cream, or a drizzle of chocolate sauce. They’re perfect for potlucks because everyone gets their own little dessert without needing a fork and knife fuss. What I love most is that they’re perfectly portioned. You can have one (or two!) without feeling guilty, and they’re perfect for a late-night craving when you don’t want to bake a whole dessert. They’re a lifesaver when unexpected guests pop by, too. I’ve made these with dark chocolate and milk chocolate, and both yield slightly different but equally delicious results. It’s a recipe that makes you feel like a baking pro, even if you’re just starting out.
How to Make Mini Chocolate Cheesecakes
Quick Overview
Making these little chocolate delights is a breeze. You’ll whip up a quick cookie crumb crust, mix a rich chocolate cream cheese filling, then bake them until they’re set and glorious. The whole process is pretty hands-off once they’re in the oven, and the results are always stunningly delicious. It’s a foolproof method that guarantees a creamy, decadent treat every single time, perfect for any occasion or just because you deserve a little something sweet.
Ingredients
For the Crust:
Here’s what you’ll need for that perfect crunchy base. I always use graham crackers because they’re a classic, but digestive biscuits or even chocolate wafer cookies work beautifully! You’ll need about 1 ½ cups of finely crushed crumbs. To bind them together, we’ll use melted butter – about 6 tablespoons. A tablespoon of sugar can be added if you like a slightly sweeter crust, but it’s optional. Just mix the crumbs, melted butter, and sugar (if using) until it resembles wet sand.
For the Filling:
This is where the magic happens! You’ll need three 8-ounce blocks of cream cheese, softened to room temperature. This is key for a smooth filling. Make sure it’s full-fat cream cheese for the best texture and flavor. Then, we need sugar – about 1 cup of granulated sugar works perfectly. For that intense chocolate flavor, I like to use ¼ cup of unsweetened cocoa powder, plus another ¼ cup of melted dark chocolate (around 60-70% cacao) for an extra boost of richness. If you prefer, you can just use ½ cup of cocoa powder. Two large eggs, also at room temperature, are essential for binding. And a teaspoon of vanilla extract and a pinch of salt to enhance all those lovely flavors.
For the Glaze (Optional but Highly Recommended!):
This is totally optional, but it adds such a lovely finish! For a simple chocolate glaze, melt ½ cup of semi-sweet chocolate chips with 2 tablespoons of heavy cream or milk. Stir until smooth. If it’s too thick, add another splash of cream. If it’s too thin, add a few more chocolate chips. Another great option is a dusting of powdered sugar or a dollop of whipped cream.
Step-by-Step Instructions
Step 1: Preheat & Prep Pan
First things first, let’s get everything ready. Preheat your oven to 325°F (160°C). Line a standard 12-cup muffin tin with paper liners. I always use the standard ones, but if you have foil liners, those work great too. Make sure they fit snugly. This step is super important for easy removal later. You don’t want these precious little cheesecakes sticking!
Step 2: Mix Dry Ingredients
In a medium bowl, combine your finely crushed graham cracker crumbs, the optional tablespoon of sugar, and a tiny pinch of salt if you didn’t use salted butter. Give it a good stir to make sure everything is evenly distributed. This is your foundation!
Step 3: Mix Wet Ingredients
In a separate, larger bowl, beat the softened cream cheese with an electric mixer on medium speed until it’s completely smooth and creamy. Scrape down the sides of the bowl as needed. Gradually add the granulated sugar and continue beating until well combined and no lumps remain. Beat in the vanilla extract and the pinch of salt. If you’re using cocoa powder, whisk it in now until fully incorporated. If you’re using melted chocolate, let it cool slightly before beating it into the cream cheese mixture. It should be a beautiful, chocolatey, smooth batter!
Step 4: Combine
Now, add the eggs one at a time, beating on low speed just until each egg is incorporated. It’s really important not to overmix here, as that can lead to cracking or a rubbery texture. Overmixing incorporates too much air. Just mix until they’re combined. It should be thick and luxurious.
Step 5: Prepare Filling
Your filling is basically ready! If you haven’t added the melted chocolate or cocoa powder yet, now’s the time. Make sure it’s all smoothly blended. You should have a wonderfully thick, rich chocolate cream cheese mixture. Give it a taste (carefully, of course!) and adjust sweetness or chocolate intensity if you feel it needs it, though I find the ratios here pretty perfect.
Step 6: Layer & Swirl
Spoon about a tablespoon of the crumb mixture into the bottom of each prepared muffin liner. Press it down gently with the back of your spoon or a small glass to form an even crust. Then, carefully spoon the chocolate cheesecake filling over the crusts, filling each liner about two-thirds to three-quarters full. You want them to have a little room to puff up slightly. If you want to add a little swirl of extra chocolate or caramel on top, now’s the time! Just add a small dollop and swirl gently with a toothpick.
Step 7: Bake
Pop the muffin tin into your preheated oven. Bake for 18-22 minutes, or until the edges are set but the center still has a slight jiggle. They shouldn’t be jiggly like liquid, but a gentle wobble indicates they’re perfectly cooked. Overbaking is the enemy of creamy cheesecake! I always do the toothpick test around the 18-minute mark. It should come out mostly clean, maybe with a few moist crumbs, but not wet batter.
Step 8: Cool & Glaze
Once baked, remove the muffin tin from the oven. Let them cool in the tin for about 10-15 minutes. This is crucial for them to set up properly. Then, carefully lift the liners out of the tin and place the mini cheesecakes on a wire rack to cool completely. Once they’re completely cool, you can add your optional glaze. Drizzle it over the top or dip the tops into the glaze. Let the glaze set before serving.
Step 9: Slice & Serve
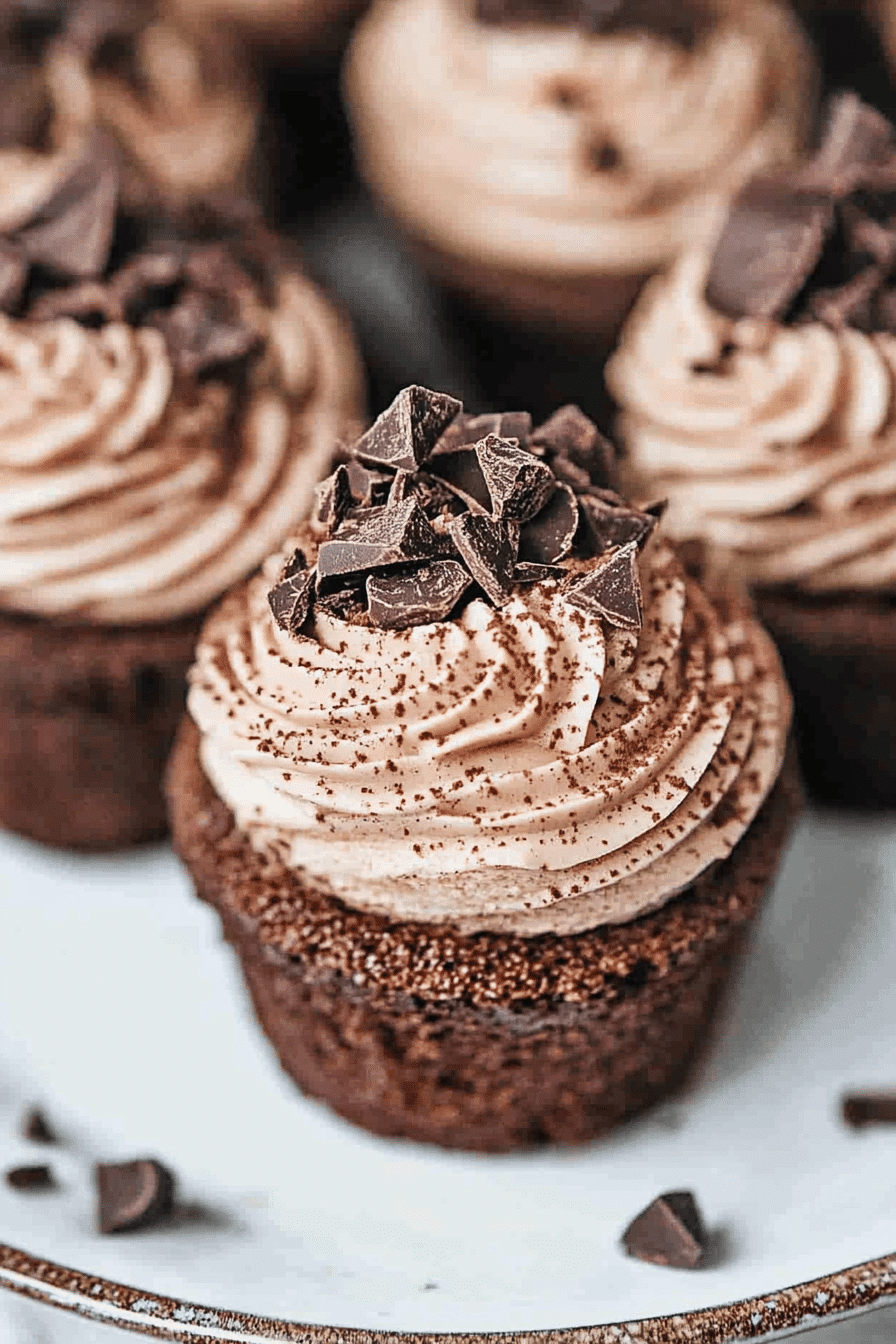
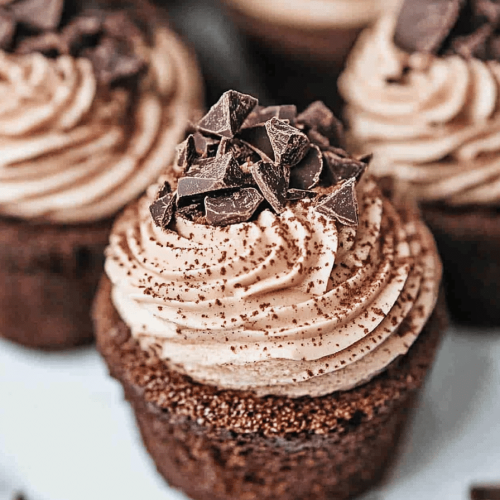
Once cooled and glazed (or just cooled!), these little beauties are ready to be devoured. You can serve them chilled or at room temperature. They are absolutely delightful on their own, but feel free to add some fresh berries, a dollop of whipped cream, or a sprinkle of chocolate shavings. Enjoy every single bite!
What to Serve It With
These mini chocolate cheesecakes are so versatile, they truly fit into any occasion! For a relaxed breakfast or brunch, I love serving them with a strong cup of coffee. The rich chocolate and the slightly bitter coffee are a match made in heaven. They look so elegant nestled on a platter, especially with a few fresh raspberries scattered around. For a more formal brunch, imagine these alongside some fresh fruit salad and maybe some mini quiches – it’s a crowd-pleaser for sure! As a dessert, they’re simply divine. I often serve them after a hearty meal, maybe with a side of berry coulis for a pop of color and tartness, or a dusting of cocoa powder. My family adores them as a simple, special dessert after a weeknight dinner when we want something sweet but don’t want the fuss of a big cake. They’re also fantastic for parties and gatherings because everyone gets their own little treat. Just imagine a dessert table filled with these, some brownies, and maybe some mini fruit tarts – pure happiness! For cozy snacks, they’re perfect with a glass of milk or a warm mug of hot chocolate. They’re rich enough to feel like a real treat but small enough that you don’t feel overly stuffed. My kids always ask for these when they have friends over; they make everyone feel a little bit special.
Top Tips for Perfecting Your Mini Chocolate Cheesecakes
Over the years of making these (and believe me, I’ve made them *a lot*!), I’ve picked up a few tricks that I think make all the difference. For the crust, make sure your butter is fully melted and your crumbs are really fine. This helps the crust hold together beautifully without being too hard. I always press it down firmly with the bottom of a small glass or a measuring cup – it creates a nice, even layer. When it comes to the filling, the most important thing is to make sure your cream cheese is truly at room temperature. If it’s cold, you’ll end up with lumps, and no one wants lumpy cheesecake! I learned this the hard way early on. Beat the cream cheese until it’s super smooth before you add anything else. When you add the eggs, beat on low speed. Overbeating after adding eggs can incorporate too much air, which can lead to cracking or a soufflé-like texture. For the chocolate, I really recommend using good quality cocoa powder and real melted chocolate if you can. It makes such a difference in the depth of flavor. If you’re not a fan of dark chocolate, semi-sweet or even milk chocolate chips will work, but adjust the sugar slightly if you do. Baking is where most people get a little nervous with cheesecake. The key is not to overbake! You want those edges to be set, but the center should still have a slight wobble. It will continue to set as it cools. I always check mine around the 18-minute mark and trust the jiggle. If you want to get really fancy with your swirl, you can melt a little extra chocolate and drizzle it on top after filling the liners, then swirl with a toothpick. Just be careful not to over-swirl, or you’ll lose definition. For ingredient swaps, I’ve successfully made these with gluten-free graham crackers for my GF friends, and they’ve turned out wonderfully. You can also experiment with different cookie crumbs – Oreos without the filling are fantastic for an extra chocolatey crust! And for the glaze, if you find it too thick, a tiny splash of milk or cream thins it right out, and if it’s too thin, just add a few more chocolate chips and stir until melted. This recipe is pretty forgiving, but these little details really do elevate them from good to spectacular.
Storing and Reheating Tips
These mini chocolate cheesecakes are wonderfully forgiving when it comes to storage, which is another reason I love them! Once they’re completely cooled, I usually store them in an airtight container. If you plan on serving them within a day or two, you can keep them at room temperature, especially if your kitchen isn’t too warm. Just make sure they are well covered to prevent them from drying out or picking up any odors. For longer storage, the refrigerator is your best bet. They’ll stay perfectly delicious for up to 3-4 days. I find they actually taste even better on the second day as the flavors meld. If you want to freeze them, this is a great option for making ahead for a party. Make sure they are completely cooled, and then you can either freeze them unfrosted or with the glaze already on. Wrap each mini cheesecake individually in plastic wrap, then place them in a freezer-safe container or bag. They’ll keep well in the freezer for up to 2 months. To thaw, simply transfer them from the freezer to the refrigerator overnight. If you’ve glazed them, you might want to re-drizzle a little fresh glaze or add some toppings after thawing if they look a bit dull. Honestly, they don’t really need reheating, as they’re best served chilled or at room temperature. But if you absolutely wanted to warm them slightly, you could pop one in a very low oven for just a few minutes, but I’d be cautious not to overdo it, as cheesecake can get a bit gooey when overheated. I generally advise against reheating.
Frequently Asked Questions
Final Thoughts
So there you have it, my dear friends – the recipe for these utterly divine mini chocolate cheesecakes! I truly hope you give them a try. They’re more than just a dessert; they’re little bites of happiness that are perfect for almost any occasion, or just for treating yourself. They embody that perfect balance of rich chocolate flavor and creamy cheesecake texture in a perfectly portioned package. It’s a recipe that brings smiles to faces, and honestly, that’s what baking is all about for me. If you love this recipe, you might also enjoy my classic New York cheesecake recipe or my no-bake chocolate mousse if you’re looking for more chocolatey indulgence. I can’t wait to hear how yours turn out! Please leave a comment below and tell me all about your experience, or share your own creative twists. Happy baking, and enjoy every delicious bite!
Mini Chocolate Cheesecakes
Ingredients
Crust
- 1 cup Oreo cookie crumbs
- 2 tbsp unsalted butter, melted
Cheesecake Filling
- 12 ounces cream cheese, room temperature
- 0.5 cup sugar
- 2 tbsp natural unsweetened cocoa powder
- 0.25 cup sour cream, room temperature
- 0.5 tsp vanilla extract
- 2 large eggs, room temperature
- 4 ounces semi-sweet or bittersweet chocolate, chopped and melted
Chocolate Ganache
- 3 ounces semi-sweet chocolate chips
- 0.25 cup heavy whipping cream
Chocolate Whipped Cream
- 0.75 cup heavy whipping cream, cold
- 3 tbsp powdered sugar
- 3 tbsp natural unsweetened cocoa powder
- 0.5 tsp vanilla extract
Garnish
- Mini chocolate bars, for topping optional
Instructions
Preparation Steps
- Preheat oven to 325°F (162°C). Add cupcake liners to a cupcake pan.
- Combine the oreo crumbs and melted butter. Divide the mixture between the cupcake liners and press into the bottoms.
- Bake crusts for 5 minutes then remove from oven. Allow to cool while you make the filling.
- Reduce oven to 300°F (148°C).
- In a large bowl, beat the cream cheese, sugar and cocoa powder until well combined (Use low speed to keep less air from getting into the batter, which can cause cracks). Scrape down the sides of the bowl.
- Add the sour cream and vanilla extract. Beat on low speed until well combined.
- Add eggs one at a time, beating slowly and scraping the sides of the bowl after each addition.
- Stir in the melted chocolate.
- Add the filling to each cheesecake cup until cups are mostly full.
- Bake cheesecakes for 15 minutes, then turn off oven and leave the door closed for another 10 minutes.
- Crack the oven door and allow cheesecakes to cool for 15-20 minutes, then put in the fridge to finish cooling. When the cheesecakes are cool, remove from the pan.
- Add the chocolate chips for the ganache to a small bowl. Heat the heavy whipping cream just until it begins to boil.
- Pour the cream over the chocolate chips and then whisk until melted and smooth.
- Add a little chocolate ganache to the top of each cheesecake.
- To make the whipped cream, add the heavy whipping cream, powdered sugar, cocoa powder and vanilla to a large mixer bowl and whip on high speed until stiff peaks form.
- Pipe whipped cream onto each mini chocolate cheesecake, then top with a mini chocolate bar.
- Refrigerate cheesecakes until ready to serve. Cheesecakes are best when stored well covered and consumed within 3-4 days.