Okay, picture this: I’m It’s a freezing night, snow is coming down sideways, and all you want to do is hug in your mug. Is that exactly what these people are saying?Hot cocoa bombs are great forForget those instant packets that taste like chalk – we’re talking about a decadent, sweet treat. What is a melt-in-your-mouth experience that’s surprisingly easy to make I think these are even easier than making a batch of cookies, and trust me, the payoff is great. Is it like a mini chocolate volcano erupting in your mug?
What is a hot cocoa bomb?
What is the best way to break it down. A.I.A.Chot cocoa bombIs a hollow chocolate sphere filled with hot cocoa, marshmallows, and sometimes even chocolate chips. Extra goodies like chocolate chips or sprinkles. Think of it as a bath bomb, but for your Hot Chocolate! How does chocolate melt in milk? How do you release all that deliciousness into your cup? What is the perfect single-serving hot cocoa? Is this the kind of treat that makes even grumpy mornings a little bit brighter? Isn’t it fun?
Why you’ll love this recipe?
Where do I start? We’re talking rich, creamy, intensely chocolatey goodness that will satisfy even the most serious of eaters. What I love most about these are how simple they are to make. Do not let the fancy appearance fool you – it’s mostly melting chocolate and assembling! Plus, the ingredients are super budget-friendly. You probably have most of them in your pantry already.
What are some of the best things about a leather jacket? What are the possibilities for dark chocolate, milk chocolate and white chocolate? My kids love peppermint candy. I can’t get enough of it! Is it fun? What are some fun activities to do with the kids on a cold afternoon? What is it like to receive a homemade treat?hot cocoa bomb. They’re far better than store-bought and so much more personal.
How do you make hot cocoa bombs?
Quick Overview
Making Hot cocoa bombs are delicious.is all about melting, molding, filling, and sealing. I know it sounds daunting, but I promise, it’s much easier than you think! What is the most important thing to do is to work quickly and efficiently. Once you get the hang of melting chocolate, the rest is a breeze. We are basically creating an empty shell and then putting Hot Chocolate mix and marshmallows and a few more. Is it possible to seal it all back up?
Ingredients
For the Chocolate Shell:
* 12 ounces chocolate chips (milk, dark, or white – your choice! I always use good quality chocolate chips because it really does make a difference in the final product. Is Ghirardelli or Guittard my go-to brand?
* Silicone sphere molds (2. 5 inch diameter) – These are readily available online or at most craft stores. Make sure they are flexible for easy removal!
For the Hot Cocoa Filling:
* 1 cup hot cocoa mix – Use your favorite brand! I prefer the kind that has mini marshmallows already mixed in.
* 1 cup mini marshmallows – Because, you know, more marshmallow is always better.
* Optional: chocolate shavings, crushed peppermint candies, etc.
For Sealing/De
* Melted chocolate (leftover from shells or fresh) – Use a piping bag or spoon to drizzle.
* Sprinkles – Because sprinkles make everything better!

How do I learn step
Step 1: Melt the Chocolate
What is the most important step? You need to melt chocolate slowly and carefully to prevent it from seizing up. I prefer to use a double boiler, but you can also melt it in the microwave in 30-second intervals. If you are a beginner, stir in between, until smooth. Make sure the bowl and utensils you use are completely dry, because even a drop of water can ruin your food. What is melted chocolate
Step 2: Mold the Chocolate Shells
Do not overdo the chocolate in each mold cavity. Spoon about 1-2 tablespoons of chocolate into each. Use the back of a spoon to spread the chocolate evenly up the sides of the mold. How do you coat a surface? You want a nice, thick layer to prevent breakage. Place the molds in the freezer for 5-10 minutes, or until the chocolate is firm.
Step 3: Remove the Chocolate Shells
Gently peel the silicone molds away from the chocolate shells. If they are sticking, you can try running a small knife or spatula around the edge of the mold to loosen them. Work carefully to avoid breaking the shells. If they break, don’t worry – you can always remelt the chocolate and start over!
Step 4: Fill the Chocolate Shells
Fill half of the chocolate shells with hot cocoa mix, marshmallows, and any other desired fillings. Be generous, but don’t overfill them, or they will be difficult to seal.
Step 5: Seal the Chocolate Bombs
I know this is where things can get tricky, but don’t panic! What is the best way to warm a small plate in the microwave for seconds? Place an empty chocolate shell rim-down on the warm plate for just a second or two to slightly melt. Then, immediately place it on top of a filled shell and gently press down to seal. Does chocolate act as glue?
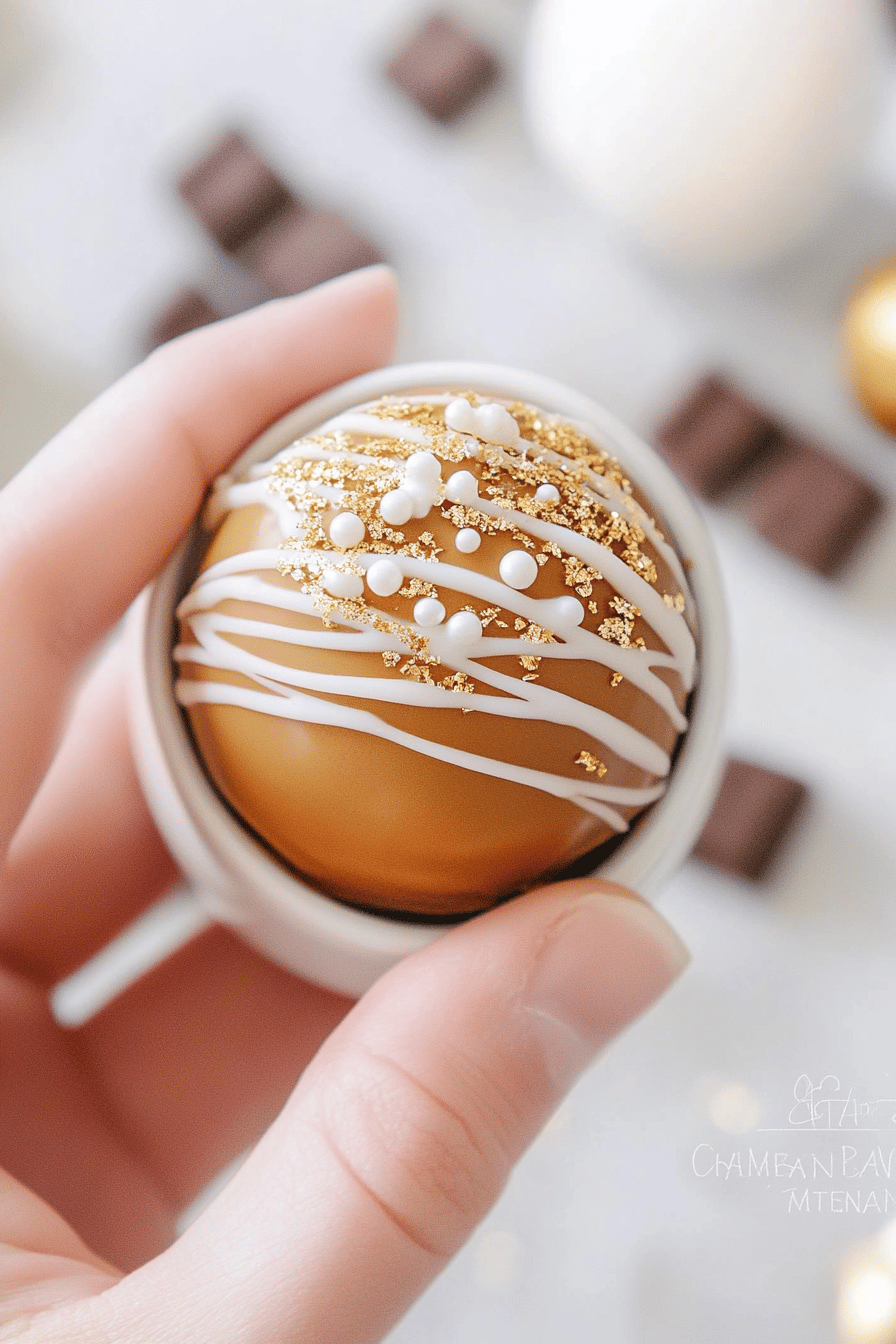
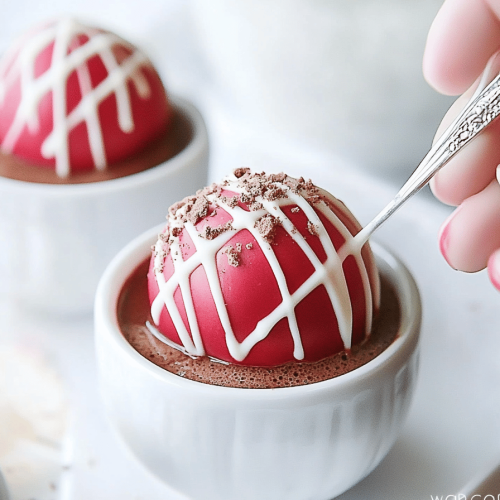
Step 6: Decorate!
How do you sprinkle chocolate over sealed bombs? I like to use a piping bag for more precise drizzle, but I also like using spoons. Have fun with it!
Step 7: Chill and Enjoy
Place the decorated item on the table.Hot cocoa bombs are aIn the refrigerator for about 10 minutes to allow the chocolate to set completely. Then, drop one into a mug of hot milk, watch it explode with chocolatey goodness, and enjoy!
Step 8: Tips and Serving
To serve, simply heat up your favorite milk (I think almond milk makes it even creamier), drop in a few drops of lemon juice, and serve. How do you make a cocoa bomb? What is the best part about presentation?
What should I serve it with?
Hot cocoa bombs are aare pretty perfect on their own, but if you want to take things to the next level, here are a few things that you should know. Serving suggestions:
What’s a good holiday treat?Serve with gingerbread cookies or Peppermint Bark. What is the best combination of peppermint and chocolate?
For a Cozy Night In:What’s the best way to relax with a good book?
As a Gift: Package the hot cocoa bombs in a cute little box or cellophane bag and tie with a ribbon. They make a thoughtful and delicious gift for friends, family, and coworkers. My own family loves when I give these as holiday gifts.
For a Special Occasion: Add a shot of espresso or a splash of liqueur (like Baileys or Kahlua) to your hot cocoa for an extra indulgent treat. It’s the perfect way to celebrate a birthday or anniversary.
Honestly, the possibilities are endless! Get creative and have fun with it! They are very good and extremely versatile.
Top Tips for Perfecting Your Hot Cocoa Bombs
Alright, let’s talk tips and tricks. I’ve made countless batches of these things, and I’ve learned a few things along the way.
Chocolate Tempering: If you want your chocolate shells to be super shiny and snap when you break them, you’ll need to temper your chocolate. This is a bit more advanced, but there are tons of tutorials online. It’s not essential, but it does make a difference in the final presentation.
Mold Release: If you’re having trouble getting the chocolate shells out of the molds, try rubbing a small amount of shortening or coconut oil into the molds before adding the chocolate. This will help prevent sticking.
Sealing Secrets: The key to sealing the bombs is to have a slightly melted edge on the empty shell. Don’t overmelt it, or it will be too thin and won’t seal properly. If you’re struggling, you can also use a small amount of melted chocolate as “glue” to seal the edges.
Customization Crazy: Don’t be afraid to get creative with your fillings! You can add caramel bits, chopped nuts, cookie crumbs, or even a sprinkle of chili powder for a little kick. The possibilities are endless!
Troubleshooting Tips: If your chocolate is seizing up, try adding a tablespoon of vegetable oil or shortening to the melted chocolate. This will help to loosen it up. If your shells are breaking easily, make sure you’re using a thick enough layer of chocolate and that you’re not removing them from the molds too soon.
Storing and Reheating Tips
If you’re not planning on using your hot cocoa bombs right away, you can store them in an airtight container at room temperature for up to two weeks. I actually find that keeping them in the fridge will ensure they last longer. They can also be frozen for up to two months. Just make sure they are well-wrapped to prevent freezer burn.
If you’re storing them in the refrigerator or freezer, it’s best to wait to drizzle the melted chocolate until right before serving. This will prevent the drizzle from getting dull or cracking.
One of the keys is to keep moisture away from them. If they are left out too long in humid environments, they can melt.
Frequently Asked Questions
Final Thoughts
So there you have it! My tried-and-true recipe for perfect hot cocoa bombs. They are seriously so worth the small effort. If you are a fan of chocolate, you should try these and I’m sure your friends and family will be very impressed with them. These are so much fun and a perfect family project on a cold afternoon.
If you love this recipe, be sure to check out my other chocolatey treats, like my decadent chocolate lava cakes and my fudgy brownies. And don’t forget to leave a comment below and let me know how your hot cocoa bombs turned out! I can’t wait to hear from you! Happy bomb-making!
Hot Cocoa Bombs
Ingredients
Main Ingredients
- 12 ounces semi-sweet chocolate chips
- 1 tablespoon coconut oil
- 0.5 cup unsweetened cocoa powder
- 0.5 cup powdered sugar
- 1 teaspoon vanilla extract
- 1 cup mini marshmallows
Instructions
Preparation Steps
- Melt chocolate chips and coconut oil in a double boiler or microwave. Stir until smooth.
- Line a baking sheet with parchment paper. Spoon melted chocolate into a piping bag or ziplock bag with a corner snipped off.
- Pipe 2-inch circles onto the prepared baking sheet. Refrigerate for 10-15 minutes until set.
- In a small bowl, whisk together cocoa powder, powdered sugar, and vanilla extract.
- Remove the chocolate circles from the refrigerator. Fill each circle with a spoonful of the cocoa powder mixture and top with mini marshmallows. Top with another chocolate circle to seal.
- Refrigerate again for at least 30 minutes before serving.