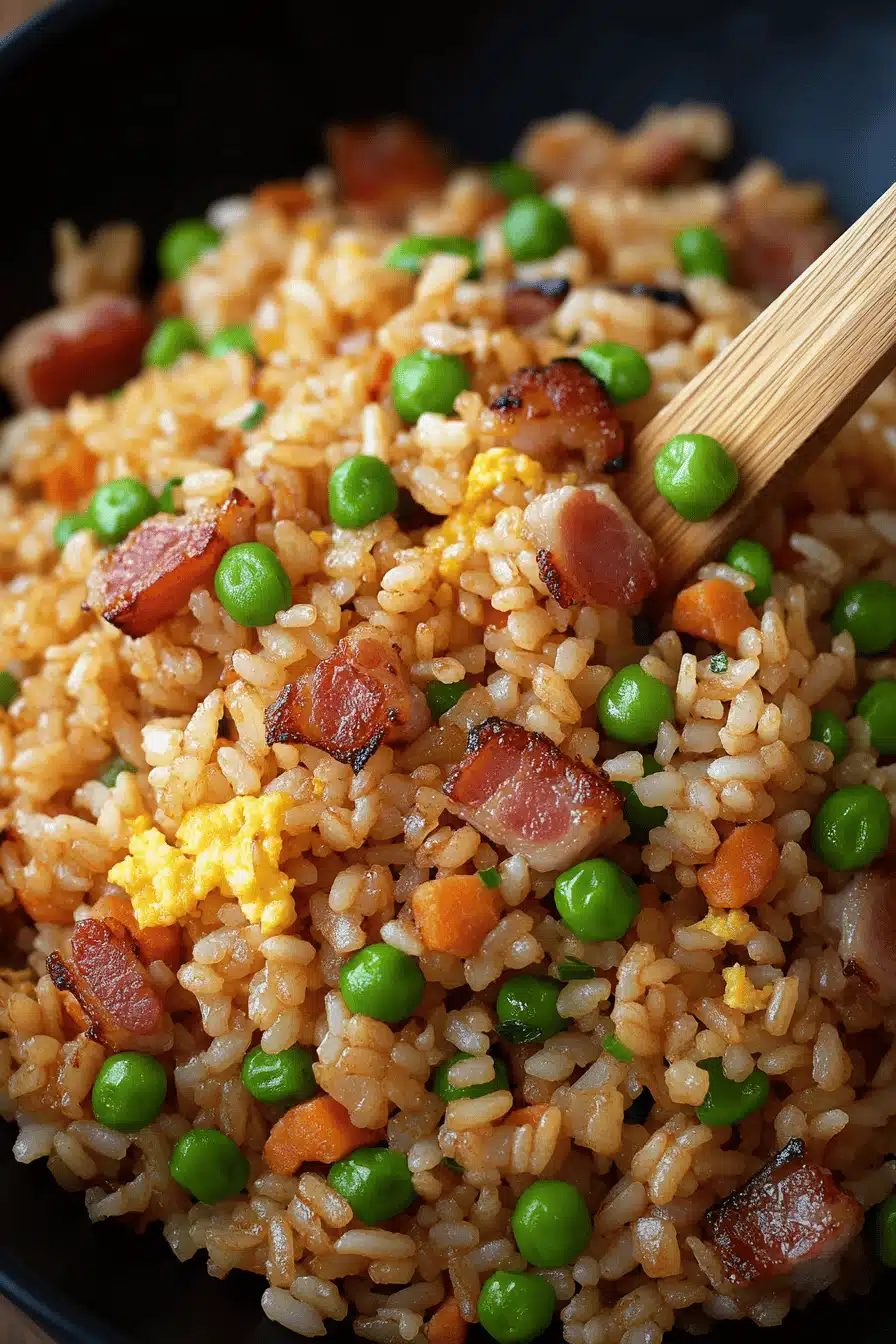
Oh, this dish! It’s more than just a meal; it’s a hug in a bowl, a burst of comfort, and honestly, a lifesaver on those chaotic weeknights when dinner feels like a mountain to climb. I remember the first time I really nailed my own homemade Fried Rice. It wasn’t fancy, just a simple pan on a Tuesday evening, but the aroma that filled my kitchen… it was pure magic. It reminded me of the takeaways we’d get as a kid, but somehow brighter, fresher, and so much more satisfying. Forget those takeout containers that leave you feeling a bit… meh. This is the real deal, folks. It’s that satisfyingly savory, delightfully chewy, slightly smoky goodness that just makes everything feel right. Honestly, if you can boil water and chop an onion, you can make this. It’s truly my shortcut to deliciousness, a vibrant plate that always brings smiles to the table.
What is fried rice?
So, what exactly *is* homemade fried rice? Think of it as your pantry’s best friend, a culinary chameleon that transforms humble leftovers into a star attraction. At its heart, it’s simply cooked rice that’s stir-fried in a wok or large skillet with a medley of ingredients. These can range from humble frozen peas and carrots to succulent shrimp, tender chicken, or crispy tofu. The magic really happens with the sauce – usually a savory blend of soy sauce, a touch of sesame oil, and maybe a hint of ginger and garlic. It’s less about a rigid recipe and more about a flexible framework. It’s that comforting, go-to dish you can whip up in minutes, especially when you have some day-old rice hanging out in the fridge. It’s the culinary equivalent of a cozy blanket and a good book, but you can eat it!
Why you’ll love this recipe?
There are so many reasons why this homemade fried rice has earned a permanent spot in my recipe rotation. First off, the flavor is just *incredible*. It’s this perfect symphony of salty, umami, and slightly sweet, with those delightful little pops of texture from the veggies and whatever protein you choose. The aroma alone is enough to get everyone in the kitchen asking “What’s cooking?”. And the simplicity? Oh, you guys, it’s ridiculously easy. Most of the work is done when you’re chopping your veggies, and then it’s just a quick stir-fry. This is a lifesaver on busy nights when you’re tempted to just order pizza. Plus, it’s incredibly budget-friendly. Using day-old rice is key, and the other ingredients are usually things you already have on hand. It’s so versatile, too! I’ve made it with leftover roast chicken, a bit of ham, or even just eggs and loads of veggies when I want something lighter. It’s the perfect canvas for whatever you have in your fridge, making it super sustainable and always interesting. What I love most about this is the satisfaction of creating something so delicious from scratch, with ingredients I know and trust, in less time than it takes for delivery to arrive. It’s a little bit of kitchen alchemy that always pays off!
How do I make homemade fried rice?
Quick Overview
This is where the magic happens! We’re going to take some cooked, chilled rice and toss it into a screaming hot pan with your favorite veggies and a savory sauce. The key is high heat and quick movement to get those lovely little browned bits and that slightly smoky flavor. It’s a fast, fun, and ridiculously rewarding process. You’ll be amazed at how quickly this comes together, turning simple ingredients into a restaurant-worthy meal right in your own kitchen. Don’t be intimidated by the “wok hei” (that smoky flavor!) – you can achieve it right on your stovetop with a little technique.
Ingredients
For the Rice:
4 cups cooked and chilled day-old rice (This is crucial! Fresh rice is too moist and will clump. I always make a big batch of rice earlier in the week and keep it in the fridge. Jasmine or basmati work beautifully.)
2 tablespoons neutral oil (like vegetable, canola, or grapeseed – something with
For the Aromatics & Veggies:
1 tablespoon neutral oil
2 cloves garlic, minced
1 teaspoon grated fresh ginger (optional, but really adds a lovely warmth)
1 cup diced onion (yellow or red, your preference!)
1 cup frozen peas and carrots mix (no need to thaw! They cook right in the pan)
1/2 cup diced bell pepper (any color, adds a nice sweetness and crunch)
For the Protein (choose one or combine!):
2 large eggs, lightly beaten
1 cup cooked and diced chicken, pork, or shrimp (leftovers are perfect here!)
1/2 cup cubed firm tofu, pan-fried until golden
For the Sauce:
3 tablespoons soy sauce (low-sodium is great if you want to control saltiness)
1 tablespoon oyster sauce (optional, but adds an amazing depth of flavor and gloss)
1 teaspoon sesame oil (don’t skip this, it’s key for that signature aroma!)
1/2 teaspoon sugar (balances the saltiness beautifully)
For Garnishing:
2-3 scallions, thinly sliced (green parts only, for that fresh pop)
Step-by-Step Instructions
Step 1: Preheat & Prep Pan
Get your wok or a large, heavy-bottomed skillet screaming hot over medium-high heat. Add the 2 tablespoons of neutral oil. You want it to shimmer, almost to the point of smoking – that’s when you know it’s ready to go. This high heat is what gives fried rice that lovely char and prevents it from getting soggy. If you don’t have a wok, a good cast-iron skillet or a sturdy stainless steel pan will work wonders.
Step 2: Cook the Eggs (if using)
Push the hot oil to the sides of the pan, creating a small well in the center. Pour in your lightly beaten eggs. Let them set for about 30 seconds, then scramble them gently with your spatula until just cooked through. Remove the scrambled eggs from the pan and set them aside on a plate. This prevents them from overcooking and becoming rubbery.
Step 3: Sauté Aromatics and Veggies
Add the remaining 1 tablespoon of oil to the hot pan. Toss in your diced onion and sauté for about 1-2 minutes until it starts to soften. Add the minced garlic and grated ginger (if using) and stir-fry for another 30 seconds until fragrant – be careful not to burn the garlic! Next, add the frozen peas and carrots and diced bell pepper. Stir-fry for about 2-3 minutes, allowing the veggies to heat through and get slightly tender-crisp. We don’t want mushy veggies here!
Step 4: Add the Rice and Protein
Now for the star! Add the cold, day-old rice to the pan. Break up any clumps with your spatula. Stir-fry for about 3-5 minutes, letting the rice heat through and get a little toasted. If you’re adding cooked protein like chicken, pork, or shrimp, toss it in now and stir-fry for another minute to heat it up. If you’re using tofu, add it here too.
Step 5: Mix the Sauce
While the rice is stir-frying, quickly whisk together the soy sauce, oyster sauce (if using), sesame oil, and sugar in a small bowl. This ensures everything is well combined before it hits the hot pan.
Step 6: Sauce it Up and Combine
Pour the prepared sauce evenly over the rice and veggies. Stir everything together vigorously, making sure every grain of rice is coated. Continue to stir-fry for another 2-3 minutes, allowing the sauce to thicken slightly and the flavors to meld. Gently fold in the cooked scrambled eggs and sliced scallions. Give it one final toss.
Step 7: Taste and Serve
Taste your homemade fried rice and adjust seasoning if needed. You might want a splash more soy sauce or a pinch more sugar. Serve immediately in bowls, garnished with extra scallions if you like! The smell alone will have everyone flocking to the table.
What to Serve It With
This homemade fried rice is wonderfully self-sufficient, but if you’re looking to build out a bigger meal or pair it with something special, you have so many fantastic options! For a hearty breakfast, I love serving a smaller portion alongside some crispy bacon or perfectly poached eggs. It’s surprisingly satisfying and a great way to use up any leftover rice from dinner the night before. For a proper brunch spread, imagine a vibrant bowl of fried rice next to some teriyaki Glazed Salmon or even some sweet pineapple salsa. It adds a lovely savory contrast. As a light dessert? Well, not exactly a dessert, but it can be a comforting late-night snack! Sometimes, after a long day, a small bowl of this, maybe with a sprinkle of chili flakes, hits the spot better than anything else. And for cozy family dinners, this is the perfect main event. I often pair it with simple steamed or stir-fried broccoli, some spring rolls from the freezer, or a light miso soup. My kids even love it when I add a few extra shrimp to the mix, turning it into a more substantial meal. It’s adaptable for any occasion, really!
Top Tips for Perfecting Your Homemade Fried Rice
I’ve made this homemade fried rice more times than I can count, and over the years, I’ve picked up a few tricks that really elevate it from good to *great*. First and foremost: cold, day-old rice is non-negotiable. Freshly cooked rice has too much moisture and will steam rather than fry, leading to a mushy, clumpy mess. Seriously, plan ahead! If you don’t have leftovers, spread your freshly cooked rice on a baking sheet and pop it in the fridge for at least an hour to dry out. When it comes to the veggies, I’m a huge fan of the frozen peas and carrots mix because it’s so convenient, but feel free to add whatever you have on hand – finely diced broccoli florets, chopped bell peppers, corn, edamame – just make sure they’re cut into small, bite-sized pieces so they cook evenly and quickly. Don’t overcrowd the pan! If you’re making a big batch, it’s better to cook it in two separate batches. Overcrowding lowers the pan temperature, steaming the ingredients instead of frying them, and you’ll lose that beautiful wok hei flavor. For the sauce, I always recommend whisking it together in a separate bowl *before* you start cooking. This way, you can just pour it in and stir without fumbling for ingredients when everything is sizzling in the pan. My kids actually ask for seconds when I add a teaspoon of honey to the sauce; it gives it a lovely subtle sweetness that they adore. And finally, don’t be afraid to taste and adjust! Fried rice is all about balance. If it tastes a little flat, add a splash more soy sauce. Too salty? A tiny pinch of sugar can help. It’s your kitchen, your rules!
Storing and Reheating Tips
One of the best things about homemade fried rice is how well it stores and reheats, making it a champion for meal prepping. Once it’s cooled down completely (this is important for food safety and to prevent sogginess), I like to store it in an airtight container in the refrigerator. It will stay delicious and perfectly edible for about 3-4 days. I often make a big batch on Sunday and have it for lunches throughout the week. When it comes to reheating, the microwave is the quickest option; just a minute or two, stirring halfway through, usually does the trick. However, for the absolute best texture, I highly recommend reheating it in a skillet over medium heat. Add a tiny drizzle of oil and stir-fry the rice for a few minutes until it’s heated through and a little bit crispy again. It really brings back that fresh-from-the-wok quality. If you’re planning to freeze it, make sure to cool it completely first. Portion it into freezer-safe containers or bags, and it should keep well for up to 2-3 months. Thaw it overnight in the refrigerator before reheating. I generally advise against adding the final garnish of scallions until after reheating, especially if you’re planning to store it long-term, as they can wilt and get a bit slimy.
Frequently Asked Questions
Final Thoughts
There you have it – my absolute favorite way to make homemade fried rice! It’s proof that you don’t need to be a gourmet chef or spend hours in the kitchen to create something truly delicious and satisfying. It’s the perfect dish for using up leftovers, a fantastic canvas for whatever veggies you have hiding in your crisper drawer, and honestly, just incredibly comforting. I hope you give this recipe a try and that it becomes a regular in your own meal rotation. It’s brought so much joy and ease to my busy life, and I truly believe it can do the same for you. If you loved this, you might also enjoy my recipe for [link to another recipe, e.g., Quick Chicken Stir-Fry] or my guide to [link to another recipe, e.g., Perfect Steamed Rice]. I can’t wait to hear how your homemade fried rice turns out! Please leave a comment below with your favorite additions or any questions you have. Happy cooking!
Homemade Fried Rice
Ingredients
Main Ingredients
- 3 cups cooked jasmine rice leftover, cold rice works the best
- 1 tablespoon vegetable oil
- 0.25 large Vidalia onion chopped
- 2 cloves garlic minced
- 1 cup frozen peas and carrots
- 2 eggs
- 0.5 teaspoon sesame oil
- 3 tablespoons soy sauce
- Green onion for garnish
Instructions
Preparation Steps
- Prepare your rice according to package directions. Set this aside. This is a handy recipe if you happen to have rice leftover from a previous meal. You can also choose to make your rice in an Instant Pot or use frozen already cooked rice!
- In a large skillet or wok, preheat your oil over medium heat and add onion and garlic. Cook until onions are soft, about 2-3 minutes. Make sure to stir occasionally to keep the garlic from burning. Add peas and carrots and cook until partially thawed 1-2 minutes. You’ll need to adjust this time if you use fresh veggies.
- Turn the heat up to medium-high and add cooked rice. Cook for another 2-3 minutes until rice is nice and hot and starts to brown.
- Reduce heat and push the rice to the sides of the pan, making a hole in the middle for the eggs. Crack the eggs into the middle of the pan and scramble them in the center of the pan.
- Once the eggs are cooked, stir them into the rice. Mix soy sauce and sesame oil together and pour over rice. Stir until rice is evenly coated with sauce.