I’ve got a soft spot for desserts that feel fancy but come together in a rush, and French Silk Brownies are basically the kitchen equivalent of a warm hug in a square pan. I remember the first time I tasted a version of this treat at a friend’s house—the brownies were dense and fudgy, and the silk filling tasted like a cloud with chocolate on it. The moment you slice into it, the ribbons of silky filling swirl through the chocolate with a glossy, inviting sheen. It’s not a heavy dessert; it’s indulgent in a way that still feels lifted, elegant, and totally doable on a weeknight. This one’s a lifesaver on busy nights, and trust me when I say: the kids ask for seconds every single time. If you love a classic brownie but crave something a touch more luxurious, French Silk Brownies are your new go-to.
What is French Silk Brownies?
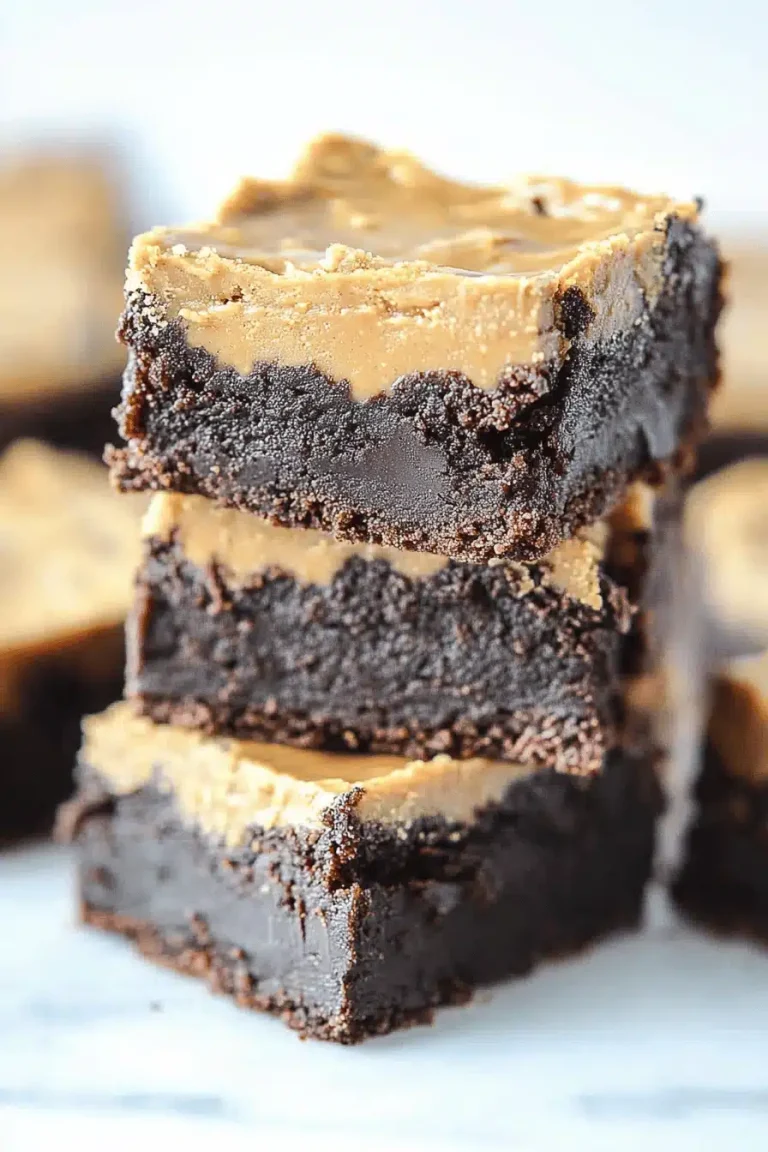
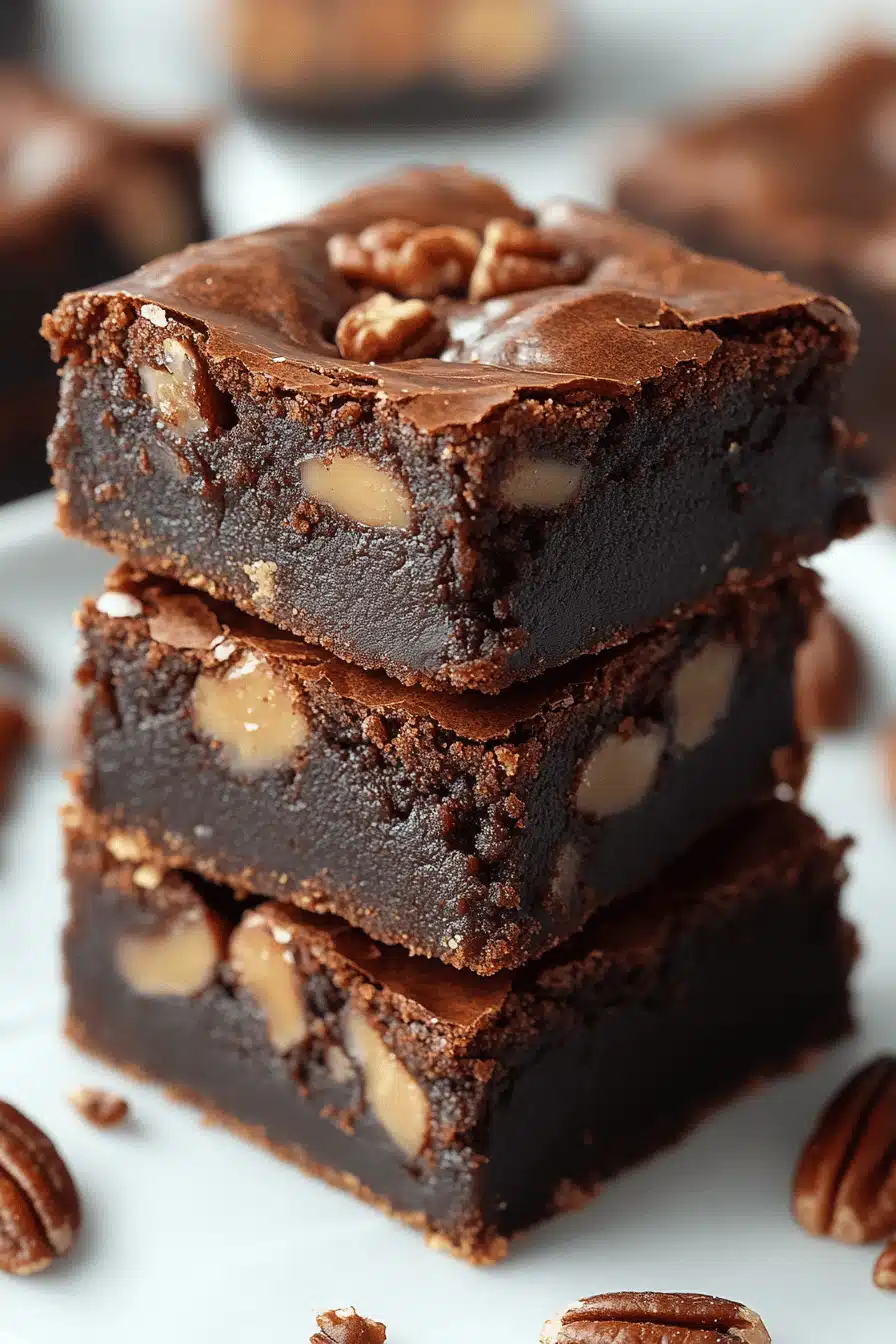
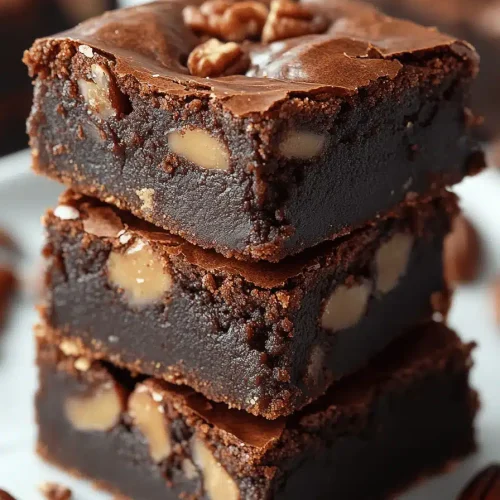
Think of French Silk Brownies as a two-layer love affair. The base is a rich, fudgy brownie—thin-cracked, deeply chocolatey, and not too sweet. The star is the silky filling—Cream Cheese whipped with cocoa and vanilla, lightened with whipped cream so it stays airy and almost mousse-like. It’s essentially brownie meets silk pie vibes in a single slice. The name “French Silk” nods to the luxurious, whisper-soft texture that evokes classic French desserts, but here it’s married to a straightforward brownie recipe you can actually pull off in a busy kitchen. It’s the kind of dessert that looks plated and polished but tastes like comfort—perfect for birthdays, date nights at home, or a post-dinner treat that disappears in minutes.
Why you’ll love this recipe?
What I love most about French Silk Brownies is the contrast—the brownie crust gives you that dense, chocolatey bite, while the silk filling brings a cooling, creamy bite that makes each mouthful feel almost luxurious. It’s like having two desserts in one, but you don’t have to juggle pans or textures. The recipe is forgiving, too. If you’ve got a busy evening, you can mix the batter, swirl in the filling, and bake. The glaze on top adds that glossy finish and a final chocolate punch that ties everything together. And because the filling is whipped into lightness, you don’t end up feeling weighed down after dessert; it’s the kind of richness that feels indulgent without being overwhelming. I’ve made this countless times, and it never fails to impress guests or bring a smile to a tired family member’s face. What I love most about this is how flexible it is—a few tweaks here and there can make it your signature version each time you bake it.
How do I make French Silk Brownies?
Quick Overview
This recipe starts with a glossy, fudgy brownie layer, then a luscious silk filling that’s whisked until smooth and airy. You’ll spread a thick layer of brownie in a prepared pan, dollop the silky filling over it, and swirl the two together to create elegant ribbons. A glossy chocolate glaze seals the deal. It’s all about timing and texture: keep the brownie fudgy, keep the silk light, and let the glaze gleam. If you’re new to this, think of it as assembling two simple components and giving them a little dance in the pan. The result is impressive, but the steps are wonderfully straightforward.
Ingredients
For the Main Batter:
- 1 cup (226 g) unsalted butter, melted and cooled
- 2 cups (400 g) granulated sugar
- 4 large eggs, room temperature
- 2 teaspoons vanilla extract
- 3/4 cup (95 g) all-purpose flour
- 3/4 cup (75 g) unsweetened cocoa powder, sifted
- 1/2 teaspoon salt
For the Filling:
- 8 oz (225 g) cream cheese, softened
- 1/2 cup (60 g) powdered sugar
- 2 tablespoons cocoa powder (for depth)
- 1 teaspoon vanilla extract
- 1 cup (240 ml) heavy cream, cold, lightly whipped to soft peaks
For the Glaze:
- 1 cup (170 g) semisweet chocolate chips or finely chopped chocolate
- 2 tablespoons unsalted butter
- 3 tablespoons heavy cream
- Pinch of salt (optional)
Tips and sourcing notes: I like using a high-quality Dutch-processed cocoa for a deeper, velvety finish, and I’ll sometimes swap in dark chocolate for a richer bite. If you’re dairy-free, try a sturdy Coconut Cream whipped and sweetened lightly; the texture will stay silky, though the flavor shifts a touch. For a lighter touch, use a little less sugar in the filling, but taste as you go to keep that signature silkiness.
Step-by-Step Instructions
Step 1: Preheat & Prep Pan
Preheat your oven to 350°F (175°C). Line a 9×13-inch pan with parchment, letting the edges overhang for easy removal. If your pan isn’t lined perfectly, don’t sweat it—just smooth a little extra parchment into the corners so the brownies don’t stick when you cut them.
Step 2: Mix Dry Ingredients
In a medium bowl, whisk together the flour, cocoa powder, and salt. This keeps the cocoa evenly distributed and makes the batter feel smooth rather than grainy once it bakes. Sift if you can; you’ll thank yourself when you don’t chase cocoa lumps later.
Step 3: Mix Wet Ingredients
In a large bowl, whisk the melted butter with the granulated sugar until glossy. Add eggs one at a time, beating well after each addition, then whisk in vanilla. The mixture should look a bit thick and glistening—the sign you’re in brownie territory. If it looks too oily, give it a minute to rest and then whisk again.
Step 4: Combine
Fold the dry ingredients into the wet in three additions, just until you no longer see flour. A few minor streaks are fine; overmixing can make the brownies dense and dry. The batter should be thick but still pourable.
Step 5: Prepare Filling
Beat the cream cheese with powdered sugar, cocoa powder, and vanilla until ultra-smooth. It should be free of lumps. Gently fold in the lightly whipped cream until the mixture looks creamy and aerated—think satin, not a mousse that holds a peak. Chill the filling briefly if it’s too soft to hold its shape when dolloped on the brownie.
Step 6: Layer & Swirl
Spread the brownie batter evenly into the prepared pan. Drop dollops of the silk filling over the surface, then use a knife or skewer to swirl it through the batter in wide, gentle strokes. You want ribbons, not a uniform layer—this is where the magic happens. If the filling becomes too fluid, pop the pan back in the fridge for 10 minutes to firm up slightly.
Step 7: Bake
Bake for 25–30 minutes, until the edges look set and a tester inserted near the center comes out with a few moist crumbs. The center should still feel slightly jiggly—that’s the sign you’ll have fudgy, luscious brownies once they cool. If you’re using a convection oven, reduce the temperature by 25°F (about 15°C). If your oven runs hot, tent the top with a sheet of foil after 15 minutes to prevent over-browning.
Step 8: Cool & Glaze
Let the pan cool completely on a rack. A full cooling helps the silk filling set into those pretty, clean slices. For the glaze, warm the cream, butter, and chocolate together until smooth, then pour over the surface, tilting the pan to create a glossy, even layer. Sprinkle a pinch of salt if you like a little contrast. Let the glaze set for at least 20 minutes before slicing.
Step 9: Slice & Serve
Use a sharp, warm blade to slice into neat squares. Wipe the blade between cuts for clean edges. These brownies are best served slightly at room temperature; they’re sliceable, but the filling still feels luxuriously soft. For an extra touch, dust with a whisper of cocoa powder or top with tiny chocolate shavings before serving.
What to Serve It With
French Silk Brownies pair beautifully with a simple coffee or a mug of milk, which makes them a perfect dessert for weekend mornings or after-dinner chats. I love sharing a plate with friends on a casual night—the kind where you pour a second cup and trade stories while the glaze catches the light. Here are some ideas to suit different occasions:
For Breakfast: A cut with a strong coffee or a creamy latte, maybe with a few berries for brightness. The silk filling adds a dreamy twist to a morning treat, and the brownie base keeps everything feeling comforting rather than too fancy for the start of the day.
For Brunch: Slice into thin bars and arrange on a platter with citrus zest and whipped cream. A splash of orange zest in the glaze adds a sunny note that wakes up the palate beautifully.
As Dessert: Serve with vanilla bean Ice Cream and a drizzle of extra glaze. The contrast between the warm brownie and the cold ice cream is a classic crowd-pleaser that never gets old at dinner parties.
For Cozy Snacks: Pair with a hot cup of tea and a few almonds or toasted hazelnuts for texture. The silken filling feels luxe without being overpowering, which makes it a wonderful end to a long day.
In my family, French Silk Brownies are a tradition of sharing—a pan that disappears too quickly, a kitchen full of laughter, and that unmistakable homey scent that says, “you’re exactly where you’re meant to be.” If you try a tweak, I’d love to hear how you made it your own—a splash of espresso in the silk, perhaps, or a citrus twist in the glaze. These little moments of invention are what keep recipes alive.
Top Tips for Perfecting Your French Silk Brownies
Seasoned bakers and first-timers alike can benefit from a few insider tips that keep this recipe at its best every time.
Silk Filling Prep: Let the cream cheese soften completely so you don’t chase lumps. Warm cream slightly before folding into the whipped cream so everything suspends evenly. I usually press a plastic wrap directly onto the surface of the filling after mixing to prevent a skin from forming while I finish the rest of the steps.
Mixing Advice: Don’t overwork the batter once you add the dry ingredients. Stop as soon as you no longer see flour streaks. A few tiny lumps are friendlier to texture than a tough, compact batter.
Swirl Customization: For a more dramatic effect, reserve a portion of the silk filling and place it in a piping bag. Pipe thin ribbons over the batter before swirling, then give it a few quick turns with a knife to create a swirled marbling that looks like a painter’s stroke on the top.
Ingredient Swaps: You can swap half of the cream cheese for ricotta for a slightly different texture, though the silk will be more delicate. If you’re avoiding dairy, try coconut cream whipped with a touch of vanilla and cocoa; you’ll still get that silky feel with a dairy-free finish.
Baking Tips: If your oven runs hot, start checking at 22 minutes. If you’re uncertain, use a thermometer to check for a center temperature around 205–210°F (96–99°C) for fudgy brownies. If the glaze thickens too much as it sits, warm it gently over a double boiler or microwave in 5-second bursts until it’s pourable again.
Glaze Variations: Add a teaspoon of espresso powder to the glaze for a mocha note, or a splash of almond extract for a nutty aroma. If you want a lighter finish, brush a thin layer of glaze toward the edges to let the silk color peek through in the center.
Lessons learned: I’ve learned to let the silk filling chill briefly to hold its shape, and I’ve learned to trust the glaze’s shine without overworking it. My family’s favorite moment is when the first slice lands on a plate, the glaze catching the light just so, and the silk gleaming beneath like a velvet ribbon.
Storing and Reheating Tips
French Silk Brownies store beautifully, which means you can bake ahead for a crowd without worry. Here’s how I keep them tasting their best.
Room Temperature: Store in an airtight container at room temperature for up to 2 days. If your kitchen runs warm, add a light plastic wrap layer to prevent the glaze from absorbing fridge scents.
Refrigerator Storage: Keep in an airtight container for up to 5 days. The silk filling will firm a bit when chilled, which some people enjoy—it’s like a chilled mousse moment with chocolate on the outside.
Freezer Instructions: Freeze baked brownies in a single layer on a parchment-lined tray, then wrap tightly. They’ll keep well for up to 2 months. Thaw at room temperature and drizzle fresh glaze if you want that glossy finish to be as vibrant as the day you baked them.
Glaze Timing Advice: If you’re stacking or layering, apply the glaze just before serving; it will stay glossy and run-free. If you’re freezing the brownies, you can glaze after thawing, but I prefer glazing first for a perfect shine once cut.
Quality indicators: The brownies should feel moist and the silk should hold its shape when sliced. If the silk looks runny, give it a few minutes in the fridge to firm up before slicing. If the glaze cracks or looks dull, it might have cooled too much or tempered too quickly; gently re-warm and smooth with a spoon.
Frequently Asked Questions
Final Thoughts
French Silk Brownies are the kind of dessert that makes you feel like you’ve found a little secret—two textures harmonizing in one square, both fancy and cozy at the same time. They’re forgiving enough for a weeknight dinner but sturdy enough to cut into neat squares for guests. The silk filling adds a whisper of elegance without complicating the process, and the glossy glaze brings everything home with a glossy, chocolatey finish. If you’re looking for a crowd-pleasing showstopper that’s really just a few smart steps away from simple, this is it. I hope you’ll bake a batch soon and tell me what tweaks you fell in love with—the espresso kiss in the glaze, the citrus zest in the topping, or simply the joy of sharing a perfect square with someone you love. Happy baking! And please, drop a comment or leave a rating to share how yours turned out. I can’t wait to hear your variations and see your beautiful slices.
French Silk Brownies
Ingredients
Main Ingredients
- 1 cup unsalted butter
- 0.5 cup semi-sweet chocolate morsels
- 2 cup granulated sugar
- 4 large eggs
- 1 teaspoon vanilla extract
- 0.75 cup unsweetened cocoa powder
- 1 cup all-purpose flour
- 0.5 teaspoon kosher salt
- 0.5 teaspoon baking powder
- 8 ounce cream cheese softened
- 1.5 cup powdered sugar
- 1 teaspoon vanilla extract
- 0.5 cup semi-sweet chocolate morsels melted and cooled
- 16 ounce Cool Whip thawed and divided
Instructions
Preparation Steps
- Preheat oven to 350 degrees. Grease a 9 by 13 inch baking dish with cooking spray or line with parchment paper.
- In a saucepan, melt butter over medium heat. Remove from heat and stir in chocolate morsels and sugar until chocolate is melted.
- Beat in eggs one at a time, then mix in vanilla extract. Stir in cocoa powder, flour, salt, and baking powder just until combined.
- Pour batter into prepared dish and bake for 40 minutes. Cool completely.
- For the topping, beat cream cheese with powdered sugar and vanilla until smooth. Blend in melted chocolate, then fold in half of the Cool Whip.
- Spread topping over cooled brownies. Top with remaining Cool Whip. Refrigerate for at least 4 hours. Garnish with chocolate shavings before serving.