There are some recipes that just feel like coming home, aren’t there? For me, these golden cornmeal biscuits are absolutely one of them. They’re not fancy, they don’t require a million obscure ingredients, but oh my goodness, they have this way of making any meal feel just a little bit more special. I remember my grandma making these for Sunday dinners, the smell of them baking filling her tiny kitchen and drawing us all in like little magnets. They’re the kind of comfort food that just hugs you from the inside out. If you’re a fan of classic buttermilk biscuits but crave a little something extra, a little texture, a little bit of that sunshine-y corn flavor, then you’re going to adore these. Honestly, these cornmeal biscuits are my secret weapon for elevating a simple weeknight dinner or making a lazy weekend brunch feel like a celebration. They’re so darn good, I’ve even caught myself sneaking one (or two!) straight from the cooling rack before dinner even starts. It’s a habit I’m not proud of, but one I absolutely cannot break!
What are Golden Cornmeal Biscuits?
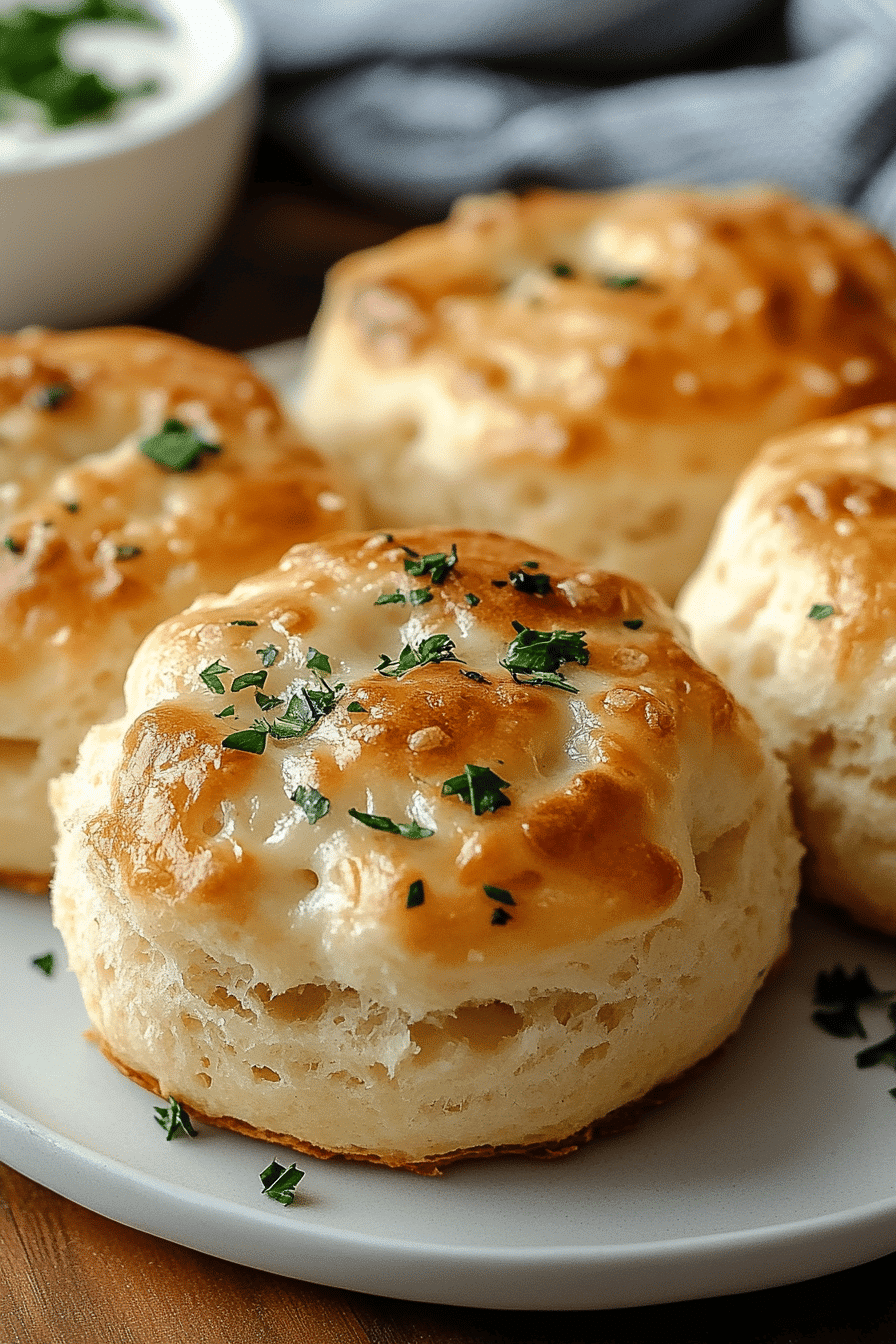
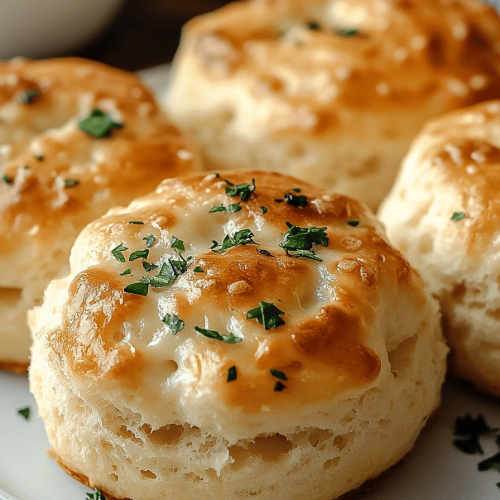
So, what exactly are these little golden wonders? Think of them as your favorite fluffy buttermilk biscuit, but with a delightful little twist: the addition of cornmeal. It’s not enough to make them crumbly or heavy like cornbread, but just enough to give them a beautiful, subtle texture and a warm, toasty flavor that’s simply divine. They’re essentially a delightful hybrid, borrowing the best qualities from both worlds. The name “Golden Cornmeal Biscuits” really just comes from their lovely color when baked – a perfect golden brown – and, of course, the star ingredient that gives them their signature charm. They’re not complicated; they’re just straightforward, honest-to-goodness biscuits that taste like pure happiness. If you’ve ever enjoyed a really good scone or a tender biscuit, you’ll recognize some familiar comfort here, but the cornmeal adds a depth of flavor and a slight chew that sets them apart in the best possible way.
Why you’ll love this recipe?
Honestly, where do I even begin with why I adore these cornmeal biscuits so much? First off, the FLAVOR. That gentle sweetness and nutty hint from the cornmeal, perfectly balanced with the tang of buttermilk and a touch of salt – it’s just heavenly. They have this wonderful aroma when they’re baking that is pure comfort. Then there’s the SIMPLICITY. I’m not kidding when I say this recipe is a lifesaver. On those evenings when I’m rushing to get dinner on the table or just want something warm and comforting without a lot of fuss, these are my go-to. They come together so quickly, and you don’t need any fancy equipment. Plus, they are incredibly COST-EFFECTIVE. Most of the ingredients are pantry staples, making these a budget-friendly way to add something really special to your meal. And the VERSATILITY! Oh, I could write a whole post just about how many ways you can enjoy these. They’re incredible alongside a hearty stew, perfect with a dollop of butter and honey for breakfast, and surprisingly wonderful as a base for a savory breakfast sandwich. They’re the kind of recipe that makes you feel like a baking pro, even if you’re just starting out. What I love most, though, is the pure joy they bring. Seeing my family’s faces light up when they smell these baking, or hearing them ask for “those cornmeal ones” – that’s what makes it all worthwhile.
How do I make golden cornmeal biscuits?
Quick Overview
Making these golden cornmeal biscuits is surprisingly straightforward. You’ll whisk together your dry ingredients, including that key cornmeal, then cut in some cold butter until it resembles coarse crumbs. Next, you’ll gently mix in the wet ingredients – a splash of buttermilk and maybe an egg yolk for richness – just until everything comes together. The magic happens when you pat out the dough, cut your biscuits, and pop them into a hot oven. They bake up quickly into tender, golden rounds with that delightful cornmeal texture. It’s a process that takes less than 30 minutes from start to finish, making them ideal for any meal.
Ingredients
For the Main Batter:
2 cups all-purpose flour
½ cup fine yellow cornmeal (this is important for texture and color, not coarse cornmeal!)
2 tablespoons granulated sugar (just a touch to balance)
2 teaspoons baking powder (for that lovely lift)
½ teaspoon baking soda (works with the buttermilk for tenderness)
1 teaspoon salt (enhances all the flavors)
½ cup (1 stick) cold unsalted butter, cut into small cubes (key for flaky layers!)
¾ cup cold buttermilk (plus a little extra if needed – don’t use sour milk, it’s different!)
For the “Fill the Hole” & Brushing (Optional but recommended!):
1 tablespoon melted butter
A tiny pinch of flaky sea salt (for a little sparkle)
Step-by-Step Instructions
Step 1: Preheat & Prep Pan
First things first, let’s get that oven ready. Preheat it to a nice hot 425°F (220°C). While it’s heating up, I like to grab a baking sheet and line it with parchment paper. This does two things: it prevents sticking, and it makes cleanup a breeze. If you’re feeling fancy or want an extra-even bake, you can lightly grease a cast-iron skillet and use that instead; just make sure it’s oven-safe. Parchment paper on a regular baking sheet is perfectly fine for everyday baking, though!
Step 2: Mix Dry Ingredients
In a large mixing bowl, I like to whisk together the all-purpose flour, the fine yellow cornmeal, sugar, baking powder, baking soda, and salt. Whisking is important here; it not only combines everything evenly but also aerates the dry ingredients, which helps with the final texture of the biscuits. Make sure you get all those little lumps out, especially from the baking powder and soda. You want a uniform mixture before we add the butter.
Step 3: Mix Wet Ingredients
Now, grab a separate, smaller bowl or a liquid measuring cup. Pour in your cold buttermilk. If you’re using an egg yolk for extra richness, whisk it into the buttermilk now. The key here is COLD. Cold buttermilk is crucial for creating those flaky layers. If your buttermilk isn’t super cold, you can even pop it in the freezer for about 10 minutes before using it. Just don’t forget about it!
Step 4: Combine
This is where the biscuit magic really starts. Add your cold, cubed butter to the dry ingredients. Now, using your fingertips, a pastry blender, or two forks, cut the butter into the flour mixture. You want to work quickly so the butter stays cold. The goal is to get a texture that looks like coarse crumbs, with some pieces of butter about the size of peas. Don’t overwork it! Those little bits of butter are what melt in the oven and create steam, leading to flaky layers. Now, make a little well in the center of your flour-butter mixture and pour in the cold buttermilk mixture. Using a fork or a rubber spatula, gently stir just until the dough *just* comes together. It will look a little shaggy, and that’s exactly what you want. Overmixing is the enemy of tender biscuits, so stop as soon as you don’t see any big dry patches.
Step 5: Prepare Filling
This step is optional but highly recommended for that extra something special. In a tiny bowl, mix your melted butter with a pinch of flaky sea salt. This is going to be brushed on top of the biscuits before baking. It gives them a gorgeous golden sheen and an extra layer of flavor that’s just delightful. It takes about 30 seconds to whip up, and it makes a noticeable difference!
Step 6: Layer & Swirl
Turn the shaggy dough out onto a lightly floured surface. Gently, and I mean *gently*, pat or lightly roll the dough into a rectangle about ½ to ¾ inch thick. Don’t press down too hard; we don’t want to compress all those lovely air pockets we worked to create. Now, fold the dough over on itself, like a letter, and pat it down again. Do this one or two more times. This is what creates those beautiful flaky layers. Once you’ve done your folds, pat or roll the dough out one last time to about ¾ inch thickness. Now, for cutting! I love using a round biscuit cutter (about 2-2.5 inches). Press straight down – don’t twist! Twisting seals the edges and can prevent the biscuits from rising up evenly. Place the cut biscuits onto your prepared baking sheet, making sure they’re touching each other. This helps them rise up tall and soft on the sides.
Step 7: Bake
Now for the glorious part! Brush the tops of the biscuits with your melted butter-salt mixture (if using). Pop that baking sheet into your preheated oven. Bake for about 12-15 minutes, or until they are beautifully golden brown on top and cooked through. You can gently lift one to check the bottom; it should be golden too. If your oven tends to bake unevenly, you might want to rotate the pan halfway through. The smell that fills your kitchen at this stage? Pure bliss.
Step 8: Cool & Glaze
Once they’re beautifully golden and baked through, carefully remove the baking sheet from the oven. Let the biscuits cool on the baking sheet for just a few minutes before transferring them to a wire rack. If you’re using a glaze (though these don’t really need one, they’re perfect plain!), now’s the time to prepare it while they’re still warm. However, for these specific cornmeal biscuits, I often just serve them as is, perhaps with a smear of butter. If you *were* to do a glaze, you’d usually let them cool slightly before drizzling.
Step 9: Slice & Serve
These are best served warm, right out of the oven or within an hour or so. Use a serrated knife to gently slice them in half horizontally. A dollop of good quality butter is heavenly, or a drizzle of local honey is equally divine. They’re also fantastic for soaking up sauces or gravies. Enjoy the warm, slightly crumbly, wonderfully textured bite!
What to Serve It With
Honestly, these cornmeal biscuits are so versatile, they can go with almost anything! For a simple and satisfying BREAKFAST, I love them split open, slathered with butter and a drizzle of maple syrup or local honey. They’re also amazing with a fried or scrambled egg and a side of crispy bacon. When it comes to BRUNCH, they really shine. Imagine them alongside some smoked salmon, Cream Cheese, and capers, or even as the perfect vehicle for eggs benedict if you’re feeling ambitious. For a more elegant spread, serve them warm with a side of fresh fruit salad. As a DESSERT, and yes, I do sometimes have them as dessert!, they are fantastic with a scoop of vanilla ice cream and a warm fruit compote. The slight sweetness and texture of the biscuit really complement the cold ice cream. And for those COZY SNACKS, they are pure comfort food. They’re perfect alongside a steaming bowl of chili, a hearty vegetable soup, or even just on their own with a cup of tea or coffee. My kids often ask for them after school with just a bit of jam, and honestly, I can’t blame them!
Top Tips for Perfecting Your Golden Cornmeal Biscuits
Over the years, I’ve definitely learned a few tricks that help make these cornmeal biscuits absolutely perfect every single time. First, about the cornmeal: make sure you’re using *fine* yellow cornmeal, not coarse cornmeal or polenta. The fine grind gives you that subtle texture and golden hue without making the biscuits gritty. If you use coarse cornmeal, you’ll end up with a much different texture, more like cornbread. When you’re cutting in the butter, remember that cold is key! I’ve tried using slightly softened butter and it just doesn’t give you those distinct, flaky layers. You want pieces of butter, about pea-sized, distributed throughout the flour. Don’t overmix the dough once you add the buttermilk. Seriously, resist the urge to knead it like bread. Just mix until it *barely* comes together. A shaggy dough is a happy biscuit dough. When you pat out the dough, be gentle. You’re not trying to roll it thin; you’re preserving those air pockets. Folding it a couple of times (like a letter) really helps create those beautiful layers. For cutting, always press straight down with your biscuit cutter and avoid twisting. Twisting can seal the edges, which prevents the biscuit from rising straight up. If you don’t have a biscuit cutter, you can use the rim of a clean glass. For baking, don’t be tempted to open the oven door too early, especially in the first 10 minutes. That rush of cool air can cause your biscuits to fall. Finally, for ingredient swaps, I’ve experimented with using a plant-based butter alternative, and it works pretty well, though the texture might be slightly less tender. I’ve also tried a touch of almond milk instead of buttermilk in a pinch, but it doesn’t give quite the same tangy lift. Stick with buttermilk if you can; it really makes a difference!
Storing and Reheating Tips
These cornmeal biscuits are truly best enjoyed fresh, but thankfully, they hold up pretty well! If you happen to have any leftovers (which is rare in my house!), storing them properly is key. At ROOM TEMPERATURE, they’re usually good for a day, maybe two if it’s not too humid. I like to store them in an airtight container or wrap them tightly in plastic wrap or foil. This helps keep them from drying out. If you want them to last longer, the REFRIGERATOR is your best bet. They’ll keep well in the fridge for about 3-4 days. Again, an airtight container or a well-sealed bag is ideal. When it comes to FREEZER INSTRUCTIONS, these biscuits freeze beautifully! Once they’ve cooled completely, wrap them individually in plastic wrap, then place them in a freezer-safe bag or container. They can stay frozen for up to 2-3 months. To reheat from frozen, you can either let them thaw at room temperature for a bit and then pop them in a toaster oven or a regular oven at around 300°F (150°C) for a few minutes until warmed through. If reheating from the fridge, a quick zap in the oven at the same temperature works wonders, or even a few seconds in the microwave if you’re in a real rush, though the oven gives them back that lovely crispness. For the glaze, I almost always recommend adding it just before serving, especially if you’re warming them up. A glaze applied too early to stored biscuits can get gummy.
Frequently Asked Questions
Final Thoughts
There you have it – my beloved golden cornmeal biscuits! I truly hope you give these a try. They’re more than just a recipe; they’re a little piece of comfort, a taste of nostalgia, and a delicious addition to so many meals. They prove that sometimes, the simplest ingredients, handled with a little care, can create something truly magical. They’re proof that you don’t need to be a professional baker to make something wonderful. If you love these, you might also enjoy my Fluffy Buttermilk Pancakes or my Easy Skillet Cornbread – they share a similar comfort food vibe! I can’t wait to hear how yours turn out, and what delicious ways you find to enjoy them. Don’t hesitate to leave a comment below with your thoughts or any fun variations you discover. Happy baking, my friends!
Cornmeal Biscuits
Ingredients
Main Ingredients
- 1.5 cups all-purpose flour
- 0.5 cup yellow cornmeal
- 2 teaspoons baking powder
- 0.5 teaspoon salt
- 0.25 cup granulated sugar
- 0.33 cup unsalted butter cold, cut into cubes
- 0.75 cup milk
Instructions
Preparation Steps
- Preheat your oven to 425°F (220°C). Line a baking sheet with parchment paper.
- In a large bowl, whisk together the flour, cornmeal, baking powder, salt, and sugar.
- Cut in the cold butter using a pastry blender or your fingertips until the mixture resembles coarse crumbs.
- Pour in the milk and stir until just combined. Be careful not to overmix.
- Turn the dough out onto a lightly floured surface and gently pat it into a 0.75-inch thick rectangle.
- Cut out biscuits using a 2-inch round cutter. Place the biscuits on the prepared baking sheet.
- Bake for 10-12 minutes, or until golden brown and puffed.
- Serve warm with butter or your favorite toppings.