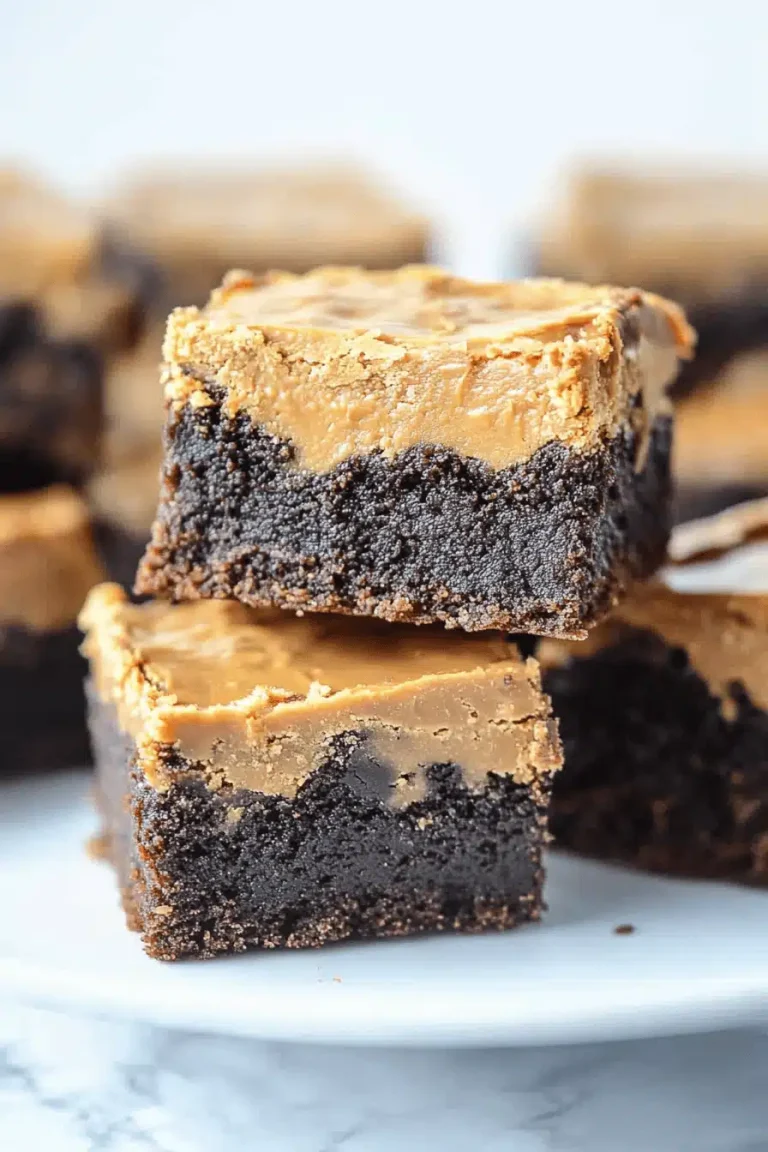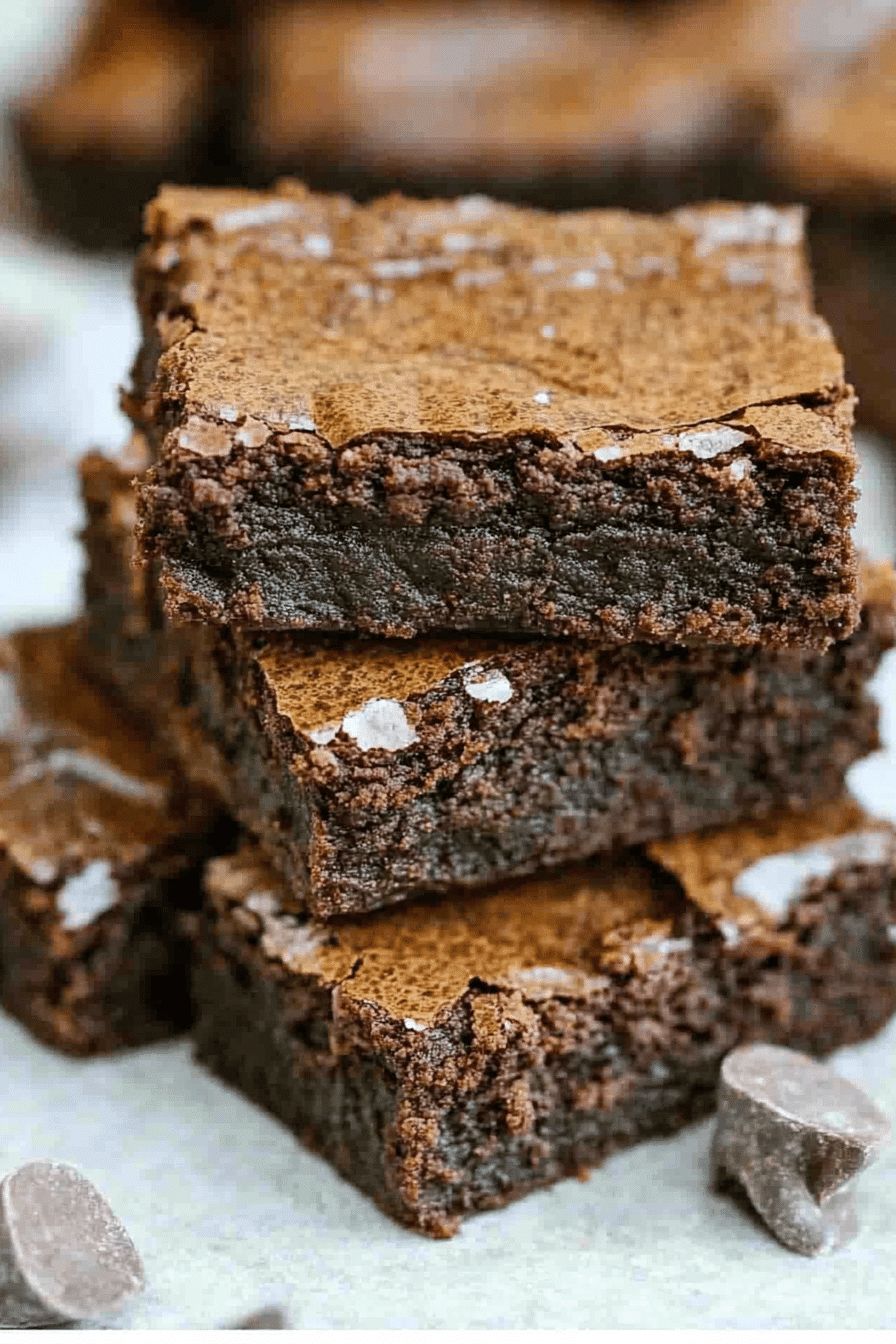
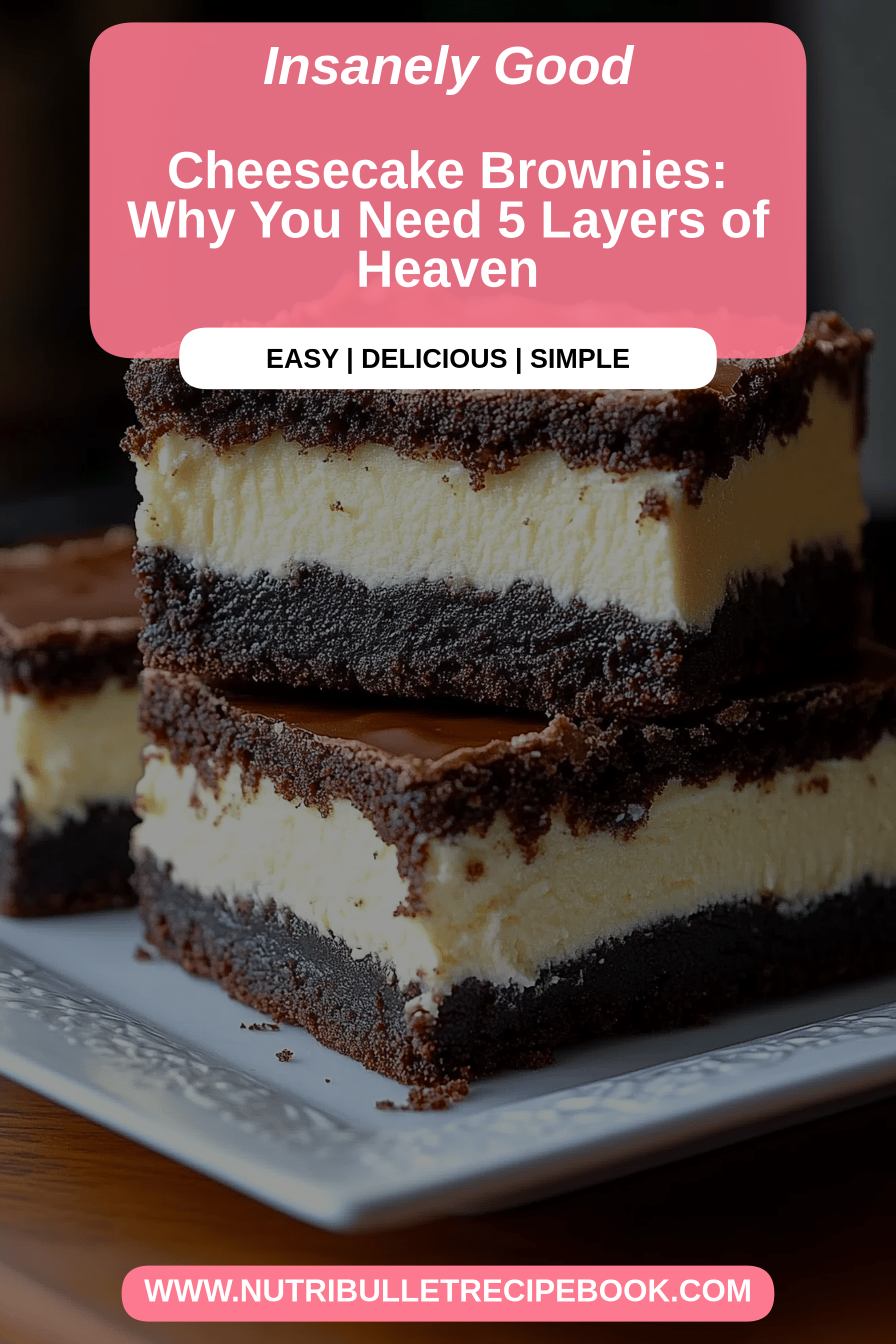
Oh, where do I even begin with these cheesecake brownies? If you’ve ever stood at the dessert crossroads, torn between the rich, fudgy embrace of a perfect brownie and the tangy, creamy allure of cheesecake, then this recipe is your answer. Seriously, it’s like a dessert miracle! I remember the first time I attempted to combine these two titans of the sweet world. It felt ambitious, a little risky even, but the payoff? Absolutely mind-blowing. My family went nuts for them, and now they’re a staple for birthdays, holidays, or, let’s be honest, just a Tuesday night when you need a serious mood booster. They’re the perfect compromise when you can’t decide, offering the best of both worlds in every single bite. This isn’t just a dessert; it’s an experience, a celebration of textures and flavors that I’m so excited to share with you.
What is cheesecake brownie?
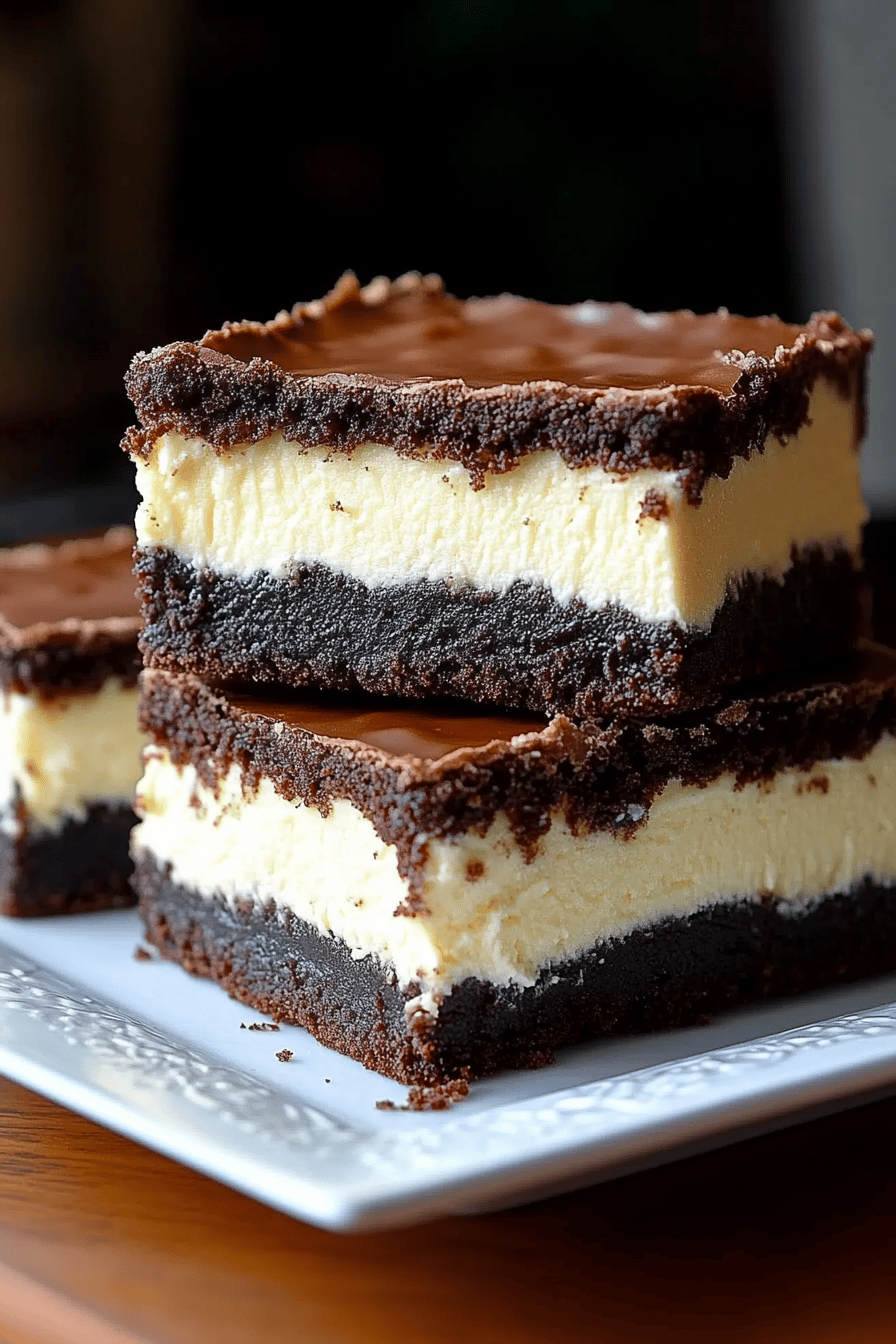
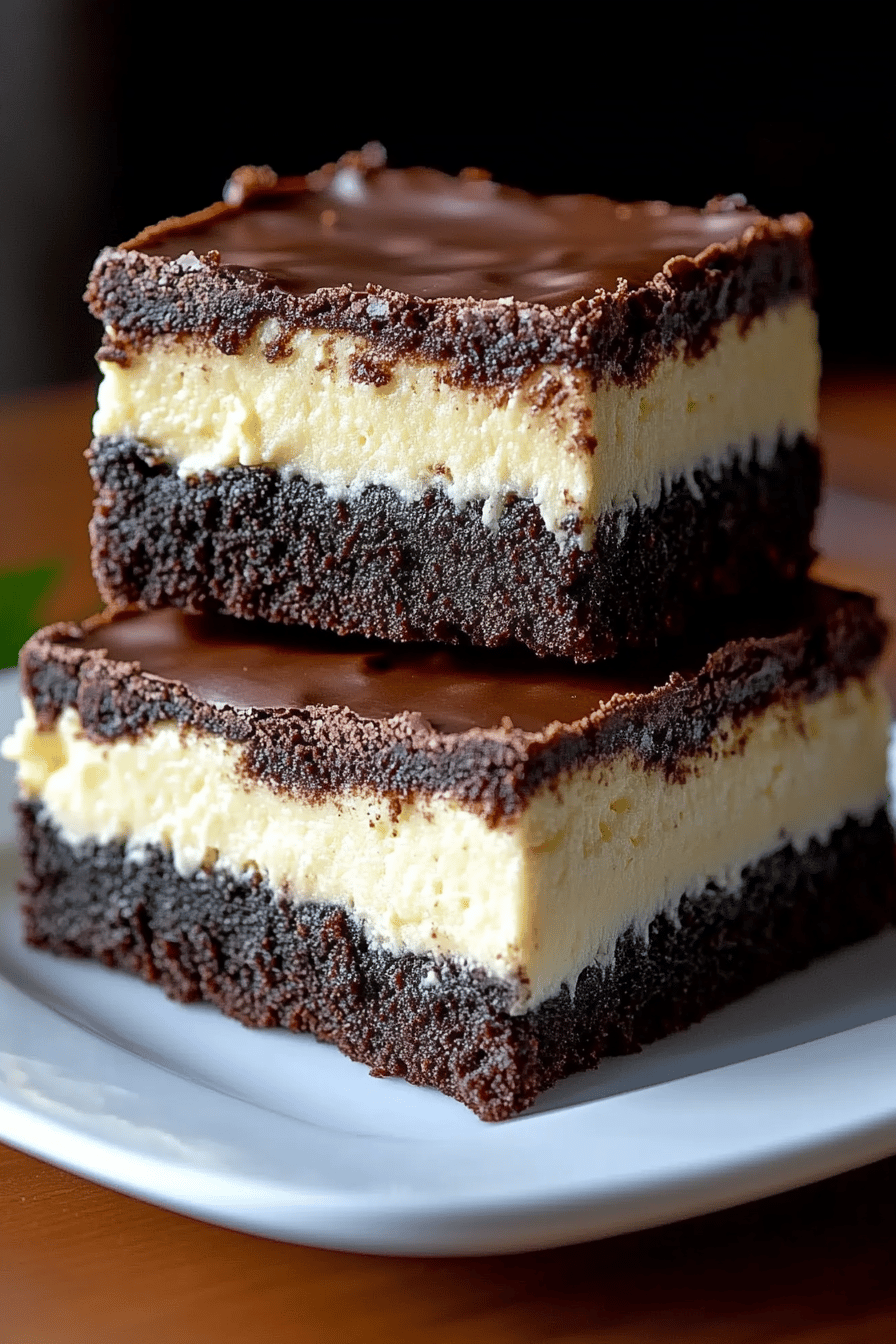
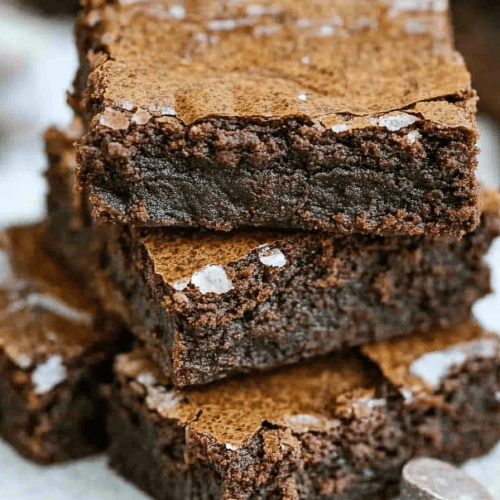
So, what exactly are these magical cheesecake brownies? Think of it as a glorious mashup of your two favorite dessert dreams. You’ve got a rich, dense, chocolatey brownie base, that classic fudgy texture that just melts in your mouth. Then, swirled right on top, is a creamy, tangy cheesecake layer. It’s not just a thin topping; it’s a substantial, luscious layer that bakes up beautifully. The magic happens in the contrast: the deep, intense chocolate of the brownie meets the bright, smooth creaminess of the cheesecake. It’s essentially the best of both worlds, creating a flavor and texture combination that’s utterly irresistible. This recipe is designed to give you that perfect balance, ensuring neither the brownie nor the cheesecake overpowers the other, but instead, they harmonize into something truly special.
Why you’ll love this recipe?
There are so many reasons why this cheesecake brownie recipe has become my absolute go-to, and I just know you’re going to fall in love with it too. First off, the flavor profile is out of this world. You get that deep, satisfying chocolate hit from the brownie, but then the creamy tang of the cheesecake cuts through it perfectly, preventing it from being too heavy. It’s a sophisticated balance that makes each bite feel special. And the texture? Oh my goodness. You have that slightly chewy, fudgy brownie base, topped with that incredibly smooth, melt-in-your-mouth cheesecake. It’s pure bliss!
Beyond the incredible taste, I love how surprisingly simple this is to make. I know combining two desserts sounds complicated, but trust me, it’s very manageable. The brownie batter comes together quickly, and the cheesecake filling is just a matter of beating a few ingredients together. The swirling is actually fun and creates a beautiful marbled effect without any stress. Plus, it’s incredibly cost-effective compared to buying separate brownies and cheesecakes. All the ingredients are pretty standard pantry staples, making it a budget-friendly indulgence. I’ve also found it’s incredibly versatile. It’s fantastic served slightly warm with a scoop of vanilla Ice Cream, or chilled and cut into neat squares for a party. It’s even delicious for breakfast (don’t judge me!). Honestly, what I adore most is the sheer wow factor. When you bring these out, people are always impressed, and the fact that they’re homemade makes it even better. It’s the kind of dessert that always gets rave reviews!
How do I make [Recipe Name]?
Quick Overview
Making these cheesecake brownies is a two-part harmony, but don’t let that intimidate you! It’s essentially a rich brownie batter topped with a luscious cheesecake mixture, then swirled together for a beautiful marbled effect before baking. The beauty of this method is that you prepare the brownie base first, then whip up the simple cheesecake filling while the oven heats. Layering and swirling is the fun, artistic part, and then it’s just a matter of baking until golden and set. You end up with a dessert that looks and tastes like you spent hours in the kitchen, but it’s genuinely straightforward.
Ingredients
For the Main Batter:
You’ll need unsalted butter, good quality semi-sweet chocolate (or even dark chocolate if you like it intense!), granulated sugar, brown sugar for that extra chewiness and moisture, eggs, pure vanilla extract, all-purpose flour, unsweetened cocoa powder for that deep chocolate flavor, a pinch of salt to balance the sweetness, and a little baking powder for just a touch of lift without making them cakey.
For the Filling:
This is where the creamy magic happens! You’ll need softened Cream Cheese (full-fat is best for that luxurious texture), granulated sugar, an egg yolk (this adds richness and helps bind it), and a touch more pure vanilla extract. I’ve found that using room temperature ingredients for the cheesecake filling is key to getting it super smooth.
For the Glaze:
This is optional but highly recommended for that extra touch of elegance and flavor. A simple powdered sugar glaze made with powdered sugar, a splash of milk or cream (or even lemon juice for a tangier kick), and a tiny bit more vanilla extract is perfect. You want it to be pourable but not too thin.
Step-by-Step Instructions
Step 1: Preheat & Prep Pan
First things first, preheat your oven to 350°F (175°C). This is a pretty standard temperature for most brownies and cheesecakes, so it’s the perfect middle ground. Then, get your baking pan ready. I usually use an 8×8 inch or 9×9 inch square pan. Line it with parchment paper, leaving some overhang on the sides. This parchment sling is a lifesaver for lifting the entire baked dessert out cleanly later. You can also grease and flour the pan if you prefer, but the parchment makes it so much easier!
Step 2: Mix Dry Ingredients
In a medium bowl, whisk together your all-purpose flour, unsweetened cocoa powder, baking powder, and salt. Whisking them together ensures everything is evenly distributed, preventing pockets of flour or unsalted bites. You want a nice, uniform mixture. Don’t skip this step; it really helps with the texture of your brownie base.
Step 3: Mix Wet Ingredients
Now, for the brownie base itself. In a larger, heatproof bowl, melt your butter and chopped chocolate together. You can do this gently in the microwave in 30-second intervals, stirring in between until smooth, or over a double boiler. Once melted and smooth, whisk in your granulated sugar and brown sugar until well combined. Then, beat in your eggs one at a time, followed by the vanilla extract. Make sure each egg is fully incorporated before adding the next. The mixture should look glossy and thick.
Step 4: Combine
Now, gently fold the dry ingredients into the wet chocolate mixture. Use a spatula and fold just until *barely* combined. Seriously, do NOT overmix! Overmixing will develop the gluten in the flour, resulting in tough brownies, and we want them fudgy and tender. A few streaks of flour are okay; they’ll disappear as it bakes.
Step 5: Prepare Filling
While the brownie batter rests, let’s make the cheesecake filling. In a separate bowl, beat the softened cream cheese until it’s completely smooth and creamy. This is crucial for a lump-free cheesecake layer. Then, beat in the granulated sugar, the egg yolk, and the vanilla extract until everything is just combined and smooth. Again, don’t overbeat; we don’t want too much air incorporated.
Step 6: Layer & Swirl
Pour about two-thirds of the brownie batter into your prepared pan and spread it evenly. Dollop spoonfuls of the cheesecake filling over the brownie batter. Then, spoon the remaining brownie batter over the cheesecake. Now comes the fun part: swirling! Take a knife or a skewer and gently swirl the brownie batter and cheesecake filling together. Don’t overdo it; you want distinct swirls, not a uniform gray-brown color. A few gentle passes should do the trick.
Step 7: Bake
Bake for about 30-35 minutes. You’re looking for the edges of the brownies to be set and slightly puffed, and the cheesecake portion to be mostly set but still have a slight wobble in the center. A toothpick inserted near the center should come out with moist crumbs attached, not wet batter. Be careful not to overbake, or your brownies will be dry.
Step 8: Cool & Glaze
This is probably the hardest part – waiting! Let the cheesecake brownies cool completely in the pan on a wire rack. This is essential for the cheesecake to fully set. Once cooled, you can prepare your glaze by whisking powdered sugar with a bit of milk or cream and vanilla until smooth and pourable. Drizzle this over the cooled brownies. Let the glaze set slightly before slicing.
Step 9: Slice & Serve
Once everything is completely cooled and the glaze has set (or if you skipped the glaze), use the parchment paper overhang to lift the whole slab out of the pan. Slice into squares using a sharp knife. I find running the knife under hot water and wiping it clean between cuts helps get really clean slices, especially with the gooey brownie and creamy cheesecake. Enjoy!
What to Serve It With
These cheesecake brownies are so rich and satisfying on their own, but they also pair beautifully with a few other things, depending on the occasion. For a decadent breakfast treat (yes, I’m totally advocating for this!), a strong cup of black coffee is the perfect foil to the sweetness. The bitterness cuts through the richness, making it feel almost like a sophisticated breakfast pastry. For brunch, I love to serve them with a side of fresh berries – strawberries or raspberries add a lovely tartness and vibrant color that looks gorgeous on a plate. A light dusting of powdered sugar over the berries and brownies can elevate it even further.
As a dessert, these are truly showstoppers. They are fantastic served slightly warm with a scoop of good quality vanilla bean ice cream – the contrast of warm brownie and cold ice cream is divine. A drizzle of raspberry coulis or a dollop of whipped cream also takes them to the next level. For those cozy, late-night cravings, sometimes I just cut a small square and enjoy it with a glass of milk. It’s pure comfort. My kids also love them with a side of chocolate syrup, because, well, why not add more chocolate? My personal favorite way to serve them is at room temperature, allowing all those flavors to meld beautifully. No matter how you serve them, they’re always a hit!
Top Tips for Perfecting Your Cheesecake Brownies
Over the years of making these, I’ve picked up a few tricks that I think really make a difference. For the brownie base, using good quality chocolate is a must. It really impacts the overall depth of flavor. Also, don’t be tempted to overmix the batter once you add the flour. Seriously, just combine it until you don’t see any dry streaks anymore. A few lumps are fine; they make for a more fudgy brownie. I’ve learned the hard way that overmixing leads to tough brownies, and nobody wants that!
When it comes to the cheesecake filling, using softened, room-temperature cream cheese is non-negotiable. Cold cream cheese will result in a lumpy filling, and it’s a pain to smooth out later. Similarly, don’t overbeat the filling once the egg and sugar are added. You just want it smooth and combined; too much air incorporated can cause it to puff up too much while baking and then crack later. For the swirling, less is often more. You want distinct ribbons of brownie and cheesecake, not a muddy mess. Gentle, shallow swirls with a knife or skewer are perfect. Aim for a beautiful marbled effect.
For baking, keep an eye on them. Ovens can be so different! The edges should look set and maybe a little set at the center, but the very center might still have a slight wobble. It will continue to set as it cools. I’ve also found that an 8×8 pan gives you thicker brownies, while a 9×9 pan yields thinner ones, which bake a little quicker. Adjust your baking time accordingly. If you’re feeling adventurous with ingredient swaps, I’ve had success using half dark chocolate and half semi-sweet for an even richer flavor. And for the glaze, if it’s too thick, add a tiny bit more liquid; if it’s too thin, whisk in more powdered sugar. Consistency is key!
Storing and Reheating Tips
Storing these cheesecake brownies is pretty straightforward, but there are a few things that help keep them at their best. If you’ve managed to have any leftovers (which is rare in my house!), and you plan to eat them within a day or two, they can be kept at room temperature, covered loosely with plastic wrap or in an airtight container. This is especially good if you want them slightly soft and fudgy. However, because of the cream cheese component, I generally prefer to store them in the refrigerator for optimal freshness and to prevent any spoilage. They’ll stay delicious in an airtight container in the fridge for up to 4-5 days. The texture might firm up a bit more in the fridge, which I actually quite like!
If you need to store them for longer, these cheesecake brownies freeze beautifully. Once they’re completely cooled and the glaze (if using) has set, cut them into individual portions. Wrap each piece tightly in plastic wrap, then place them in a freezer-safe bag or container. They can be stored in the freezer for up to 2-3 months. To thaw, simply transfer the frozen brownies to the refrigerator overnight. For reheating, if you prefer them warm, you can gently warm individual slices in a microwave on low power for about 10-15 seconds. Be careful not to overheat, or the cheesecake part might get oily. Honestly, though, they are absolutely delightful served cold or at room temperature straight from the fridge or after thawing.
Frequently Asked Questions
Final Thoughts
Seriously, these cheesecake brownies are a game-changer. They’re the perfect testament to how two amazing desserts can come together to create something even more spectacular. The rich, fudgy chocolate paired with the creamy, tangy cheesecake is a flavor combination that I just can’t get enough of. They’re impressive enough to serve at a dinner party, yet comforting enough for a quiet night in. The joy of making them, seeing that beautiful swirl come together, and then taking that first bite… it’s pure happiness. I really hope you give this recipe a try. I’m always eager to hear how it turns out for you, and I especially love seeing your own creative twists and additions in the comments below!
If you enjoyed these cheesecake brownies, you might also love my classic fudgy brownies or my no-bake cheesecake bars. They’re all delicious in their own right, but this fusion recipe truly holds a special place in my heart. Don’t forget to share your baking adventures with me – tag me on social media or leave a comment! Happy baking!
Cheesecake Brownies
Ingredients
For the Brownie Batter
- 0.5 cup unsalted butter melted
- 1 cup granulated sugar
- 2 large eggs
- 1 teaspoon vanilla extract
- 0.5 cup all-purpose flour
- 0.25 cup unsweetened cocoa powder
- 0.25 teaspoon salt
- 0.5 cup chocolate chips
For the Cheesecake Swirl
- 8 ounces cream cheese
- 0.25 cup granulated sugar
- 0.5 teaspoon vanilla extract
- 1 large egg yolk
Instructions
Preparation Steps
- Preheat oven to 350°F (175°C). Grease and flour a 9x9 inch baking pan.
- In a medium bowl, whisk together melted butter and sugar. Beat in eggs one at a time, then stir in vanilla extract.
- In a separate small bowl, whisk together flour, cocoa powder, and salt.
- Gradually add the dry ingredients to the wet ingredients, mixing until just combined. Stir in chocolate chips.
- In another bowl, beat cream cheese and sugar until smooth. Beat in egg yolk and vanilla extract until well combined.
- Spread half of the brownie batter into the prepared pan. Dollop the cheesecake mixture over the brownie batter and swirl gently with a knife or skewer.
- Spoon the remaining brownie batter over the cheesecake layer and swirl again gently.
- Bake for 30-35 minutes, or until a toothpick inserted into the center comes out with moist crumbs (not wet batter).
- Let cool completely in the pan before cutting into squares.