I’m not exaggerating when I say this, but cake mix cookie bars have saved many dinner chaos nights at my house. Imagine the cozy scent of vanilla and butter filling the kitchen, a tray of warm bars cooling on the rack, and kids flocking around like pigeons at a bakery window. This is comfort with zero fuss—the kind of treat you whip up while the coffee breathes cinnamon into the air. I grew up making something similar with a shortcut mindset: a box of cake mix, a handful of pantry staples, and a pan that never lets me down. It’s like cookies with a built-in time-saving halo. The first bite carries that familiar vanilla kiss, the soft center, and a telltale gloss from the glaze that makes them look store-bought but taste like grandma’s afternoon project. This recipe is a lifesaver on busy nights, and my kids actually ask for seconds, which is basically every parent’s dream come true.
What is cake mix cookie bars?
Think of cake mix cookie bars as cookies meeting a quick, chewy bar, all baked in one Sheet Pan. It’s essentially dessert fast-forward: a tender cake-mix-based batter that bakes up into generous squares, then crowned with a simple glaze or a playful cream-cheese swirl. The beauty is in its simplicity—you don’t need a long list of ingredients or fancy equipment. You use a standard box of cake mix as the backbone, jazz it up with a few add-ins, and decide how you want to finish it: a glossy vanilla glaze, a tangy cream-cheese swirl, or even a chocolate drizzle. The name is honest about what you get: bars that taste like cookies but come together with the ease of a corner-store shortcut—perfect for busy nights, potluck weekends, or a late-night craving when you don’t want to bake a whole batch of cookies from scratch.
Why you’ll love this recipe?
What I love most about this cake mix Cookie Bars recipe is how it checks every box you might want in a weeknight treat. It’s incredibly forgiving, which is a relief when you’re juggling kids, homework, and a I-just-remembered-district-birthday party to plan.
- Flavor: The base vanilla sweetness from the cake mix is bright and comforting, with buttered richness that isn’t too heavy. Add a swirl of cream cheese or a kiss of chocolate and you’ve got a celebration in every bite.
- Simplicity:One bowl for the batter, a few pantry add-ins, and you’re pouring glaze before you know it. No mixer needed
- Cost-efficiency: What is the best way to measure cost-efficiency? Boxed cake mix, a splash of milk, and a couple of store-brand pantry staples keep the price per batch delightfully low. It’s the kind of dessert you can make for a crowd without breaking the bank.
- Versatility: Swap flavors, mix-ins, or finishes to suit the moment. Want lemony brightness? Use lemon cake mix. Feeling chocolatey? Fold in mini chips or a cocoa glaze. The options are endless, and the base remains forgiving.
If you’ve enjoyed other quick-bake crowd-pleasers—say, my quick blondies or a sheet-pan chocolate bar—you’ll recognize the same spirit here: flavor without fuss, texture that stays soft in the center, and a finish that makes everything look a little more special. This is the kind of recipe that becomes a go-to when you’re feeding a crowd or just craving something sweet after dinner. And trust me, I’ve made this countless times and it never fails to disappear in minutes at my house.
How to Make Cake Mix Cookie Bars
Quick Overview
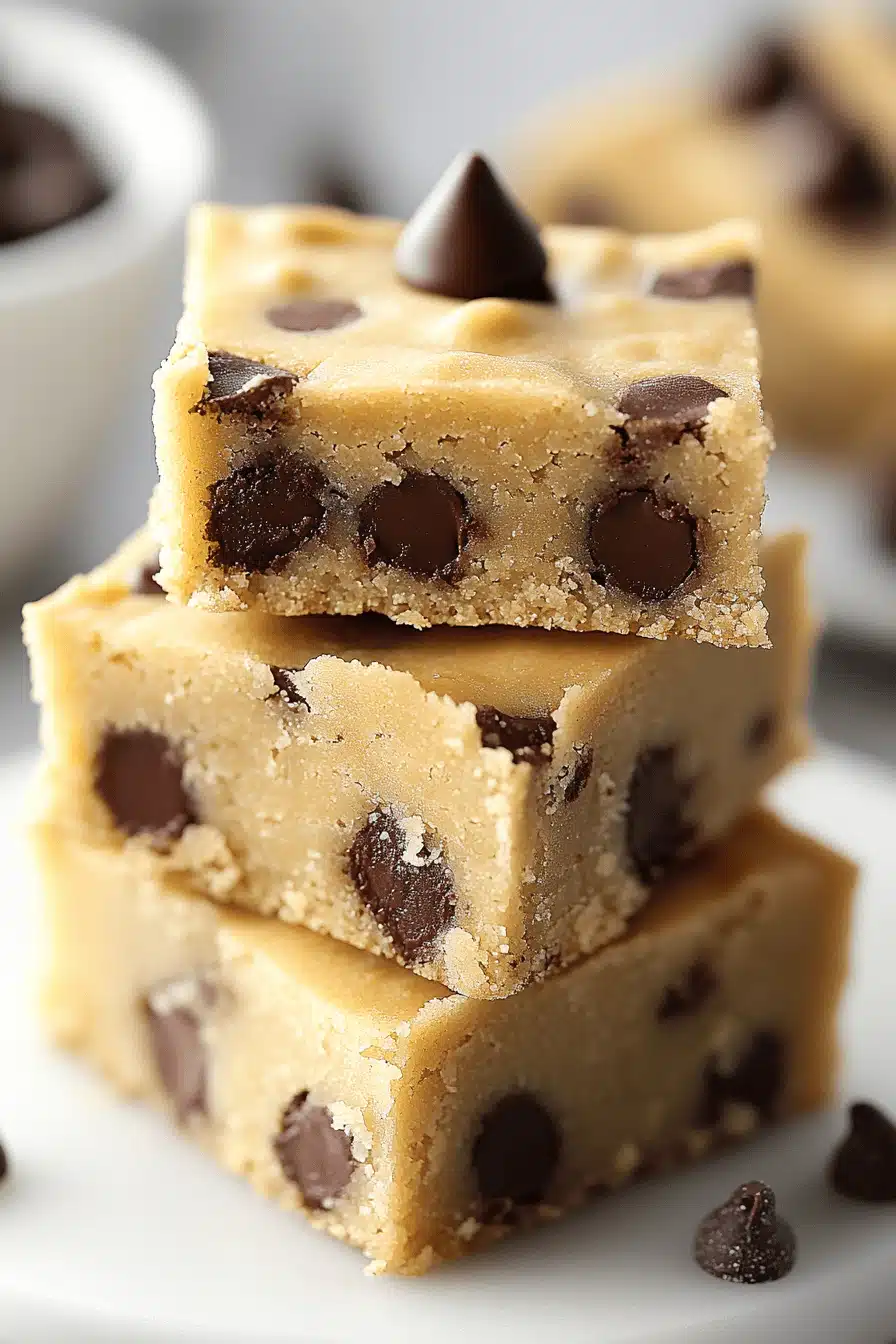
Here’s the nutshell version: whisk together a handful of easy ingredients to form a thick batter, spread it in a lined pan, add a creamy swirl or glaze if you like, bake until the edges are just lightly bronzed, then slice into generous bars. It’s simple, forgiving, and incredibly forgiving—if you overbake by a minute or two, you’ll still end up with bars that stay moist and chewy in the center. The beauty is in the sheet-pan format, which means quick portioning and easy sharing. I love that this method leaves you with a tray of treats that feel special without requiring fancy equipment or a ton of prep time.
Ingredients
For the Main Batter:
- 1 box (about 15.25 oz) cake mix (vanilla or yellow works beautifully)
- 1/3 cup melted butter, cooled slightly
- 1 large egg
- 2–4 tablespoons milk (any kind) or water, as needed to loosen the batter
- 1/2 cup mix-ins (optional): chocolate chips, chopped nuts, or sprinkles
For the Filling:
- Option A: Cream Cheese swirl — 8 oz cream cheese, 2–3 tablespoons sugar, 1 teaspoon vanilla
- Option B: No filling, just more batter and a glaze
- Tip: If using cream cheese, beat it with sugar and vanilla until smooth for a glossy swirl that stays put during baking.
For the Glaze:
- 1 cup powdered sugar
- 2–3 tablespoons milk (adjust for desired drip)
- 1/2 teaspoon vanilla extract
- Optional: a pinch of cocoa powder for a chocolate glaze
Step-by-Step Instructions
Step 1: Preheat & Prep Pan
Heat your oven to 350°F (175°C). Line a 9×13-inch baking pan with parchment paper or lightly grease it. This makes the bars easy to lift out and slice later, which is essential when you’re chasing a hungry crew around the kitchen. I always double-check that the parchment has a little overhang so I can grab and lift the whole batch in one go.
Step 2: Mix Dry Ingredients
In a large bowl, whisk together the cake mix (the dry base) and any add-ins you’re using, like chocolate chips or chopped nuts. The dry mix sets the stage for that tender, cake-like crumb that makes these bars so comforting. If you’re using instant pudding mix or a sprinkle of cinnamon, add it here so the flavors distribute evenly.
Step 3: Mix Wet Ingredients
In a separate bowl, whisk the melted butter with the egg and milk. The mixture should look glossy and smooth, not split. If the batter seems too thick once you add the dry ingredients, a little extra milk will bring it to the perfect spreadable consistency. I’ve learned that a tad more milk makes the center softer—but go slow and test until it’s just right.
Step 4: Combine
Pour the wet ingredients into the dry and fold just until you no longer see dry streaks. The goal is a thick, slightly sticky batter that glides across the pan. Don’t overmix; lumpy batter can still yield tender bars if you handle it gently. If you’re dolloping in fillings, this is the moment to swirl in a few spoonfuls for a marbled effect.
Step 5: Prepare Filling
If you’re going for the cream cheese swirl, beat the cream cheese with sugar and vanilla until smooth. It should be soft enough to spread but thick enough to hold a ribbon-like swirl. Drop spoonfuls on top of the batter in scattered patches or line a few ribbons across the surface for a pretty marbling. If you’re skipping the filling, you can skip this step or reserve your swirl for a baked-in twist later.
Step 6: Layer & Swirl
Spread the batter evenly in the prepared pan. If you’re using the cream cheese filling, drop dollops of the filling onto the batter and use a butter knife or skewer to swirl it gently through the surface. The goal is a visual marbling that hints at the creamy center without fully blending in. You’ll want a few visible swirls in each bite—the kind that makes you smile before you cut into the bars.
Step 7: Bake
Bake for 25–30 minutes, until the edges are just lightly golden and a toothpick inserted near the center comes out with a few moist crumbs. If you like a firmer edge, you can bake a minute or two longer, but keep a close eye so the center doesn’t dry out. Ovens vary, so it’s smart to start checking at the 22-minute mark the first time you try this recipe. The glaze can help mask a slightly underbaked center, so don’t panic if the middle seems a touch soft when you take it out.
Step 8: Cool & Glaze
Let the bars cool in the pan for at least 20 minutes before glazing or slicing. If you’re glazing, whisk together the powdered sugar, milk, and vanilla until smooth. The glaze should be pourable but not runny. Drizzle it in a zig-zag or straight line across the surface, then let it set for a few minutes. For a thicker glaze, add a touch more sugar; for a lighter finish, thin with a bit more milk. If you’re keeping the filling, you can glaze around the edges to highlight the marbling.
Step 9: Slice & Serve
Once the glaze is set, use a sharp knife to cut the bars into generous squares. For clean cuts, wipe the knife between slices. These cake mix cookie bars are best served warm or at room temperature. They store beautifully, staying soft and chewy for days when kept in an airtight container. I love serving them with a scoop of vanilla ice cream or a dollop of whipped cream for a cozy dessert that feels special without extra effort.
What to Serve It With
These cake mix cookie bars shine on a casual table, but they also pair nicely with a few thoughtful accompaniments that elevate their simple charm.
For Breakfast: They’re surprisingly breakfast-friendly when served warm with a mug of strong coffee or a glass of cold milk. Cut small squares and present them on a platter with fresh berries for a little brunch sparkle.
For Brunch: Plate bars alongside mini quiches or a fruit salad. A light vanilla yogurt parfait on the side echoes the glaze’s sweetness and balances the richness.
As Dessert: Serve with vanilla bean ice cream and a drizzle of extra glaze. A dusting of cocoa powder or a splash of espresso on top makes this feel like a cafe-worthy treat you whipped up at home.
For Cozy Snacks: Keep a tray on the counter for after-school nibbling. A cup of hot chocolate or a warm chai makes the flavors sing, and the bars disappear before you know it.
Family traditions often hinge on the simple moments, and this cake mix cookie bars recipe has quietly become one in mine. I’ll often bake a double batch for church potlucks or school events, where the kids sprint to the kitchen to help cut and plate. The kids’ favorite version is the one with a cream cheese swirl and a lemon glaze—bright, tangy, and just a touch fancy. It’s funny how something so simple can bring so much laughter to the table, but that’s the magic of these bars. They taste like home, with a little extra sparkle.
Top Tips for Perfecting Your Cake Mix Cookie Bars
Here are a few tricks I’ve learned from countless tests and a few kitchen mishaps that finally clicked.
Cake Mix Prep: Use a cake mix that matches the flavor you want to highlight. If you want a punch of butter and vanilla, a classic yellow cake mix is perfect. If you’re feeling fancy, swap a butter cake mix for a more buttery crumb. I’ve found that letting the batter sit for a minute or two after mixing can help the flavors meld, especially if you’re adding a swirl with cream cheese.
Mixing Advice: Don’t overwork the batter once you combine the wet and dry ingredients. A few gentle folds are enough. Overmixing can lead to a tougher crumb, and nobody wants that in a bar. If your batter looks very thick, splash in a teaspoon of milk at a time until it’s easy to spread but still thick enough to hold shape.
Swirl Customization: The swirl is where personality lives. For color, add a few drops of gel food coloring to the cream cheese filling. For flavor, swap a portion of the cream cheese with peanut butter, lemon curd, or caramel sauce. Just keep the total wet ingredients consistent so the batter bakes evenly.
Ingredient Swaps: You can sub gluten-free cake mix for a gluten-free version, or use dairy-free butter and milk if needed. With gluten-free mixes, you might notice a slightly crumblier texture; that’s fine—just bake a touch longer or glaze for moisture. If you’re using a dairy-free option, the glaze may need a touch more liquid to achieve the same gloss.
Baking Tips: Bread-proof your bars by placing the pan on a ninja-level rack. If your oven runs hot, tent the bars with foil for the last 5–7 minutes to avoid over-browning. Rotate the pan halfway through baking if your oven has hot spots. The goal is evenly baked bars with a chewy center and a light golden edge.
Glaze Variations: A glaze is optional but magical. Try citrus zests (orange or lemon) for brightness, a vanilla-espresso glaze for coffee-house vibes, or a simple chocolate glaze for a richer finish. For a no-glaze option, dust with powdered sugar or serve with a scoop of whipped cream to keep the surface glossy and inviting.
Over the years I’ve learned that the real trick is keeping the finish flexible. If you’re serving these to kids, keep the glaze light and add a few colorful sprinkles. For adults, go for a deeper cocoa glaze or a tart cream-cheese swirl—it feels a little more refined without losing the cozy feel. The best part is how every batch carries a hint of your own kitchen personality, the way it should.
Storing and Reheating Tips
Knowing how to store cake mix cookie bars can make all the difference between a one-night wonder and a weeklong stash of happiness. Here’s how I keep them tasting fresh and fudgy the longer they last.
Room Temperature: Store in an airtight container at room temperature for up to 3 days. If you’re planning to serve them over a couple of days, keep the glaze on the surface but don’t add toppings until just before serving to avoid sogginess.
Refrigerator Storage: You can refrigerate for up to 5–7 days, but the bars may firm up a bit. Bring them to room temperature before slicing for the cleanest edges. The glaze will set nicely again after a quick warm-up if you’re serving them cold.
Freezer Instructions: Freeze baked bars (without glaze) for up to 2–3 months. Wrap individually and place in a freezer bag. Thaw overnight in the fridge or at room temperature, then glaze or re-warm gently in a 300°F (150°C) oven for 5–8 minutes if you like a warm finish.
Glaze Timing Advice: If freezing, glaze after thawing to preserve the gloss. For best texture, you can also freeze the bars unglazed and add the glaze after they’ve thawed. The glaze locks in moisture and adds a luscious finish that makes even simple bars feel special.
In practice, I keep a tray in the fridge for a couple of days and cut fresh portions as needed. The smell alone after reheating a single square is enough to win anyone over, and it still tastes like the day I pulled them from the oven—soft, sweet, and full of homey goodness.
Frequently Asked Questions
Final Thoughts
This recipe—cake mix cookie bars—has earned a permanent spot in my weeknight rotation. They’re easy, forgiving, and endlessly adaptable, which means they grow with you as your tastes do. The buttery base is comforting, the center stays delightfully soft, and the glaze or cream cheese swirl adds a touch of whimsy without stealing the show from that cozy cookie-bar texture you crave. If you’re new to this idea, start simple: cake mix, butter, egg, a splash of milk, and a glaze. Then let your taste buds guide you toward fillings that feel like your own family tradition. It’s the kind of dessert you’ll keep coming back to—perfect for bake sales, school lunches, or a casual coffee-break treat with a close friend. I’d love to hear what you swapped in or how you customized the glaze. Share your variations in the comments, and tag me in your photo—I’m always cheering for your kitchen victories. Happy baking!

cake mix cookie bars
Ingredients
Main Ingredients
- 2.5 cup Yellow cake mix
- 0.5 cup butter, melted
- 2 count large eggs
- 0.75 cup semi-sweet chocolate chips
Instructions
Preparation Steps
- Preheat your oven to 350°F (175°C). Line a 9x13-inch baking pan with parchment paper or lightly grease it.
- In a large bowl, combine cake mix and melted butter until a thick dough forms.
- Beat in eggs one at a time, then fold in chocolate chips until evenly distributed.
- Spread the batter evenly in the prepared pan and bake for 22-25 minutes until the edges are golden. Cool completely before slicing into bars.