Oh my goodness, have I got a treat for you today! You know those moments when a craving hits, and you *really* want something sweet and satisfying, but the thought of baking a whole cake feels like… well, a lot? That’s exactly when I reach for this avalanche bars recipe. Seriously, these are my absolute lifesaver on busy weeknights, and my kids ask for them constantly. They’re not quite cookies, not quite brownies, but something wonderfully in-between that just hits the spot every single time. If you love those classic chocolate chip cookies, these avalanche bars are going to be your new best friend. They’re packed with all the good stuff – gooey chocolate, crunchy nuts, and a hint of something special that just makes them utterly addictive. I’ve made them more times than I can count, and they always disappear in minutes!
What are Avalanche bars?
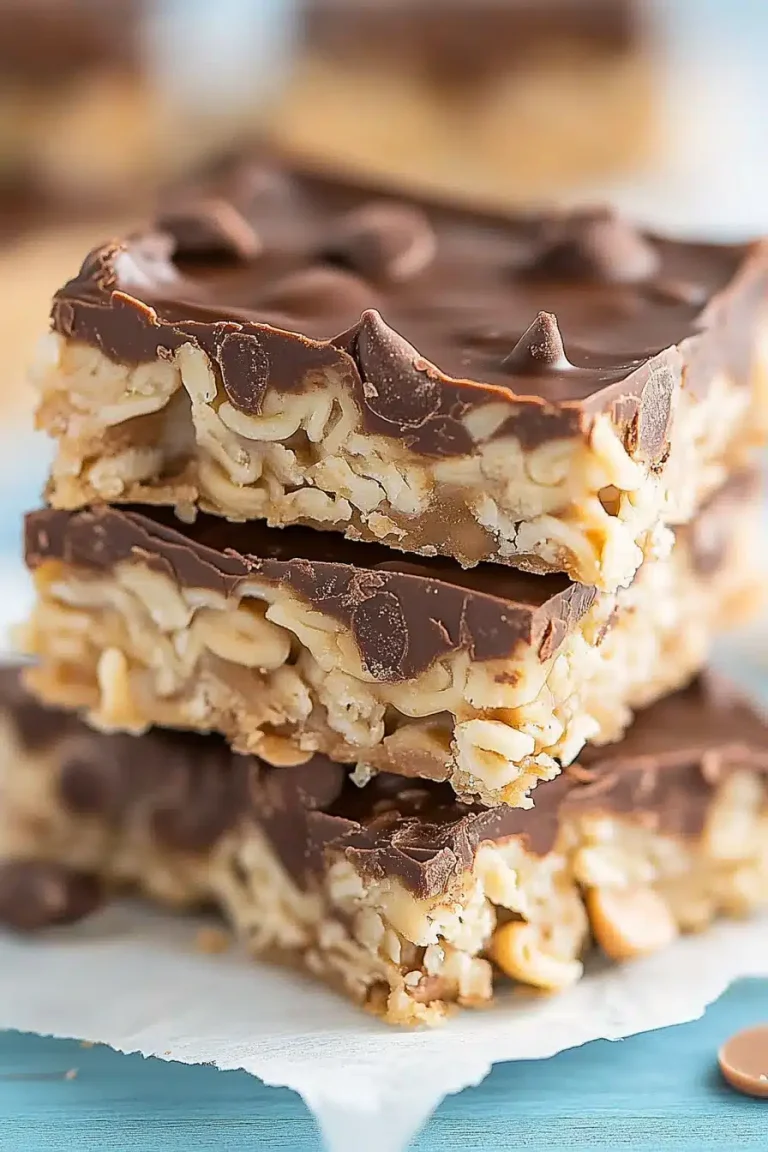
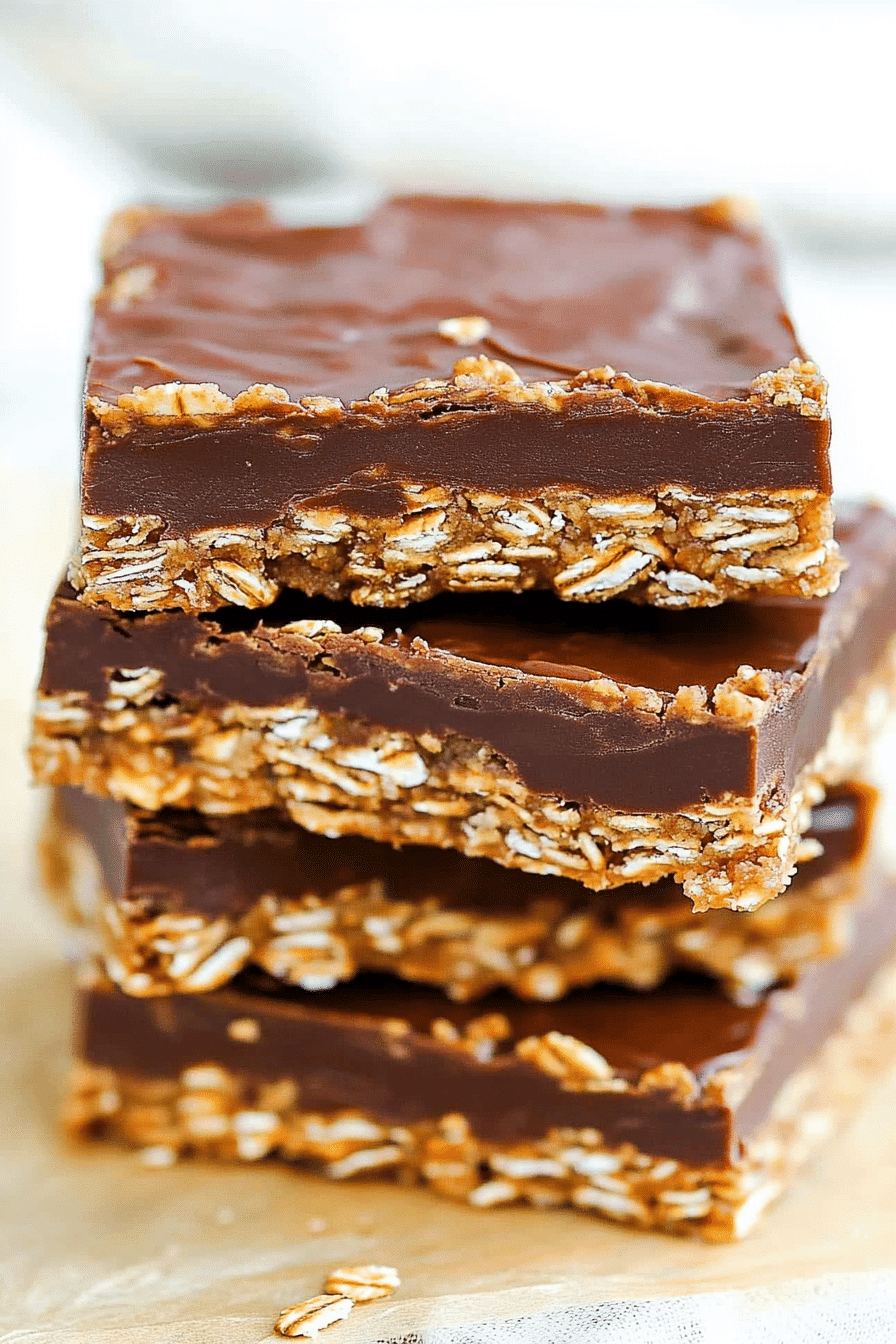
So, what exactly are avalanche bars? Think of them as a delightful no-bake concoction that brings together a wonderful medley of textures and flavors. They’re essentially a sweet, slightly chewy base loaded with goodies like chocolate chips, Peanut Butter, and often crispy rice cereal for that amazing crunch. The “avalanche” name comes from the sheer abundance of delicious ingredients tumbling together, creating a glorious, irresistible mess of sweetness. It’s a treat that’s wonderfully forgiving; you don’t need to be a master baker to whip these up. It’s the kind of recipe that feels a bit old-fashioned, conjured up in kitchens everywhere, and for good reason! It’s simple, satisfying, and uses pantry staples that most of us already have on hand. It’s the perfect way to satisfy a sweet tooth without the fuss.
Why you’ll love this recipe?
There are so many reasons why I’m obsessed with these avalanche bars, and I just know you will be too! First off, the FLAVOR. Oh, the flavor! You get that classic sweet, creamy, slightly salty combination that’s just pure comfort. The chocolate chips melt into these little pockets of gooey heaven, the Peanut Butter adds this wonderful richness, and the crispy rice cereal gives it this fantastic, satisfying crunch that keeps you going back for another bite. It’s a symphony of textures happening all at once! Then there’s the SIMPLICITY. This recipe is ridiculously easy. We’re talking minimal effort for maximum reward. No fancy techniques, no oven required – just a few bowls, a saucepan, and some stirring. It’s perfect for when you’re short on time or energy but still want something truly special. And let’s talk about COST-EFFICIENCY. Most of the ingredients are pantry staples, making this an incredibly budget-friendly treat. You get a whole pan of deliciousness without breaking the bank, which is always a win in my book! What I love most about these avalanche bars, though, is their VERSATILITY. You can totally customize them. Don’t have peanuts? Use almonds or pecans! Want a different kind of chocolate? Go for white chocolate or dark chocolate chunks. You can even add dried fruit or sprinkles. They’re perfect for a quick snack, a potluck dessert, or even just a little pick-me-up. Honestly, they’re miles better than those store-bought granola bars, and so much more satisfying than a plain cookie sometimes!
How do you make Avalanche bars?
Quick Overview
Making these avalanche bars is almost embarrassingly simple. We’ll start by melting down some butter, sugar, and Peanut Butter to create our sweet base. Then, we’ll stir in some vanilla and chocolate chips, followed by the star of the show – crispy rice cereal and sometimes nuts for that signature crunch. Once everything is well combined, we’ll press it all into a prepared pan and let it set. That’s it! No baking, no complicated steps. The magic happens as it cools and firms up. It’s the kind of recipe that makes you feel like a kitchen wizard, even if you’re just starting out.
Ingredients
For the Main Bar:
- 1 cup (2 sticks) unsalted butter: Using unsalted butter gives you more control over the saltiness of your bars. Make sure it’s at room temperature so it melts evenly.
- 2 cups granulated sugar: This is what gives us that lovely sweetness and helps the bars set up.
- 1 cup creamy Peanut Butter: I prefer creamy because it blends so smoothly, but crunchy is great if you want even more texture! Natural peanut butter can sometimes be a bit oily, so stir it well before measuring.
- 1 teaspoon vanilla extract: This is a flavor enhancer that really brings out the sweetness and depth of the other ingredients.
- 6 cups crispy rice cereal: This is crucial for that signature crunchy texture! Make sure it’s fresh for the best crunch.
- 1 cup chopped nuts (optional, but highly recommended!): Pecans or walnuts are my favorites, but peanuts or almonds work beautifully too. Toasting them lightly beforehand really brings out their flavor.
- 1 cup chocolate chips (milk, semi-sweet, or dark): I often use a mix! Milk chocolate gives a classic sweetness, while semi-sweet or dark offers a richer flavor.
Step-by-Step Instructions
Step 1: Preheat & Prep Pan
First things first, grab an 8×8 or 9×13 inch baking pan, depending on how thick you like your bars (I prefer the 9×13 for slightly thinner, more manageable bars). Line it with parchment paper, leaving some overhang on the sides. This is my little trick for easy removal later – no sticking, no fuss! A little bit of parchment paper goes a long way, trust me.
Step 2: Melt the Base
In a large saucepan, melt the butter over medium heat. Once it’s mostly melted, add the granulated sugar and the peanut butter. Stir constantly until everything is smooth and well combined. You want it to be a beautiful, glossy mixture. Keep stirring to prevent anything from sticking or burning on the bottom.
Step 3: Add Flavor and Chocolate
Once the butter, sugar, and peanut butter mixture is smooth and looks like a lovely caramel sauce, remove it from the heat. Stir in the vanilla extract. Now for the best part – add the chocolate chips! Let them sit in the hot mixture for a minute or two, then gently stir them in until they’re mostly melted and create beautiful chocolate swirls throughout the base. Don’t overmix; we want those little pockets of melty chocolate!
Step 4: Fold in the Crunch
Now, gently fold in the crispy rice cereal and your chopped nuts (if you’re using them). Make sure to coat everything evenly with that luscious chocolatey peanut butter mixture. The goal here is to get everything incorporated without crushing the cereal too much. You want to maintain that delightful crunch.
Step 5: Press into Pan
Pour the mixture into your prepared pan. Now, this is where you need to work quickly! Use a spatula (or lightly greased hands!) to press the mixture evenly into the pan. Really get into the corners and press down firmly so the bars hold together well once they set. The firmer you press, the less crumbly your avalanche bars will be.
Step 6: Let Them Set
This is the hardest part – the waiting! Let the bars cool completely at room temperature for at least 1-2 hours, or until they are firm to the touch. You can speed this up slightly by popping them in the refrigerator for about 30-45 minutes once they’ve cooled down a bit, but I find they have the best texture when they set at room temperature.
Step 7: Slice and Serve
Once they’re firm, use the parchment paper overhang to lift the entire slab out of the pan. Place it on a cutting board and use a sharp knife to cut them into bars. I usually cut mine into squares, but rectangles work just as well. Enjoy your delicious, homemade avalanche bars!
What to Serve It With
These avalanche bars are so versatile, they fit into almost any occasion! For a casual BREAKFAST, I love having one with my morning coffee. They’re a perfect little sweet bite to start the day, especially if you’re rushing out the door. Just grab one and go – simple as that! For a lovely BRUNCH spread, I’ll arrange them on a nice platter with some fresh fruit like berries. They add a wonderfully indulgent touch that guests always rave about. People often mistake them for something much more complicated to make! As a simple DESSERT, they’re fantastic served slightly chilled with a dollop of whipped cream or a scoop of vanilla ice cream. The contrast between the cold creaminess and the chewy, crunchy bar is divine. Or, for those COZY SNACKS moments, I’ll cut them into smaller squares and serve them with a tall glass of cold milk. It’s a taste of childhood nostalgia for me, and my kids absolutely love it. Honestly, they’re good enough to eat on their own, but pairing them with a simple beverage or a little something extra just elevates the whole experience. I’ve even taken them to parties, and they’re always the first thing to disappear!
Top Tips for Perfecting Your Avalanche Bars
Over the years, I’ve learned a few tricks that make these avalanche bars even better. Here are my top tips to ensure yours turn out perfectly every time! First, for the crispy rice cereal: make sure it’s fresh! Stale cereal won’t give you that satisfying crunch. If your box has been open for a while, give it a quick toast in a low oven (around 250°F or 120°C for about 5-7 minutes) and let it cool completely before using. This revives that crispness beautifully. When it comes to MIXING, work relatively quickly once you add the cereal. You want to coat everything evenly, but don’t overmix, or you’ll end up with mushy bars. The goal is to gently fold everything together. For the SWIRL effect with the chocolate chips, don’t stir them in completely. Let them sit in the hot base for a minute or two before stirring, then gently swirl to create those beautiful ribbons of chocolate. It looks so appealing! If you’re adding NUTS, toasting them lightly before chopping really brings out their flavor and adds another layer of deliciousness. Don’t skip this if you have the time! For BARS that hold their shape, pressing the mixture firmly into the pan is key. Use a spatula or your hands (lightly greased or dampened works too) to really compact it. This makes a huge difference when it comes to slicing. And if you want VARIATIONS, try different types of chocolate chips – white chocolate, butterscotch, or even mini M&Ms can be fun additions! You can also swap out the peanut butter for almond butter or sunflower seed butter for a different flavor profile or if you have nut allergies. I once tried using a different brand of crispy rice cereal, and the texture was a bit off, so stick to a reliable brand you know and love.
Storing and Reheating Tips
One of the best things about these avalanche bars is how well they store. They’re a fantastic make-ahead treat! At ROOM TEMPERATURE, they’ll stay fresh and delicious for about 3-4 days. Just keep them in an airtight container, making sure they’re not stacked too high if you want to avoid any squishing. I usually cut mine into squares and then carefully place them in a container, sometimes with a piece of parchment paper between layers. If your kitchen is particularly warm, you might find they soften a bit, so refrigerating them might be a better option. For REFRIGERATOR STORAGE, they’ll last even longer, up to a week, and they’ll stay nicely firm. Again, an airtight container is your best friend here. When you want to serve them from the fridge, I find they’re best enjoyed cold or allowed to sit out for about 10-15 minutes to soften just slightly, depending on your preference. FREEZER INSTRUCTIONS are also a breeze! These bars freeze beautifully. You can wrap individual bars tightly in plastic wrap and then place them in a freezer-safe bag or container. They’ll keep for up to 2-3 months. To thaw, simply unwrap them and let them come to room temperature for about 30 minutes. They taste almost as good as fresh! For the GLAZE timing, I don’t typically add a separate glaze to these bars, as the chocolate chips melted into the base provide plenty of richness. However, if you wanted to add a drizzle of melted chocolate or a simple powdered sugar glaze, I’d recommend doing that right before serving or just before refrigerating if you want it to set.
Frequently Asked Questions
Final Thoughts
So there you have it – my absolute favorite avalanche bars recipe! I truly hope you give these a try. They are such a simple pleasure, a fantastic way to satisfy that sweet craving with minimal fuss, and they always bring a smile to my face (and everyone else’s in my house!). The combination of textures and that classic sweet-and-salty flavor is just unbeatable. They’re perfect for a quick snack, a potluck contribution, or even just a little treat to enjoy with a cup of tea. If you’re a fan of no-bake treats and delicious, chewy, crunchy goodness, these are a must-make. I can’t wait to hear how yours turn out! Please leave a comment below and let me know your thoughts, or share any fun variations you’ve tried. Happy baking (or rather, no-baking!)!
Avalanche Bars
Ingredients
Main Ingredients
- 22 ounces white chocolate chips
- 0.5 cup creamy peanut butter
- 6 cups Rice Krispies cereal
- 1 cup mini chocolate chip morsels
- 3 cups mini marshmallows
Instructions
Preparation Steps
- Melt white chocolate chips and peanut butter together until creamy. Fold in Rice Krispies.
- Allow to cool to room temperature (about 10 minutes). Stir in mini morsels and mini marshmallows.
- Pour into a buttered 9-inch baking dish, pressing lightly. Refrigerate for 30 minutes, cut into squares and serve cold. Enjoy!