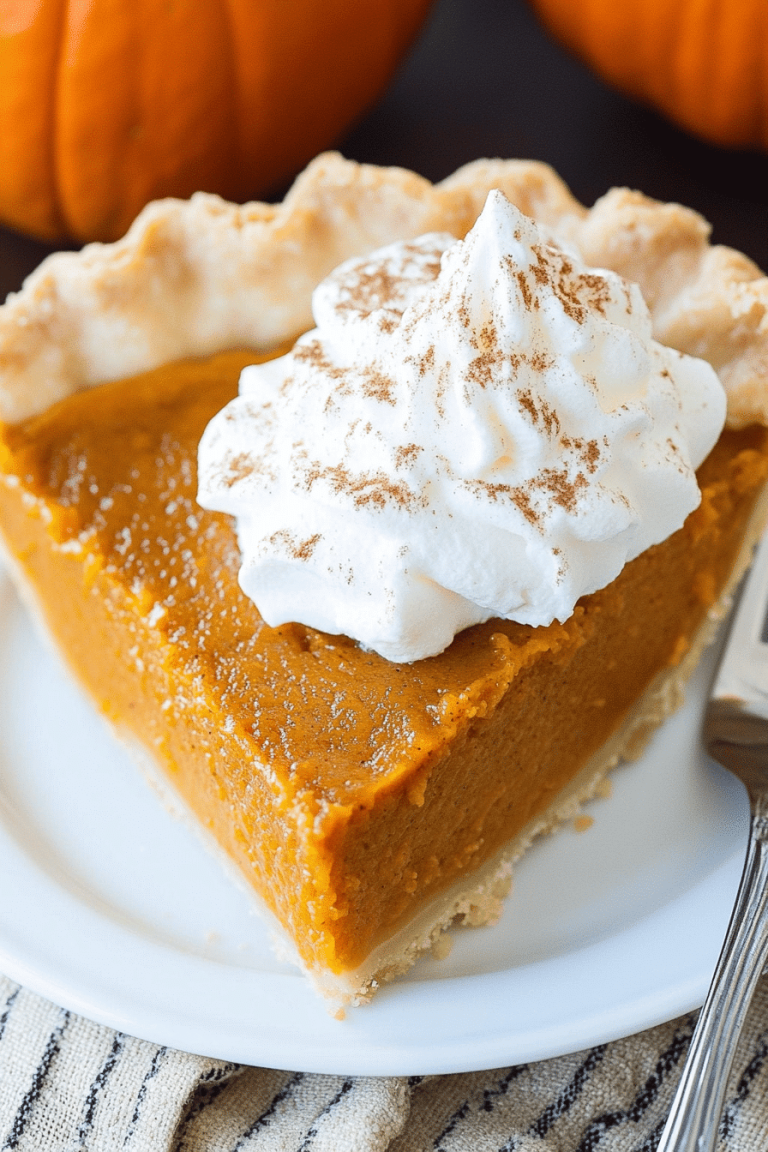
There’s something magical about the smell of cherry pie baking in the oven — a little like summer afternoons spent in grandma’s kitchen, sun sneaking through lace curtains, and a cozy invitation to sit down with something warm and sweet. My love affair with cherry pie started as a kid, sneaking bites of bright, tangy filling while no one was looking. It’s not just a dessert; it’s a hug on a plate, a perfect balance of sweet and tart that’s so inviting. I’m always surprised how easy it is to whip up, especially compared to heavier cakes or complicated pastries. Whenever I feel like treating my family or friends to something a bit special but still familiar, cherry pie is my go-to. It’s also one of those recipes that honestly beats apple pie in my book — the juiciness and bold flavor never fail to impress. If you’re craving a classic that’s both simple and show-stopping, this cherry pie recipe might just become your new favorite too.
What is a cherry pie?
Think of cherry pie as that timeless slice of Americana served all year round but truly at its best when cherries are in season or fresh-tasting frozen cherries are around to save the day. It’s essentially a golden, flaky crust hugging a juicy cherry filling that’s both sweet and tangy, often with just a hint of almond or vanilla to take it over the top. The name is pretty straightforward—the filling star is, of course, the luscious cherries, but cherry pie isn’t just fruit in a crust. It’s about that luscious, syrupy texture that balances brightness and sugar, and the crisp, buttery shell that makes every bite a contrast of textures. Family recipes vary but the charm is always in how easy it feels yet how decadently good it tastes.
Why you’ll love this recipe?
What I really love about this cherry pie is how it nails that nostalgic, homemade vibe without any of the fuss some pies demand. The flavor? Oh, it’s a bright, vibrant splash of cherry goodness with just enough sweetness to keep that tartness alive—you know that zing that wakes up your taste buds. I always do a little almond extract swirl in the filling because it makes the cherries sing in such a cozy, familiar way. The crust is golden and buttery, tender but sturdy enough to hold all that juicy filling — none of that sogginess that sometimes ruins fruit pies.
Simple is definitely the word here. The recipe requires common pantry staples and a handful of fresh or frozen cherries, which is a lifesaver when you want delicious baking but don’t want to plan days ahead. Budget-wise, cherries can sometimes feel fancy, but frozen ones are affordable and surprisingly fresh tasting. Plus, a pie like this can feed a crowd, making it great for family dinners or potlucks. I’ve also shared it at brunches—it pairs so nicely with a light coffee or even sparkling water with lemon. You can serve it warm with vanilla ice cream, or just a simple dusting of powdered sugar, and both ways feel totally homey and special.
This cherry pie has been a staple in my kitchen for years—I always bake it when I want that comforting, homemade touch but don’t want to fuss with super complicated techniques. It’s also a nice change of pace if you usually make apple or blueberry pies, giving your dessert table a little punch of color and flavor. Trust me, once you try this, you’ll find yourself coming back again and again.
How do I make a cherry pie?
Quick Overview
Making this cherry pie is like a comforting rhythm: prep your crust, mix the filling, assemble, bake, and cool while the kitchen fills with that irresistible aroma. What makes this method special is how I mix just enough sugar and thickener with fresh or frozen cherries — your filling will be luscious but won’t ooze out all over the place. The crust is simple with flour, butter, and a bit of love, and I’ll share my favorite tip for that flakiest texture. You don’t have to stress over fancy pie crust folding or fillings made days ahead. It feels like magic, but it’s honestly straightforward, even when life gets busy.
Ingredients
For the Crust:
- 2 12 cups all-purpose flour — use good quality, preferably unbleached for that tender crumb.
- 1 tsp salt — balances the sweetness perfectly
- 1 tbsp sugar — optional, but I like a hint of sweetness in the crust
- 1 cup unsalted butter, chilled and cubed — the cold butter is key for flakiness, don’t skip this!
- 4-6 tbsp ice water — add gradually till dough just comes together
For the Filling:
- 5 cups fresh or frozen pitted tart cherries — frozen works great if fresh aren’t available, just don’t thaw fully before mixing
- ¾ cup granulated sugar — adjust this if you like it more or less sweet
- 2 tbsp cornstarch — thickens that juicy filling so it’s not runny
- 1 tsp vanilla extract — adds a mellow warmth
- ½ tsp almond extract — optional, but I swear it makes all the difference
- Zest of half a lemon — brightens it up
- Pinch of salt — to balance flavor
For the Glaze:
- 1 egg yolk beaten lightly with 1 tbsp water — for brushing crust
- 2 tbsp powdered sugar mixed with 1 tbsp lemon juice — a light drizzle glaze that adds shine and a hint of tang
Step-by-Step Instructions
Step 1: Preheat & Prep Pan
Get your oven warmed to 400°F (200°C). While it heats, lightly butter your 9-inch pie dish or spray it with nonstick spray. This helps the crust pop out easily and prevents sticking, plus a small pat of butter on the bottom adds a little richness to the crust’s underside — a tip I picked up after too many soggy bottoms.
Step 2: Mix Dry Ingredients
Grab a large bowl and whisk together the flour, salt, and sugar until evenly combined. This step ensures the salt and sugar are well distributed, so every bite is balanced and flavorful with no clumps.
Step 3: Mix Wet Ingredients
Next, toss your cold butter cubes into the flour mixture. Using a pastry cutter or your fingers, work the butter into the flour until the mixture looks like coarse crumbs with some pea-sized lumps. If you feel the butter is warming up too fast, pop the bowl in the fridge for 10 minutes — cold butter is your secret weapon here to flaky crust heaven.
Step 4: Combine
Drizzle in the ice water, one tablespoon at a time, gently folding the mixture with a fork or your hands (clean!) after each addition. Stop when the dough just holds together without being sticky—don’t overmix or knead; you want those buttery flakes, not a tough pie crust. Divide dough in half, wrap in plastic, and chill in the fridge for at least 30 minutes. It’s well worth the wait.
Step 5: Prepare Filling
While the dough chills, rinse fresh cherries and pit them, or keep the frozen ones ready but still mostly frozen. In a large bowl, gently mix cherries with sugar, cornstarch, vanilla, almond extract, lemon zest, and a pinch of salt. Toss just enough to coat the fruit without crushing it. This keeps your filling juicy but not soggy, and the cornstarch will do its magic while baking.
Step 6: Layer & Swirl
Roll out one half of the dough on a lightly floured surface until about 12 inches in diameter. Transfer it to your pie pan. Spoon the cherry filling evenly over the crust, letting those ruby gems spill gently but not pack too tightly. Roll out the second dough half and either cover fully for a traditional pie or cut into lattice strips for a pretty, classic look. If you do the full top crust, cut a few slits for steam release. For a touch of fun, I sometimes swirl a little leftover filling by dollops on top for a marbled effect, which looks beautiful once baked.
Step 7: Bake
Brush the crust with egg wash to get that gorgeous golden sheen. Bake at 400°F for 20 minutes, then lower the temperature to 350°F and bake for another 30-35 minutes until the crust is deep golden and the filling bubbles excitedly through the vents. If the edges brown too quickly, cover them with foil or a crust shield. You’ll know it’s ready when your kitchen smells like heaven and the filling looks thick and syrupy.
Step 8: Cool & Glaze
Let the pie cool completely on a wire rack for at least 2 hours — the filling sets during this time, so slicing won’t be a messy affair. Once cooled, whisk together powdered sugar and lemon juice and drizzle lightly over the crust for a subtle, shiny sweetness that’s just the right touch.
Step 9: Slice & Serve
When it’s time to serve, use a sharp, serrated knife and cut slowly to keep those pretty slices intact. Pair with a scoop of vanilla ice cream or whipped cream for an elevated finish, though honestly, just plain is good enough to make my kids ask for seconds. Serve slightly warm or at room temperature — both bring out the best flavor.
What to Serve It With
For Breakfast: Cherry pie for breakfast? Absolutely! It’s a sweet treat alongside your morning coffee or tea, especially with a dollop of Greek yogurt or cream cheese spread if you’re feeling indulgent. My weekend mornings often start with a warm slice paired with a milky café latte.
For Brunch: For a light brunch, slice up this cherry pie and serve with fresh berries and a glass of sparkling lemon water or even a mimosa if you’re celebrating. A sprinkle of powdered sugar and some fresh mint leaves makes it look elegant yet inviting for guests.
As Dessert: After a cozy dinner, this cherry pie shines with a scoop of vanilla bean ice cream or a swirl of whipped cream. A drizzle of warm chocolate sauce makes it feel extra special — perfect for birthdays or a simple family night.
For Cozy Snacks: Nothing beats a warm slice of cherry pie straight from the fridge or warmed gently in the microwave on a lazy afternoon with a cup of chamomile tea. It’s one of those comfort snacks that wraps you in warmth and sweetness, perfect for a rainy day or catching up with a friend.
This pie has been a staple through our family traditions, often made on holidays but honestly, I’ve found it’s way better without the pressure of occasion — sometimes just the smell in the kitchen is celebration enough.
Top Tips for Perfecting Your Cherry Pie
Cherry Prep: Whether fresh or frozen, keeping your cherries cold helps the filling stay thick and not too watery. I learned this the hard way when my first pie turned soupy—freezing cherries until last minute or pitting fresh cherries just before mixing maintains their firmness.
Mixing Advice: Don’t overwork your dough or filling. Overmixing crust dough warms the butter too much, causing toughness, and overmixing filling can crush the cherries, releasing excess juice. Fold gently and stop when just combined.
Swirl Customization: For a fun twist, add a few dollops of almond butter or cream cheese into your cherry filling and swirl gently with a knife before baking. It’s a beautiful marbled effect and adds a subtle richness — totally worth the little extra step.
Ingredient Swaps: If you’re out of almond extract, vanilla alone works fine, or a drop of cherry liqueur adds a grown-up flair. For gluten-free crust, I swap all-purpose flour for a blend of gluten-free flours plus xanthan gum, though the texture is a tad different (less flaky, more tender).
Baking Tips: Position your rack at the middle of the oven for even baking. Some ovens run hot, so keep an eye after 40 minutes. If the crust browns too quickly, tent with foil to avoid burning while the filling finishes bubbling.
Glaze Variations: You can skip the glaze entirely or dust with cinnamon sugar before baking for a spicy, crunchy crust edge. A lemon-glaze drizzle post-bake adds brightness, or try a simple powdered sugar sprinkle as a finishing touch.
I learned these tips after plenty of trial and error: my early pies always had sad crusts or runny fillings, so I promise, these little tricks will save you some misery and bring out the lovely cherry pie you’re aiming for.
Storing and Reheating Tips
Room Temperature: Cherry pie tastes wonderful at room temp and can sit covered with foil or a pie dome for 1 to 2 days without losing its charm. I usually keep mine on the counter, especially if serving multiple times in a day.
Refrigerator Storage: To keep it fresh for up to 4 days, cover the pie loosely with plastic wrap or place it in an airtight container. This helps preserve the juiciness of the filling and the flakiness of the crust without it drying out.
Freezer Instructions: Pie freezes beautifully — wrap tightly in plastic wrap, then aluminum foil to prevent freezer burn. Freeze for up to 3 months. Let thaw overnight in the fridge before reheating gently in a 350°F oven for about 10-15 minutes to refresh the crust.
Glaze Timing Advice: I always add the glaze after baking and cooling, just before serving or storing. If you add it before freezing, it can become dull or sticky, so it’s best to keep it fresh and bright at the finish line.
I’ve found reheating works best in the oven rather than microwave to keep crust texture ideal, and leftovers are just as delicious — if not more so — the next day!
Frequently Asked Questions
Final Thoughts
I can’t tell you how many times this cherry pie has been the star at family dinners, backyard barbecues, and even midweek treats. There’s comfort baked right into the flaky crust and sticky-sweet cherries that somehow remind me of both my childhood and cozy moments with my own family. It’s a recipe that never gets old and keeps surprising me with how people’s faces light up after the first bite. If you enjoy this recipe, try pairing it with some other fruit-based desserts or experiment with different crust designs to make it your own — baking is part science, part magic, and 100% made better with shared stories and memories.
Can’t wait to hear how yours turns out! Don’t forget to drop a comment or share your favorite twists—you know I love seeing your kitchen adventures. Happy baking!
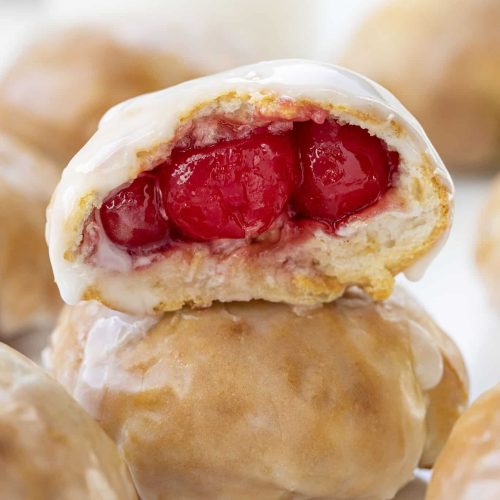
cherry pie
Ingredients
Main Ingredients
- 8 count Pillsbury Grand biscuits not flaky layers
- 1 cup cherry pie filling
- 0.5 cup unsalted butter melted
- 2 cups confectioners' sugar
- 3 tablespoons whole milk room temperature
Instructions
Preparation Steps
- Peel and separate each biscuit into two layers. Press each layer into a 4-inch circle, creating 16 circles.
- Spoon about 1 tablespoon of cherry pie filling into the center of each circle.
- Fold sides together and pinch to seal the filling inside, shaping into balls with even dough thickness.
- Brush the tops and bottoms of the balls with melted butter.
- Spray the air fryer basket with nonstick cooking spray.
- Place the pie bombs in the air fryer basket about 2 inches apart.
- Air fry at 330°F for 7 to 8 minutes or until golden brown. Remove and let cool slightly.
- Mix confectioners' sugar and milk to make a smooth glaze, adding more milk if needed.
- Dip or roll each pie bomb in the glaze and place on a wire rack over a baking sheet.
- Let the glaze firm up before serving warm or at room temperature.