Oh, where do I even begin with this Strawberry Swirl Cheesecake? It’s one of those recipes that just feels like a warm hug on a plate. I remember the first time I ever tried making it – I was probably about ten years old, attempting to “help” my grandma in the kitchen, and she let me sprinkle cocoa powder into a batter (not this one, but you get the idea!). There’s something so magical about transforming simple ingredients into something truly decadent. This strawberry swirl cheesecake, though, is pure artistry. It’s got that classic creamy, dreamy cheesecake texture that melts in your mouth, but with a gorgeous pop of bright, slightly tart strawberry swirl that cuts through the richness. It’s not just a dessert; it’s an experience. If you’ve ever found yourself staring longingly at a slice of New York cheesecake, dreaming of something a little brighter, a little more vibrant, then this is your answer. It’s like the sophisticated cousin to a chocolate cake, elegant yet so comforting. Honestly, it’s become my go-to for pretty much any occasion that calls for a little extra sparkle, and my family devours it every single time.
What is strawberry swirl cheesecake?
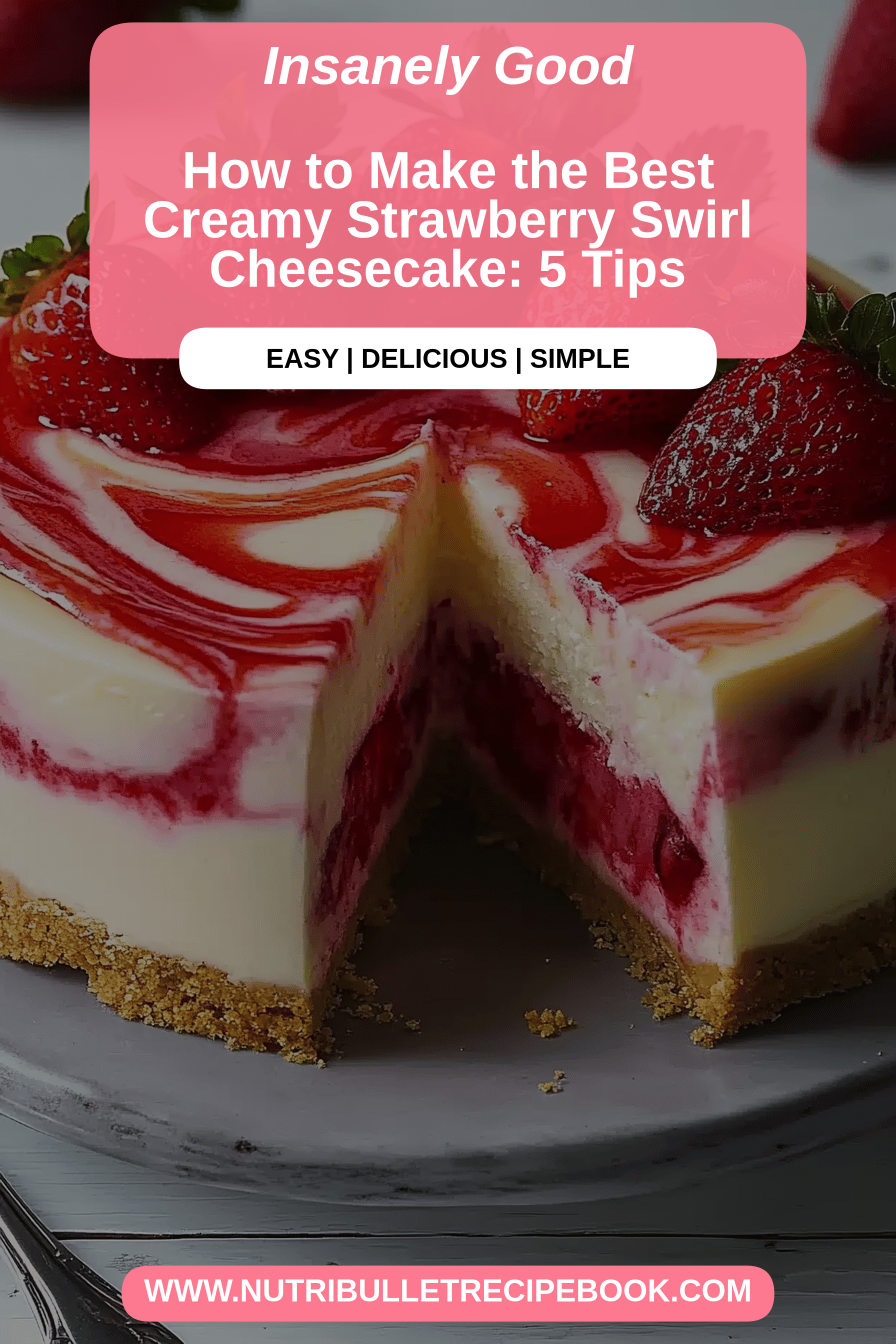
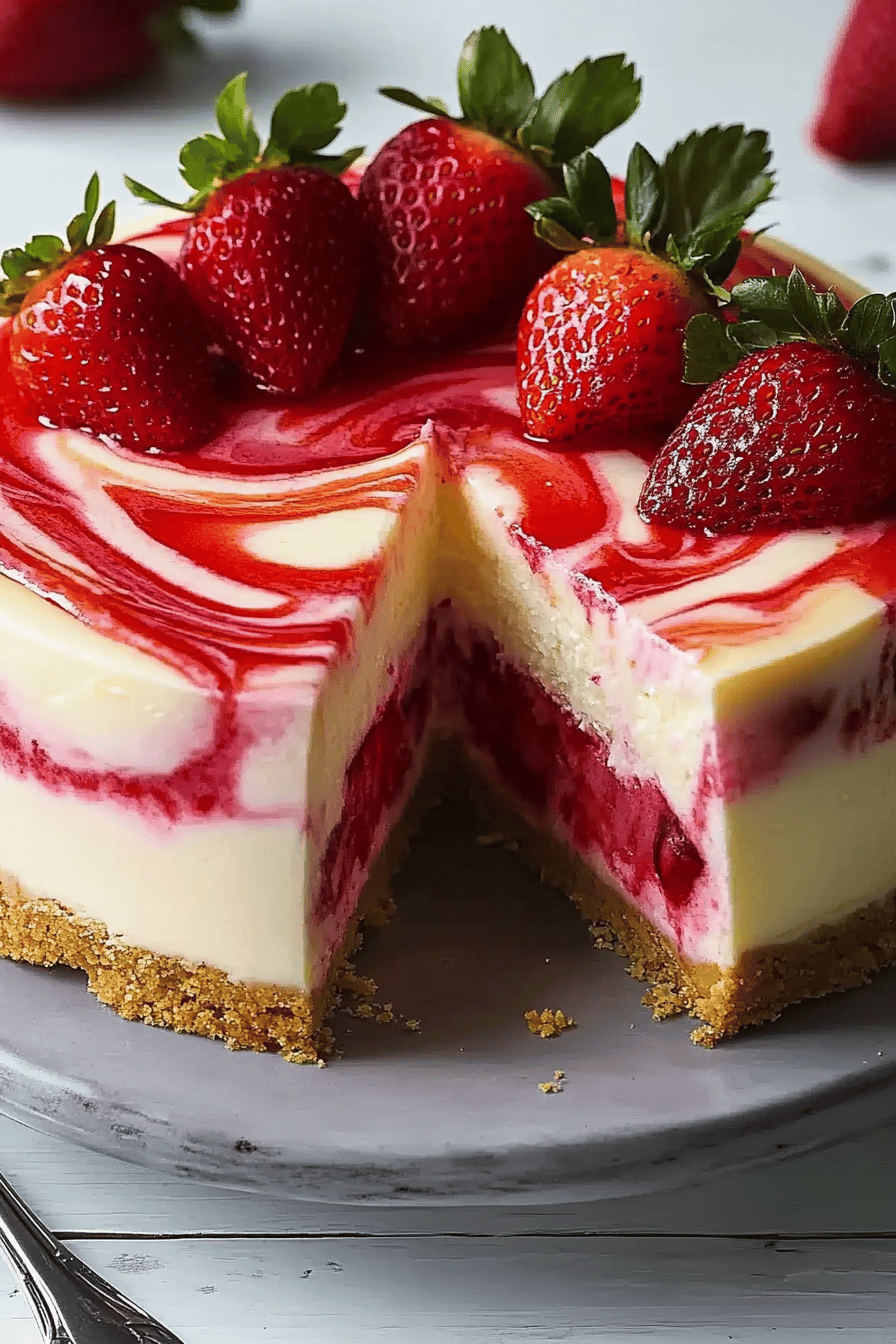
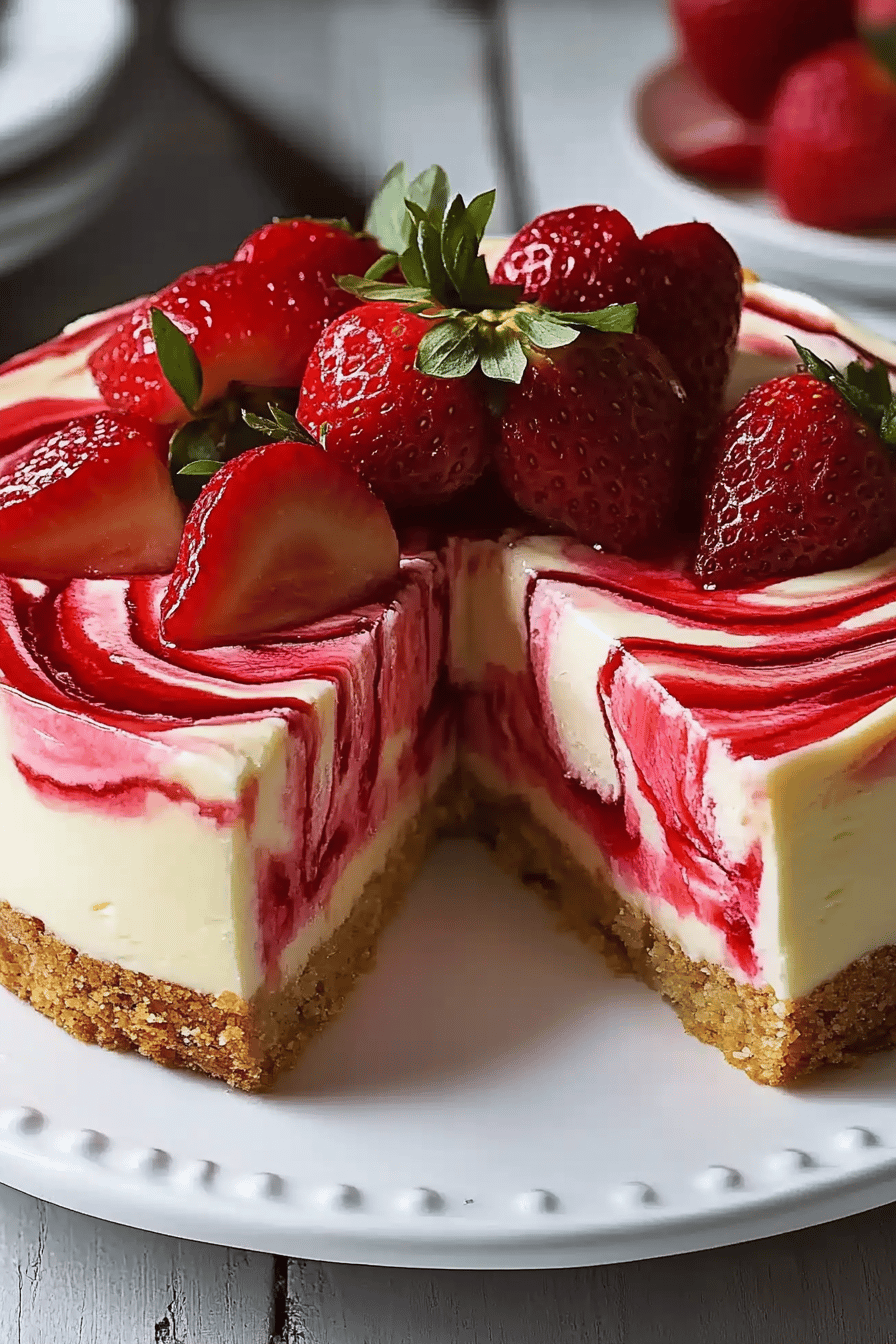
So, what exactly is this dreamy creation? At its heart, it’s a classic baked cheesecake, meaning it’s rich, creamy, and wonderfully dense. But the “swirl” part is where the magic truly happens! Instead of a plain jane cheesecake, we’re adding a vibrant, fruity ribbon of strawberry goodness that’s swirled right into the batter before baking. Think of it as a beautiful marbled masterpiece, but edible. The name itself, “strawberry swirl cheesecake,” tells you exactly what to expect: that familiar, luxurious tang of Cream Cheese blended with the sweet, slightly tart essence of fresh strawberries. It’s not overly complicated, but the visual appeal of those pink swirls peeking through the creamy white is just stunning. It’s basically the best of both worlds – the comforting familiarity of cheesecake with an exciting, fruity twist that makes it feel extra special. It’s the kind of dessert that looks like it came from a fancy bakery but is surprisingly achievable in your own kitchen.
Why you’ll love this recipe?
There are so many reasons why I keep coming back to this strawberry swirl cheesecake, and I just know you’re going to fall in love with it too! Let’s talk about the flavor first, because, wow. You get that incredibly smooth, velvety texture that only a perfectly baked cheesecake can deliver. It’s rich, it’s decadent, but then BAM! You hit a swirl of bright, fresh strawberry goodness. It’s like a little burst of sunshine in every bite. It balances the creaminess perfectly, preventing it from feeling too heavy. And the best part? It’s honestly way simpler to make than you might think. I used to be a little intimidated by cheesecakes, but this recipe is so foolproof. I’ve made it on busy weeknights when I’ve had unexpected guests, and it always impresses. Plus, it’s surprisingly budget-friendly! The ingredients are all pretty standard pantry staples, and you don’t need any fancy equipment. I’ve even experimented with different types of strawberries, and they all work beautifully. This cheesecake is incredibly versatile, too. Serve it as a showstopper dessert after a big meal, or even have a slice with your morning coffee – it’s that good! It’s a step up from a regular cheesecake, offering that little something extra without adding any major fuss. What I love most about this is that it feels sophisticated enough for a dinner party but comforting enough for a quiet night in. It’s a winner, hands down!
How do you make strawberry swirl cheesecake?
Quick Overview
The process for this strawberry swirl cheesecake is really straightforward, designed to give you maximum flavor and a gorgeous presentation with minimal stress. We start by creating a simple, buttery crust that provides a lovely foundation. Then, we whip up a rich, creamy cheesecake batter that’s incredibly smooth. The star, of course, is the vibrant strawberry filling that we’ll gently swirl in. The key is not to overmix, ensuring that beautiful marbled effect. Baking it low and slow is crucial for that signature creamy texture, and then a patient cooling process sets it perfectly. It’s a recipe that rewards a little bit of care with absolutely sensational results.
Ingredients
For the Main Batter:
Let’s start with the foundation for our creamy dream. You’ll need about 1 ½ cups of graham cracker crumbs. I like to make my own by just pulsing whole graham crackers in a food processor, but pre-crushed works just fine! For that delicious buttery binder, grab ½ cup of melted unsalted butter. A little bit of granulated sugar, about ¼ cup, helps sweeten the crust just right. And for a tiny hint of warmth, a pinch of salt. When I buy graham crackers, I always look for ones that are made with honey; they just give the crust an extra little something special.
For the Filling:
This is where the magic really happens! We’ll need four 8-ounce packages of full-fat cream cheese. Make sure it’s softened to room temperature; it makes a world of difference in achieving a smooth, lump-free batter. You’ll also need 1 ½ cups of granulated sugar. Again, full-fat is the way to go here for that signature creamy texture. For richness and structure, grab 4 large eggs, and make sure they’re at room temperature too. A teaspoon of pure vanilla extract is essential for that classic cheesecake flavor. And for an extra silky smooth texture and a slight tang, ½ cup of sour cream, also at room temperature.
For the Glaze:
To make our vibrant strawberry swirl, you’ll need about 2 cups of fresh or frozen strawberries. If you’re using frozen, no need to thaw them completely; a little frostiness actually helps them break down nicely. You’ll also want ¼ cup of granulated sugar to sweeten it and a tablespoon of lemon juice to brighten the flavor and help it set. For thickening, a teaspoon of cornstarch mixed with a tablespoon of water creates a slurry. This glaze is what gives our cheesecake its gorgeous marbled effect!
Step-by-Step Instructions
Step 1: Preheat & Prep Pan
First things first, let’s get our oven ready. Preheat it to a nice, gentle 325°F (160°C). You’ll need a 9-inch springform pan for this. I always like to grease mine lightly with butter or cooking spray. Then, I wrap the outside of the pan tightly with a couple of layers of heavy-duty aluminum foil. This is super important if you plan on using a water bath (which I highly recommend for even baking and to prevent cracks!), as it stops any water from seeping into your crust. Trust me, a soggy crust is no fun!
Step 2: Mix Dry Ingredients
In a medium bowl, combine your graham cracker crumbs, granulated sugar for the crust, and that pinch of salt. Give it a good stir with a fork to make sure everything is evenly distributed. This dry mix is the base of our crunchy, delicious crust.
Step 3: Mix Wet Ingredients
Pour the melted butter over the graham cracker mixture. Use a fork to stir it all together until the crumbs are evenly moistened. It should look like wet sand – that’s your cue that it’s ready to form into a crust!
Step 4: Combine
Now, press this crumbly mixture firmly into the bottom of your prepared springform pan. I like to use the flat bottom of a measuring cup or even the bottom of a glass to get it nice and compact. You can also press it up the sides just a little if you like a more substantial crust. Pop this into the freezer for about 10 minutes while you get the filling ready. This helps the crust set up nicely.
Step 5: Prepare Filling
In a large bowl, beat the softened cream cheese with an electric mixer on medium speed until it’s super smooth and creamy. This is a crucial step for a lump-free cheesecake! Gradually add the granulated sugar and continue beating until well combined and there are no more sugar granules visible. Beat in the eggs, one at a time, mixing just until each one is incorporated before adding the next. Don’t overbeat here; we don’t want too much air in the batter. Stir in the vanilla extract and the sour cream until just combined. Again, gentle mixing is key!
Step 6: Layer & Swirl
Pour about half of the cheesecake batter over your chilled crust. Now, spoon dollops of your prepared strawberry mixture (we’ll make this next!) over the batter. Then, pour the remaining cheesecake batter over the strawberry dollops. Spoon more strawberry mixture on top. Now, grab a butter knife or a skewer and gently swirl the strawberry mixture through the cheesecake batter. Don’t go too crazy; you want beautiful ribbons, not a fully blended pink mess. Aim for gentle figure-eights or random patterns. The more you swirl, the less defined the streaks will be, so it’s a balance!
Step 7: Bake
Carefully place the foil-wrapped springform pan into a larger roasting pan. Pour hot water into the roasting pan, coming about halfway up the sides of the springform pan. This water bath helps create a moist environment for baking, which prevents cracks and ensures a super creamy texture. Bake for 60-75 minutes, or until the edges are set but the center still has a slight wobble when you gently jiggle the pan. It will continue to set as it cools.
Step 8: Cool & Glaze
Once baked, turn off the oven, prop the oven door open slightly with a wooden spoon, and let the cheesecake cool in the oven for another hour. This gradual cooling is another secret to preventing cracks! After that, remove the cheesecake from the water bath and let it cool completely on a wire rack. Once fully cooled, cover it loosely with plastic wrap and refrigerate for at least 6 hours, or preferably overnight. For the glaze, combine the strawberries, sugar, and lemon juice in a saucepan. Cook over medium heat, stirring occasionally, until the strawberries have broken down and the sauce has thickened slightly. If you want it smoother, you can blend it with an immersion blender or a regular blender. Let it cool completely.
Step 9: Slice & Serve
Once your cheesecake is thoroughly chilled and firm, carefully run a thin knife around the edge to loosen it from the pan, then release the springform sides. Drizzle your cooled strawberry glaze over the top just before serving. Slice with a sharp knife dipped in hot water and wiped dry between each cut for the cleanest slices. Enjoy that gorgeous swirl!
What to Serve It With
This strawberry swirl cheesecake is so versatile, it’s practically its own party, but here are some of my favorite ways to serve it up! For a lovely breakfast treat, a thin slice alongside a strong cup of coffee or a refreshing glass of iced tea is pure bliss. The sweetness of the cheesecake and the tartness of the strawberry are surprisingly perfect with that morning jolt. If you’re hosting a brunch, presentation is key! Serve a slightly thicker slice on a pretty dessert plate, perhaps with a dollop of lightly sweetened whipped cream or a few fresh berries scattered around. It looks so elegant, and everyone always raves about it. As a dessert after dinner, it’s an absolute showstopper. I love serving it after a rich meal because that strawberry swirl really cuts through any heaviness. A small scoop of vanilla bean Ice Cream on the side is pure indulgence! And for those times when you just need a comforting, cozy snack, a small wedge with a glass of milk can feel incredibly luxurious. My kids go absolutely nuts for it this way; it’s their favorite “special treat.” I’ve even served it with a drizzle of balsamic glaze for an unexpected savory-sweet combination, which sounds weird but it’s surprisingly delicious for those who like a little adventure!
Top Tips for Perfecting Your Strawberry Swirl Cheesecake
Okay, so you want that perfect, bakery-worthy strawberry swirl cheesecake? I’ve learned a few tricks over the years, and I’m happy to share them! First off, on preparing your strawberry mixture: don’t overcook it into a jam. You want it to be thick enough to swirl, but still have a fresh fruit flavor. If it gets too thin, just simmer it a bit longer uncovered. When it comes to mixing the cheesecake batter, the biggest tip I can give you is to use room temperature ingredients – cream cheese, eggs, and sour cream. This is non-negotiable for a silky smooth texture. If your cream cheese is cold, you’ll end up with lumps, and nobody wants lumpy cheesecake! Also, don’t over-beat the batter once the eggs are in. You want to incorporate them, but too much air can cause cracks. For that gorgeous swirl effect, don’t go overboard! A few passes with a knife or skewer is all you need to create beautiful ribbons. Too much swirling will just blend the colors together, and you’ll lose that stunning marbling. When it comes to baking, the water bath is your best friend. Seriously, don’t skip it! It provides gentle, even heat and prevents your cheesecake from drying out or cracking. And speaking of cracks, the gradual cooling process is also super important. Letting it cool in the oven with the door ajar is a game-changer. If you’re looking to swap out the strawberries, raspberries or even a mix of berries work beautifully for the swirl. Just adjust the sugar slightly based on the sweetness of the fruit. Some people worry about the cornstarch in the glaze, but honestly, it just gives it that perfect, drizzle-able consistency without making it gummy. For a thicker crust, you can add a tablespoon of granulated sugar to the graham cracker mix. And if you ever find your cheesecake isn’t setting up quite right after baking, don’t panic! It will firm up significantly in the refrigerator. Just be patient with the chilling process; it’s the final stage that really makes it perfect.
Storing and Reheating Tips
Keeping your amazing strawberry swirl cheesecake fresh and delicious is just as important as making it! If you happen to have any leftovers (which is rare in my house!), it’s best to store it covered at room temperature for no more than 2 hours. After that, it’s best to refrigerate it. For refrigerator storage, make sure it’s well-covered with plastic wrap or in an airtight container. It will stay wonderfully fresh in the fridge for up to 4-5 days. The flavors actually meld and deepen over time, so some people even prefer it on the second day! If you’re thinking of freezing it, this cheesecake freezes beautifully, but I recommend freezing it *before* you add the glaze. Wrap individual slices or the whole cake (once completely firm from the fridge) tightly in a couple of layers of plastic wrap, then a layer of aluminum foil. It can be stored in the freezer for up to 1-2 months. To thaw, transfer it from the freezer to the refrigerator overnight. Then, you can add your fresh strawberry glaze just before serving. Reheating isn’t really necessary for cheesecake, as it’s best served chilled. However, if you prefer a slightly softer texture, you can let a slice sit at room temperature for about 20-30 minutes before enjoying. The glaze should always be added fresh after cooling or thawing to maintain its vibrant color and texture. If you freeze the whole cake, make sure your glaze is also frozen separately if you plan to add it once thawed, or make a fresh batch when you’re ready to serve.
Frequently Asked Questions
Final Thoughts
I really hope you give this strawberry swirl cheesecake a try. It’s more than just a recipe to me; it’s a little piece of joy that I love sharing. It brings together that comforting, classic cheesecake flavor with a bright, beautiful burst of fruit that just makes everything feel a little more special. It’s the kind of dessert that always gets compliments, but honestly, the best part is seeing the smiles on people’s faces when they take that first bite. It’s proof that a little bit of love and simple ingredients can create something truly magical. If you enjoy this, you might also love my Classic Chocolate Ganache Cake or my Lemon Raspberry Tart – they have a similar vibe of being impressive yet approachable. I’d be absolutely thrilled if you try this strawberry swirl cheesecake out in your own kitchen. Please, let me know how it turns out in the comments below! I love hearing your variations and seeing your beautiful creations. Happy baking, everyone!
Strawberry Swirl Cheesecake
Ingredients
Crust
- 2 cups graham cracker crumbs
- 0.25 cup granulated sugar
- 0.33 cup unsalted butter, melted
Cheesecake Filling
- 4 packages cream cheese, softened 8 oz each
- 1.5 cup granulated sugar
- tsp vanilla extract
- 4 large eggs
- 1 cup sour cream
Strawberry Swirl
- 2 cup fresh strawberries, hulled and chopped
- 0.25 cup granulated sugar
- 1 tbsp lemon juice
Instructions
Preparation Steps
- Preheat oven to 350°F (175°C). Grease a 9-inch springform pan.
- For the crust: In a medium bowl, combine graham cracker crumbs and sugar. Pour in melted butter and stir until combined. Press the mixture evenly into the bottom of the prepared springform pan.
- Bake the crust for 8-10 minutes. Remove from oven and let cool.
- For the filling: In a large bowl, beat cream cheese and sugar until smooth. Beat in vanilla extract. Add eggs one at a time, beating well after each addition. Stir in sour cream.
- Pour the filling over the cooled crust.
- For the strawberry swirl: In a small saucepan, combine strawberries, sugar, and lemon juice. Cook over medium heat, stirring occasionally, until strawberries break down and sauce thickens, about 5-7 minutes. Let cool slightly.
- Dollop spoonfuls of the strawberry mixture over the cheesecake filling. Use a knife or skewer to swirl the strawberry sauce into the batter.
- Bake for 55-65 minutes, or until the edges are set and the center is still slightly jiggly. Turn off the oven, crack the door open, and let the cheesecake cool in the oven for 1 hour.
- Remove from oven and cool completely on a wire rack. Refrigerate for at least 4 hours, or preferably overnight, before serving.