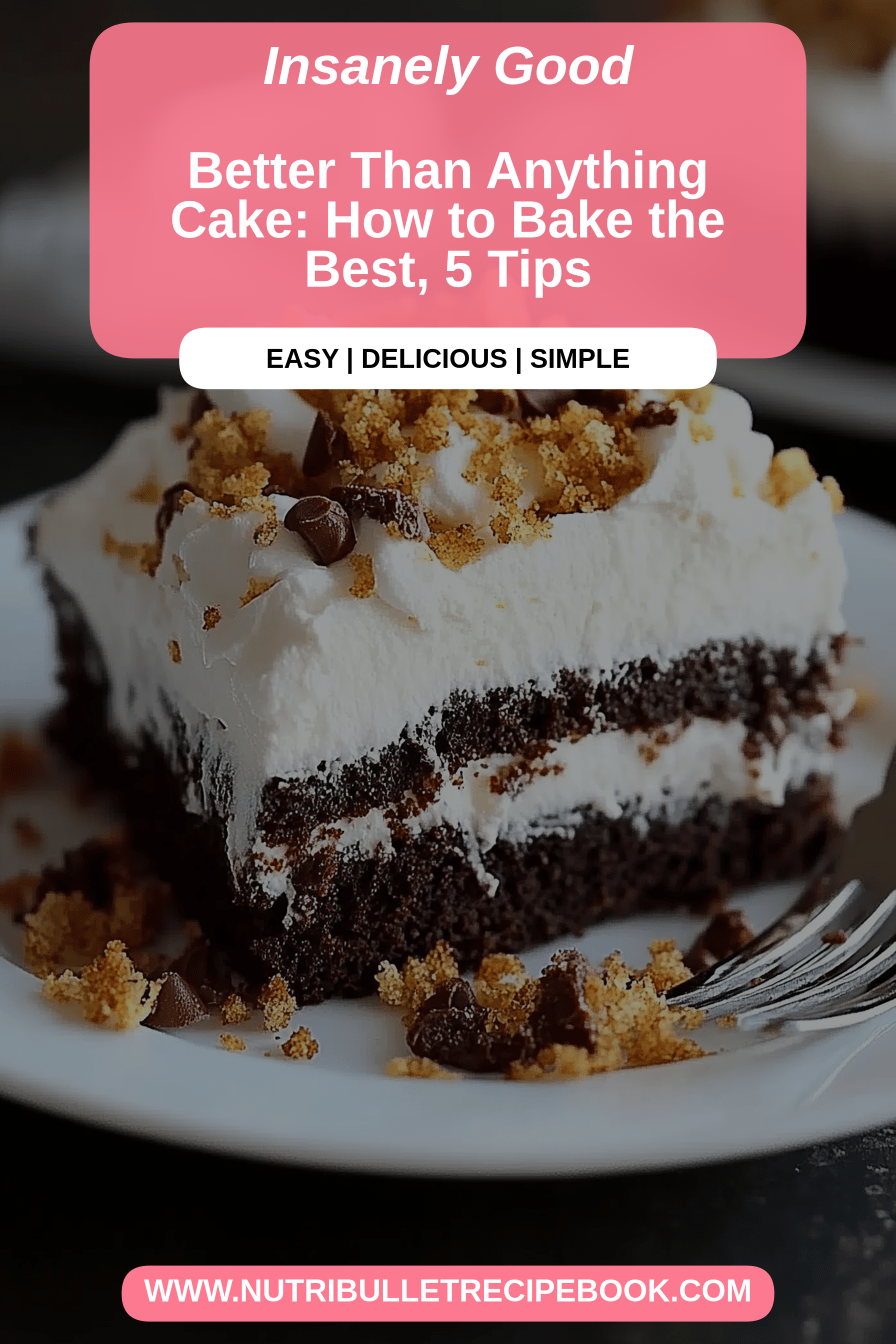
Okay, gather ’round, because I’m about to spill the beans on a recipe that has genuinely earned its name. I call it “Better Than Anything Cake,” and it’s not just a cute moniker, it’s the honest truth. This isn’t just a dessert; it’s a hug in cake form. I remember the first time I made it, purely out of desperation for something chocolatey and comforting after a ridiculously long day. I expected it to be good, but I wasn’t prepared for the sheer magic that came out of my oven. It’s one of those recipes that makes you feel like a baking superhero, even if you’re just starting out. It’s funny, because I’ve tried a lot of fancy cakes, a lot of intricate bakes, but this one, this humble, glorious cake, always rises to the top. It’s the one my family requests for birthdays, for holidays, and honestly, just for Tuesdays. If you’re looking for that perfect, crowd-pleasing, “I can’t believe I made this” kind of recipe, you’ve found it. This is seriously better than anything else out there!
What is better than cake?
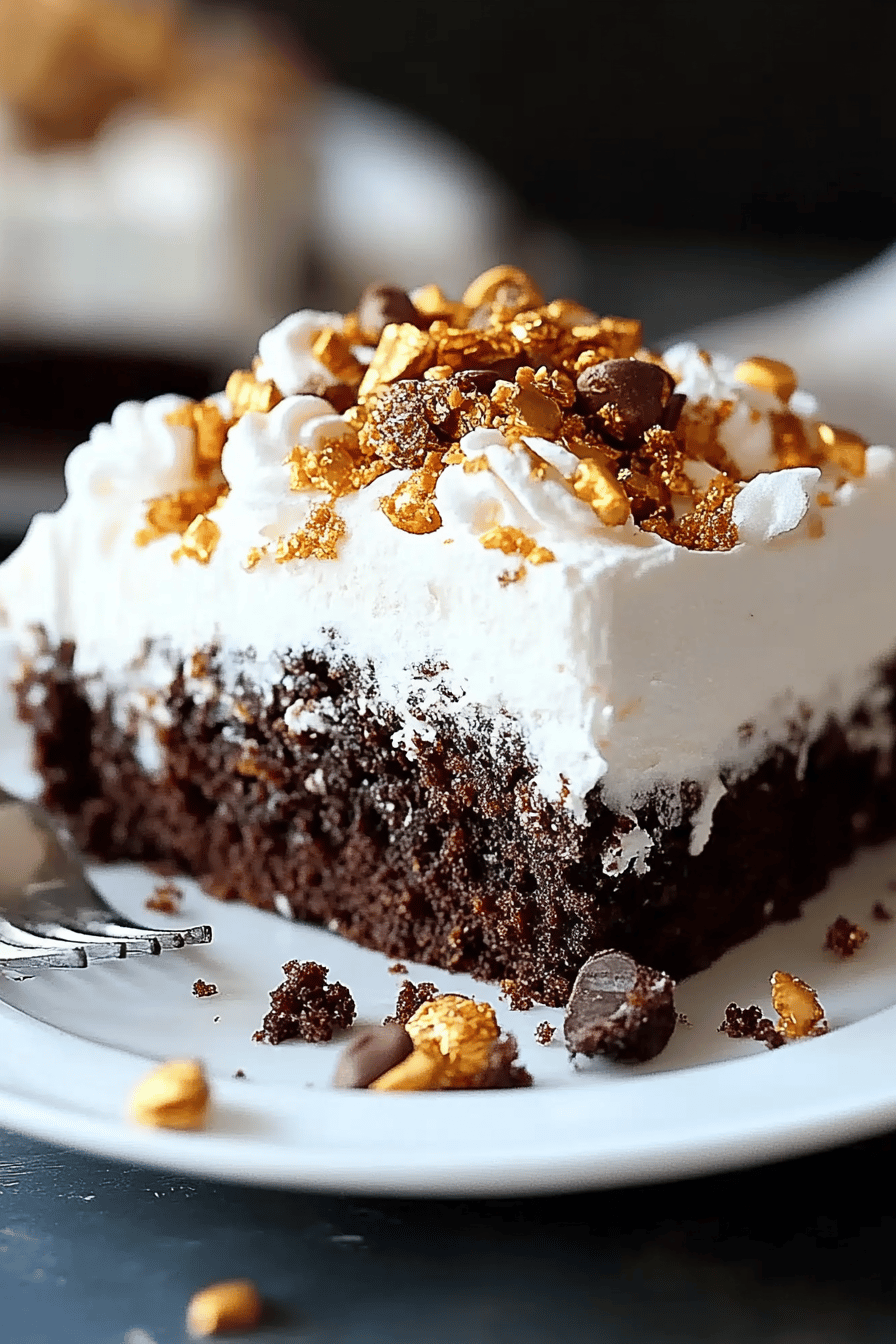
So, what exactly *is* this magical “Better Than Anything Cake”? Think of it as the ultimate comfort food in cake form, but with a surprise twist that makes it utterly irresistible. It’s essentially a incredibly moist, dense, and rich chocolate cake, but with an impossibly easy, no-fuss approach. The name comes from the fact that it’s so forgiving and so delicious, it truly surpasses most other dessert attempts. It’s not overly fussy, doesn’t require fancy ingredients you can’t find at your local grocery store, and yet, it delivers flavor and texture that rivals any gourmet bakery. It’s the kind of cake that feels both decadent and deeply satisfying, the kind you crave when you need a little sweetness and a lot of comfort. It’s a hug from the inside, if you will, and it’s the reason I never need to look for another chocolate Cake Recipe again.
Why you’ll love this recipe?
Why is this cake my go-to?flavor is just out of this world. It’s intensely chocolatey without being bitter, and it has this incredible depth that keeps you coming back for another bite. The texture is where it really shines – it’s so unbelievably moist and tender, it practically melts in your mouth. It’s not dry, it’s not crumbly; it’s just… perfect. And the best part? The simplicity! You can whip up the batter in about 10 minutes, and that includes finding your ingredients. Seriously, no creaming butter and sugar for ages or wrestling with a stand mixer. It’s one of those lifesaver recipes for busy weeknights or when unexpected guests pop over. Plus, it’s surprisingly cost-efficientWhat are some pantry staples for this delicious dessert?versatility is another huge win. While it’s phenomenal as is, you can easily dress it up or down. Serve it warm with Ice Cream, or let it cool completely for a perfect slice with your morning coffee. What I love most about this particular recipe is that it’s so forgiving. Even if you slightly overmix, or your oven runs a little hot, it still turns out wonderfully. It’s the kind of recipe that builds confidence in the kitchen. It’s leagues beyond a simple box mix, but requires about the same amount of effort, if not less!
How to Make Better Than Anything Cake
Quick Overview
This cake is all about effortless perfection. You’ll simply whisk together your dry ingredients, mix your wet ingredients separately, then combine them into a luscious batter. The magic happens when we add a few special ingredients that boost that incredible moistness and depth. It bakes up into a rich, fudgy delight that’s then topped with a simple, decadent glaze. The whole process, from start to finish, is remarkably quick, making it ideal for those moments you need a showstopper dessert without the stress. You’ll feel like a culinary wizard without breaking a sweat!
Ingredients
For the Main Batter:
Flour: I use all-purpose flour, about 2 cups. Make sure it’s sifted for the lightest texture, though honestly, even if you don’t, it’s still going to be amazing. I’ve tested this with various brands, and they all perform beautifully.
Sugar: 1 ¾ cups of granulated sugar. This provides the perfect sweetness without being cloying. If you prefer a slightly less sweet cake, you *could* dial it back to 1 ½ cups, but I find this amount creates the perfect balance for the chocolate flavor.
Cocoa Powder: ¾ cup of unsweetened cocoa powder. This is where the deep chocolate flavor comes from, so don’t skimp! Use a good quality one for the best results. I prefer natural unsweetened, but Dutch-process works too.
Baking Soda: 2 teaspoons. This is crucial for getting that lovely lift and tender crumb.
Baking Powder: 1 teaspoon. Works in tandem with the baking soda for perfect aeration.
Salt: 1 teaspoon. Salt is a flavor enhancer, don’t skip it! It really brings out the chocolate and sweetness.
Eggs: 2 large eggs. These bind everything together and add richness. I always bring mine to room temperature; it just makes them incorporate better.
Milk: 1 cup of milk. Whole milk is my favorite for richness, but buttermilk or even almond milk works wonderfully and adds a subtle tang. I tested this with almond milk and it actually made it even creamier!
Vegetable Oil: ½ cup. This is key for moisture! You can use canola oil or any neutral-flavored oil. I’ve found that oil makes this cake stay incredibly moist for days.
Vanilla Extract: 2 teaspoons. Pure vanilla extract is non-negotiable for that warm, comforting flavor.
Hot Water or Hot Coffee: 1 cup. This is the secret ingredient that blooms the cocoa and intensifies the chocolate flavor, plus it makes the batter super thin and incredibly moist. Coffee actually makes the chocolate flavor even richer, so I often use that!
For the Filling:
Cream Cheese: 8 ounces, softened. This is what gives the cake that extra layer of dreamy richness. Make sure it’s truly soft for easy mixing.
Powdered Sugar: 1 cup. For sweetness and a smooth, creamy texture.
For the Glaze:
Chocolate Chips: 1 cup (semi-sweet or milk chocolate). These melt down into a luscious, shiny glaze.
Butter: 2 tablespoons. Adds a beautiful sheen and helps the glaze set perfectly.
Step-by-Step Instructions
Step 1: Preheat & Prep Pan
First things first, let’s get that oven preheated to 350°F (175°C). This is a standard baking temperature, but it’s worth noting that every oven can be a little different, so I always recommend getting to know yours. For the pan, I usually go for a 9×13 inch baking dish. Grease it really well and then lightly flour it. This prevents any sticking, which is heartbreaking after all your hard work! Some people like to line the bottom with parchment paper too, which is an extra layer of insurance. I usually skip that step, but if you’re worried, go for it!
Step 2: Mix Dry Ingredients
In a large bowl, whisk together your flour, granulated sugar, cocoa powder, baking soda, baking powder, and salt. Whisking is important here because it not only combines everything but also aerates the dry ingredients, which contributes to a lighter cake. You want to make sure there are no clumps of cocoa powder. Give it a good few stirs until it looks uniform. It should look like a rich, dark brown mixture.
Step 3: Mix Wet Ingredients
In a separate medium bowl, whisk together your eggs, milk, vegetable oil, and vanilla extract. You just want to combine them until they’re well incorporated. No need to beat them extensively, just a good whisk until everything is blended. If you’re using room temperature eggs, they’ll mix in like a dream.
Step 4: Combine
Now, pour the wet ingredients into the bowl with the dry ingredients. Mix on low speed (or by hand with a whisk) until *just* combined. This is where many people go wrong and overmix, which can lead to a tough cake. You want to stop mixing as soon as you don’t see any dry streaks of flour. A few small lumps are totally fine!
Step 5: Prepare Filling
While the batter is resting for a moment, let’s get the cream cheese filling ready. In a medium bowl, beat the softened cream cheese with the powdered sugar until it’s smooth and creamy. You can do this with an electric mixer on medium speed, or vigorously with a whisk if you’re feeling ambitious. Make sure there are no lumps of cream cheese left. This layer is going to be amazing.
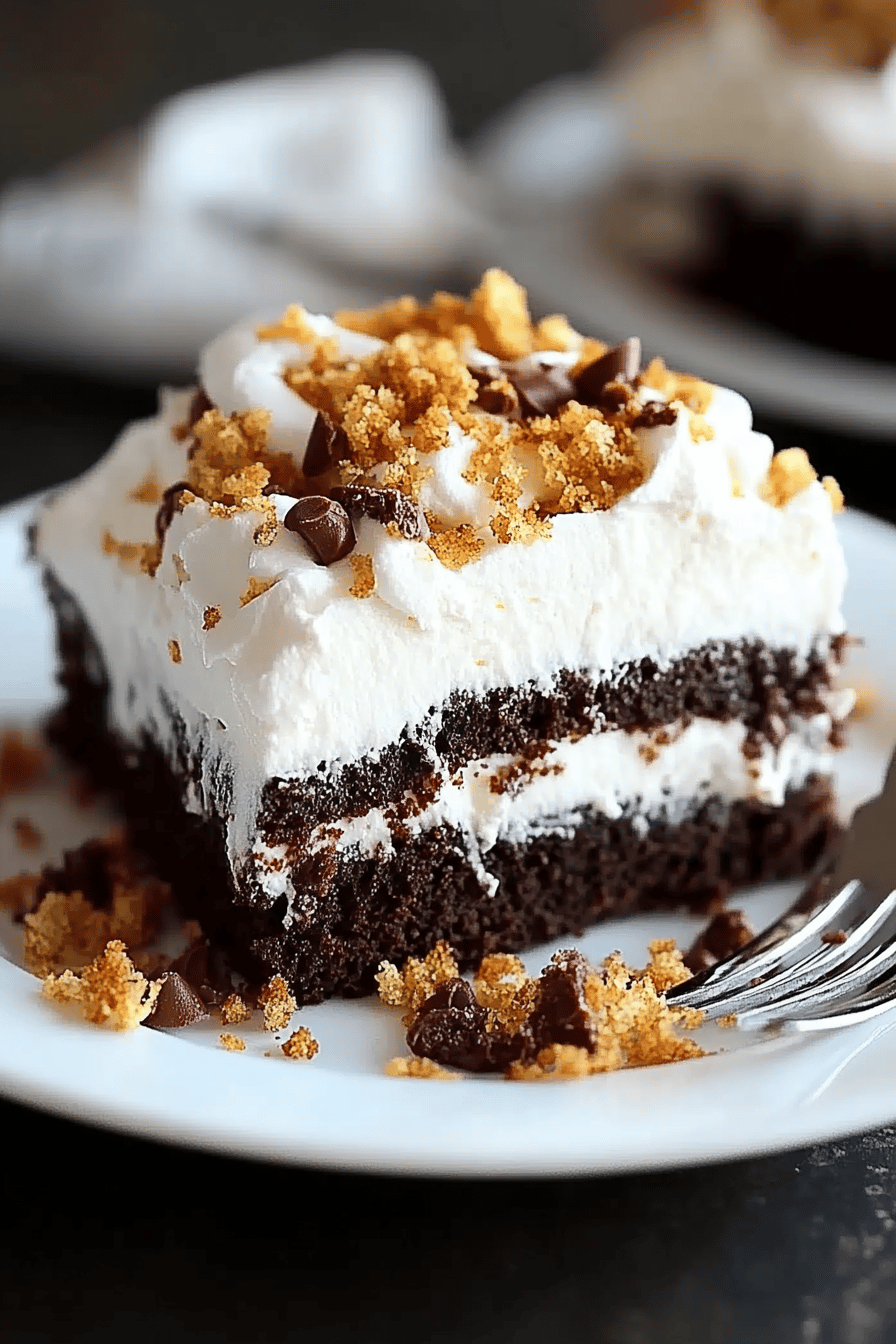
Step 6: Layer & Swirl
Now for the fun part! Pour about half of the cake batter into your prepared baking dish. Dollop spoonfuls of the cream cheese filling evenly over the batter. Then, gently spread the remaining cake batter over the cream cheese layer. At this point, you can take a knife or a skewer and gently swirl the cream cheese into the batter. Don’t overdo it; you want distinct swirls, not a completely mixed mess. This creates those beautiful pockets of creamy goodness throughout the cake.
Step 7: Bake
Pop that dish into your preheated oven and bake for about 30-40 minutes. The exact time will depend on your oven, so keep an eye on it. You’ll know it’s done when a toothpick inserted into the center comes out clean, or with just a few moist crumbs attached (not wet batter!). The top should look set and slightly puffed.
Step 8: Cool & Glaze
Once it’s baked, carefully remove the cake from the oven and let it cool in the pan on a wire rack for about 15-20 minutes. While it’s still warm, it’s time for the glaze! In a microwave-safe bowl, combine the chocolate chips and butter. Microwave in 30-second intervals, stirring in between, until the chocolate is melted and smooth. Pour this glorious glaze over the warm cake, spreading it evenly. Let the cake cool completely before slicing.
Step 9: Slice & Serve
Once the glaze has set (this happens relatively quickly as the cake cools), it’s time to slice and serve! Use a sharp knife for clean cuts. This cake is delicious at room temperature, but I also love it slightly warm, straight from the oven. It’s also fantastic the next day!
What to Serve It With
This “Better Than Anything Cake” is so versatile, it’s welcome at pretty much any meal or occasion. For breakfast, a thin slice with a strong cup of coffee is pure bliss. The chocolate isn’t overly sweet, so it feels perfectly acceptable to have it first thing. I love it right out of the fridge in the morning – it’s a nice, dense texture. For brunch, I’ll often cut it into smaller, elegant squares and serve it alongside fresh berries or a dollop of whipped cream. It looks sophisticated and tastes incredible. As a dessert, it’s an absolute showstopper. A warm slice with a scoop of vanilla bean ice cream is pure heaven. You can also serve it with a raspberry coulis or a sprinkle of sea salt for an extra touch of class. And for those cozy snacks moments, when you just need something sweet and comforting? This is your answer. A square with a tall glass of cold milk is my personal go-to when I’m craving something sweet at 10pm but don’t want to bake a whole cake. My family also loves it with a side of fresh strawberries; the tartness of the fruit cuts through the richness of the chocolate beautifully.
Top Tips for Perfecting Your Better Than Anything Cake
I’ve made this cake more times than I can count, and through those many bakes, I’ve picked up a few tricks that I think make all the difference. For the zucchini prep, if you’re using it (I’ve added a note about that in the FAQ, but it’s optional!), make sure you squeeze out as much liquid as possible. I usually grate it finely and then wrap it in paper towels or a clean kitchen towel and give it a good squeeze. This prevents the cake from becoming too wet. When it comes to mixing advice, remember that rule of thumb: don’t overmix! Overmixing develops the gluten in the flour, which can make your cake tough. Mix until the ingredients are just combined, and you’re golden. For swirl customization, don’t be afraid to get a little creative! You can make simple swirls with a knife, or use a piping bag for more defined patterns. Aim for more of a marbled effect rather than completely blending the cream cheese into the batter. For ingredient swaps, I’ve already mentioned that coffee can replace the hot water for an even deeper chocolate flavor, and different milk options work well. If you don’t have vegetable oil, melted butter can be used, but oil tends to keep the cake moister for longer. For baking tips, always do the toothpick test! It’s the most reliable way to check for doneness. If the top starts browning too quickly, you can loosely tent it with foil. And for glaze variations, if you’re not a fan of plain chocolate, you can add a tablespoon of peanut butter to the melted chocolate for a peanut butter-chocolate glaze, or even a little instant espresso powder for a mocha kick. Just make sure the cake is cooled enough so the glaze doesn’t melt right off it!
Storing and Reheating Tips
One of the best things about this cake is how well it keeps! For room temperature storage, if it’s not too warm in your house, you can keep it on the counter, well-covered with plastic wrap or in an airtight container, for up to 3 days. It actually stays incredibly moist. If your kitchen tends to be warm or humid, I’d opt for refrigerator storage. Place it in an airtight container, and it should stay fresh for up to a week. The texture might firm up slightly in the fridge, but it’s still delicious. If you want to freeze this glorious creation, it freezes beautifully. After it has completely cooled and the glaze has set, wrap it tightly in a layer of plastic wrap followed by a layer of aluminum foil. It can be stored in the freezer for up to 2-3 months. To thaw, remove the foil and plastic wrap and let it come to room temperature on the counter. The glaze timing advice is simple: for room temp or fridge storage, I glaze it when the cake is still warm. If you’re freezing it, I’d wait to glaze it until after it’s thawed, or use a very thin layer of glaze that’s fully set before freezing.
Frequently Asked Questions
Final Thoughts
So there you have it – my beloved “Better Than Anything Cake.” It’s more than just a recipe to me; it’s a testament to how simple ingredients and a little bit of love can create something truly extraordinary. It’s the kind of cake that makes everyone happy, from the pickiest eaters to the most discerning dessert aficionados. It proves that you don’t need complicated techniques or expensive ingredients to bake something amazing. This cake is consistently moist, decadently chocolatey, and just plain joyful. If you’re looking for a reliable, crowd-pleasing chocolate cake that requires minimal fuss but delivers maximum flavor, please, please give this one a try. You won’t regret it! I can’t wait to hear how yours turns out, and I’d love to see any variations you come up with in the comments below. Happy baking, friends!