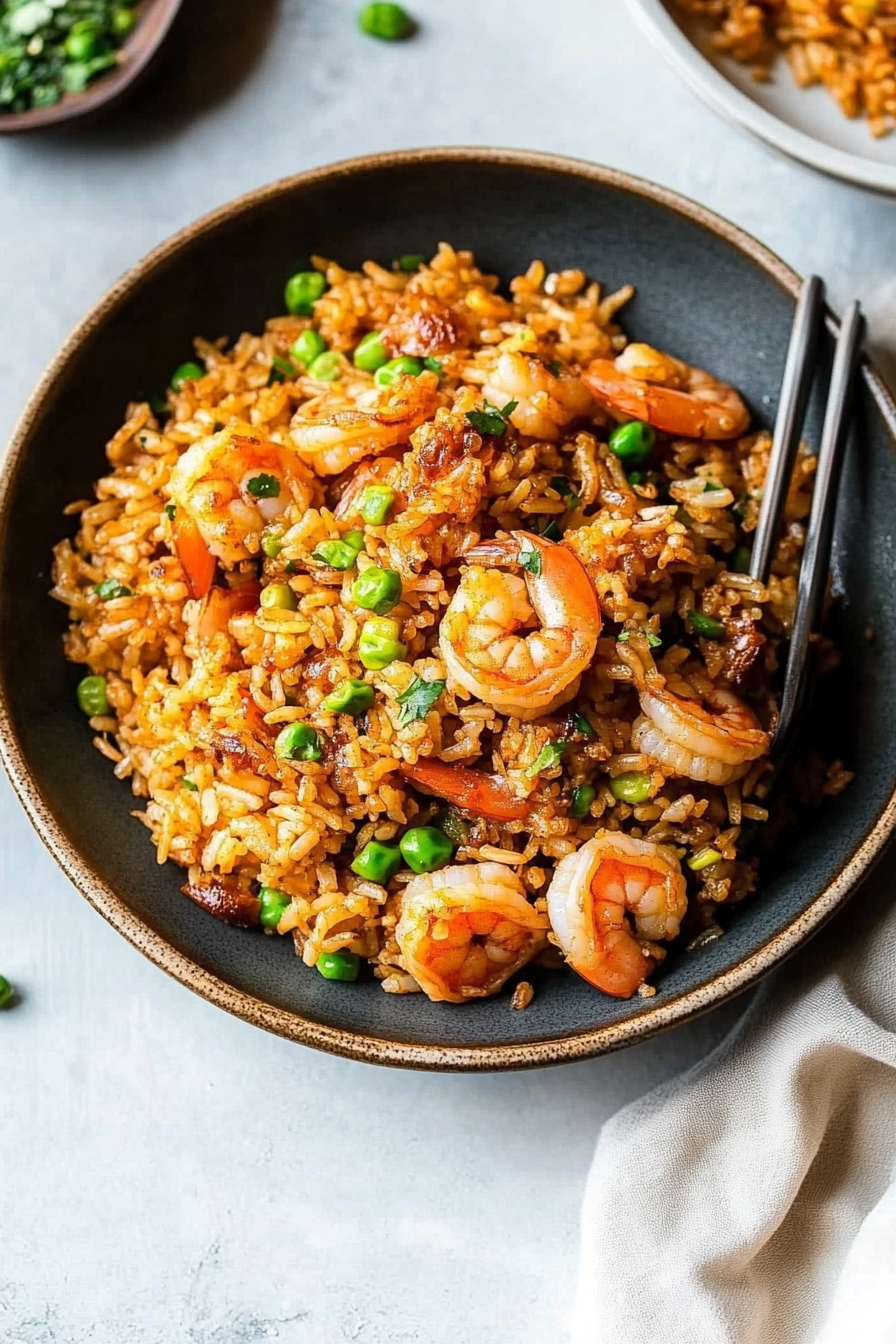
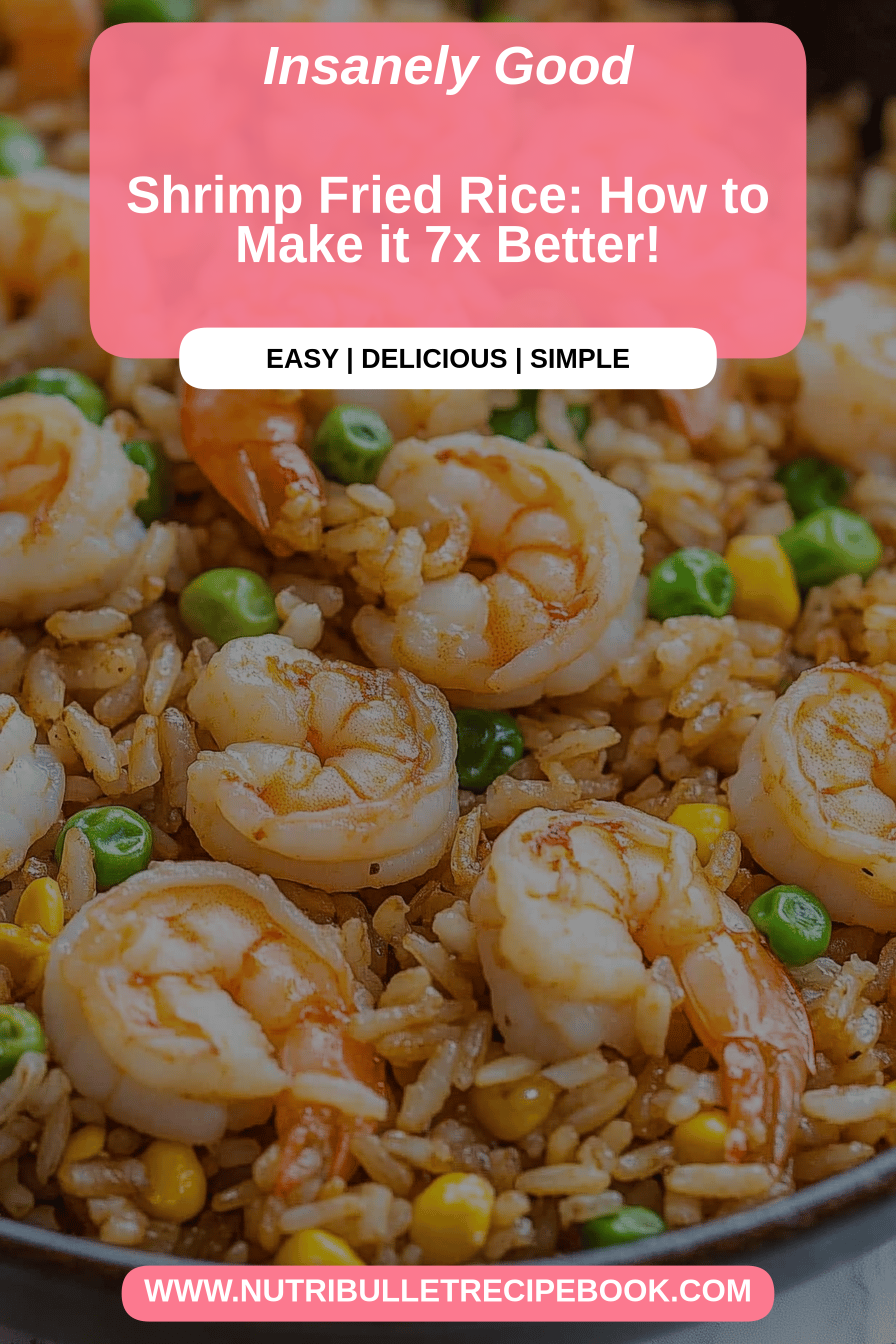
There are some dishes that just feel like home, aren’t there? For me, that’s definitely shrimp Fried Rice. It’s one of those meals that instantly transports me back to my childhood, to my mom bustling around the kitchen on a weeknight, the air thick with the most amazing aromas. It’s got that perfect balance of savory, a little bit of sweet, and that satisfying chew from the rice. Whenever I’m short on time but craving something incredibly flavorful and comforting, this shrimp fried rice is my absolute lifesaver. It’s so much better than takeout, and honestly, way easier than you might think. If you’ve ever been intimidated by making fried rice from scratch, trust me, this recipe is going to be your new best friend. It’s the kind of meal that makes everyone at the table happy, and that’s really what cooking is all about, right?
What is shrimp fried rice?
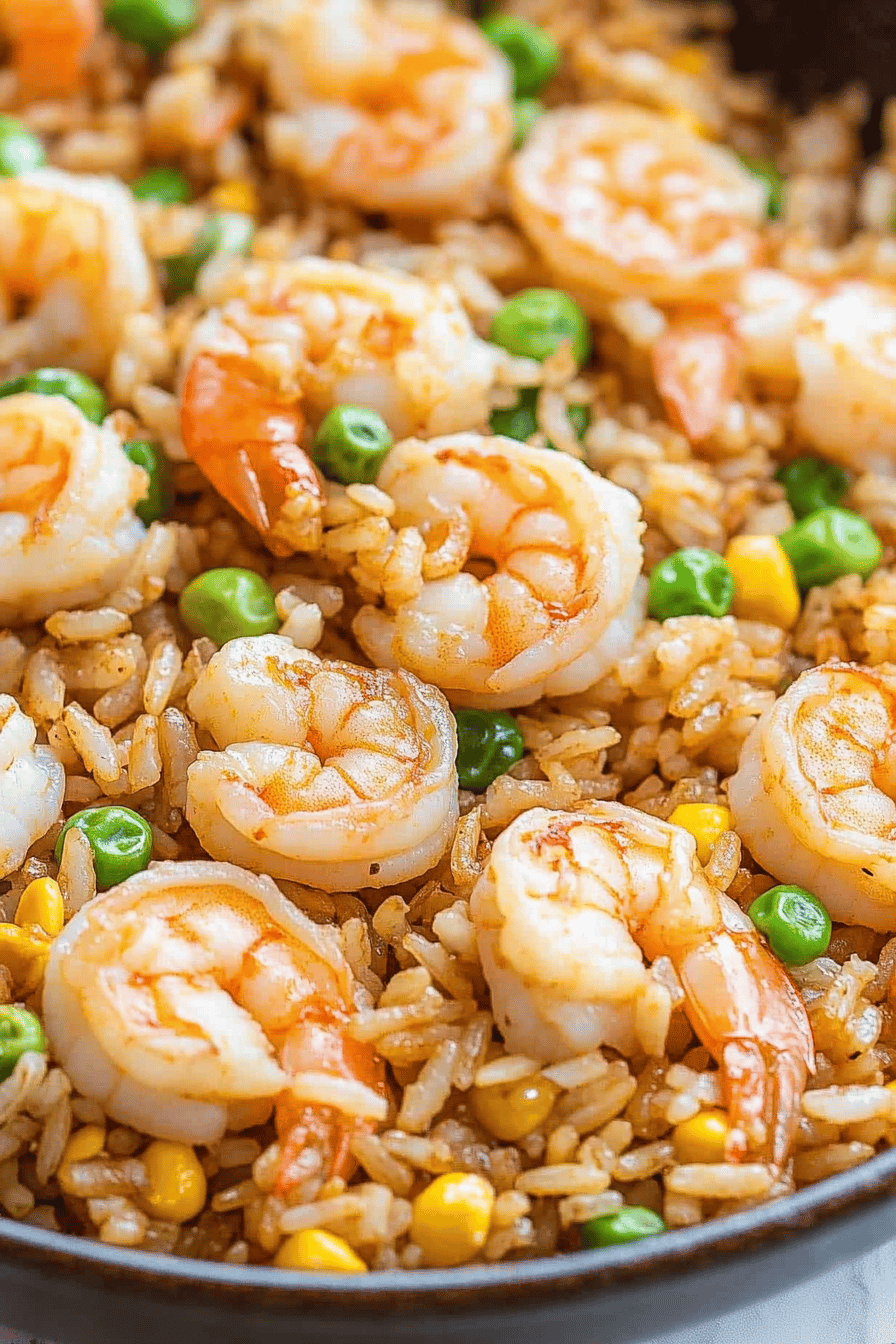
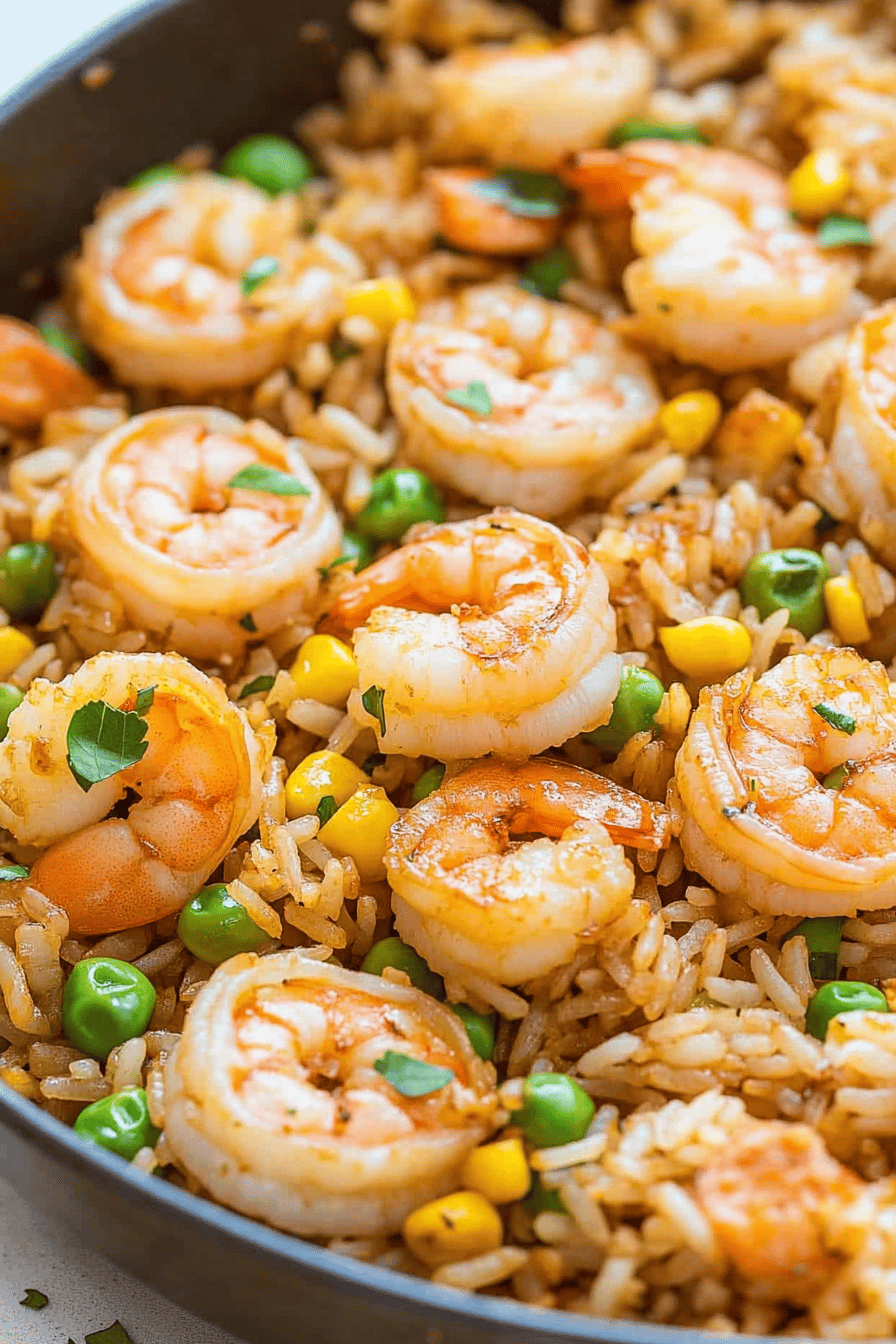
So, what exactly *is* shrimp fried rice? At its heart, it’s a classic Asian stir-fry dish where fluffy, day-old rice is sautéed with a medley of delicious ingredients, usually including plump shrimp, crisp vegetables, and a savory sauce. Think of it as a blank canvas for amazing flavors! The “fried” part doesn’t mean it’s greasy or heavy; it refers to the cooking method where everything is quickly cooked at high heat in a wok or a large skillet. This rapid cooking process gives the rice those slightly crispy edges and locks in all the vibrant flavors. It’s essentially a one-pan wonder that’s incredibly versatile and adaptable to whatever you have in your fridge. It’s one of those humble, yet glorious, dishes that proves simple ingredients can create something truly spectacular.
Why you’ll love this recipe?
I’ve made a lot of shrimp fried rice in my day, and what I love most about this particular recipe is its sheer reliability. It’s just *good*, every single time. Let’s break down why you’ll become obsessed too:
- The Flavor Explosion: What is the Flavor Explosion? Oh my goodness, the taste! It’s this incredible symphony of savory soy sauce, a hint of sweetness, the brininess of the shrimp, and the freshness of the veggies. It’s complex enough to feel fancy, but comforting enough to eat straight from the bowl.
- Seriously simple: What is the best way to describe a person? I know “fried rice” can sound daunting, but I promise this is surprisingly straightforward. The steps are clear, and you don’t need any fancy equipment. My kids can even help out with some of the simpler tasks.
- Budget-Friendly Bliss: Shrimp can sometimes be pricey, but when you stretch it out in a big batch of fried rice, it becomes so economical. Plus, you can use up leftover veggies, making it a fantastic way to avoid food waste and save money.
- Endless Versatility: Don’t have peas? Toss in some corn! No broccoli? Edamame is fantastic! You can customize this recipe endlessly based on what you have on hand or what’s in season. It’s also a brilliant way to get picky eaters to enjoy more vegetables.
Honestly, the smell that wafts from the pan as this cooks is enough to make your stomach rumble and bring everyone running to the kitchen. It’s a far cry from some bland, overcooked rice dishes. This one has personality and zing! If you’re a fan of quick stir-fries or enjoy dishes like my easy chicken stir-fry, you’re definitely going to adore this shrimp fried rice.
How to Make Shrimp Fried Rice
Quick Overview
The magic of this shrimp fried rice lies in a few key steps: using day-old rice (this is crucial for texture!), prepping all your ingredients *before* you start cooking, and cooking everything quickly over high heat. You’ll essentially be cooking the shrimp, then the aromatics and veggies, and finally tossing it all with the rice and a flavorful sauce. It comes together in about 20 minutes once you start, making it perfect for those crazy weeknights when you need a delicious meal on the table ASAP.
Ingredients
For the Main Dish:
- 1 tablespoon neutral cooking oil (like vegetable, canola, or peanut oil): This is for getting our pan nice and hot without burning.
- 1 pound medium or large shrimp, peeled and deveined: Fresh or frozen (thawed) work equally well. I usually go for medium-sized ones because they cook quickly and evenly.
- 2 tablespoons soy sauce (or tamari for gluten-free): The salty, umami backbone of our dish. You can adjust this to your taste.
- 1 tablespoon sesame oil: This adds that quintessential nutty aroma and flavor that just screams fried rice.
- 1 large egg, lightly beaten: Adds a lovely texture and richness, and it cooks up so quickly!
- 1 cup chopped yellow onion: Provides a sweet and savory base.
- 2 cloves garlic, minced: Because, well, garlic! It’s essential for that aromatic punch.
- 1 cup frozen peas and carrots mix: So convenient and adds a pop of color and sweetness.
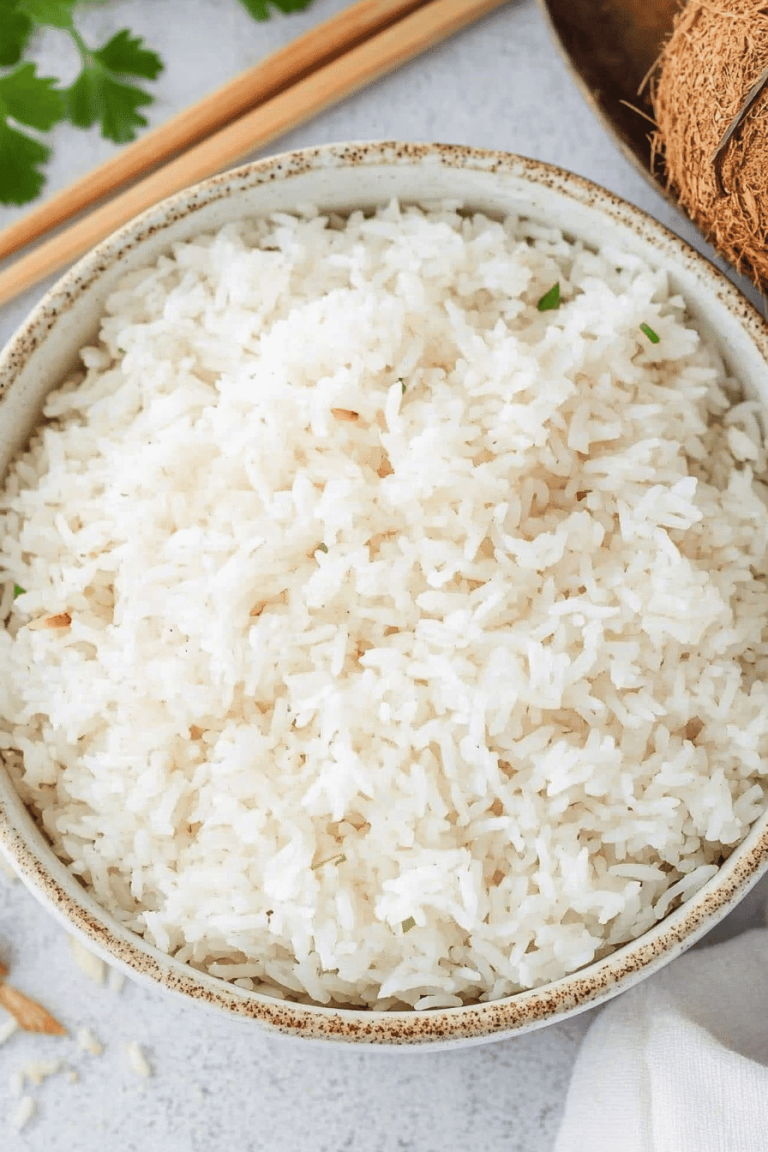
- 4 cups cooked day-old rice (cold): This is SUPER important. Freshly cooked rice is too moist and will make your fried rice mushy. Leftovers are best!
- Optional: 2 green onions, thinly sliced (for garnish): Adds a fresh, oniony bite and a lovely pop of green.
For the Sauce:
- 3 tablespoons soy sauce (or tamari): More of that glorious soy goodness.
- 1 tablespoon oyster sauce (optional, but highly recommended): It adds a depth of savory flavor that’s hard to beat. You can find this in most Asian markets or the international aisle of your grocery store.
- 1 teaspoon sugar: Just a touch to balance the saltiness and add a subtle sweetness.
- 1 teaspoon cornstarch: This helps thicken the sauce just enough so it coats the rice beautifully.
Step-by-Step Instructions
Step 1: Preheat & Prep Pan
Get your wok or a large skillet nice and hot over medium-high heat. Add the neutral cooking oil and let it shimmer. If you’re using a wok, swirl it around to coat the sides. This initial high heat is key for getting that lovely char and preventing sticking.
Step 2: Cook the Shrimp
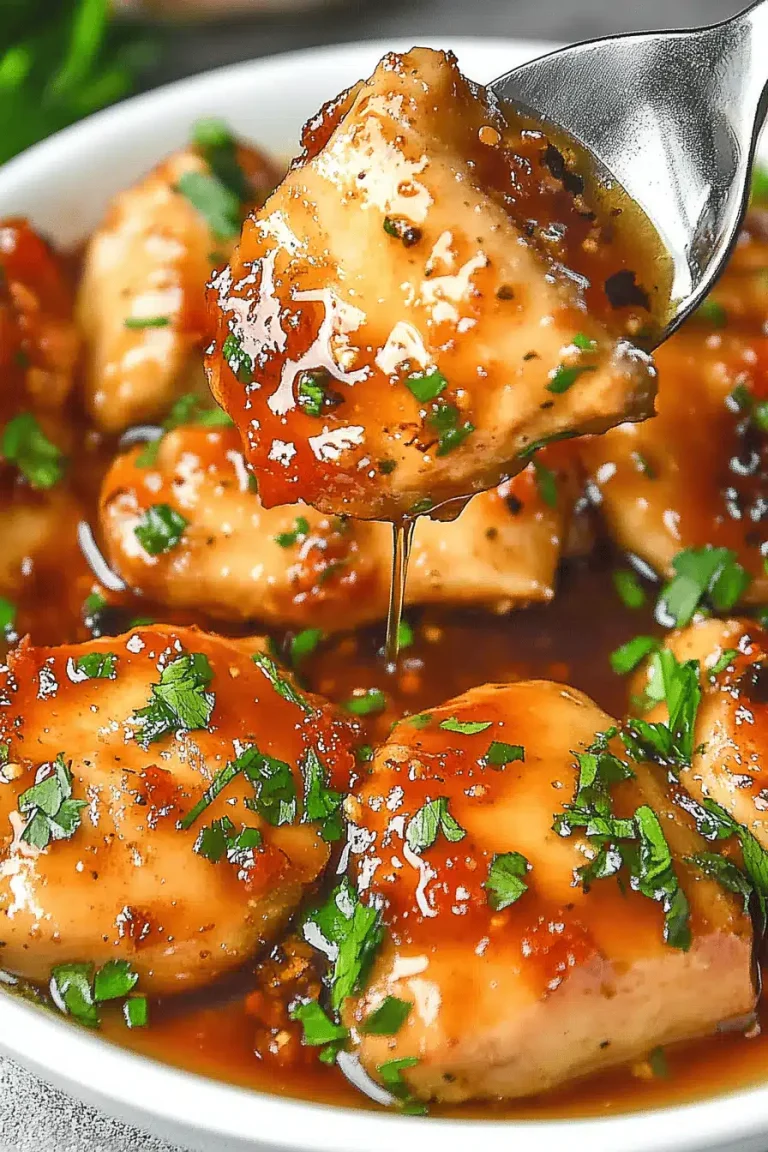
Add the peeled and deveined shrimp to the hot pan in a single layer. Season them with a pinch of salt and pepper. Cook for about 1-2 minutes per side, just until they turn pink and are cooked through. Don’t overcook them, or they’ll get tough! Remove the shrimp from the pan and set them aside on a plate. They’ll be added back in later.
Step 3: Scramble the Egg
Pour the lightly beaten egg into the same hot pan. Let it cook for about 30 seconds until it starts to set, then scramble it gently with your spatula until cooked through. Remove the scrambled egg from the pan and set it aside with the shrimp.
Step 4: Sauté Aromatics and Veggies
Add another teaspoon of oil to the pan if needed. Add the chopped onion and cook for about 2-3 minutes until it starts to soften and become translucent. Then, add the minced garlic and cook for another 30 seconds until fragrant. Be careful not to burn the garlic!
Step 5: Add Veggies and Rice
Toss in the frozen peas and carrots (no need to thaw them!) and stir-fry for about 2 minutes until they’re heated through and slightly tender. Now, add the cold, day-old rice to the pan. Break up any clumps with your spatula and stir-fry for about 3-5 minutes, until the rice is heated through and starting to get a little toasted. This is where the magic happens!
Step 6: Add the Sauce and Mix
In a small bowl, whisk together the sauce ingredients: 3 tablespoons soy sauce, oyster sauce (if using), sugar, and cornstarch. Pour this sauce over the rice and vegetables in the pan. Stir everything together well, making sure the sauce coats every grain of rice. Continue to stir-fry for another 1-2 minutes until the sauce thickens slightly.
Step 7: Combine and Finish
Return the cooked shrimp and scrambled egg to the pan. Add the sesame oil. Stir everything together gently to combine. Cook for another minute or so, just to heat everything through.
Step 8: Taste and Adjust
This is your chance to make it perfect! Taste the fried rice and add a little more soy sauce if you want it saltier, a pinch more sugar for sweetness, or a dash more sesame oil for fragrance. Stir in the sliced green onions (if using) just before serving.
Step 9: Serve!
Serve your delicious shrimp fried rice immediately. It’s fantastic on its own or as a side dish!
What to Serve It With
Honestly, this shrimp fried rice is practically a meal in itself, but it also plays *so* nicely with other dishes! Here are some of my favorite ways to serve it up:
For a Complete Meal: Think of it as the star! You can serve it alongside some steamed broccoli or a simple cucumber salad for a nice contrast. It also pairs beautifully with other Asian-inspired dishes like spring rolls or a light miso soup. My family loves it when I make a big batch of my easy General Tso’s chicken to go with it – talk about a feast!
As a Side Dish: This is perfect if you’re grilling some salmon or making a lighter protein like teriyaki chicken. The fried rice adds substance and a wonderful depth of flavor without being too heavy.
Quick Lunches: I often pack leftovers for lunch the next day. It reheats surprisingly well, and it’s so much more satisfying than a sad desk salad. Just a quick zap in the microwave and you’ve got a fantastic meal.
Kid-Friendly Favorites: My kids are obsessed with it. I often serve it with some simple chicken skewers or edamame on the side. It’s a great way to sneak in some protein and veggies without a fuss. Sometimes, we’ll even have it as a “fun” dinner with chopsticks and all!
Top Tips for Perfecting Your Shrimp Fried Rice
I’ve definitely had my share of “learning experiences” with fried rice over the years, so here are my absolute best tips to help you achieve fried rice perfection:
The Rice is King (or Queen!): I cannot stress this enough – use *cold, day-old rice*. If you cook rice fresh, it’s too moist and sticky. It will clump together and you’ll end up with mushy fried rice. The best way is to cook your rice the day before, spread it out on a baking sheet to cool completely, and then refrigerate it. This dries it out just enough for that perfect fluffy texture.
Mise en Place is Your Best Friend: Fried rice cooks FAST. Like, really fast. You absolutely need to have all your ingredients chopped, measured, and ready to go *before* you even turn on the stove. This means having your shrimp prepped, your veggies chopped, your garlic minced, and your sauce mixed. Once you start cooking, it’s a whirlwind, and you won’t have time to stop and chop an onion.
High Heat, Quick Cooking: Don’t be afraid of high heat! This is what gives fried rice its signature flavor and texture. Make sure your pan or wok is properly preheated. You want to hear that sizzle when the ingredients hit the pan. Cook in batches if necessary to avoid overcrowding the pan, which will steam the food instead of frying it.
Don’t Overcrowd the Pan: This is related to the high heat point. If you put too much in the pan at once, the temperature will drop, and your ingredients will steam instead of fry. You won’t get those lovely browned bits and crispy textures. Cook in batches if you’re making a large amount, and set aside each cooked batch to combine at the end.
Sesame Oil for Flavor, Not Frying: I like to add the sesame oil towards the end of cooking. It has a lower smoke point than neutral oils, and its delicate flavor can be easily burned off if added too early. A little drizzle at the end adds that wonderful, nutty aroma.
Customization Station: Feel free to swap out the veggies! Broccoli florets, diced bell peppers, snow peas, water chestnuts, mushrooms – they all work wonderfully. Just make sure to chop them into bite-sized pieces. For a vegetarian version, skip the shrimp and add extra veggies or some cubed tofu.
Soy Sauce Smarts: Different brands of soy sauce have different saltiness levels. Start with the amount in the recipe and taste before adding more. If you’re watching your sodium, low-sodium soy sauce is a great option. For gluten-free, tamari is an excellent substitute that usually has a richer flavor.
Storing and Reheating Tips
This shrimp fried rice is fantastic for leftovers, and it holds up really well! Here’s how I like to store and reheat it to keep it tasting its best:
Refrigerator Storage: Once the fried rice has cooled down a bit (don’t leave it sitting out at room temperature for too long!), transfer it to an airtight container. It will keep well in the refrigerator for about 3-4 days. I find that glass containers work great because they don’t absorb odors.
Reheating on the Stove: This is my preferred method for the best texture. Heat a tablespoon of neutral oil in a skillet over medium-high heat. Add the cold fried rice and stir-fry, breaking up any clumps, until it’s heated through and you get a few nice crispy bits. This usually takes about 5-7 minutes.
Microwave Reheating: If you’re in a hurry, the microwave is perfectly fine. Place the fried rice in a microwave-safe dish, cover it loosely (to allow steam to escape), and heat for 1-2 minutes, stirring halfway through, until hot. It might not get quite as crispy as the stovetop method, but it’s still delicious!
Freezer Instructions: While I don’t usually freeze fried rice because it’s so quick to make, you *can* freeze it if you have a large batch. Let it cool completely. Portion it into freezer-safe bags or containers. It should last for about 1-2 months. Thaw it overnight in the refrigerator before reheating using the stovetop or microwave method.
Frequently Asked Questions
Final Thoughts
There you have it – my absolute favorite shrimp fried Rice Recipe! It’s the kind of dish that feels both comforting and exciting, familiar yet always a little bit new depending on what veggies I’ve tossed in. I truly believe that cooking should be enjoyable, and this recipe embodies that for me. It’s a testament to how simple, fresh ingredients, combined with a little bit of love and the right technique, can create something truly magical. It’s quick enough for a busy Tuesday night but special enough for a weekend gathering with friends. I really hope you give this a try and that it becomes a go-to in your kitchen too! Don’t be afraid to experiment with different vegetables or even add a sprinkle of toasted sesame seeds for extra crunch.
I’d absolutely love to hear how yours turns out! Leave a comment below to share your experience, any variations you tried, or your favorite way to serve it. Your feedback and stories mean the world to me! Happy cooking, everyone!
Shrimp Fried Rice
Ingredients
Main Ingredients
- 1 pound shrimp peeled and deveined
- 3 cups cooked rice preferably day-old
- 0.5 cup frozen peas
- 0.5 cup frozen carrots
- 0.5 cup frozen corn
- 3 tablespoons soy sauce
- 1 tablespoon sesame oil
- 2 eggs beaten
- 2 tablespoons vegetable oil
- 0.25 cup chopped green onions
Instructions
Preparation Steps
- In a small bowl, whisk together the soy sauce and sesame oil.
- Heat 1 tablespoon of vegetable oil in a large skillet or wok over medium-high heat. Add the beaten eggs and scramble them until just cooked. Remove from the skillet and set aside.
- Add the remaining 1 tablespoon of vegetable oil to the skillet. Add the shrimp and cook until pink and opaque, about 2-3 minutes. Remove shrimp from the skillet and set aside.
- Add the frozen peas, carrots, and corn to the skillet. Cook, stirring occasionally, until heated through, about 5 minutes.
- Add the cooked rice to the skillet and stir to combine with the vegetables. Break up any clumps of rice.
- Pour the soy sauce mixture over the rice and vegetables. Stir well to coat everything evenly.
- Return the cooked shrimp and scrambled eggs to the skillet. Stir to combine and heat through.
- Stir in the chopped green onions just before serving.