Oh, where do I even begin with this vegan chocolate pie? It feels like just yesterday I was experimenting in my tiny kitchen, desperately trying to recreate that rich, fudgy chocolate pie my grandma used to make for special occasions. You know, the kind that had that incredible depth of flavor and a silky smooth texture that just melted in your mouth? I’m pretty sure I ate my weight in mediocre vegan desserts before I finally landed on this beauty. It’s not just *a* vegan chocolate pie; it’s *the* vegan chocolate pie that my family requests for birthdays, holidays, and honestly, just because it’s Tuesday. It’s surprisingly straightforward, which is a lifesaver on busy nights, and the result? Pure, unadulterated chocolate bliss. If you’ve ever felt like vegan desserts meant compromising on flavor or texture, prepare to have your mind, and your taste buds, completely changed. This recipe is a game-changer, I promise!
What is vegan chocolate pie?
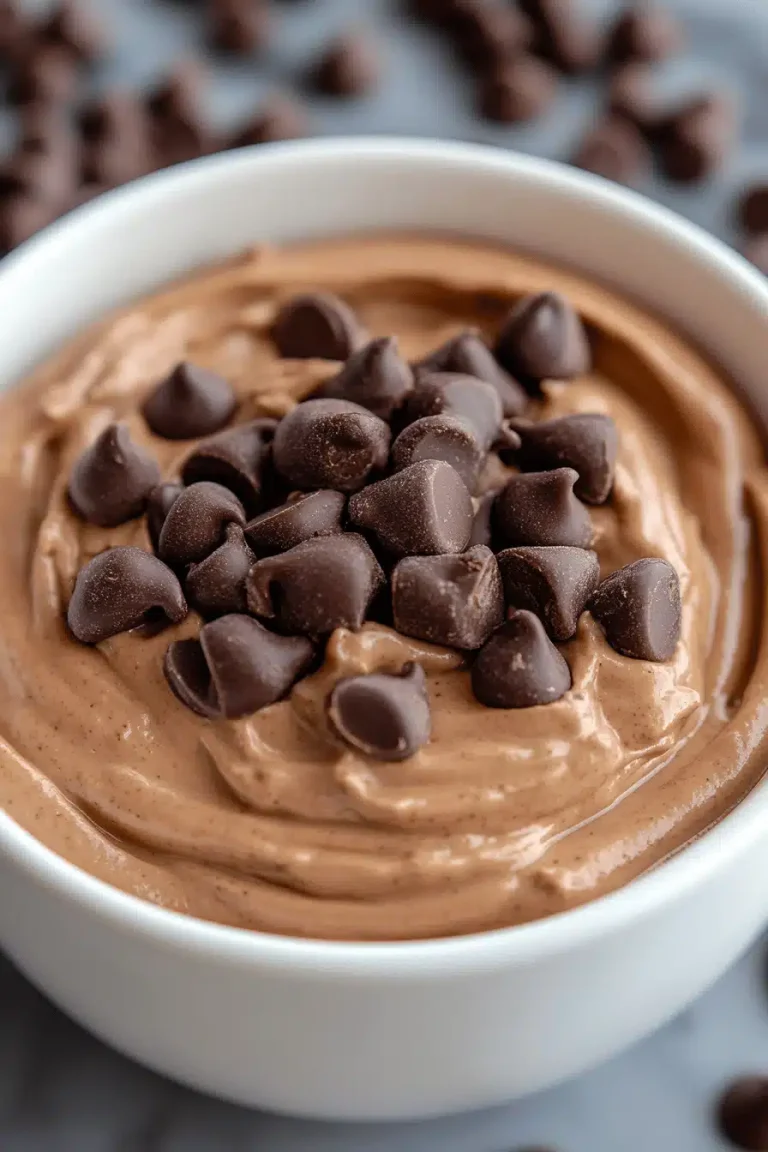
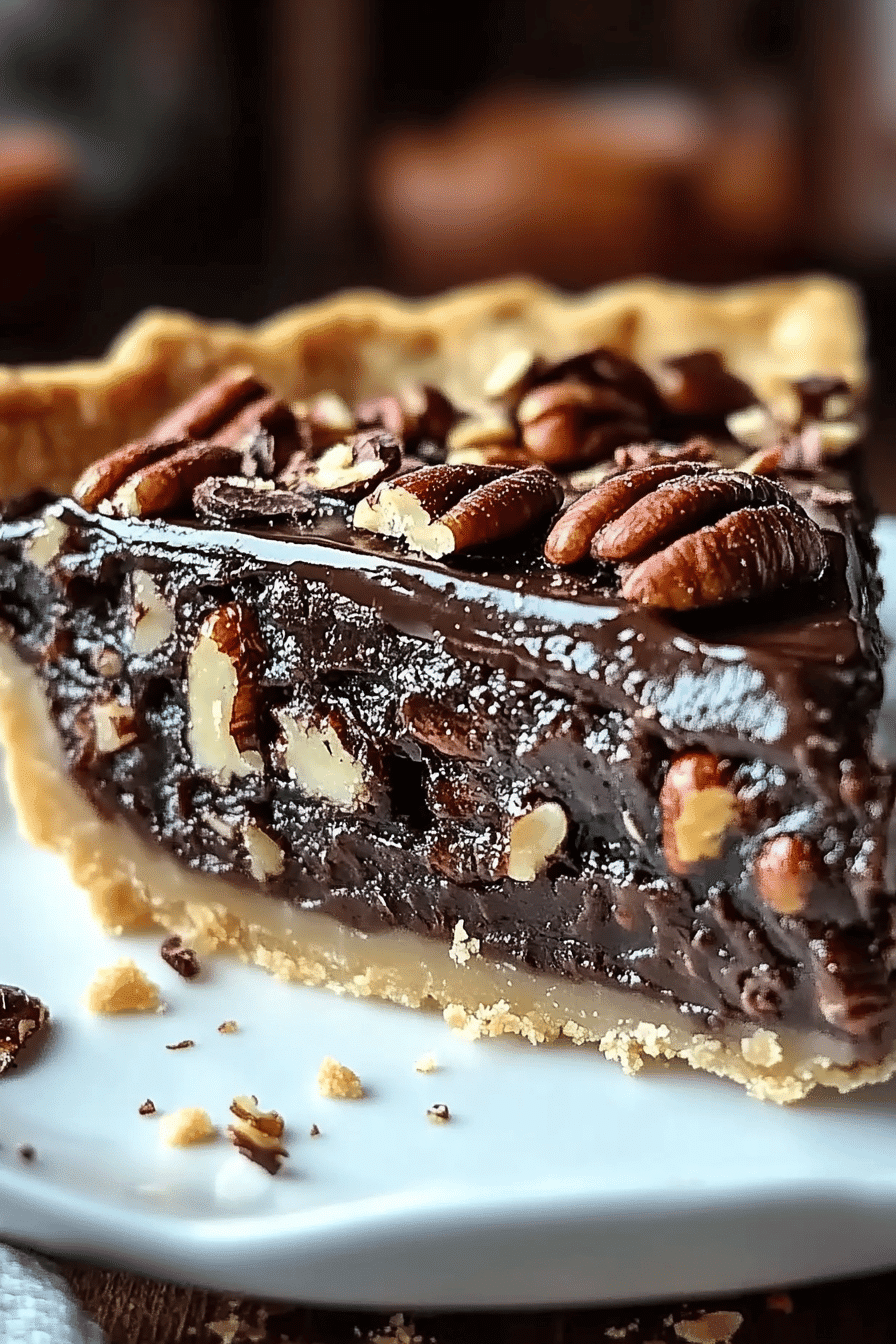
So, what exactly *is* this vegan chocolate pie I’m raving about? Think of it as your classic, utterly decadent chocolate cream pie, but without any of the dairy. It’s essentially a rich, luscious chocolate filling nestled inside a perfectly baked crust, all crowned with a dreamy topping. The “creaminess” that you might associate with butter and eggs? We get that here from ingredients like full-fat coconut milk and a touch of cornstarch (or arrowroot for a lighter option), which work their magic to create that unbelievably smooth texture. The “rich chocolate flavor” comes from good quality cocoa powder and melted vegan dark chocolate. It’s a celebration of all things chocolate, made accessible and delicious for everyone. It’s the kind of dessert that makes you pause, close your eyes, and savor every single bite. It’s honestly one of my favorite vegan Dessert Recipes because it delivers on all fronts: taste, texture, and that satisfying feeling of indulgence.
Why you’ll love this recipe?
What is vegan chocolate pie?flavor is just out of this world. It’s deeply chocolatey, not too sweet, and has this incredibly satisfying richness that you’d expect from any high-end dessert. Seriously, people are always shocked when I tell them it’s vegan! Second, it’s surprisingly simple to make. I know, I know, sometimes “vegan” and “simple” don’t always go hand-in-hand, but this recipe is designed to be foolproof. Even if you’re not a seasoned baker, you can totally nail this. The ingredients are generally easy to find at most grocery stores, and the steps are straightforward. It’s also quite cost-effectiveWhat are some good vegan treats?versatility! While it’s spectacular on its own, it’s also wonderful with a dollop of vegan whipped cream, some fresh berries, or even a sprinkle of sea salt on top. It’s perfect for those moments when you’re craving something truly special but don’t want to spend hours in the kitchen. Honestly, what I love most about this is how it brings people together. It’s the kind of dessert that sparks joy and conversation, and isn’t that what good food is all about?
How to Make This Dreamy Vegan Chocolate Pie
Quick Overview
The magic of this vegan chocolate pie lies in its straightforward assembly. We’ll start by preparing a simple, crisp crust (you can use store-bought for ultimate ease!). Then, we’ll whip up a velvety smooth chocolate filling using pantry staples, and finally, bake it to perfection until it’s set and fudgy. The key is patience during the cooling stage, which allows those flavors to meld beautifully. It’s a dessert that feels impressive but is totally manageable, even for beginners.
Ingredients
For the Crust:
You can absolutely use a store-bought vegan pie crust if you’re short on time – no judgment here! If you’re feeling ambitious, a homemade crust made with all-purpose flour, a pinch of salt, a good amount of vegan butter (the sticks work best for flakiness!), and ice-cold water is divine. Make sure it’s blind-baked until golden and set. This step is crucial to avoid a soggy bottom!
For the Luscious Chocolate Filling:
* 2 cups unsweetened plant-based milk (I love using full-fat coconut milk from a can for extra creaminess, but almond or soy milk works too!)
* 1/2 cup granulated sugar (or coconut sugar for a slightly deeper flavor)
* 1/4 cup unsweetened cocoa powder (Dutch-processed gives a richer, darker color)
* 1/4 cup cornstarch (or arrowroot starch for a lighter, more gelatinous set)
* 1/2 teaspoon salt
* 1 teaspoon vanilla extract
* 4 ounces vegan dark chocolate, finely chopped (aim for 60-70% cacao for a good balance)
For the Optional Ganache Glaze:
* 1/2 cup vegan dark chocolate chips or finely chopped vegan dark chocolate
* 1/4 cup full-fat coconut milk (from a can, the solid cream part)
* 1 tablespoon vegan butter (optional, for extra shine)
Step-by-Step Instructions
Step 1: Preheat & Prep Pan
First things first, preheat your oven to 375°F (190°C). If you’re making your crust from scratch, go ahead and prepare it according to your favorite recipe, ensuring it’s blind-baked until it’s a lovely golden brown. If you’re using a store-bought crust, follow the package instructions for pre-baking. A well-baked crust is your best defense against a soggy pie!
Step 2: Mix Dry Ingredients
In a medium saucepan (off the heat!), whisk together the sugar, cocoa powder, cornstarch, and salt. It’s really important to get these dry ingredients really well combined *before* adding any liquid. This ensures you won’t have any sneaky lumps of cornstarch or cocoa powder later on. Whisk them together until they’re uniformly blended and have a consistent color. This also helps to “bloom” the cocoa powder a bit, intensifying its chocolatey flavor.
Step 3: Mix Wet Ingredients
Now, gradually whisk in the plant-based milk. Start with just a little bit of milk, whisking it into the dry ingredients to form a thick paste. This helps break up any lumps. Once you have a smooth paste, slowly pour in the remaining milk, whisking constantly until everything is completely combined and smooth. Make sure there are no dry pockets hiding at the bottom of the pan.
Step 4: Combine & Cook the Filling
Place the saucepan over medium heat. Cook, whisking constantly, until the mixture thickens significantly and starts to bubble. This usually takes about 8-10 minutes. You’re looking for a consistency similar to pudding. Once it starts bubbling, continue to cook and whisk for another minute or two to ensure the cornstarch is fully cooked and the filling is nice and thick. Remove the pan from the heat. Stir in the vanilla extract and the finely chopped vegan dark chocolate. Keep stirring until the chocolate is completely melted and the filling is smooth and glossy. The residual heat will melt the chocolate beautifully.
Step 5: Pour into Crust
Carefully pour the warm chocolate filling into your pre-baked pie crust. Use a spatula to spread it evenly, making sure it reaches all the edges. Give the pie a gentle tap on the counter to release any air bubbles and to help create a smooth surface.
Step 6: Chill and Set
This is arguably the hardest part: waiting! Cover the pie with plastic wrap, pressing it directly onto the surface of the filling. This prevents a skin from forming. Refrigerate for at least 4 hours, or preferably overnight, until the pie is completely chilled and set. The chilling process is essential for the filling to firm up properly.
Step 7: Prepare and Apply Glaze (Optional)
If you’re opting for the ganache glaze, place the vegan chocolate chips and Coconut Cream in a heatproof bowl. Gently heat the coconut cream (you can do this in a small saucepan or in the microwave for short bursts) until it’s warm but not boiling. Pour the warm cream over the chocolate. Let it sit for 5 minutes, then whisk gently until smooth and glossy. Stir in the vegan butter, if using, for extra shine. Let the ganache cool slightly until it’s pourable but not too hot. Drizzle or spread it over the chilled pie. I like to do a rustic swirl pattern with a spoon.
Step 8: Slice and Serve
Once the pie is fully chilled and the glaze (if using) has set, it’s time to slice! For the cleanest slices, use a sharp knife dipped in hot water and wiped dry between each cut. Serve chilled. A little dollop of vegan whipped cream or some fresh berries on the side is always a welcome addition!
What to Serve It With
This vegan chocolate pie is truly a star on its own, but let’s talk about how to elevate it for different occasions. For a simple breakfast treat (yes, I’m a believer in dessert for breakfast!), a small slice with a strong cup of coffee is pure heaven. It’s not overly sweet, so it feels less indulgent and more like a rich chocolate bread. For brunch, I love to make it a bit more elegant. Serve a neat slice on a pretty plate with a scattering of fresh raspberries or a sprig of mint. A glass of sparkling rosé or a light, fruity iced tea pairs beautifully. When serving it as a formal dessert, lean into the decadence. A generous swirl of homemade vegan whipped cream (coconut cream whipped with a touch of maple syrup and vanilla is my go-to!), or a drizzle of vegan caramel sauce takes it to the next level. A sprinkle of flaky sea salt on top is also a must for that sweet and salty contrast. And for cozy snacks? This pie is perfect for movie nights or just a quiet evening in. I often serve it simply with a glass of cold oat milk. My family loves it when I top it with toasted chopped hazelnuts for an extra crunch. It’s that versatile!
Top Tips for Perfecting Your Vegan Chocolate Pie
I’ve made this vegan chocolate pie more times than I can count, and over the years, I’ve picked up a few tricks that I think make a real difference. Here are my top tips to help you achieve vegan chocolate pie perfection:
Cocoa Powder Quality: Don’t skimp here! Using a good quality Dutch-processed cocoa powder makes a huge difference in the depth of flavor and the rich, dark color of the pie. It’s worth the extra few cents.
The Creamy Base: Full-fat canned coconut milk is my secret weapon for that ultra-creamy, luscious texture. Make sure you’re using the thick, creamy part from the top of the can. If you can’t find it or prefer not to use coconut, a good quality unsweetened soy milk also works well, though it might be slightly less rich.
Cornstarch vs. Arrowroot: Cornstarch gives a classic, slightly more gelatinous set, while arrowroot starch creates a lighter, silkier texture. Both work wonderfully, so choose based on your preference. Just make sure it’s fully cooked to avoid any starchy taste.
Don’t Overcook the Filling: Once the filling starts to bubble and thicken, keep a close eye on it. Overcooking can sometimes make the filling a bit too firm once cooled. You want it to be thick enough to coat the back of a spoon, but still have a bit of wobble.
Melting the Chocolate: Stirring the chopped vegan dark chocolate into the hot filling off the heat is key. The residual heat is perfect for melting it smoothly without scorching. Make sure your chocolate is chopped finely so it melts evenly. I’ve learned that using chocolate chips can sometimes result in a less smooth finish, so chopping a bar is usually best.
The Importance of Chilling: Seriously, let it chill. I know it’s tempting to dig in, but the pie needs that time in the fridge to fully set and develop its flavor. Covering the surface directly with plastic wrap is crucial to prevent that unappetizing skin from forming.
Glaze Consistency: If you’re making the ganache, the ratio of chocolate to cream is important. If it seems too thick, add a tiny bit more warm cream. If it’s too thin, let it sit a bit longer or add a few more chocolate chips. It should be pourable but not watery.
Serving Temperature: This pie is best served chilled. However, if it’s been refrigerated for too long and is rock-solid, letting it sit at room temperature for about 15-20 minutes before slicing can make it easier to cut and improve the texture.
Storing and Reheating Tips
One of the best things about this vegan chocolate pie is how well it stores, making it perfect for making ahead of time. Here’s how I keep mine fresh:
Room Temperature: If your pie is unglazed and you plan on eating it within a day or two, you can keep it at cool room temperature. Make sure to cover it loosely with plastic wrap or place it in an airtight container. It’s best to avoid this if it’s very warm in your kitchen, though.
Refrigerator Storage: This is my go-to method. Once the pie is fully chilled and set, cover it tightly with plastic wrap or foil, or transfer it to an airtight container. It will stay delicious in the refrigerator for up to 4-5 days. The texture might firm up a bit more the longer it sits, which is why letting it sit out for a few minutes before serving is a good idea.
Freezer Instructions: Yes, you can freeze this pie! It’s a great make-ahead strategy. It’s best to freeze it *before* applying the glaze, if you’re using one. Wrap the chilled, unglazed pie tightly in a layer of plastic wrap, followed by a layer of aluminum foil. You can also place the wrapped pie in a freezer-safe container or bag. It will keep well in the freezer for up to 2-3 months. To thaw, transfer the pie to the refrigerator overnight. Once thawed, you can apply the glaze (prepare it fresh) and serve.
Glaze Timing Advice: If you’re freezing the pie, definitely wait to glaze it until after it has thawed and you’re ready to serve it. A pre-glazed pie might not freeze and thaw as beautifully. If you’re just refrigerating it, the glaze holds up wonderfully. Just be sure the pie is completely cool before glazing.
Frequently Asked Questions
Final Thoughts
There you have it – my absolute favorite vegan chocolate pie recipe! I truly believe this recipe proves that you don’t need dairy or eggs to create a decadent, soul-satisfying chocolate dessert. It’s the kind of pie that makes you feel good, both while you’re making it and especially while you’re eating it. The rich, velvety filling and the flaky crust are a match made in heaven, and it’s surprisingly easy to get right, even if you’re new to vegan baking. It’s become a staple in my home, and I really hope it becomes a favorite in yours too. If you love this, you might also enjoy my Vegan Chocolate Avocado Mousse for another rich chocolate fix or my Easy Vegan Brownies for a quick treat. Give this vegan chocolate pie a try, and please, please let me know in the comments how it turns out! I love hearing your stories and seeing your creations. Happy baking, and enjoy every single bite!
Vegan Chocolate Pie
Ingredients
For the Filling
- 12 ounces firm silken tofu
- 0.5 cup chocolate almond milk
- 0.5 cup almond butter
- 12 ounces chocolate chips
For the Crust
- 1 pre-made pie crust your favorite vegan pie crust or see notes for DIY options
Optional Topping
- flaky sea salt
Instructions
Preparation Steps
- In a blender, combine the silken tofu, chocolate almond milk, and almond butter. Blend until completely smooth.
- Melt the chocolate chips. You can do this in a microwave-safe bowl in 30-second intervals, stirring in between, or over a double boiler.
- Add the melted chocolate to the blender with the tofu mixture. Blend again until the filling is smooth and thick. You may need to scrape down the sides of the blender with a spatula.
- Pour the chocolate filling into your prepared pie crust.
- If desired, sprinkle the top with flaky sea salt.
- Refrigerate the pie for at least 12-24 hours, or until firm and set.
- Slice and serve chilled.