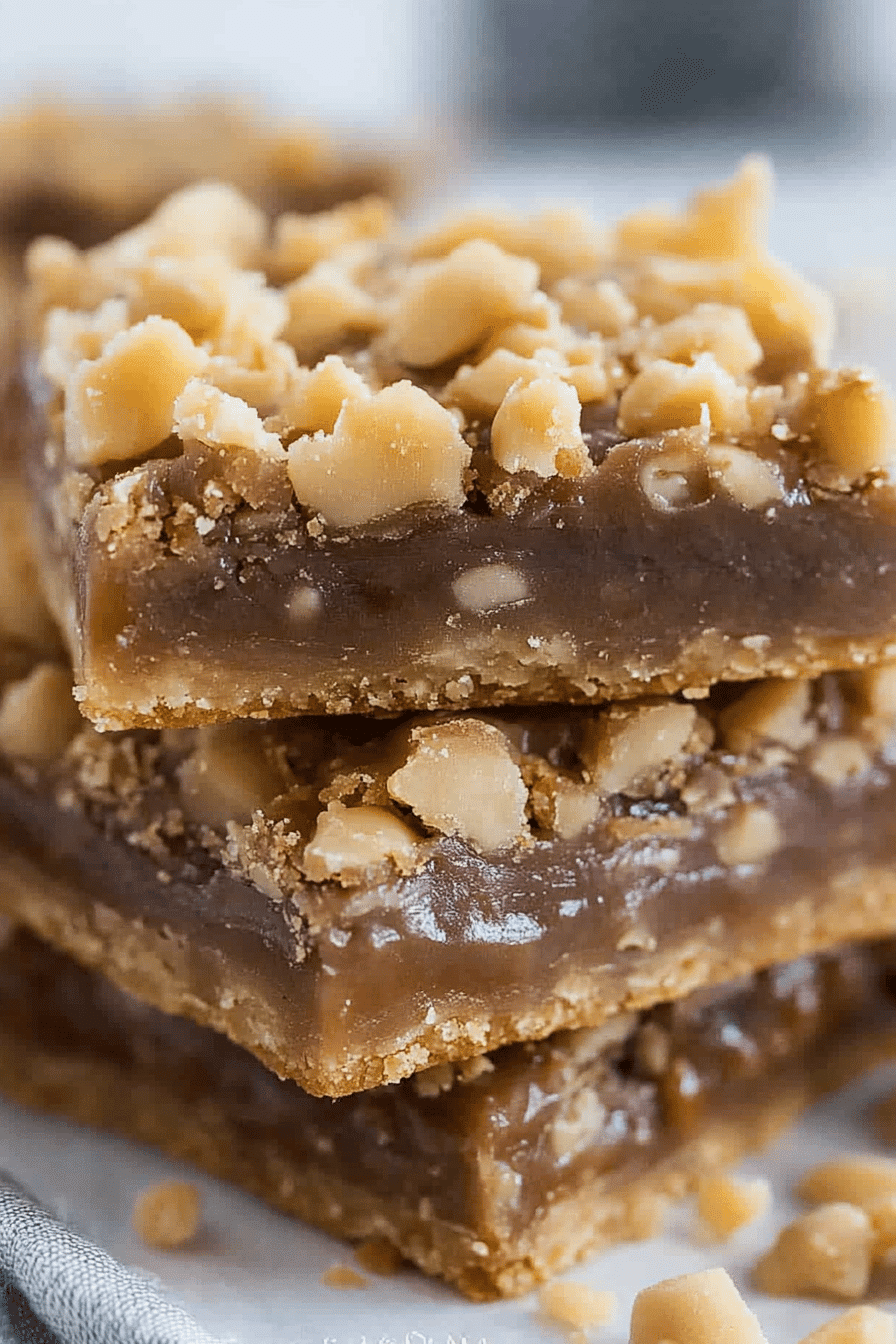
You know those moments? The ones where a craving hits you like a freight train, but you *really* don’t want to spend hours in the kitchen? Or maybe you need something spectacular for a bake sale that won’t have you sweating bullets? That’s precisely when my mind goes straight to these toffee crunch bars. Forget those complicated, multi-day toffee recipes that require a candy thermometer and a prayer. This is the real deal, folks – simple, no-fuss, and outrageously delicious. They’re sort of like a blondie met a glorious, buttery toffee bar and they decided to have the most delightful baby ever. I’ve tried a million variations of baked goods over the years, but these toffee bars? They’ve earned a permanent spot in my recipe binder, right next to my grandma’s apple pie. And trust me, they disappear in minutes at my house, every single time.
What are toffee crunch bars?
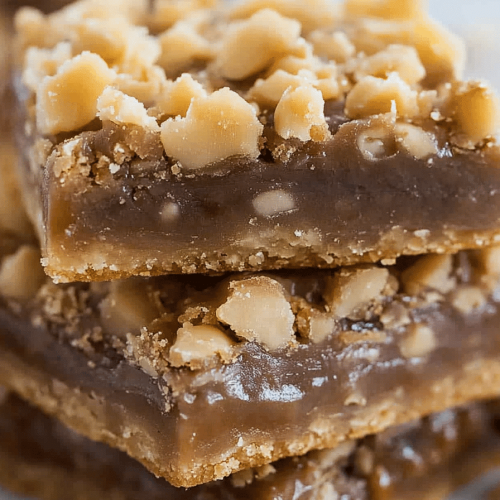
So, what exactly *are* these magical things? Think of them as a decadent, chewy bar that’s packed with the irresistible flavor of toffee, but without any of the usual toffee-making drama. It’s essentially a rich, buttery base, studded with bits of toffee candy, and sometimes finished with a little drizzle of chocolate or a sprinkle of sea salt. The name itself, “toffee crunch,” really says it all, doesn’t it? You get that classic, deep caramel-like toffee taste and then, oh my goodness, that delightful *crunch* from the toffee pieces as you bite into it. It’s like a little party in your mouth, and everyone’s invited. They’re a far cry from those hard, brittle toffee shards you might be picturing; these are soft, chewy, and wonderfully satisfying.
Why you’ll love this recipe?
Honestly, where do I even begin? The sheer joy these bars bring is almost overwhelming for how little effort they require. First off, the flavor is just out of this world. You get that warm, comforting sweetness from the buttery base, perfectly complemented by the distinct, rich flavor of the toffee bits. It’s a flavor combination that just screams comfort and happiness. Then there’s the texture – oh, the texture! It’s that perfect balance of chewy and slightly crisp from the toffee pieces. It’s absolutely divine. And the best part? The simplicity. I’m talking about a recipe that uses pretty standard pantry staples, comes together in one bowl for the base, and bakes up beautifully without any fuss. You don’t need any fancy equipment, and it’s pretty much foolproof, even if you’re a beginner baker. Plus, these are incredibly budget-friendly. You’re not hunting for obscure ingredients; everything is readily available and affordable. And talk about versatile! I often find myself reaching for these when I need a quick dessert, a potluck contribution, or even just a little pick-me-up. They’re fantastic on their own, but a little sprinkle of flaky sea salt on top? Game changer. They’re also amazing chopped up and added to Ice Cream. Seriously, these toffee bars are my secret weapon for guaranteed deliciousness every single time.
How do I make toffee crunch bars?
Quick Overview
This recipe is all about creating a rich, buttery base, folding in those amazing toffee bits, and baking until golden. It’s a simple mix-and-bake process that yields maximum flavor and texture with minimal effort. The key is using good quality ingredients and not overbaking, so you get that perfect chewy center. You’ll mix the wet and dry ingredients for the base, stir in the toffee, press it into a pan, and bake. It truly is that straightforward, and the results are always spectacular.
Ingredients
For the Main Batter:
1 cup (2 sticks) unsalted butter, softened – make sure it’s nice and soft, not melted! This really helps with the texture.
1 cup granulated sugar – for that classic sweetness.
1 cup packed light brown sugar – this is what gives them that lovely chew and depth of flavor.
2 large eggs – at room temperature, please! They incorporate much better.
2 teaspoons pure vanilla extract – don’t skimp on this; it makes a huge difference.
2 ½ cups all-purpose flour – sifted, if you have the time, but not essential if you’re in a hurry.
1 teaspoon baking soda – for a little lift.
½ teaspoon salt – to balance all that sweetness.
1 ½ cups toffee bits – the star of the show! I love the Heath brand ones, but any good quality toffee bits will work. Make sure they’re the small, baking kind.
Optional: ½ cup chocolate chips (milk or dark) – if you’re feeling extra decadent, which I often am!
For the Topping (Optional but Highly Recommended!):
½ cup toffee bits – for an extra crunch on top.
¼ cup chopped nuts (pecans or walnuts work beautifully) – adds another layer of texture and flavor.
Flaky sea salt – just a pinch, to really make the flavors pop.
Step-by-Step Instructions
Step 1: Preheat & Prep Pan
First things first, get your oven preheated to 350°F (175°C). Grab a 9×13 inch baking pan. I like to line mine with parchment paper, leaving some overhang on the sides. This makes lifting the baked bars out so much easier, and cleanup is a breeze! You can grease it too, but parchment is my go-to. Make sure the parchment paper lays flat in the pan – sometimes a couple of binder clips on the sides can help keep it from wanting to curl up.
Step 2: Mix Dry Ingredients
In a medium bowl, whisk together the all-purpose flour, baking soda, and salt. Give it a good whisking to make sure everything is evenly distributed. This helps prevent pockets of baking soda or salt in your bars. Set this aside for a moment.
Step 3: Mix Wet Ingredients
In a large bowl, cream together the softened butter, granulated sugar, and light brown sugar. Beat them together with an electric mixer (or a whisk and some elbow grease!) until the mixture is light and fluffy. This usually takes about 3-4 minutes. Then, beat in the eggs, one at a time, making sure each is fully incorporated before adding the next. Finally, stir in the vanilla extract. The mixture should look smooth and luscious.
Step 4: Combine
Gradually add the dry ingredients to the wet ingredients. Mix on low speed or stir with a spatula until *just* combined. Be careful not to overmix! Overmixing can lead to tough bars, and nobody wants that. You should still see a few streaks of flour; that’s perfectly fine. This is the point where you want to fold in your 1 ½ cups of toffee bits and any optional chocolate chips. Gently fold them in until they’re evenly distributed throughout the batter. The batter will be thick and wonderfully fragrant.
Step 5: Prepare Filling
This recipe doesn’t have a separate “filling” in the traditional sense, as the toffee bits are mixed directly into the base batter. The “filling” is essentially the toffee-infused dough itself! The magic happens as it bakes, with the toffee bits melting slightly and creating those gooey, caramel-like pockets throughout the chewy bar.
Step 6: Layer & Swirl
Spoon the thick batter into your prepared 9×13 inch baking pan. Use a spatula or your hands (lightly greased if you prefer) to spread the batter evenly into the pan. It will be quite stiff, so you might need to press it down a bit to get it into the corners. If you’re using the optional topping, now’s the time to sprinkle the extra toffee bits and nuts evenly over the top. Then, lightly sprinkle with flaky sea salt if you’re using it. This is where you create that irresistible crust and extra crunch.
Step 7: Bake
Bake in the preheated oven for 25-30 minutes. You’re looking for the edges to be golden brown and the center to be set. You can test for doneness by inserting a toothpick into the center; it should come out with moist crumbs attached, not wet batter. Be careful not to overbake, or your bars will be dry. I’ve found that ovens can vary, so keep an eye on them, especially during the last 5-10 minutes.
Step 8: Cool & Glaze
Once baked, remove the pan from the oven and let it cool completely in the pan on a wire rack. This is crucial! The bars will continue to set as they cool, and trying to cut them while warm will just result in a crumbly mess. If you’re planning on adding a chocolate glaze, now would be the time to melt some chocolate chips with a teaspoon of butter or coconut oil and drizzle it over the cooled bars. Let the glaze set before slicing.
Step 9: Slice & Serve
Once completely cool, use the parchment paper overhang to lift the entire slab out of the pan. Place it on a cutting board. Use a sharp knife to cut into squares or bars. I usually cut mine into about 16-24 bars, depending on how big I want them. They are absolutely divine served at room temperature, but I also love them slightly chilled sometimes. Enjoy the pure bliss!
What to Serve It With
These toffee crunch bars are so wonderfully versatile, they fit in perfectly for almost any occasion! For a cozy breakfast, I love to pair a small bar with a steaming mug of coffee. The rich sweetness is a perfect way to start the day, especially on a chilly morning. They’re not overly sweet in the morning, especially if you’ve added nuts. For a more elegant brunch spread, I’ll cut them into smaller, bite-sized squares and arrange them on a pretty platter alongside fresh fruit and maybe some mini muffins. They add a touch of indulgence without being too heavy. As a dessert, these are an absolute star. They’re fantastic on their own after dinner, but imagine them crumbled over a scoop of vanilla bean ice cream or served warm with a dollop of whipped cream. For those moments when you just need a comforting snack, they’re perfect with a glass of cold milk. My kids always ask for these after school, and they disappear in minutes. My absolute favorite way to serve them is with a sprinkle of flaky sea salt on top – it just elevates all the flavors and cuts through the sweetness beautifully. They’re also a hit at holiday cookie exchanges, often stealing the show from more elaborate confections.
Top Tips for Perfecting Your Toffee Crunch Bars
Over the years, I’ve learned a few tricks that make these bars consistently amazing. First, about the toffee bits: make sure you’re using the small, baking kind, not the big Heath bar pieces you’d eat on their own. The small bits distribute better and create that delightful crunch throughout. I’ve also found that using a combination of granulated and brown sugar is non-negotiable for that perfect chewy texture. Brown sugar adds moisture and that wonderful caramel note, which is crucial for these toffee bars. When you’re mixing the wet and dry ingredients, please, please, please don’t overmix! It’s tempting to keep going until it’s perfectly smooth, but that’s how you end up with tough bars. Just mix until the flour is *barely* incorporated. A few streaks of flour are fine; they’ll disappear in the oven. For an extra layer of flavor, try adding some chopped nuts – pecans and walnuts are my favorites. They add a lovely texture and complement the toffee flavor so well. And don’t forget that sprinkle of flaky sea salt on top! It seems minor, but it makes such a huge difference in balancing the sweetness and bringing out the buttery toffee notes. If your batter seems really thick and hard to spread, you can gently press it in with the back of a spoon or even lightly oiled hands. It’s a thick dough, and that’s a good sign that you’ll get a nice, substantial bar. Baking time is also key. Ovens vary wildly, so start checking around the 23-25 minute mark. You want them golden around the edges and set in the middle, but still a little soft. They’ll firm up a lot as they cool. If you happen to overbake them slightly, don’t despair! They’re still delicious, especially if you crumble them over ice cream. And for the ultimate treat, a drizzle of melted dark chocolate over the top right before serving adds an extra layer of decadence that’s simply divine.
Storing and Reheating Tips
These toffee crunch bars are wonderfully forgiving when it comes to storage, which is another reason I love them so much. At room temperature, they’ll stay fresh and chewy for about 3 to 4 days, especially if they’re stored in an airtight container. I usually just pop them in a container with a tight-fitting lid, or I’ll wrap the pan tightly with plastic wrap. If you’ve added a chocolate glaze, it’s generally best to keep them at room temperature so the chocolate doesn’t get too hard or develop a bloom, unless your kitchen is particularly warm. If you’ve got a really long shelf life in mind, or if you live in a super humid climate, popping them in the refrigerator is a great option. In the fridge, they’ll keep well for up to a week. Just make sure they’re in a good airtight container to prevent them from drying out or absorbing other fridge odors. When you want to eat them from the fridge, I find they’re best if you let them sit out for about 15-20 minutes to soften up to room temperature again. For longer storage, these bars freeze beautifully! You can wrap them individually in plastic wrap, then place them in a freezer-safe bag or container. They’ll keep perfectly for about 2 to 3 months. When you’re ready to enjoy them, just take them out of the freezer and let them thaw at room temperature for a couple of hours. The glaze will still be fine, and the chewiness will come right back. If you want to warm them up slightly, a few seconds in the microwave (just 10-15 seconds) can bring back that lovely gooey texture, but be careful not to overheat them, or they can get a bit too soft. Honestly, though, they’re usually delicious straight from the fridge or at room temperature.
Frequently Asked Questions
Final Thoughts
So there you have it – my absolute favorite toffee crunch bars! They’re the perfect blend of chewy, buttery goodness with that irresistible toffee flavor and crunch. They’re ridiculously easy to make, incredibly satisfying, and always a crowd-pleaser. Whether you need a quick treat for yourself, a potluck contribution, or a special dessert, these bars are guaranteed to hit the spot. I truly hope you give them a try and fall in love with them as much as my family and I do. If you’re a fan of this recipe, you might also enjoy my Chewy Chocolate Chip Cookie Bars or my Classic Blondies – they share a similar comforting vibe! I can’t wait to hear how yours turn out, so please leave a comment below with your thoughts or any variations you try. Happy baking!
Homemade English Toffee
Ingredients
Toffee Base
- 0.5 cup unsalted butter
- 0.5 cup margarine
- 1 cup granulated sugar
- 0.25 teaspoon kosher salt
- 0.5 teaspoon vanilla extract
Toppings
- 1 cup unblanched whole almonds
- 12 ounce milk chocolate chips or chopped milk chocolate melted
- 1 cup finely ground walnuts
Instructions
Preparation Steps
- Line a baking dish (11x7 inches) with foil or use a silicone brownie bite pan (with 24 cavities). Arrange the whole almonds in a single layer on the prepared surface. Set aside.
- In a heavy-bottomed saucepan, combine the butter, margarine, granulated sugar, kosher salt, and vanilla extract. Cook over medium-high heat, stirring constantly with a wooden spoon, until the butter is melted. Bring the mixture to a rolling boil.
- Continue boiling and stirring constantly for an additional 5-7 minutes, or until the candy mixture reaches the color of almonds and registers about 300 degrees Fahrenheit (hard crack stage) on a candy thermometer. If using a brownie bite pan, quickly use a small metal scoop to transfer the hot toffee into each cavity.
- Let the toffee cool completely. This may take about 2 hours.
- Once the toffee is cooled and set, spread the melted milk chocolate evenly over the top. Immediately sprinkle generously with the ground walnuts. If you prefer to coat both sides, allow the first layer of chocolate and walnuts to set, then flip the toffee and repeat with the remaining chocolate and walnuts. Once the chocolate is fully set, carefully pop the toffee out of the silicone pan or cut into pieces if made in a baking dish. Store in an airtight container.