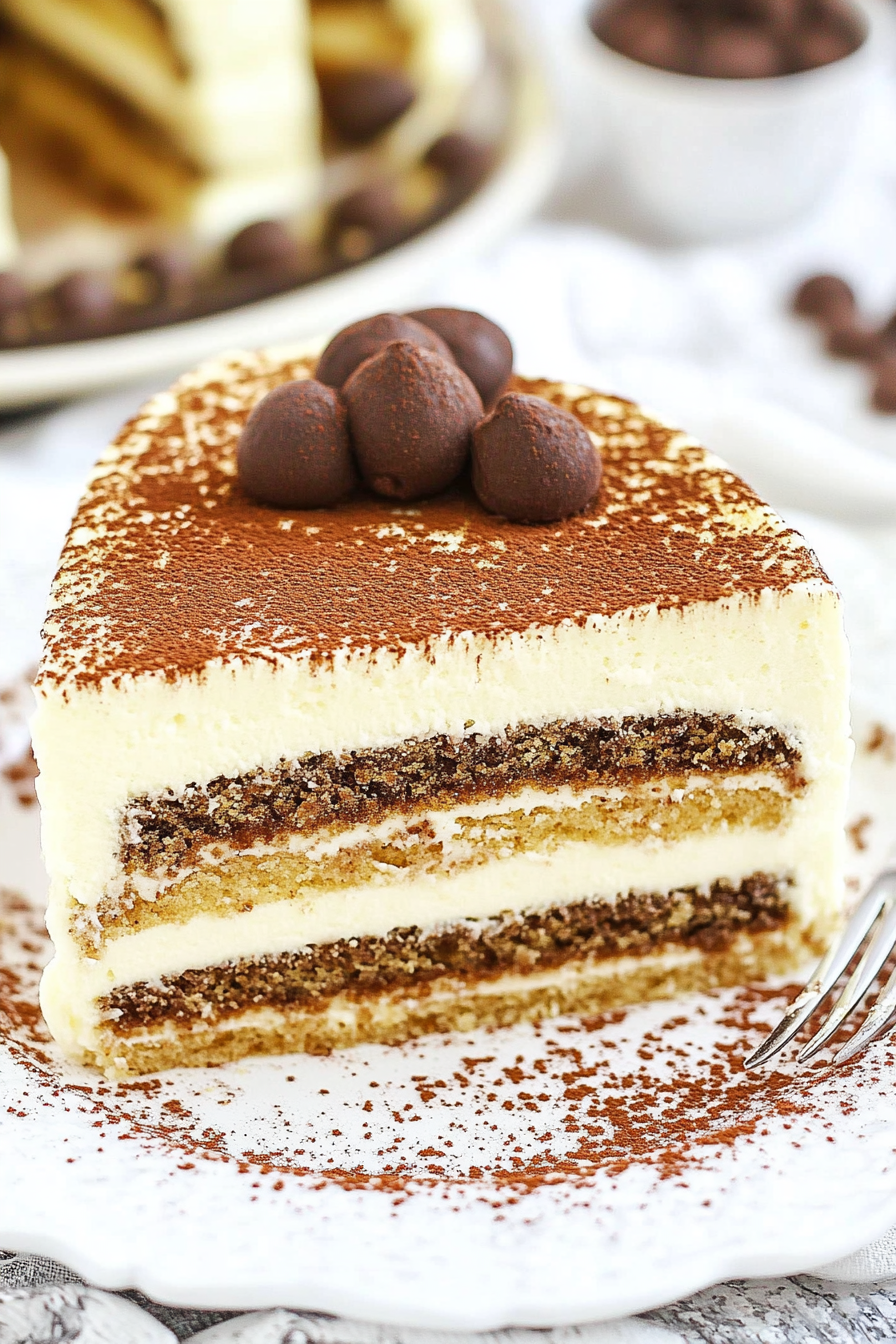
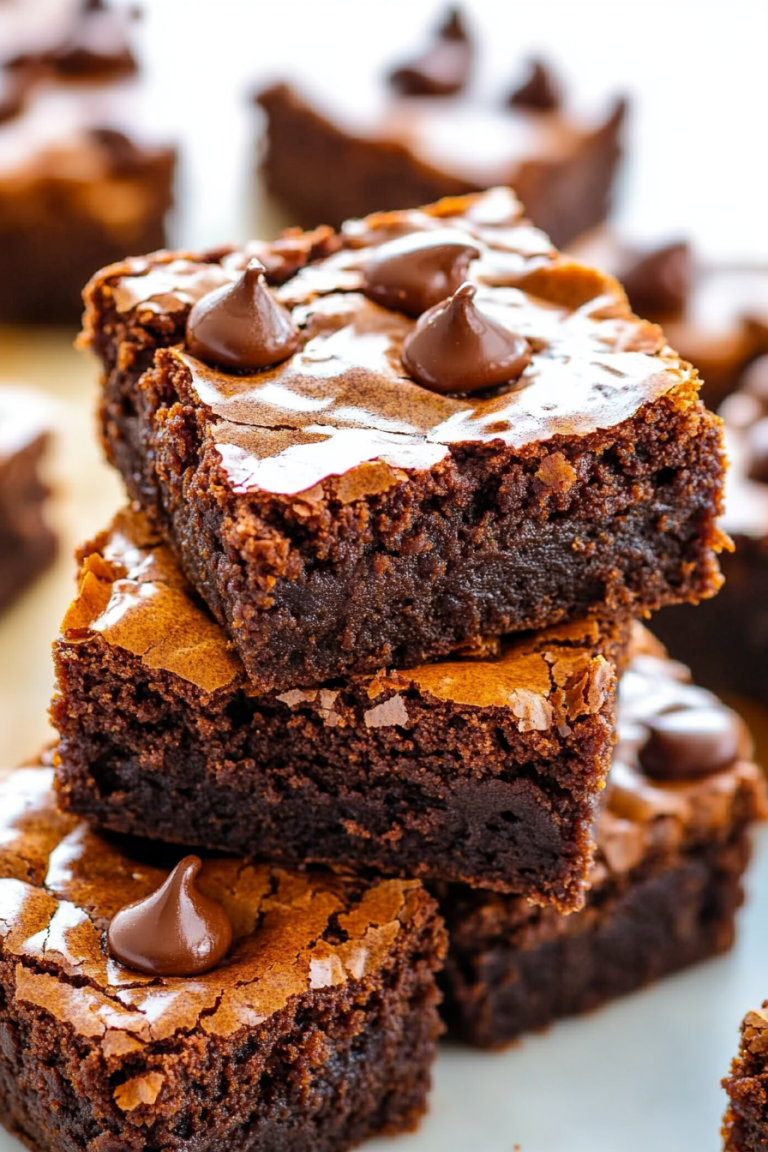
There are some desserts that just make you feel instantly happy, aren’t there? For me, that’s always been tiramisu. The creamy, coffee-soaked layers, that hint of cocoa and mascarpone… it’s pure bliss. But let’s be honest, sometimes the thought of all those individual ladyfingers and careful dipping can feel a bit… daunting. That’s where my absolute favorite tiramisu cake comes in. It captures all those incredible flavors and textures of traditional tiramisu but in a much more forgiving, cake-like format. Think of it as the best of both worlds! This recipe has become my go-to for everything from potlucks to last-minute sweet cravings. It’s the kind of dessert that looks impressive, tastes divine, and is surprisingly straightforward to whip up, even on a weeknight. If you love tiramisu but want a simpler, more robust version, you’ve landed in the right place!
What is a Tiramisu cake?
So, what exactly *is* this magical tiramisu cake? In its simplest form, it’s a dessert that takes all the beloved elements of classic Italian tiramisu and reimagines them in a baked cake structure. Instead of layering ladyfingers, you’ll often find a tender, coffee-infused cake base. The creamy mascarpone filling is still very much present, swirled or layered throughout, and the signature coffee soak is crucial. The name itself, “tiramisu,” translates to “pick me up” in Italian, and that’s exactly what this cake does – it lifts your spirits with every bite! It’s essentially a decadent, coffee-flavored cake that channels the soul of its no-bake ancestor, offering a familiar yet excitingly different way to enjoy those iconic flavors. It’s less about precise assembly and more about pure, unadulterated deliciousness.
Why you’ll love this recipe?
Honestly, there are so many reasons I’ve fallen head-over-heels for this tiramisu cake, and I just know you will too. First and foremost, the flavor is absolutely sensational. It’s got that rich, bold coffee kick that wakes up your taste buds, perfectly balanced by the smooth, luxurious mascarpone cream. The hint of cocoa is like a warm hug, and the cake itself is moist and tender. It’s not overly sweet, which is something I really appreciate, allowing the coffee and cream to truly shine. Then there’s the simplicity factor. I know “cake” can sometimes sound intimidating, but this recipe is genuinely a lifesaver on busy nights. It uses pretty standard pantry ingredients, and the steps are straightforward enough that you won’t feel lost at sea. I’ve made this countless times, and it never fails to impress, yet it doesn’t require any fancy techniques. Plus, it’s incredibly cost-effective compared to buying a fancy dessert. You get so much flavor and satisfaction for a fraction of the price! I also love its versatility. You can easily adapt the coffee strength, add a splash of liqueur if you’re feeling adventurous, or even use different types of chocolate for dusting. It’s perfect for when you’re craving something sweet at 10 pm but don’t want to bake a whole elaborate dessert. It truly hits that sweet spot between effortless and utterly decadent.
How do I make Tiramisu cake?
Quick Overview
This tiramisu cake is all about building layers of flavor and texture, starting with a tender coffee-infused cake. We’ll then create a rich, creamy mascarpone filling that gets swirled right into the batter and on top. The whole thing bakes up into a moist, decadent treat that’s then finished with a simple, elegant glaze or dusting. It’s a streamlined approach to a classic, giving you all the beloved tiramisu notes in a sliceable, shareable cake. Trust me, it’s much simpler than it sounds!
Ingredients
For the Main Batter:
You’ll need all-purpose flour, granulated sugar for sweetness, baking powder and baking soda for lift, and a pinch of salt to balance everything out. I always like to use good quality unsalted butter, softened, and some eggs at room temperature – it makes a world of difference in how well they incorporate. For that signature tiramisu flavor, strong brewed coffee (cooled!) is essential. A little bit of vanilla extract rounds out the flavors. And a touch of vegetable oil or another neutral oil keeps the cake incredibly moist, even after cooling.
For the Filling:
This is where the magic really happens! You’ll need mascarpone cheese, which is key for that authentic, luxuriously creamy texture. Make sure it’s full-fat for the best results. We’ll also use heavy cream, whipped to soft peaks, to make it even lighter and airier. Powdered sugar adds just the right amount of sweetness without making it grainy. And of course, a bit more strong brewed coffee, cooled, to dip the cake or brush over the layers. Some people add a touch of coffee liqueur here, which is absolutely delicious if you like that extra kick!
For the Glaze:
A simple dusting of unsweetened cocoa powder is classic and looks beautiful. If you prefer a glaze, a simple mix of powdered sugar, a splash of coffee, and maybe a tiny bit of melted butter or vanilla extract works wonders. You want it thick enough to coat but thin enough to drizzle.
Step-by-Step Instructions
Step 1: Preheat & Prep Pan
First things first, let’s get our oven preheated to 350°F (175°C). This ensures an even bake from the moment the cake goes in. Then, grab an 8 or 9-inch round cake pan. I like to grease it thoroughly with butter or baking spray, and then dust it lightly with flour. Tapping out any excess flour is important so you don’t end up with white splotches on your beautiful cake. For extra insurance against sticking, you can also line the bottom with a circle of parchment paper. Make sure your coffee is brewed and has had a chance to cool down completely – hot coffee can mess with the batter!
Step 2: Mix Dry Ingredients
In a large bowl, whisk together the all-purpose flour, granulated sugar, baking powder, baking soda, and salt. Whisking them all together at this stage ensures that the leavening agents are evenly distributed, which is super important for a consistent rise. You’re looking for a pale, uniform mixture. No lumps allowed!
Step 3: Mix Wet Ingredients
In a separate, medium-sized bowl, whisk together the softened butter, eggs, cooled brewed coffee, vegetable oil, and vanilla extract. You want to whisk until everything is well combined and looks like a smooth, cohesive liquid. Don’t worry if it looks a little bit separated at first; it will come together when you add it to the dry ingredients.
Step 4: Combine
Now, pour the wet ingredients into the bowl with the dry ingredients. Mix them together using a whisk or a spatula until just combined. Be careful not to overmix! Overmixing can develop the gluten in the flour too much, leading to a tough cake. You’re looking for a batter that’s mostly smooth, with maybe a few tiny lumps still visible. A few lumps are better than a tough cake, so err on the side of caution here.
Step 5: Prepare Filling
In a clean, dry bowl (important for whipping cream!), beat the mascarpone cheese and powdered sugar until smooth and creamy. Then, in a separate bowl, whip the heavy cream until soft peaks form. Gently fold the whipped cream into the mascarpone mixture until it’s fully incorporated and beautifully smooth. You should have a luscious, luscious filling. Taste it – if you want it a little sweeter, now’s the time to add a touch more powdered sugar.
Step 6: Layer & Swirl
Pour about half of the cake batter into your prepared pan. Dollop half of the mascarpone filling over the batter. Now, take a knife or a skewer and gently swirl the filling into the batter, creating beautiful marbled patterns. Don’t over-swirl; you want distinct pockets of cake and filling. Pour the remaining batter over the top, followed by the rest of the mascarpone filling. Swirl again, creating even more gorgeous marble effects. This is where the cake gets its “tiramisu” look!
Step 7: Bake
Pop that beautiful pan into your preheated oven. Bake for about 30-40 minutes, or until a wooden skewer or toothpick inserted into the center comes out clean. The top should be golden brown and slightly puffed. Oven temperatures can vary, so it’s always good to start checking around the 30-minute mark. If the top starts to brown too quickly, you can loosely tent it with aluminum foil.
Step 8: Cool & Glaze
Once baked, let the cake cool in the pan for about 15-20 minutes. This allows it to set up properly. Then, carefully invert it onto a wire rack to cool completely. Once it’s totally cool, you can dust it generously with cocoa powder or drizzle your prepared glaze over the top. For the cocoa dusting, I like to use a fine-mesh sieve to get an even, beautiful layer.
Step 9: Slice & Serve
Once cooled and decorated, it’s time for the best part! Slice your tiramisu cake into wedges. I love serving it at room temperature, but it’s also fantastic slightly chilled. The flavors really meld and develop as it sits, so it’s often even better the next day!
What to Serve It With
This tiramisu cake is pretty much a star on its own, but it also plays wonderfully with a few other things, depending on the occasion. For a leisurely breakfast, a simple cup of strong, black coffee is all you need. The bitterness cuts through the sweetness perfectly, and it just feels so sophisticated to start the day with a slice. If you’re serving it for brunch, I like to elevate it a bit. A small dollop of lightly sweetened whipped cream on the side, maybe some fresh berries (raspberries are amazing with coffee!), and a glass of chilled Prosecco or a mimosa just makes it feel extra special. As a dessert, it’s pure indulgence. It pairs beautifully with a shot of espresso or a small glass of Vin Santo or even a rich dessert wine. For those moments when you just need a cozy snack, honestly, a glass of milk or a warm cup of tea is just delightful. My kids especially love it with a tall glass of cold milk after school. It’s just one of those comforting treats that makes everyone feel a little bit happier.
Top Tips for Perfecting Your Tiramisu Cake
I’ve made this tiramisu cake more times than I can count, and through all those bakes, I’ve picked up a few tricks that I think make all the difference. For the zucchini prep, if you’re using it (I sometimes add it for extra moisture!), make sure you squeeze out as much liquid as possible. Grating it on the fine side of your grater and then wrapping it in a clean kitchen towel and wringing it out like a sponge is key. It might seem like a lot of work, but it prevents a soggy cake. When it comes to mixing, I can’t stress enough: *do not overmix*. Gently combine the wet and dry ingredients until they’re just incorporated. You’ll feel the batter get a bit more elastic if you mix too much, and that’s your cue to stop. For the swirl customization, don’t be afraid to play with it! You can do random swirls, create more defined patterns, or even dollop the filling in neat little mounds. The goal is visual appeal and pockets of creamy goodness. If you’re looking for ingredient swaps, I’ve had success using almond milk in place of regular milk in some cake recipes, and it actually made this one even creamier! You could also try swapping some of the all-purpose flour for a gluten-free blend, though you might need to adjust the liquid slightly. For baking tips, always know your oven. If your oven tends to run hot, reduce the temperature by about 25°F (15°C). Using the middle rack ensures even heat circulation. And for the glaze variations, if you want a thinner glaze, add just a tiny bit more coffee or milk. If you want it thicker, add more powdered sugar. You can also add a drop of almond extract or a tiny bit of citrus zest for a different flavor profile. These little adjustments can really make the cake your own!
Storing and Reheating Tips
Storing this tiramisu cake is pretty straightforward, thankfully! If you have any leftovers (which is rare in my house!), you can store it at room temperature for about 24 hours, as long as it’s covered tightly with plastic wrap or in an airtight container. This is usually fine for the cocoa-dusted version. If your cake has a Cream Cheese or mascarpone frosting, or if your kitchen is particularly warm, it’s always best to refrigerate it. In the refrigerator, it will stay fresh and delicious for up to 3-4 days. Just make sure it’s well-covered to prevent it from drying out or absorbing other fridge odors. I usually use a cake dome or an airtight container. Freezing is also an option, though I find the texture is best when it’s not frozen. If you do want to freeze it, wrap individual slices very tightly in plastic wrap, then in aluminum foil, and pop them into a freezer-safe bag. It should be good for about 1-2 months. To thaw, transfer the frozen slices to the refrigerator overnight. For the glaze, it’s usually best to add it right before serving, especially if you’re refrigerating it, as some glazes can get sticky or melt too much. If you’re dusting with cocoa, you can do that ahead of time. For a cooked cake with a cooked glaze, it can often withstand refrigeration a bit better.
Frequently Asked Questions
Final Thoughts
This tiramisu cake is more than just a recipe to me; it’s a little slice of happiness that I love to share. It embodies that perfect balance of rich, comforting flavors and surprising simplicity. It’s the kind of dessert that brings a smile to everyone’s face, and honestly, it makes me feel like a kitchen rockstar every time I make it, even though it’s so easy. If you’re a fan of classic tiramisu but want something a bit more forgiving and perhaps even more decadent in its cake form, you absolutely have to give this a try. I promise you won’t be disappointed! You might also want to check out my recipe for no-bake tiramisu bars if you’re looking for another quick and delightful way to get your tiramisu fix. Happy baking, and I can’t wait to hear how your tiramisu cake turns out in the comments below! Don’t forget to share your own variations and tips – I always love learning new tricks!
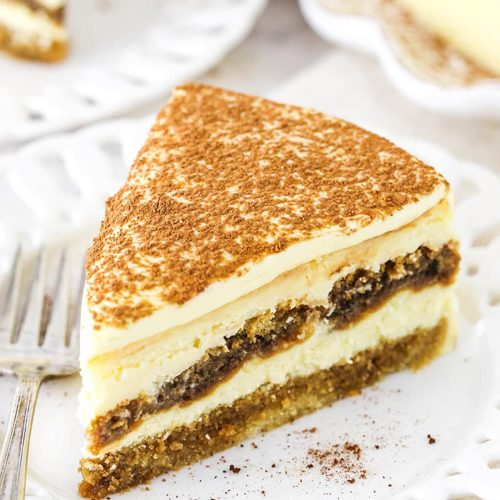
The Ultimate Tiramisu Cheesecake
Ingredients
Cake Layer
- 0.625 cup all-purpose flour
- 0.5 tsp baking powder
- pinch salt
- 3 tbsp unsalted butter, room temperature
- 0.3125 cup sugar
- 1 tbsp vegetable oil
- 0.75 tsp vanilla extract
- 0.25 cup milk
- 0.75 cup hot water
- 2.5 tbsp instant espresso coffee powder
- 4 tbsp sugar
- 6 tbsp Kahlua
Cheesecake Filling
- 8 oz cream cheese, room temperature
- 16 oz mascarpone cheese, room temperature
- 1 cup sugar
- 3 tbsp all-purpose flour
- 0.75 cup sour cream
- 0.5 tbsp vanilla extract
Assembly
- 5 tbsp sugar
- 7 tbsp heavy whipping cream, cold
- 3 oz mascarpone cheese, cool but not cold
- Cocoa powder for dusting
Instructions
Make Cake Layer
- Prepare a 9-inch cake pan or springform pan with parchment paper in the bottom and grease the sides. Preheat the oven to 350°F.
- Combine the flour, baking powder and salt in a medium-sized bowl and set aside.
- Add the butter, sugar, oil and vanilla extract to a large mixer bowl and beat together until light in color and fluffy, about 3-4 minutes.
- Add the egg to the creamed butter and sugar mixture, mixing until mostly combined. Scrape down the sides of the bowl as needed.
- Add half of the dry ingredients to the batter and mix until mostly combined.
- Slowly add the milk and mix until well combined. The batter will look a little curdled, but that’s ok.
- Add the remaining dry ingredients and mix until well combined and smooth. Do not overmix the batter.
- Spread the cake batter evenly into the bottom of the prepared pan and bake for 13-15 minutes, or until a toothpick comes out with a few crumbs.
- Remove the cake from the oven and allow it to cool for about 2-3 minutes, then transfer it to a cooling rack to cool completely. Set aside.
Make Espresso Mixture & Filling
- While the cake is cooling, add the espresso coffee powder and sugar to the hot water and stir to dissolve, then add the Kahlua. Set aside.
- Add the cream cheese, mascarpone cheese, sugar and flour to a large mixer bowl and beat on low speed until combined and smooth. Scrape down the sides of the bowl.
- Add the sour cream and vanilla extract and mix on low speed until well combined.
- Add the eggs and egg yolks one at a time, mixing slowly to combine after each addition. Scrape down the sides of the bowl as needed.
Assemble & Bake
- Reduce the oven temperature to 300°F. Prepare a springform pan with parchment paper in the bottom and grease the sides.
- Reset the springform pan edges around the cake layer and drizzle 6-7 tablespoons of the espresso mixture evenly over the cake.
- Set aside about 2 cups of the cheesecake filling, then add the remainder of the cheesecake filling to the pan and spread evenly.
- One at a time, dip each ladyfinger in the remaining espresso mixture, then add it to the pan on top of the cheesecake filling. Make an even layer, breaking the ladyfingers if needed.
- Pour the reserved cheesecake filling over the top of the ladyfingers, using a spoon to drop spoonfuls, then spreading them evenly.
- Prepare the pan for a water bath by wrapping the outside of the pan with aluminum foil, then place the springform pan inside another larger pan. Fill the outside pan with warm water about halfway up the sides of the springform pan.
- Bake the cheesecake for about 1 hour and 15 minutes. The center should be set, but still jiggly.
- Turn off the oven and leave the door closed for 30 minutes.
- Crack open the door of the oven for 30 minutes to allow the cheesecake to continue cooling slowly.
- Remove the cheesecake from the oven and the water bath, then refrigerate it until firm (at least 5-6 hours, or overnight). Once cool and firm, remove it from the springform pan.
- Combine the egg yolks and sugar in a double boiler or metal bowl over simmering water. Whisk to combine until the mixture thickens and turns pale yellow (about 160°F).
- Set the egg mixture aside to cool to a little warmer than room temperature.
- Whip the heavy whipping cream in a large mixer bowl until stiff peaks form.
- When the egg mixture has cooled, add the mascarpone cheese and gently fold together until combined.
- Gently fold the whipped cream into the mascarpone/egg mixture in two parts.
- Remove the cheesecake from the springform pan and set it on a serving platter. Spread the topping evenly onto the cheesecake, then sprinkle with cocoa powder.
- Enjoy or refrigerate until ready to serve.

