I totally get it — you know those moments when you’re craving something ridiculously sweet but don’t want to haul out an entire cake or fuss with complicated recipes? That’s exactly how I stumbled into making these Little Debbie cake balls for the first time. Honestly, the smell alone draws everyone to the kitchen like magnets, and my kids can’t help but sneak two or three before dinner. It’s like having a little party in your mouth with each bite—soft, buttery cake mixed with just the right touch of glaze. If you’ve ever loved those nostalgic Little Debbie treats but wondered how to elevate them a bit or make them yourself, this recipe is your best friend. It’s quick, ridiculously easy, and perfect for sharing when company drops by unexpectedly. Trust me, these cake balls have saved countless busy afternoons at my house, and I’m excited to share the secret with you.
What is Little Debbie cake ball?
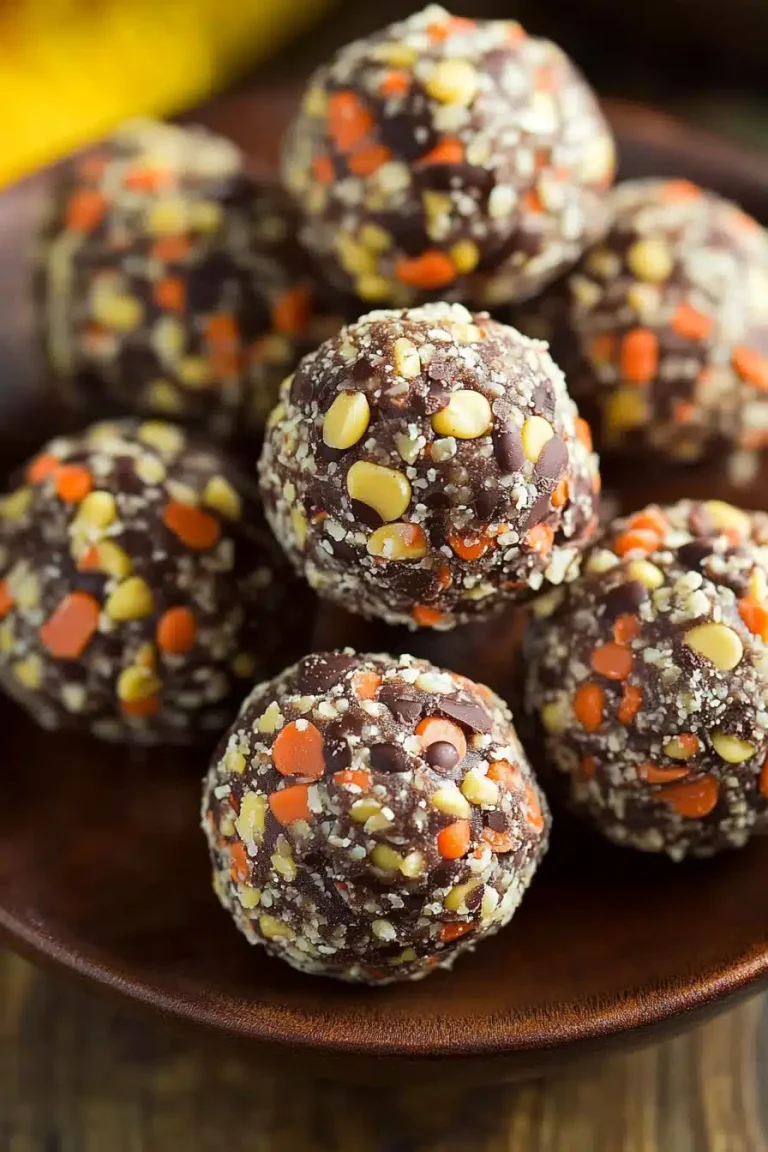
So, what exactly are Little Debbie cake balls? Picture this: taking that iconic Little Debbie cake, you know, those moist little squares packed with flavor, and turning them into adorable, bite-sized spheres dipped in a sweet glaze or chocolate coating. It’s essentially a fun twist on cake pops, but without the messy sticks or fancy decorations. You can think of it like your favorite childhood treat but made at home — way fresher, customizable, and fun to eat. The “cake balls” part comes from the idea of rolling tiny portions of cake combined with frosting or glaze into balls you can pop in your mouth. It’s simple, nostalgic, and totally approachable, even if you’re not a big baker. And the best part? You can jazz them up any way you like, making them perfect for lazy afternoons, celebrations, or just because.
Why you’ll love this recipe?
This recipe hits all the right notes, and I mean it from the heart. What I love most about these Little Debbie cake balls is how insanely flavorful they are without any fancy ingredients or hours in the kitchen. The cake stays moist, the glaze adds just the right kiss of sweetness, and each bite melts in your mouth. Honestly, it’s the kind of treat that brings back all those cozy memories of sneaking snacks as a kid.
But beyond flavor, the simplicity is a huge win. I’m talking about a handful of ingredients, minimal prep, and no baking required if you use store-bought Little Debbie cakes as your base. They’re fantastic for last-minute get-togethers or when you want something homemade without the fuss. Plus, it’s a sweet that doesn’t break the bank — no exotic spices or pricey chocolate, just good ol’ comfort food ingredients.
And here’s a nugget from me: these cake balls are crazy versatile. Want them as an addition to your holiday dessert tray? Easy. Need a sweet bite for an afternoon party? Done. I even brought a batch to my nephew’s school event, and they disappeared in minutes. If you’ve ever tried classic cake balls, you’ll find this one’s a bit lighter and has a nostalgic twist that feels like home. My family swears by this recipe, and I bet you’ll fall for it too.
How do I make little Debbie cake balls?
Quick Overview
This recipe is a breeze, honestly. Whether you’re starting with a box mix or actual Little Debbie snack cakes, the method is straightforward: crumble the cake, mix it with just enough glaze or frosting to hold together, roll into bite-sized balls, and chill. Then, dip them in your glaze or chocolate of choice, and let them set. It’s so simple that it almost feels like playtime in the kitchen, and it’s perfect when you want something delicious fast without turning on the oven for long.
Ingredients
For the Main Batter:
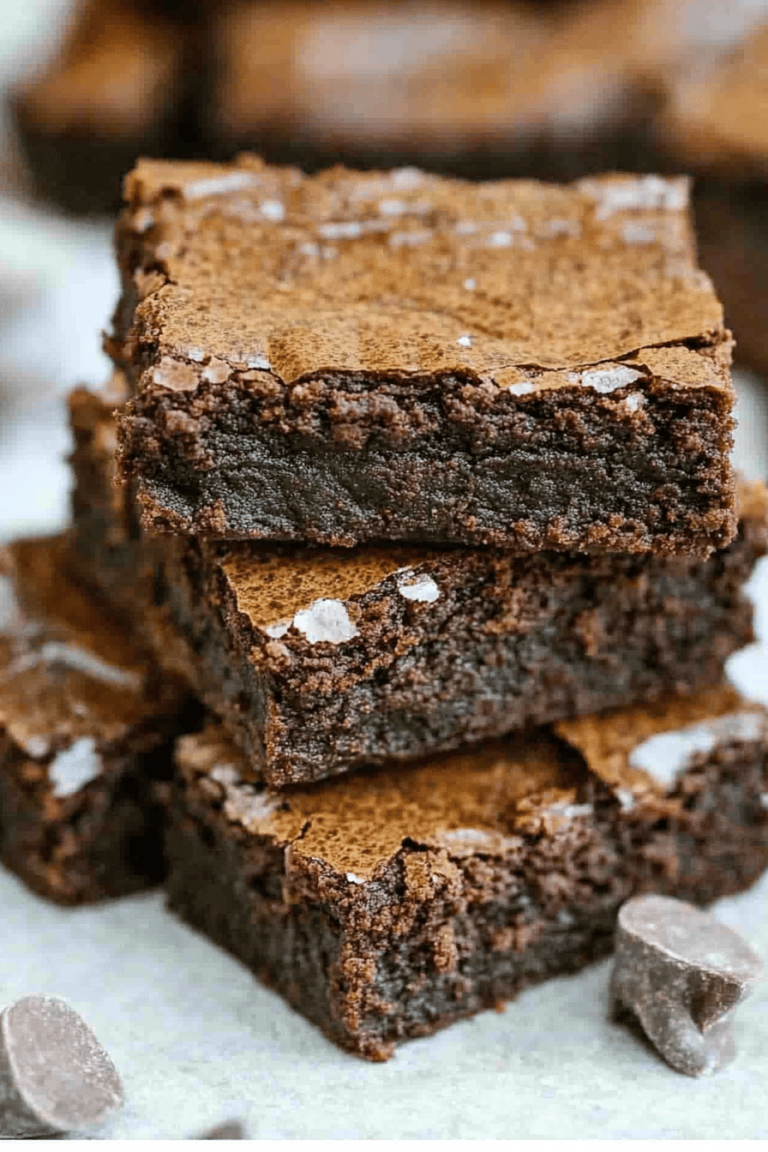
- Little Debbie snack cakes (I usually use the classic Cosmic Brownies or Swiss Roll for that perfect texture)
- Vanilla or cream cheese frosting (store-bought works fine; homemade if you’re feeling fancy)
- A pinch of cinnamon or vanilla extract (optional, but adds a nice warm note)
For the Glaze:
- Powdered sugar – about 2 cups
- Milk or cream – start with 2-3 tablespoons, adjust for glaze consistency
- Vanilla extract or almond extract (a teaspoon adds lovely depth)
- Optional: melted white or semi-sweet chocolate for coating
Step-by-Step Instructions
Step 1: Preheat & Prep
If you’re going to melt chocolate for dipping, start by gently heating it on low power in the microwave or over a double boiler. Otherwise, get yourself a baking sheet ready lined with parchment paper to chill your cake balls once formed. No oven needed if you’re using store-bought cakes—major time saver!
Step 2: Crumble the Cake
Take your cake and crumble it in a large bowl with your hands or a fork. I find using fingers is best—you can feel when the crumbs get finely broken but not mushing it into a paste. Texture here is everything; you want fluffy, not soggy.
Step 3: Mix Frosting and Add Flavor
Spoon in your frosting bit by bit, mixing gently until the cake crumbs can hold together when rolled between your palms. It shouldn’t be too sticky or too dry. This is where I throw in a splash of vanilla extract or a sprinkle of cinnamon to brighten things up.
Step 4: Roll the Balls
Pinch about a tablespoon of the mixture and roll it into a smooth ball. Place it on your parchment-lined sheet. I always wash my hands between rolls to avoid stickiness. This part is oddly cathartic—like tiny little doughy orbs of happiness.
Step 5: Chill Them
Pop those little beauties in the fridge to firm up for at least 30 minutes. This helps them keep their shape when you dip them in glaze or chocolate later.
Step 6: Make the Glaze
In a small bowl, combine powdered sugar with milk and your chosen extract. The trick is to get a smooth, thick, but pourable glaze. You want it thick enough to coat the cake balls but thin enough to drip off gracefully. Adjust with a teaspoon of milk or sugar as needed.
Step 7: Dip & Decorate
Using a fork or a dipping tool, dunk each chilled cake ball into the glaze or melted chocolate, allowing excess to drip back into the bowl. Set them back on the parchment paper. Feel free to sprinkle crushed nuts, sprinkles, or sea salt over the top before the glaze sets for a little extra zing.
Step 8: Let Them Set
Allow the glaze to harden slightly—you can speed this up by popping them back in the fridge for 15-20 minutes. Once set, they’re ready to serve or store.
Step 9: Serve & Enjoy
Arrange your cake balls on a pretty plate or in cupcake liners for a darling display. They’re best enjoyed at room temperature, so pull them out a little before serving so the glaze isn’t too hard to bite through.
What to Serve It With
For Breakfast: These cake balls pair wonderfully with a hot cup of coffee or chai. I like to arrange a few on a plate alongside scrambled eggs and fresh fruit for a sweet little weekend treat that feels decadent but is actually easy.
For Brunch: Dress them up with fresh berries and a sprinkle of powdered sugar. Serve with mimosas or freshly squeezed orange juice. I once brought these as a surprise for a friend’s brunch, and they were the hit of the table — everyone loved the nostalgic vibe with a grown-up twist.
As Dessert: Try serving alongside a scoop of vanilla ice cream or drizzled with warm caramel sauce. This combo will have your guests swooning and asking for the recipe. It’s a lovely way to end a family dinner without overdoing it.
For Cozy Snacks: Pop a few with a glass of milk or hot cocoa for a late-night pick-me-up. This is my go-to when I want something sweet but not too heavy before bedtime. It’s like a warm hug in bite-sized form.
Top Tips for Perfecting Your Little Debbie Cake Balls
Cake Crumble: Don’t rush this part! I learned the hard way that too big crumbs make rolling tricky and too small can make the balls dense. Light, fluffy crumbs are your best friend — use your fingers and trust your touch.
Frosting Mix: Add frosting slowly; you can always add more if it’s too dry, but too much frosting makes the balls sticky and hard to handle. A little tip: the frosting should act like glue, not syrup.
Glaze Consistency: One time I made the glaze too thin, and it ran everywhere leaving a mess. Take your time to get the pour just right — thick but fluid. If you want a shiny finish, adding a teaspoon of corn syrup can work wonders.
Swirls and Dips: For a gorgeous look, swirl chocolate drizzle over your glaze after it sets. I’ve also played with dipping half the ball and leaving the rest exposed — adds a fun contrast and texture.
Ingredient Swaps: Tried this with almond milk instead of regular milk for the glaze once, and it gave a subtle nutty flavor that was surprisingly addictive. You can also swap the frosting for peanut butter or Nutella for a totally different vibe.
Baking Tips: If you decide to make the cake from scratch for a truly homemade touch, bake it a day ahead. Freshly baked cake tends to be too moist and fragile to handle well for balls.
Above all, have fun with it. I’ve learned that the best cake balls are the ones with a little love rolled in, and the occasional imperfect shape just adds character.
Storing and Reheating Tips
Room Temperature: You can keep these out for a day or so, covered with a loose cloth or cake dome. They stay delightfully fresh, and the glaze won’t sweat as long as it’s not too hot in your kitchen.
Refrigerator Storage: Store in an airtight container, and they’ll last up to a week. I find chilling helps them hold their shape and intensifies the flavors. Let them sit out 15 minutes before eating to take off the chill.
Freezer Instructions: Wrap each cake ball individually in plastic wrap or parchment and stash in a freezer-safe bag. They keep up to 3 months. To enjoy, defrost overnight in the fridge and bring to room temp before diving in.
Glaze Timing Advice: If planning to freeze, I recommend glazing and dipping after thawing to avoid glaze cracking from freezer temperature swings. Otherwise, the glaze can discolor or crack a bit.
Frequently Asked Questions
Final Thoughts
Honestly, Little Debbie cake balls are that warm, familiar hug of a treat that brings a little joy no matter the day. They’re easy, nostalgic, and endlessly adaptable—you can feel good making them on a whim or dressing them up for special occasions. What I cherish most is how they bring my family together; every time I make a batch, it’s met with smiles and requests for seconds (and sometimes thirds!). If you’ve enjoyed these little bites, I highly recommend exploring some of my other no-fuss dessert recipes; you might find a new favorite to add to your routine. I’m so excited for you to try this — can’t wait to hear how yours turns out! Don’t be shy, leave a comment or share pics if you make your own twist on these delightful cake balls. Happy baking!
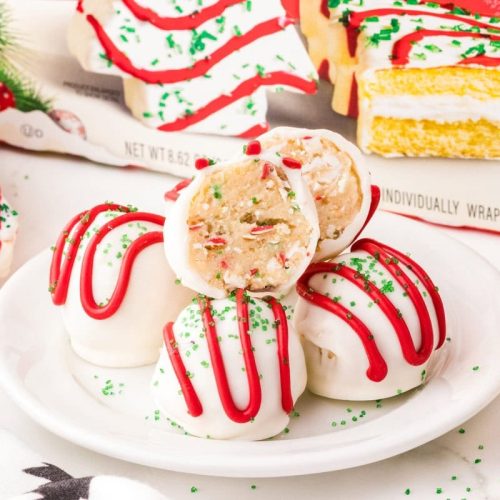
Little Debbie cake balls
Ingredients
Main Ingredients
- 10 pieces Little Debbie vanilla Christmas tree snack cakes Unwrapped from 2 boxes, 8.62 oz each
- 8 oz cream cheese Softened to room temperature
- 20 oz white chocolate melting wafers Ghirardelli brand recommended
- 6 oz red vanilla flavored melting candy wafers Wilton brand used
- 1 tbsp green sanding sugar sprinkles
Instructions
Preparation Steps
- Line two large baking sheets with parchment paper or silicone mats and set aside.
- In a large bowl, beat the softened cream cheese on medium speed using a handheld mixer for 1 to 2 minutes until smooth and fluffy.
- Break the vanilla Christmas tree snack cakes into smaller pieces and add them to the cream cheese. Mix on low speed until combined but with some small pieces remaining.
- Using a small cookie scoop, scoop out 1 tablespoon sized portions and gently roll each into a smooth ball with your hands.
- Place each cake ball onto one of the prepared baking sheets. Repeat until all balls are formed.
- Freeze the cake balls for 30 to 45 minutes until solid to make coating easier.
- Melt the white chocolate wafers in a medium bowl according to package directions until smooth.
- In a separate bowl, melt the red candy wafers until smooth and transfer to a piping bag with the tip cut off.
- Dip each cake ball into the melted white chocolate, coating all sides, then lift out with a fork and tap to remove excess chocolate.
- Place the coated cake ball on the second baking sheet and pipe decorative red lines on top, then sprinkle with green sanding sugar to mimic the original snack cake design.
- Let the cake balls set for 15 to 20 minutes until the coating is firm before serving.