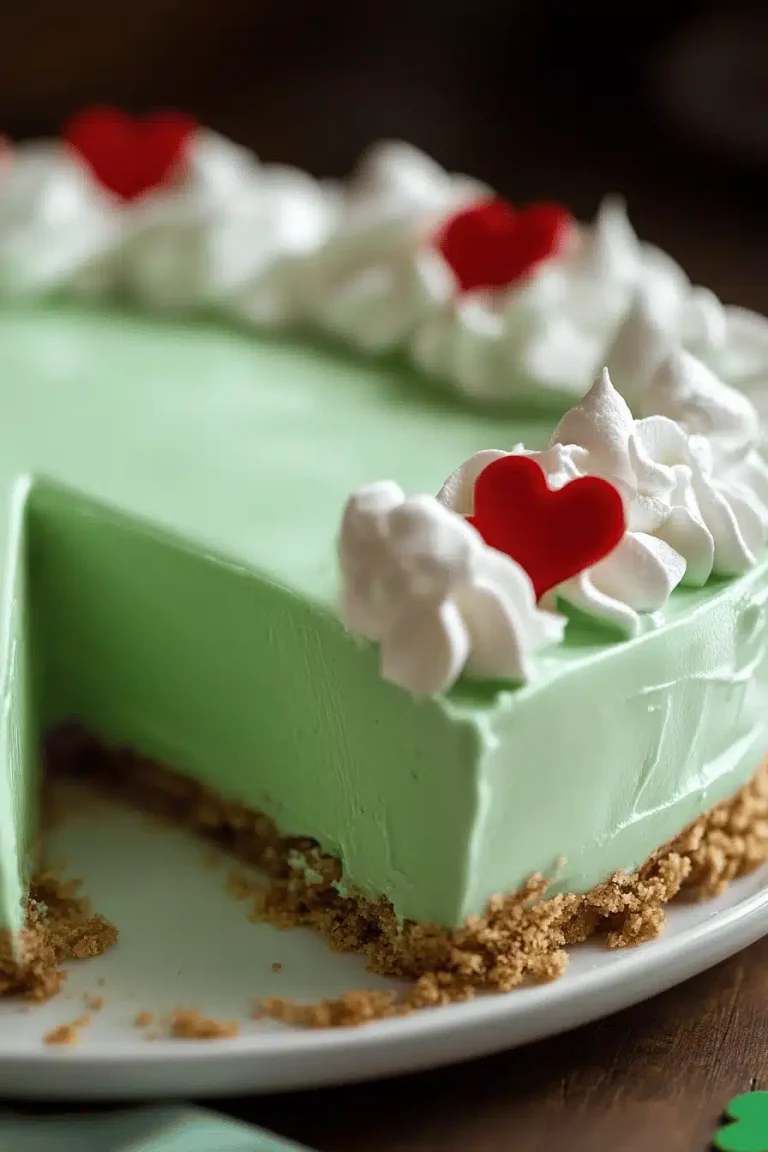
I still remember the first bite that convinced me Sugar Cookie Cheesecake could live on the counter year-round, not just during holidays. The crust tasted like buttery vanilla cookies and the filling was lusciously smooth, with a tiny tang that reminded me of classic cheesecake but somehow lighter, sweeter, friendlier. It’s the kind of dessert that makes a kitchen smell like a memory you want to hold onto. I’m pretty sure this is the only dessert my family will beg for on busy weeknights—the kind you assemble in advance, stash in the fridge, and pull out when guests arrive with a smile and a plate full of seconds. Sugar Cookie Cheesecake is an easy, approachable love letter: familiar flavors, clean textures, and just enough whimsy to feel special. I’ve baked this with a dash of lemon zest in the glaze, with almond milk in the filling to keep it dairy-light, and even with gluten-free cookies for a party that needed to dodge gluten. It’s a dessert that travels well, tastes like home, and somehow always disappears in minutes at my house.
What is sugar cookie cheesecake?
Think of Sugar Cookie Cheesecake as a gentle marriage between a crisp sugar cookie crust and a silky cheesecake filling. The name comes from the way the crust is built from crushed sugar cookies, giving you that familiar vanilla butter flavor in every bite, while the filling stays creamy and bright with a touch of tang. It’s essentially a no-fuss, crowd-pleasing dessert that tastes like a party in your mouth: comforting, nostalgic, and a little indulgent. I love that this recipe preserves the cookie-loving sweetness we all adore, but with the luxe texture of cheesecake. It’s approachable enough for a weeknight treat and elegant enough to serve at gatherings. Think of it as the kid-friendly cousin of a traditional cheesecake: enough sophistication to feel special, enough simplicity that you aren’t stuck in the kitchen all night. And yes, you can customize with a lemon glaze, a drizzle of chocolate, or a scatter of berries to finish it off.
Why you’ll love this recipe?
What I love most about this Sugar Cookie Cheesecake is how reliably delicious it is while still feeling effortless. The crust carries that familiar cookie flavor—soft, sweet, a touch toasty—without needing to bake a separate batch of cookies. The filling arrives silky and creamy, with a gentle vanilla note that doesn’t overpower the tang of Cream Cheese. The texture is absolutely the best of both worlds: the crust gives you a slight snap, while the center stays luxuriously smooth. It’s not too rich, which makes it perfect for sharing after a heavy dinner or for a party where folks are nibbling rather than slicing large wedges. It’s also remarkably forgiving: you can stretch the bake time a little, or chill it longer to firm up the slices for a pretty presentation. For me, what’s most wonderful is how easily you can customize. A little lemon glaze brightens the entire dessert; a handful of berries offers color and freshness; or you can keep it classic and simply dust with powdered sugar. This dessert checks a lot of boxes: flavor, ease, and a little show-stopping charm that still feels completely homey.
How do I make sugar cookie cheesecake?
Quick Overview
This Sugar Cookie Cheesecake comes together in two simple stages: first, you crush a batch of sugar cookies and mix in melted butter to form a firm crust. Then you whisk a creamy cheesecake filling, pour it over the crust, and bake it in a snug water bath until the center barely jiggles. Once it’s cooled, you can glaze the top for a glossy finish or leave it naked for a pure, cookie-forward bite. It’s a one-pan, no-fuss dessert that tastes like it took forever to perfect. The trick is to keep the filling smooth and to bake it slowly so the center stays creamy rather than curdled. If you’re feeling fancy, a quick swirl of extra cookie crumbs or a touch of zest in the glaze adds personality without complicating the process.
Ingredients
For the Main Crust / Batter:
- 2 cups sugar cookie crumbs (about 200 g), finely crushed for a tight crust
- 6 tablespoons unsalted butter, melted
- Pinch of salt
For the Filling:
- 16 oz cream cheese, softened (about 450 g)
- 3/4 cup granulated sugar (150 g)
- 2 large eggs
- 1/2 cup sour cream (120 g)
- 1 teaspoon vanilla extract
- 2 tablespoons all-purpose flour (or 1 tablespoon cornstarch for gluten-free option)
For the Glaze:
- 1 cup powdered sugar (120 g)
- 2–3 tablespoons milk or heavy cream
- 1/2 teaspoon vanilla extract
- Optional: a pinch of lemon zest or orange zest
Notes and tips: If you’re gluten-free, swap the sugar cookie crumbs for gluten-free sugar cookies or crush a shortbread-style GF cookie. A splash of almond milk in the filling makes it a touch lighter if dairy isn’t your friend. For a more intense vanilla flavor, add a second half-teaspoon of vanilla and a whisper of lemon zest to the glaze. I’ve tested this with a light sour cream replacement for dairy-free friends, and while it’s not exactly the same, it’s still wonderfully creamy and satisfying.
Step-by-Step Instructions
Step 1: Preheat & Prep Pan
Preheat your oven to 325°F (165°C). Lightly grease a 9-inch springform pan and line the bottom with parchment for easy release. Wrap the bottom in two layers of heavy-duty foil to protect against leaks, since this wants a little water bath support. Place the pan in a shallow roasting pan ready for the water bath, if you’re using one. Trust me, this makes the cheesecake crack less and slice cleaner.
Step 2: Mix Dry Ingredients
In a bowl, whisk together the sugar cookie crumbs and salt. The salt helps balance the sweetness and deepens the cookie flavor. If you’re starting with larger cookie bits, pulse them in a food processor until you have a fine, even texture. You want crumbs that feel cohesive when pressed, not crumbly dust that slides away.
Step 3: Mix Wet Ingredients
In a separate bowl, beat the cream cheese with the sugar until it’s beautifully smooth and free of lumps—about 2 minutes on medium speed with a mixer. Scrape the bowl, then add the eggs one at a time, letting each incorporate fully. Beat in the sour cream and vanilla until everything is silky. Sift in the flour (or cornstarch) and mix just until combined. Overmixing will introduce air that can cause cracks, so slow it down toward the end.
Step 4: Combine
Pour the wet filling into the prepared crust. If you want to be fancy, you can pour a little on top of the crust, then sprinkle a tablespoon or so of extra cookie crumbs and swirl a bit. Then spoon the rest on top and smooth the surface with a spatula. If you see air bubbles, a quick tap on the counter helps them rise to the surface.
Step 5: Prepare Filling
Finish the filling by giving it a few light folds to ensure it’s uniform and creamy. The texture should be thick yet pourable—like a stiff batter you can spread with a spatula. If you want a latte-hint in your dessert, stir a drop of espresso powder into the glaze later; it’s a delightful whisper, not a punch.
Step 6: Layer & Swirl
Pour the filling over the crust, then, if you like, drop spoonfuls of extra cookie crumbs onto the surface and swirl gently with a knife to create delicate marbling. This is purely for beauty and that cookie-to-chewy contrast when you slice into it. Don’t over-swirl; you’re aiming for a few pretty ribbons, not a fully mixed pane of cake.
Step 7: Bake
Set your pan on the center rack and bake for about 55–65 minutes, or until the edges are set and the center jiggles only slightly when you nudge the pan. If you’re using a water bath, you’ll see the center stay a touch wobbly—that’s okay. Turn off the oven and let the cake rest inside for 15 minutes, then remove to a rack to cool. If the top begins to brown too quickly, tent with a piece of foil for the last 15 minutes. A gentle bake helps prevent cracking and keeps the center creamy.
Step 8: Cool & Glaze
Cool the cheesecake on a rack for an hour, then refrigerate for at least 4 hours, ideally overnight. This is where the magic happens—flavors mellow, texture firms up, and you can slice cleanly. For the glaze, whisk the powdered sugar with milk and vanilla until it’s a pourable consistency. Drizzle it over the cooled cake and scatter a pinch of zest if you like. The glaze is the finishing kiss that brightens the vanilla and ties the cookie-forward crust to the creamy center.
Step 9: Slice & Serve
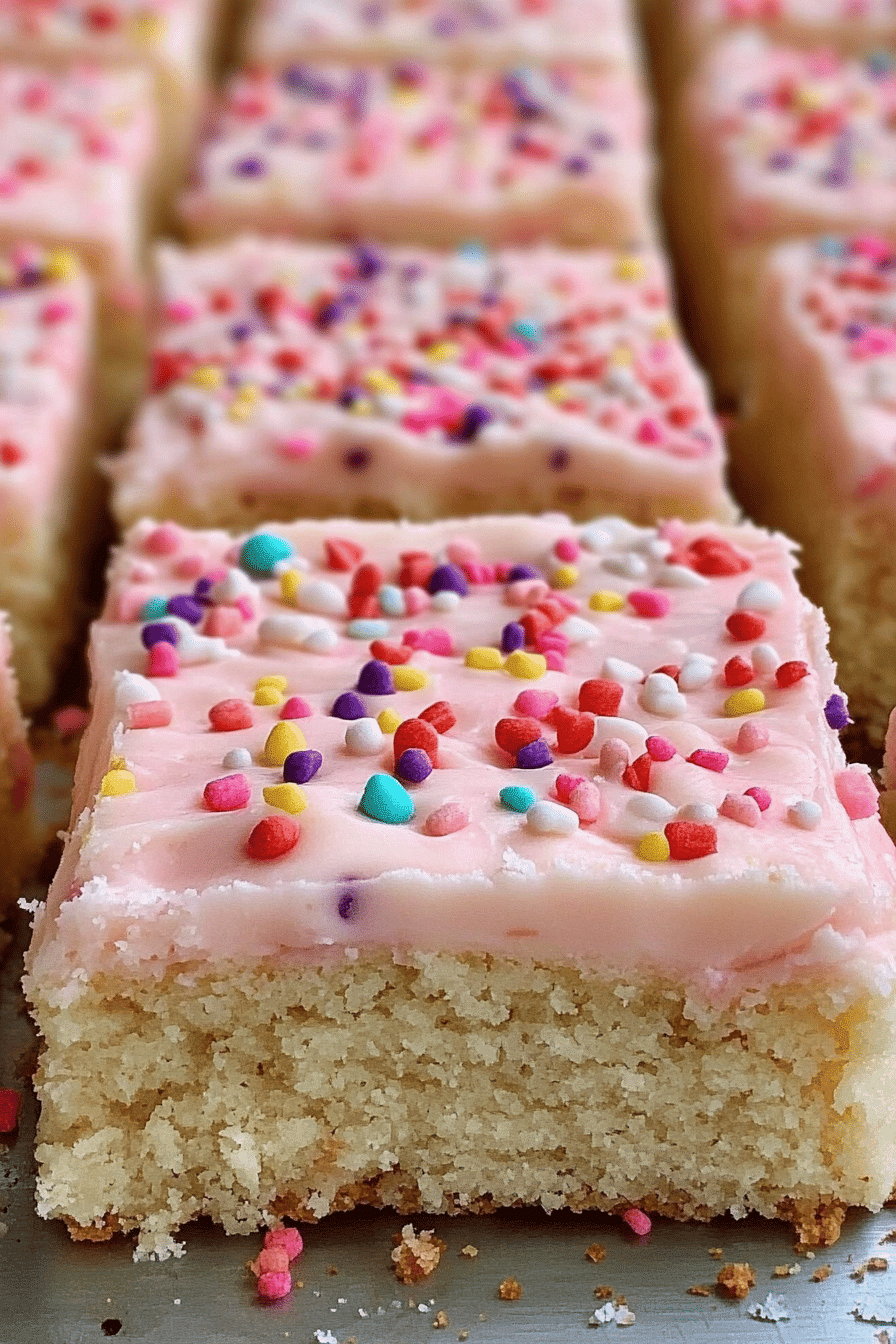
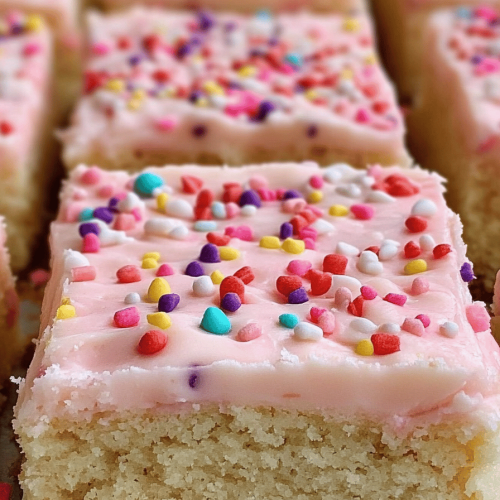
Run a warm knife under hot tap water, wipe, and slice. Clean cuts come from a quick, warm knife pass. Serve with a few fresh berries, a dollop of whipped cream, or a light dusting of more cookie crumbs for texture. This Sugar Cookie Cheesecake is at its best chilled, so don’t skip the fridge time. I love plated slices with a little extra glaze on the side for dipping—your guests will thank you for the extra sweetness and the pretty presentation.
What to Serve It With
This Sugar Cookie Cheesecake is a chameleon in the best possible way—great on its own, but even better when paired with a few complementary accompaniments. Here are some ideas that work across occasions:
For Breakfast: A quiet morning slice with a robust coffee, a dollop of yogurt on the side, and a splash of vanilla over fresh berries. It becomes a gentle, indulgent start to the day without feeling heavy.
For Brunch: Plate wedges with citrus zest, a few mint leaves, and a glass of sparkling water or light prosecco. A small fruit compote can offer a bright contrast to the richness.
As Dessert: Serve with a warm berry compote or a spoonful of lemon curd for a tangy balance that brightens the flavors. A swirl of dark chocolate adds a luxurious touch for a special occasion.
For Cozy Snacks: Cut thick squares and pair with a mug of hot cocoa or a spiced chai. The cookie-crust bite and creamy center make late-night snacking feel nostalgic and comforting.
Family rituals often show up here, too. I usually bake a bigger batch before a weekend movie night and tuck a few slices into the fridge for Sunday mornings. The smell draws everyone to the kitchen, and I swear the glaze catches the light in just-so ways that make the whole house feel lucky. My sister swears the glaze tastes better after the cake has rested a day or two, and I’m not about to argue with a family tradition that makes dessert taste even better.
Top Tips for Perfecting Your Sugar Cookie Cheesecake
These little notes come from years of making this with a sleepy-eyed toddler in my arms and a timer that never seems to cooperate. They’re simple, but they save you from common missteps and guarantee a cheesecake that’s creamy, stable, and irresistible.
Crust Prep: Use cookie crumbs that are finely ground and well combined with butter so the crust doesn’t crumble at the first bite. A gentle press into the pan, using the flat bottom of a glass, ensures an even, compact crust. If your crumbs feel dry, add a teaspoon of water or a touch more butter to bind them; you want cohesive crumbs that hold together when pressed.
Mixing Advice: Cream cheese should be very soft but not melted. Beat until smooth and free of lumps, then add sugar gradually. Scrape the bowl often and mix on low speed towards the end to avoid incorporating too much air, which can cause cracks in the finished cheesecake.
Swirl Customization: If you want a pretty marble effect, reserve a few tablespoons of cookie crumbs and sprinkle on top after pouring. Drag a knife through to create a few delicate swirls. For a bolder look, stir in a teaspoon of lemon zest or orange zest into the glaze for a sunny finish.
Ingredient Swaps: GF-friendly option: use GF sugar cookies or crush gluten-free shortbread and omit gluten-containing ingredients. Dairy-free friends can swap sour cream for coconut yogurt and a dairy-free cream cheese substitute, then adjust with a little extra vanilla for balance. If using almond milk, you may want a touch more flour to keep the center set, but test first with half the amount and adjust as needed.
Baking Tips: A gentle bake with a water bath yields the creamiest center. If you don’t have a water bath, you can still bake in a larger pan filled with hot water on a lower rack to maintain moisture. Watch the center: it should wobble slightly but not look liquid. Cracking is less likely when the cheesecake has a slow, even rise and a long cooling period in the oven after turning off the heat.
Glaze Variations: Keep the glaze thick enough to coat but thin enough to run in a delicate ribbon. Add citrus zest, cinnamon, or a splash of espresso with the vanilla for different flavor expressions. If you’re refrigerating after glazing, apply the glaze just before serving to preserve shine and texture.
Lessons learned? I’ve learned to bake this with a little extra patience. If you’re short on time, you can skip the water bath and bake a tad longer, but you’ll want to check early and often so it doesn’t dry out. The first time I tried, I pulled it too soon and the center was a bit louder than I liked; now I give it a touch more time and finish with the glaze. My kids actually ask for seconds, which is the highest compliment in our house.
Storing and Reheating Tips
Storing this Sugar Cookie Cheesecake properly makes all the difference in flavor and texture. It’s a dessert you can batch for a party, then enjoy leftovers for a few days without losing its charm.
Room Temperature: Not recommended for longer than 2 hours. If you’re serving at room temp for a party, you can slice a portion and keep the rest covered in the fridge, bringing slices to room temperature just before serving.
Refrigerator Storage: Store the cheesecake in its pan, covered tightly with plastic wrap or foil. It will stay fresh and creamy for up to 5 days. For best texture, keep the glaze light and fresh by refrigerating separately if you expect longer storage, then glaze right before serving.
Freezer Instructions: You can freeze the cheesecake, whole or in slices, for up to 2 months. Wrap tightly in plastic wrap, then foil, and place in a freezer-safe bag. Thaw overnight in the fridge before serving. If you’re freezing with glaze, freeze without glaze and add it after thawing for best appearance and texture.
Glaze Timing Advice: If you know you’ll be freezing, hold off on the glaze and apply fresh after thawing. If you’re refrigerating, you can glaze a day ahead—but for the sharpest shine, glaze just before serving.
These tips have kept my Sugar Cookie Cheesecake tasting as bright and creamy as day one. A little planning goes a long way, and the payoff is always worth it: a crowd-pleasing dessert that tastes like a hug in a slice.
Frequently Asked Questions
Final Thoughts
If you’ve been on the hunt for a dessert that tastes like a warm hug but doesn’t demand hours of kitchen time, this Sugar Cookie Cheesecake is for you. The crust carries the friendly flavor of soft sugar cookies, while the filling stays luxuriously creamy and lightly tangy—enough to feel special without being heavy. It’s a recipe I’ve tested with friends during late-night kitchen chats and family gatherings that end with everyone leaning over the last slice. It’s not just about the taste; it’s about the experience—the way the kitchen fills with vanilla, butter, and a hint of lemon, the way a simple glaze makes the top glow, and the way the first bite invites a chorus of “mmm”s that never get old. If you’re new to this, start with the basic version and then play with glaze flavors or berry toppings. I’d love to hear your tweaks and which variations your crew loves most. Happy baking!
Sugar Cookie Cheesecake
Ingredients
Main Ingredients
- 3 cup Cream cheese Softened
- 1 cup Granulated sugar
- 0.5 cup Sour cream Full-fat
- 3 count Large eggs
- 2 teaspoon Vanilla extract
- 2 cup Sugar cookie crumbs For crust
- 4 tablespoon Unsalted butter, melted
Instructions
Preparation Steps
- Preheat the oven to 325 degrees Fahrenheit. Lightly grease a 9-inch springform pan and set aside.
- In a bowl, combine the 2 cups of sugar cookie crumbs with the melted butter until the mixture resembles wet sand. Press firmly into the bottom of the prepared pan to form an even crust. Bake crust for 8 minutes, then cool.
- With a stand mixer, beat the softened cream cheese and 1 cup sugar on medium speed until smooth and creamy, about 2 minutes. Scrape the bowl as needed.
- Add sour cream and vanilla extract; mix on medium speed until combined. Add eggs one at a time, mixing on low speed after each addition until just combined. Do not overmix.
- Pour the filling onto the cooled crust. Bake for 60 to 70 minutes, or until the center barely jiggles. Turn off the oven and crack the door; let the cheesecake cool in the oven for 1 hour, then refrigerate for at least 4 hours or overnight.
- Serve chilled, optionally with a dusting of cookie crumbs or fresh berries.