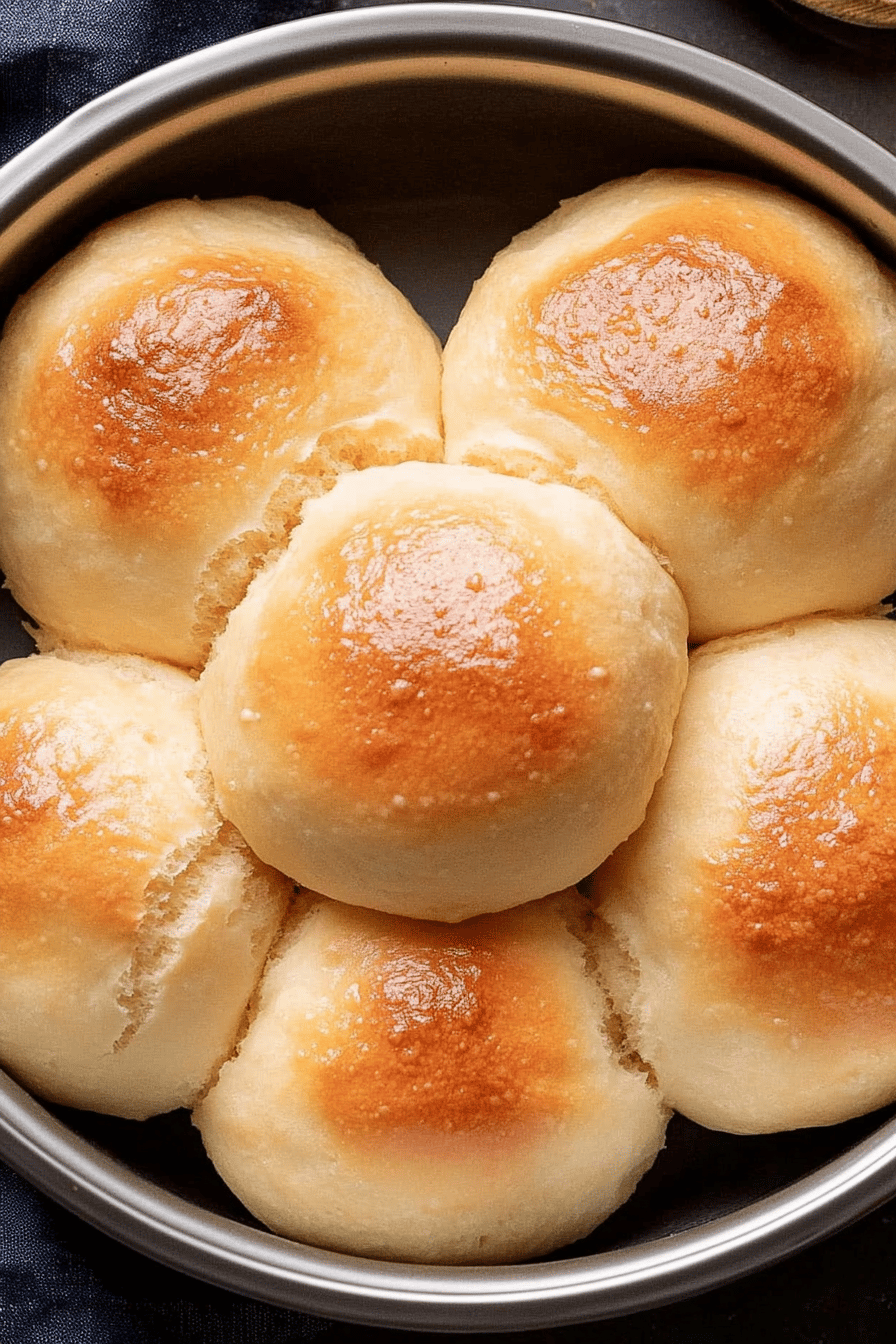
There’s something about pulling a tray of warm, golden dinner rolls fresh from the oven that just feels like coming home. I remember my grandmother’s kitchen filling with that irresistible yeasty smell—like a cozy hug during the cold months. These dinner rolls? They’re the kind that vanish before you can say “pass the butter.” Seriously, I’ve lost count of how many times I’ve tried to save a few for later, only to find the whole batch gone by dinnertime. They beat out even my go-to garlic knots for softness and that perfect pillow-y crumb. Whether you’re hosting a holiday feast or just want a simple side to jazz up the dinner table, these rolls will quickly become your new favorite. Plus, they’re surprisingly easy to whip up, even on a busy weeknight when you don’t want to spend hours fiddling with dough. Stick around—I’m about to share my all-time beloved recipe and all my secret tips!
What is dinner roll?
Think of dinner rolls as the humble heroes of the bread world. They’re essentially small, soft, individual-sized yeast breads that make every meal feel a little more special. The name says it all—they’re perfect for dinner but honestly, I’ve found them sneaking their way into breakfasts and lunchboxes too. The beauty is in their simplicity and versatility. Originating as a staple side in many cultures, these rolls can be fluffy and light or dense and chewy, depending on your preference. The ones I’m sharing are the former: light enough to melt in your mouth but sturdy enough to hold butter without falling apart. If you’ve enjoyed classic homemade bread but shy away from long, complicated recipes, these dinner rolls hit that sweet spot between simple prep and total yum.
Why you’ll love this recipe?
What I love most about this dinner rolls recipe is how reliably fluffy and tender it turns out—every. single. time. The flavor is lightly sweet with a buttery undertone that just begs for a swipe of jam or honey. Beyond taste, the simplicity of the ingredients and steps means you don’t have to be a baking pro; trust me, I learned this the hard way after a few rock-hard batches! There’s nothing complicated about the process, but the end result feels so impressive whenever I bring them out at family meals. And talk about budget-friendly—flour, yeast, some sugar and butter, maybe a splash of milk, and you’re good to go. These rolls are also insanely versatile: you can turn them into sliders for a casual party or just serve as-is alongside soup or salad. I even threw a batch together last minute when friends dropped by, and they disappeared in minutes. If you like recipes like homemade biscuits or soft pretzels, this one fits right in that cozy, comforting category but with its own unique soft crumb. It’s a crowd-pleaser and a total kitchen lifesaver.
How do I make dinner rolls?
Quick Overview
Making these dinner rolls is all about simple steps done well—activating your yeast just right, a gentle knead to develop that perfect texture, and letting the dough rest until it’s puffed up with promise. The magic is in the rise, and the patience pays off when you pull those golden beauties from the oven. No fancy tools or weird ingredients; just straightforward baking that fits into your usual rhythm. I always do this on a weekend morning so I can enjoy the smell and warmth all day, but it’s equally doable when you need fresh rolls in less than two hours.
Ingredients
For the Main Batter:
- 3 cups all-purpose flour (I recommend spooning it into your measuring cup rather than scooping directly—prevents packing for lighter rolls)
- 2 ¼ teaspoons active dry yeast (one packet, fresh and bubbly is best!)
- 1 cup warm milk (not hot—around 110°F is perfect to wake the yeast without killing it)
- 3 tablespoons unsalted butter, softened (plus extra for brushing—this stuff is magic!)
- 2 tablespoons granulated sugar (balances the yeast with a subtle sweetness)
- 1 teaspoon salt (don’t skip—salt helps with flavor and dough strength!)
For the Glaze:
- 2 tablespoons unsalted butter, melted (brushed on while warm for that irresistible shine and richness)
- Optional: a pinch of garlic powder or herb mix to jazz up the glaze
Step-by-Step Instructions
Step 1: Preheat & Prep Pan
Set your oven to 375°F (190°C) and line a 9×13-inch baking pan with parchment paper or lightly grease it. I usually just smudge a bit of butter around so the rolls don’t stick, but parchment is a lifesaver for cleanup. This step gets your space ready while the dough starts its magic.
Step 2: Mix Dry Ingredients
In a large mixing bowl, combine flour, yeast, sugar, and salt. Give it a gentle whisk to evenly distribute everything. I always make sure the yeast and salt aren’t sitting directly next to each other for too long because salt can kill yeast if it’s right on top.
Step 3: Mix Wet Ingredients
Warm your milk until it feels pleasantly warm but not hot. Add in the softened butter and stir to start melting it gently. The warmth helps activate the yeast and starts softening the butter for that buttery crumb. I often test milk temp on my wrist—if it feels comfortable, you’re good!
Step 4: Combine
Pour the wet mixture into the dry ingredients and stir with a wooden spoon or your hand until a sticky dough forms. Don’t fret if it looks a little rough—this dough isn’t stiff. You’ll knead it next, and it’s normal for it to be slightly tacky here.
Step 5: Knead the Dough
Turn the dough out onto a lightly floured surface and knead for about 7-8 minutes. The first couple of minutes will feel sticky, but as the gluten develops, it smooths out. I like using a little flour on my hands rather than adding too much to the dough itself, so it stays soft. When it’s elastic and springs back when poked, you’re done.
Step 6: First Rise
Lightly oil a clean bowl and place the dough inside, turning once to coat with oil. Cover it with a damp kitchen towel or plastic wrap. Let it rise in a warm, draft-free spot until it doubles in size—this usually takes about 1 to 1.5 hours. The smell during this stage is just heavenly.
Step 7: Shape Rolls
Once doubled, punch down the dough gently to release the trapped air. Divide it into 12 equal pieces for nice, shareable rolls—I find using a kitchen scale really helps keep sizes consistent. Shape each piece into a smooth ball by pulling the edges underneath and pinching the seams. Place them in your prepared pan, slightly touching but not squished.
Step 8: Second Rise
Cover the pan again and let the rolls rise for another 30-40 minutes until puffy and nearly doubled. This rise is vital for that melt-in-your-mouth softness.
Step 9: Bake
Pop the pan into your preheated oven and bake for 18-22 minutes. Look for a golden top and a light crust. If you tap gently, it should sound hollow underneath. Ovens vary, so start checking around 18 minutes to avoid overbaking.
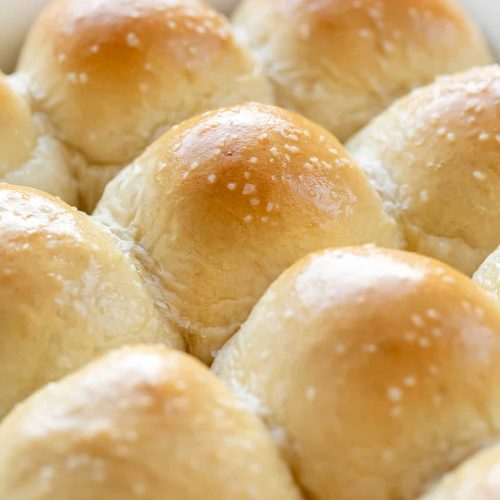
Step 10: Cool & Glaze
Right when they come out of the oven, brush generously with melted butter. The rolls absorb it beautifully, giving you that irresistible tender, shiny finish. Let them cool a few minutes before serving—they’re perfect warm, but honestly, I sometimes sneak one hot off the pan before the butter soaks in.
Step 11: Slice & Serve
These dinner rolls are best served fresh and warm. Use a serrated knife for clean cuts if you want to split them open without squashing. Serve alongside your favorite soups, roasts, or just slathered with good-quality butter and a sprinkle of sea salt.
What to Serve It With
For Breakfast: These rolls are dreamy toasted with a smear of homemade jam and a rich, dark coffee. I like pairing them with scrambled eggs and bacon on lazy weekend mornings—my kids ask for these every time.
For Brunch: Dress them up with a bowl of whipped ricotta and fresh fruit on the side, plus a mimosa or herbal tea. I’ve found little herb-infused butters also elevate the flavor and add a lovely elegance without fuss.
As Dessert: Give them a cinnamon sugar glaze or dip warm rolls into melted chocolate and a dollop of whipped cream for a simple yet indulgent treat that everyone remembers.
For Cozy Snacks: They’re unbeatable fresh out of the oven with a slice of sharp cheddar or a dab of honey butter while curled up by the fire. It’s my go-to when the evening chill sets in and I want a bite that feels like a comfort hug.
Top Tips for Perfecting Your Dinner Rolls
Yeast Activation: Never add yeast to hot liquids—too hot and it dies, too cold and it won’t activate. I learned this the first time when rolls just didn’t rise a bit.
Kneading: Don’t rush! Under-kneading gives you dense rolls, but over-kneading makes the crumb too tight. The dough should feel a bit tacky but not stick to your hands or the counter.
Rolling Technique: When shaping the balls, pulling the dough edges under helps create that classic smooth top and prevents cracking during the rise.
Rising Environment: If your kitchen is cold, try warming your oven to 200°F for 2 minutes, turn it off, then let the covered dough rise inside. It’s a game changer on chilly days.
Ingredient Swaps: I’ve tried swapping milk for almond milk and it made the rolls even creamier. You can also use half whole wheat flour for a nuttier flavor, but reduce the amount by ¼ cup to keep them soft.
Baking: Position your pan in the center rack for even heat. If the tops brown too quickly, tent lightly with foil during the last 5 minutes.
Glaze Variations: Try brushing with honey mixed with butter for a touch of sweetness, or garlic butter for a savory twist that’s perfect with soup or stew.
Storing and Reheating Tips
Room Temperature: Store cooled dinner rolls in an airtight container or ziplock bag for up to 2 days. Avoid refrigeration if you want to preserve softness—fridge air tends to dry them out.
Refrigerator Storage: If you need to keep them longer, wrap tightly in plastic wrap and place in an airtight container. They’ll last up to 5 days but reheat gently to avoid toughness.
Freezer Instructions: Wrap individual rolls or the whole batch in plastic wrap and then foil, freeze for up to 3 months. Thaw overnight at room temp, then warm in a 350°F oven for about 10 minutes for best results.
Glaze Timing Advice: For storage, I usually glaze freshly baked rolls. If freezing, skip glazing until reheating so you get that fresh buttery finish every time.
Frequently Asked Questions
Final Thoughts
These dinner rolls have been my kitchen companion for years—the kind I turn to when I want a little comfort baked into every bite. There’s something about that warm, fluffy roll that instantly lifts the spirit and brings loved ones closer around the table. Whether you’re pairing them with dinner, turning them into sliders, or just sneaking a warm one with butter for a snack, I promise you’ll be coming back to this recipe again and again. If you try this recipe, don’t be shy—leave a comment or share your spin on it. I’d love to hear how your rolls turned out or what you paired them with! Happy baking and here’s to many cozy meals ahead!
dinner rolls
Ingredients
Main Ingredients
- 4 cups all-purpose flour divided, plus more if needed
- 0.5 tablespoons rapid rise yeast about 4 ½ teaspoons or 2 envelopes
- 0.25 cup granulated sugar
- 1 large egg room temperature
- 1 teaspoon kosher salt
- 1.5 cups whole milk
- 2 tablespoons salted butter melted
- 1 teaspoon kosher salt optional, for sprinkling on top
Instructions
Preparation Steps
- In a stand mixer bowl with dough hook, combine 3 cups flour, yeast, sugar, egg, and 1 teaspoon salt.
- Heat milk until it reaches 110°F to 120°F (warm to touch).
- Add warm milk to the flour mixture and knead for 2 minutes at medium speed, scraping sides as needed.
- Add 0.5 cup more flour and knead for 2 more minutes.
- Add remaining 0.5 cup flour and knead until dough pulls away from bowl sides, adding more flour if too wet.
- Cover dough with plastic wrap and let rise until doubled in size, about 30 minutes.
- Remove plastic wrap and punch down the dough.
- Spray a 9x13-inch baking dish with nonstick spray.
- Divide dough into 16 equal balls and place in prepared dish. Cover with plastic and let rise again for 30 minutes.
- Preheat oven to 375°F.
- Bake rolls for 16-17 minutes until golden brown.
- Brush warm rolls with melted butter and sprinkle kosher salt on top if desired. Serve warm.