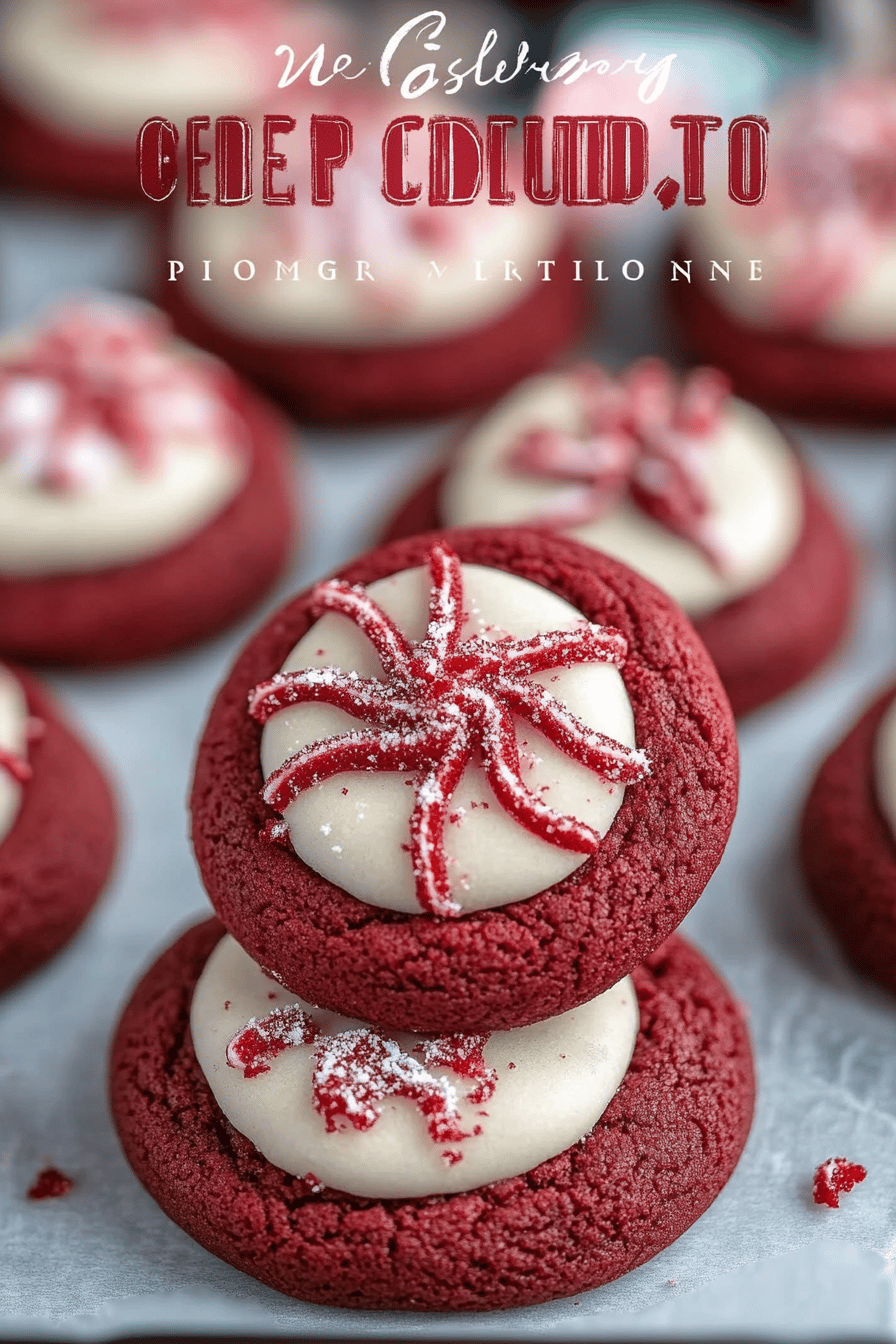
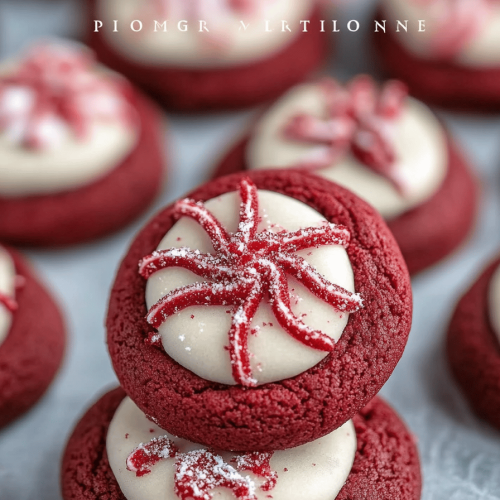
Oh, where do I even begin with these Red Velvet cookies? If you’ve ever had that deep, undeniable craving for something chocolatey, a little bit decadent, but still perfectly cookie-shaped, then this recipe is about to become your new best friend. I remember the first time I baked these; it was a chilly autumn evening, and the smell that wafted from my oven was pure bliss. It wasn’t just the sweet aroma, but that distinct, subtle cocoa scent with a hint of something special. My kids, who are usually pretty discerning critics, came running from their rooms, their eyes wide. “What’s that amazing smell, Mom?” they’d ask. And honestly, that’s when I knew I’d struck gold. These aren’t just any red velvet cookies; they’re little bites of happiness that have a way of making even the most ordinary day feel a bit more festive. They’re like a mini red velvet cake, but in a format that’s perfect for dunking in milk or sharing (if you can resist eating them all yourself, that is!).
What is Red Velvet Cookies?
So, what exactly are we talking about when we say “red velvet cookies”? Think of them as the adorable, bite-sized cousins of the classic red velvet cake. They capture all the essence of that beloved cake – the deep, rich cocoa flavor, that signature beautiful red hue, and often, a hint of tanginess from buttermilk – all rolled up into a perfectly chewy and slightly crisp cookie. The “velvet” part? That comes from the smooth texture, achieved through a careful balance of ingredients that create a tender crumb. And that vibrant red color? It’s usually thanks to a touch of red food coloring, which really amps up the visual appeal, making them stand out on any cookie platter. They’re not overpoweringly sweet, which is something I really appreciate. Instead, they have this lovely, sophisticated chocolate flavor that’s just perfectly complemented by a hint of vanilla and that subtle tang. It’s a flavor profile that’s both comforting and exciting, all at the same time.
Why you’ll love this recipe?
What are some of the reasons why I have a recipe for red velvet cookie in my recipe binder?
- What is the Flavor of a Chicken? Seriously, the taste is divine. It’s that deep, dark chocolate goodness you crave, but with a subtle, almost tangy undertone that makes it so much more interesting than a plain chocolate cookie. The texture is also spot-on: wonderfully chewy in the center with just the slightest crisp around the edges. It’s the kind of cookie that makes you close your eyes and savor each bite.
- Surprisingly Simple to Make: Even if you’re not usually a baker, you can totally nail these. The process is straightforward, and it doesn’t require any fancy techniques. I’ve made these on busy weeknights, and they still turn out beautifully. The clean-up is usually pretty minimal too, which is always a huge win in my book!
- Budget-Friendly and Delicious: Most of the ingredients you’ll need are pantry staples. You probably already have most of them on hand! This makes it a fantastic option when you want a homemade treat without breaking the bank. It’s proof that you don’t need exotic ingredients to make something truly special.
- So Versatile: While they are absolutely sensational on their own, you can totally play around with them. I’ve dipped them in white chocolate, added cream cheese frosting between two cookies (hello, mini red velvet sandwich cookies!), or even just sprinkled them with a little powdered sugar. They’re perfect for holidays, parties, or just a quiet afternoon pick-me-up.
What I love most about these red velvet cookies is that they deliver on all fronts: flavor, ease, and that wonderful feeling of accomplishment when you pull a perfect batch from the oven. They’re a guaranteed crowd-pleaser, and honestly, they just make me happy every time I make them. They remind me a bit of the red velvet cupcakes my grandma used to make, but in a more portable, snackable form. It’s that familiar comfort, but with a fun cookie twist.
How to Make Red Velvet Cookies
Quick Overview
The magic happens in just a few simple steps: you’ll cream together butter and sugar, add in the wet ingredients, whisk together your dry components, combine them gently, then form and bake your beautiful red cookies. It’s a straightforward process that yields incredibly rewarding results. What makes this method so great is how it ensures a tender cookie every single time. We’re not aiming for cakey; we’re aiming for that perfect chew that defines a truly great cookie. Trust me, it’s easier than you think, and the payoff is immense!
Ingredients
For the Main Batter:
Butter: 1 cup (2 sticks) unsalted butter, softened. It’s crucial that your butter is at room temperature, not melted! This helps create that fluffy base for the cookies. I always take mine out of the fridge about an hour before I plan to start baking.
Granulated Sugar: 1 ½ cups. This gives the cookies sweetness and helps them spread. If you like them a touch less sweet, you can reduce this slightly, but I find this is the perfect balance.
brown sugar: ½ cup, packed. The brown sugar is key for that chewy texture and adds a lovely depth of flavor. Light or dark will work just fine.
Eggs: 2 large eggs. Make sure they’re at room temperature too! They bind everything together and contribute to the cookie’s structure.
Vanilla Extract: 2 teaspoons. Good quality vanilla makes a difference! It really enhances all those chocolatey notes.
Red Food Coloring: 1 to 2 tablespoons gel food coloring (or enough to achieve your desired vibrant red hue). Gel coloring is best because it provides intense color without adding too much liquid. Start with a tablespoon and add more if you want it super vivid.
Unsweetened Cocoa Powder: 2 tablespoons. This provides the classic red velvet chocolate flavor. Don’t skip this! I prefer Dutch-processed cocoa for a richer, less bitter taste, but natural works too.
All-Purpose Flour: 2 ½ cups. Spooned and leveled, not scooped! Scooping can pack too much flour, leading to dry cookies.
Baking Soda: 1 teaspoon. This is our leavening agent, helping the cookies puff up just a bit.
Salt: ½ teaspoon. Essential for balancing the sweetness and enhancing all the other flavors.
Buttermilk: 2 tablespoons. This adds a subtle tanginess that is characteristic of red velvet and also contributes to the tender texture. If you don’t have buttermilk, you can make a substitute by mixing 2 tablespoons of milk with ½ teaspoon of white vinegar or lemon juice and letting it sit for 5 minutes.
For the Filling (Optional, but highly recommended!):
Cream Cheese: 4 ounces, softened. For that classic red velvet cream cheese pairing. Make sure it’s really soft to avoid lumps.
Butter: ¼ cup (½ stick) unsalted butter, softened. Again, room temperature is key here.
Powdered Sugar: 2 cups, sifted. Sifting prevents a gritty texture. You might need a little more or less depending on your desired consistency.
Vanilla Extract: 1 teaspoon.
For the Glaze (Optional):
Powdered Sugar: 1 cup, sifted.
Milk or Cream: 1-2 tablespoons. Start with one and add more, a tiny bit at a time, until you reach a drizzle-able consistency.
Step-by-Step Instructions
Step 1: Preheat & Prep Pan
First things first, let’s get your oven ready. Preheat it to 375°F (190°C). While that’s heating up, line your baking sheets with parchment paper. This is a lifesaver for easy cleanup and ensures your cookies don’t stick. You can also use silicone baking mats if you have them!
Step 2: Mix Dry Ingredients
In a medium bowl, whisk together the all-purpose flour, unsweetened cocoa powder, baking soda, and salt. Whisking them together ensures that the leavening agents and salt are evenly distributed, which means your cookies will bake evenly and have the best texture. You want to see no streaks of cocoa or salt.
Step 3: Mix Wet Ingredients
In a large bowl, or the bowl of your stand mixer fitted with the paddle attachment, cream together the softened butter, granulated sugar, and packed brown sugar. Beat this mixture until it’s light and fluffy – this usually takes about 3-5 minutes. This creaming process is super important because it incorporates air into the dough, which helps create a tender cookie. Next, beat in the eggs one at a time, making sure each is fully incorporated before adding the next. Stir in the vanilla extract and the red food coloring until you have a beautifully uniform red batter. Don’t be shy with the food coloring if you want that vibrant look!
Step 4: Combine
Gradually add the dry ingredients to the wet ingredients, mixing on low speed until just combined. Be careful not to overmix here! Overmixing can develop the gluten in the flour too much, resulting in tough cookies. You want to stop as soon as you no longer see streaks of dry flour. Then, gently stir in the buttermilk until it’s just incorporated. The dough will be thick and beautifully colored.
Step 5: Prepare Filling (If Using)
If you’re making sandwich cookies, now’s the time to whip up the filling. In a medium bowl, beat together the softened cream cheese and butter until smooth and creamy. Gradually add the sifted powdered sugar, mixing until fully combined and the frosting is light and fluffy. Stir in the vanilla extract. If it seems too thick, add a tiny bit more milk or cream. If it’s too thin, add a little more powdered sugar. You want a consistency that’s pipeable but not runny.
Step 6: Form & Bake
Drop rounded tablespoons of dough onto your prepared baking sheets, about 2 inches apart. I like to use a cookie scoop for uniform size, which means they bake evenly. For sandwich cookies, you’ll bake them as cookies and then sandwich them later. If you’re making drop cookies, you can press them down slightly with your palm or the bottom of a glass if you prefer a flatter cookie, but I usually leave them as is for a chewier center.
Bake for 9-12 minutes, or until the edges are set and the centers look slightly underbaked. They will continue to set up as they cool. Don’t overbake, or they’ll lose their chewiness!
Step 7: Cool
Let the cookies cool on the baking sheets for about 5 minutes before transferring them to a wire rack to cool completely. This is important! If you try to move them too soon, they might break. Patience is a virtue, especially with warm cookies!
Step 8: Glaze (If Using)
Once the cookies have cooled completely, you can drizzle them with the glaze. Whisk together the sifted powdered sugar and 1 tablespoon of milk or cream until smooth. Add more milk, a teaspoon at a time, until you get a nice drizzling consistency. Drizzle it over the cooled cookies. It hardens slightly, adding a lovely touch.
Step 9: Assemble Sandwich Cookies (If Using Filling)
Once the cookies are totally cool, spread or pipe the cream cheese filling onto the flat side of one cookie and gently press another cookie on top to create a sandwich. These are irresistible!
Step 10: Slice & Serve
These red velvet cookies are best enjoyed when they’ve had a chance to cool completely. Serve them as is, or if you’ve made sandwich cookies, they’re ready to be devoured! They look absolutely stunning on a platter, especially with that pop of red.
What to Serve It With
These red velvet cookies are pretty fantastic all on their own, but they also pair wonderfully with a variety of beverages and occasions. Here are a few of my favorite ways to serve them:
For Breakfast: While not exactly a breakfast food, a single red velvet cookie with a hot cup of coffee is a lovely treat to start the day, especially on a weekend. The slight bitterness of the coffee cuts through the sweetness perfectly. Or, if you’re feeling adventurous, try a cookie with a tall glass of cold milk – pure childhood nostalgia!
For Brunch: They make a beautiful addition to any brunch spread. Imagine a platter of these alongside fresh fruit, pastries, and maybe some mini quiches. They add a fun pop of color and a sweet treat to round off the meal. A glass of sparkling cider or a light mimosa would be a great beverage pairing.
As Dessert: These cookies shine as a dessert. They’re perfect for cookie exchanges, potlucks, or just a treat after dinner. For a more elegant presentation, arrange them on a nice serving plate, perhaps with a dusting of powdered sugar or a few fresh berries on the side.
For Cozy Snacks: Honestly, this is where they truly excel for me. After the kids are in bed, or on a rainy afternoon, a couple of these cookies with a cup of tea or hot chocolate are pure comfort. My family loves them as an after-school snack, and they disappear in minutes!
My personal favorite is a warm red velvet cookie paired with a cold glass of milk. It’s simple, but it hits all the right notes. I also love making them into sandwich cookies; they feel extra special and decadent that way.
Top Tips for Perfecting Your Red Velvet Cookies
Over the years, I’ve learned a few tricks that make these red velvet cookies consistently amazing. Here are my go-to tips:
Food Coloring Wisdom: Gel food coloring is your best friend here. It provides vibrant color without making your dough too wet, which can affect the cookie’s texture. Start with the recommended amount, and if you want an even deeper red, add a little more, but do so gradually. Remember that the color will slightly deepen as the cookies bake and cool.
Don’t Overmix the Dough: This is probably the most important rule for tender cookies. Once you add the flour, mix only until it’s just combined. Overmixing develops gluten, leading to tough, dense cookies instead of soft, chewy ones. Stop as soon as you don’t see dry flour.
The Cream Cheese Filling Factor: For the smoothest, creamiest filling, ensure your cream cheese and butter are truly at room temperature. If they’re cold, you’ll end up with lumps. Sifting the powdered sugar is also non-negotiable if you want that silky texture.
Baking to Perfection: Keep a close eye on your cookies during the last few minutes of baking. The edges should look set, but the centers should still appear slightly soft and underbaked. They will continue to firm up as they cool on the baking sheet, and this is the secret to that perfect chewy texture. Pulling them out just a minute too early is better than pulling them out a minute too late.
Ingredient Swaps: If you’re out of buttermilk, the milk-and-vinegar trick (2 tablespoons milk + ½ teaspoon vinegar, let sit for 5 minutes) works wonders. It provides the necessary acidity for tenderness and flavor. For a slightly different flavor profile, you could experiment with a tiny pinch of cinnamon in the dry ingredients, though I tend to keep these classic!
Cooling is Crucial: Resist the urge to move the cookies from the baking sheet immediately. Let them rest on the hot sheet for about 5 minutes. This allows them to firm up enough to be transferred to a wire rack without breaking. Then, let them cool completely on the wire rack before glazing or making sandwich cookies.
I learned the hard way about overmixing after one batch came out suspiciously tough! And the trick for the buttermilk? That’s a lifesaver for anyone who doesn’t always keep buttermilk on hand. Trust me on these tips; they’ve been trial-tested and approved in my kitchen countless times!
Storing and Reheating Tips
Proper storage is key to keeping these red velvet cookies delicious. Here’s how I manage to keep them tasting fresh:
Room Temperature: Once completely cooled, you can store unfrosted or unglazed cookies in an airtight container at room temperature for up to 3-4 days. If you’ve glazed them, it’s best to let the glaze fully set before storing. For sandwich cookies, they are also best stored at room temperature and are usually at their peak within the first 2 days.
Refrigerator Storage: If your kitchen is particularly warm, or if you’ve made sandwich cookies with cream cheese filling, refrigerating is a good option. Store them in an airtight container in the fridge for up to a week. They might become a bit firmer in the fridge, so you may want to let them come to room temperature for about 15-20 minutes before enjoying them.
Freezer Instructions: These cookies freeze exceptionally well! You can freeze the baked and cooled cookies (plain or glazed, but not filled) for up to 3 months. Wrap them tightly in plastic wrap, then place them in a freezer-safe airtight container or bag. To thaw, simply remove them from the freezer and let them come to room temperature on a wire rack. For the best texture after freezing, I recommend letting them thaw completely.
Glaze Timing Advice: If you plan to freeze cookies that you intend to glaze later, freeze them unglazed. Glaze them *after* they have thawed. If you are making sandwich cookies and want to freeze them, it’s best to freeze the individual cookies and assemble them with the filling after thawing. However, if you want to freeze assembled sandwich cookies, be aware that the cream cheese filling might affect the cookie’s texture over time in the freezer.
I’ve found that storing them in a single layer in an airtight container is best to prevent sticking, especially if they have a glaze or are sandwich cookies. And if they’re not eaten within a few days (which is rare in my house!), freezing is a lifesaver!
Frequently Asked Questions
Final Thoughts
So there you have it – my go-to recipe for red velvet cookies! I truly believe these are some of the best cookies you’ll ever make. They capture that beloved red velvet flavor in a perfectly chewy, delightful cookie form. They’re not overly complicated, they use mostly common ingredients, and the result is always spectacular. They’re a little bit special, a little bit festive, and a whole lot delicious. If you love red velvet cake, you are going to adore these!
I hope you give these red velvet cookies a try. I can’t wait to hear how they turn out for you! If you make them, please leave a comment below and tell me what you think, or share your own tips and variations. Happy baking, and enjoy every delicious bite!
Red Velvet Hugs Cookies
Ingredients
Main Ingredients
- 1 box Red Velvet Cake Mix (any brand)
- 2 large eggs
- 0.5 cup unsalted butter melted or softened
- 30 Hershey’s Kisses unwrapped (use your favorites: Hugs, Almond, Plain, Caramel, Cookies 'n Cream, etc.)
Instructions
Preparation Steps
- Preheat oven to 350°F (175°C). Line cookie sheets with parchment paper or silpat baking mats.
- In a bowl, mix together cake mix, eggs, and butter using a hand mixer or stir by hand until a thick dough forms.
- Scoop 1 tablespoon sized balls of dough onto the prepared cookie sheets. Chill for at least 30 minutes to prevent excessive spreading.
- Bake for about 8-10 minutes, or until the tops just start to crack. It's better to slightly underbake them. Immediately press a Hershey's Kiss onto the top of each warm cookie. Let cool completely.
- Store in an airtight container for up to 3 days, or freeze for up to 1 month.