Oh, you guys. If there’s one dessert that has a permanent, glitter-covered spot in my heart (and on my kitchen counter!), it’s these red velvet cheesecake bars. They’re like a little slice of heaven that’s ridiculously easy to whip up, even on a weeknight when the sweet cravings hit hard. You know those moments? When you *need* something a little bit special, but the thought of baking a whole cake feels like climbing Mount Everest in flip-flops? Yeah, these are your savior. They’re the perfect marriage of rich, fudgy red velvet and creamy, dreamy cheesecake, all swirled together in a bite-sized bar that disappears faster than you can say “more, please!” Forget the fuss of traditional cheesecakes; these red velvet cheesecake bars are here to make your life a whole lot sweeter and a lot less complicated.
What is Red Velvet Cheesecake?
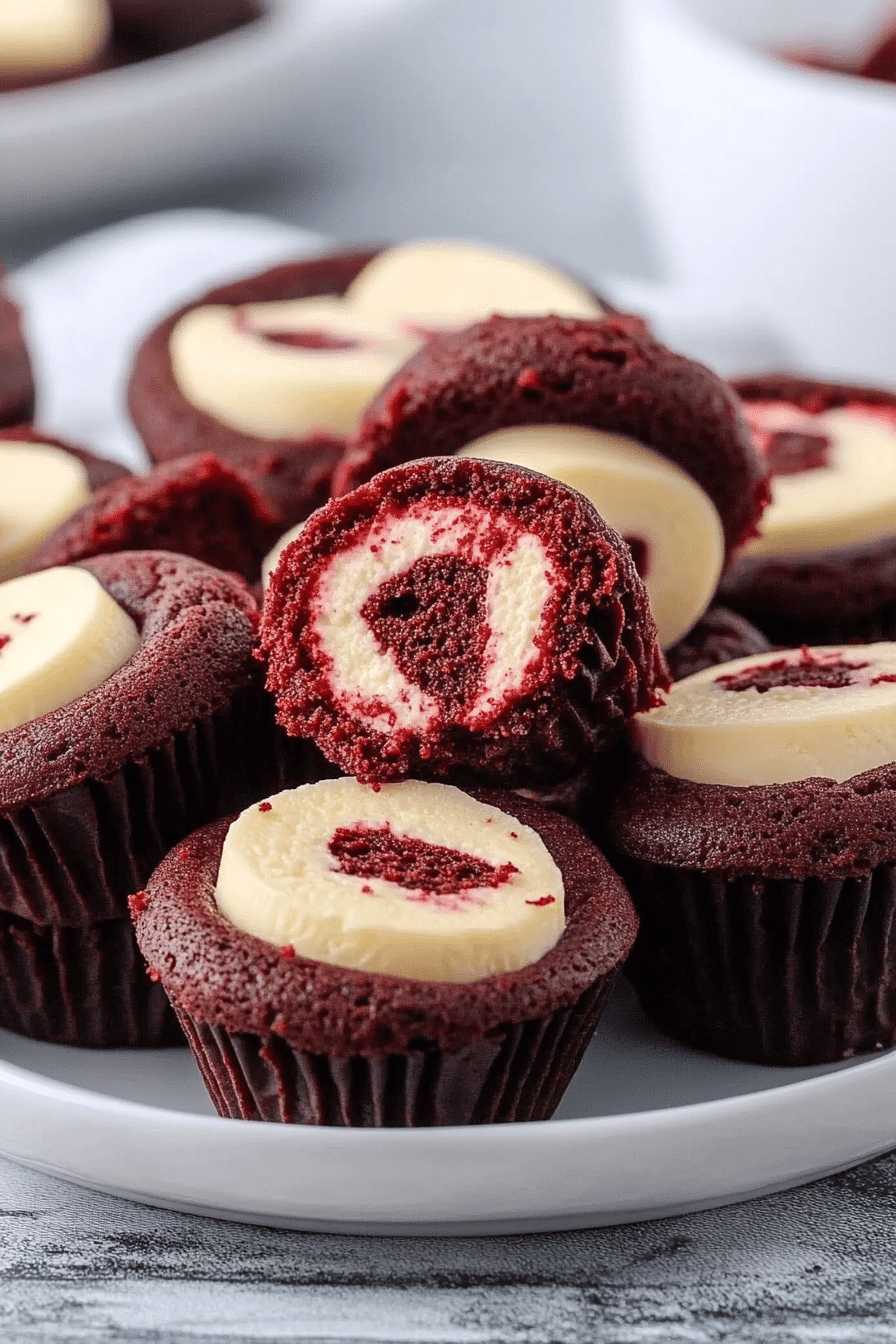
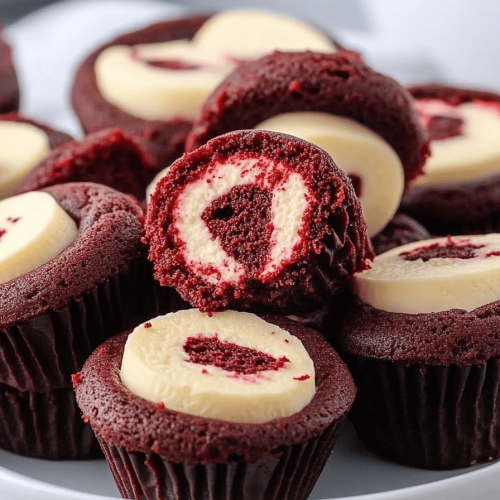
So, what exactly are we talking about here? Think of these Red Velvet cheesecake bars as the ultimate mashup of two beloved desserts. We’ve taken the classic, vibrant red velvet cake – that slightly chocolatey, subtly tangy flavor profile we all adore – and combined it with a smooth, luscious cheesecake filling. It’s not a cake, and it’s not a cheesecake, exactly. It’s a beautiful, harmonious blend that’s baked in a pan and then sliced into convenient bars. The “red velvet” comes from the characteristic red hue, often achieved with a touch of cocoa powder and food coloring, and a hint of vinegar that adds to its unique flavor. The cheesecake part is that creamy, tangy, melt-in-your-mouth goodness that balances the richness of the red velvet. It’s essentially all the best parts of both desserts, presented in a way that’s utterly irresistible and super approachable for any home baker.
Why you’ll love this recipe?
Honestly, where do I even begin with why this recipe is a total winner? First off, the flavor. It’s just *chef’s kiss*. You get that distinct red velvet taste – a subtle chocolatey depth with that signature tang – paired with the cool, creamy cheesecake. It’s a flavor combination that just works, and it’s incredibly satisfying. And the texture? Oh my goodness. You’ve got the slightly dense, moist red velvet cake base and that silky smooth cheesecake topping. When they come together, it’s pure magic. Then there’s the sheer simplicity of it all. Unlike a traditional cheesecake that can be finicky and requires a water bath (which, let’s be real, can be intimidating!), these bars are straightforward. You mix, swirl, bake, and voilà! You’ve got a stunning dessert. Plus, they’re surprisingly budget-friendly. Most of the ingredients are pantry staples, so you don’t need to break the bank to make something truly special. I also love how versatile they are. They’re perfect for a potluck, a birthday party, a holiday gathering, or even just an afternoon treat with a cup of coffee. They’re much easier to transport and serve than a whole cake, and everyone always loves a bar! What I personally love most about these red velvet Cheesecake Bars is that they feel indulgent and celebratory without demanding hours in the kitchen. They’re a lifesaver when you want to impress without the stress.
How do I make Red Velvet Cheesecake Bars?
Quick Overview
Making these red velvet cheesecake bars is a joyfully simple process. We’ll start by preparing a simple red velvet cake batter, then whip up a luscious cheesecake filling. The magic happens when we swirl these two together before baking them to perfection. The result is a stunning, marbled treat that’s way easier than it looks! It’s the perfect dessert for when you want maximum flavor with minimum fuss. You’ll be amazed at how quickly this comes together, and the results are always spectacular.
Ingredients
For the Main Batter:
You’ll need all-purpose flour, granulated sugar, unsweetened cocoa powder (Dutch-processed gives a deeper color and flavor, but natural works too!), baking soda, salt, buttermilk (it’s key for that tender texture and tang!), vegetable oil (or another neutral oil like canola), eggs, vanilla extract, and a touch of red food coloring. A little white vinegar also helps activate the baking soda and gives that classic red velvet tang. Don’t skip the buttermilk; it makes a world of difference in the texture. If you don’t have buttermilk, you can make a substitute by adding a tablespoon of white vinegar or lemon juice to regular milk and letting it sit for about 5 minutes.
For the Filling:
This is pure, creamy bliss. You’ll need cream cheese (make sure it’s softened to room temperature – this is crucial for a smooth filling!), granulated sugar, an egg, and vanilla extract. That’s it! Some people like to add a touch of lemon juice for extra tang, but I find the cream cheese alone gives us plenty. The key is to ensure your cream cheese is truly soft so you don’t end up with lumps.
For the Glaze:
This is optional but highly recommended for that extra layer of deliciousness! You can make a simple powdered sugar glaze by whisking together powdered sugar with a little milk or cream and a splash of vanilla extract. You can also add a drop of red food coloring if you want to enhance the red theme. For a richer glaze, a cream cheese frosting would be divine, or even just a dusting of powdered sugar is lovely.
Step-by-Step Instructions
Step 1: Preheat & Prep Pan
First things first, get your oven preheating to 350°F (175°C). Grab an 8×8 or 9×9 inch baking pan. I like to line mine with parchment paper, leaving a little overhang on the sides. This makes lifting the bars out so much easier once they’re baked and cooled. Just grease the pan lightly first, then lay in the parchment paper, pressing it into the corners. That little bit of extra paper is your best friend when it comes to serving!
Step 2: Mix Dry Ingredients
In a medium bowl, whisk together the all-purpose flour, granulated sugar, cocoa powder, baking soda, and salt. Whisking them together now ensures everything is evenly distributed, which is super important for a uniform cake texture. You don’t want pockets of unmixed baking soda or cocoa!
Step 3: Mix Wet Ingredients
In a separate large bowl, whisk together the softened butter (if using, some recipes use oil, I find butter gives it a richer flavor), granulated sugar, eggs, vanilla extract, buttermilk, vegetable oil (if using), red food coloring, and white vinegar. Whisk until everything is well combined and the color is vibrant. This is where the magic starts to happen color-wise!
Step 4: Combine
Now, it’s time to bring it all together. Gradually add the dry ingredients to the wet ingredients, mixing on low speed (or by hand) just until *barely* combined. Seriously, do not overmix! Overmixing can lead to tough bars, and we want them tender and moist. A few little streaks of flour are okay; they’ll disappear as you fold.
Step 5: Prepare Filling
In a separate bowl, beat the softened cream cheese and granulated sugar together until smooth and creamy. This is best done with an electric mixer, but you can do it by hand if you’re feeling strong! Beat in the egg and vanilla extract until just combined. Again, don’t overmix here; we just want it smooth and cohesive.
Step 6: Layer & Swirl
Pour about two-thirds of the red velvet batter into your prepared pan. Dollop spoonfuls of the cheesecake filling over the batter. Then, dollop the remaining red velvet batter over the cheesecake filling. Now for the fun part: grab a knife or a skewer and gently swirl the batters together. You don’t want to completely mix them; just create beautiful marbled patterns. Don’t overdo the swirling, or you’ll lose the distinct layers. Think elegant swirls, not mud pie!
Step 7: Bake
Bake in the preheated oven for 30-40 minutes. You’ll know they’re done when the cheesecake is set and the edges of the red velvet cake are firm. A toothpick inserted into the center should come out with moist crumbs attached, not wet batter. Be careful not to overbake, as this can make them dry.
Step 8: Cool & Glaze
Let the bars cool completely in the pan on a wire rack. This is crucial! If you try to cut them while they’re warm, they’ll fall apart. Once completely cool, you can prepare your glaze. Whisk together powdered sugar, a tablespoon or two of milk, and a dash of vanilla until you reach your desired drizzling consistency. Drizzle it over the cooled bars. Let the glaze set for a bit before slicing.
Step 9: Slice & Serve
Once the glaze has set, use the parchment paper overhangs to lift the entire slab out of the pan. Place it on a cutting board and slice into bars. I usually aim for about 16 bars from an 8×8 pan. Serve them chilled or at room temperature. They’re fantastic on their own, but even better with a cold glass of milk!
What to Serve It With
These red velvet cheesecake bars are so versatile, they fit into almost any occasion! For a cozy breakfast, I love serving them with a strong cup of coffee. The richness of the bar is a perfect contrast to the bitterness of the coffee, and it feels like such a decadent start to the day. They’re also surprisingly great alongside a fruit salad; the tartness of berries can cut through the sweetness. For brunch, they’re an absolute showstopper. Imagine them alongside a platter of fresh fruit, mini quiches, and some scrambled eggs. They add that touch of elegance and indulgence that makes brunch feel extra special. I usually present them cut neatly on a nice platter. As a dessert, well, they’re just divine on their own! But if you want to go the extra mile, a small scoop of vanilla bean ice cream or a dollop of whipped cream is never a bad idea. For a truly rich experience, consider a raspberry coulis drizzled around the plate. And for those cozy snack times? These bars are perfect for an afternoon pick-me-up with a glass of cold milk, or even as a late-night treat when you need something sweet but don’t want to bake a whole cake. My kids absolutely adore them after school – they disappear in minutes!
Top Tips for Perfecting Your Red Velvet Cheesecake Bars
Over the years of making these bars (and trust me, I’ve made them *a lot*), I’ve picked up a few tricks that make them even better. First, about the red food coloring: I always opt for gel coloring. It gives you a much more vibrant red without adding extra liquid, which can mess with the batter consistency. A little goes a long way! For the cheesecake filling, the biggest tip I can give you is to make sure your cream cheese is *really* softened. I’m talking leave-it-out-on-the-counter-for-at-least-an-hour soft. Cold cream cheese is the number one culprit for lumpy cheesecake, and nobody wants lumpy cheesecake bars! When you’re mixing the batters, remember my mantra: don’t overmix! For the red velvet batter, mixing until just combined is key to tenderness. For the cheesecake, just mix until it’s smooth; overbeating can incorporate too much air, which can lead to cracks when baking (though cracks are less of an issue with bars than a full cheesecake!). When it comes to swirling, less is more. You want distinct ribbons of red velvet and cheesecake, not a muddy mess. Use a skewer or a thin knife and just do a couple of passes. For baking, every oven is a little different. Keep an eye on them towards the end of the baking time. The cheesecake should be set around the edges but might still have a slight wobble in the very center. It will continue to firm up as it cools. If you find your oven tends to bake hot, you can always reduce the temperature slightly or tent the pan loosely with foil halfway through baking. And for the glaze, if it’s too thick, add a tiny bit more milk (like, a teaspoon at a time). If it’s too thin, add more powdered sugar. You’re aiming for a consistency that’s thick enough to coat but thin enough to drizzle easily.
Storing and Reheating Tips
Storing these delicious red velvet cheesecake bars is pretty straightforward, but doing it right ensures they stay as tasty as possible. If you’ve glazed them and they’re fully cooled, you can store them at room temperature for about 24 hours, as long as your kitchen isn’t too warm. Just make sure they’re covered loosely with plastic wrap or a cake dome to keep them from drying out. For longer storage, the refrigerator is your best friend. Wrap the entire pan (or the bars once cut) tightly in plastic wrap, then in foil, or place them in an airtight container. They’ll stay good in the fridge for about 3-4 days. The cheesecake texture is actually even better after a day in the fridge, when the flavors have really melded! If you want to freeze them, which I often do because they’re so good for last-minute treats, wrap them extremely well. Cut them into bars first, then wrap each bar individually in plastic wrap, and then place them in a freezer-safe bag or container. They can last in the freezer for up to 2-3 months. To thaw, take them out of the freezer and let them defrost in the refrigerator overnight. This prevents condensation from making them soggy. If you’ve glazed them, I usually wait to glaze them until *after* they’ve thawed or just before serving if they’re going to be stored at room temperature. A simple dusting of powdered sugar after thawing is also a beautiful alternative!
Frequently Asked Questions
Final Thoughts
So there you have it – my absolute favorite red velvet cheesecake bars! I genuinely hope you give these a try. They’re proof that you can have incredible flavor and a beautiful presentation without spending your entire day in the kitchen. They’re the perfect way to satisfy that sweet craving, whether you’re celebrating something special or just want to make an ordinary Tuesday feel a little bit extraordinary. They’re always a hit at parties, and my family devours them every single time I bake a batch. If you love the idea of red velvet but want something a little more casual than a full cake, these bars are for you. Don’t forget to let me know how yours turn out in the comments below – I’d love to hear about your swirling techniques or any fun variations you try! And if you’re a red velvet fan, you might also want to check out my recipe for [Link to another relevant recipe, e.g., Red Velvet Cookies or Red Velvet Brownies]. Happy baking, my friends!
Red Velvet Cheesecake Bars
Ingredients
Crust
- 1 box red velvet cake mix
- 1 large egg egg
- 0.5 cup unsalted butter, softened (113g)
Cheesecake Filling
- 8 ounces cream cheese, room temperature (226g)
- 1 large egg egg, room temperature
- 0.25 cup granulated sugar (50g)
- 0.25 cup sour cream, room temperature (61g)
- 1 teaspoon vanilla extract
- 0.5 cup mini chocolate chips
Instructions
Preparation Steps
- Preheat oven to 350°F (175°C). Line a 9x13 inch pan with foil and spray with cooking spray.
- In a large bowl, combine the red velvet cake mix, 1 egg, and softened butter. Mix until a thick cookie dough forms. Press this mixture evenly into the bottom of the prepared pan.
- In a separate bowl, beat the cream cheese until smooth. Add the granulated sugar and beat until smooth. Mix in the second egg, sour cream, and vanilla extract until no lumps remain. Gently stir in the mini chocolate chips.
- Pour the cheesecake filling evenly over the red velvet crust. Bake for 30-40 minutes, or until the edges are set and the center is still slightly jiggly. The cheesecake will continue to set as it cools.
- Let the bars cool completely to room temperature, then chill in the refrigerator for at least 4 hours, or preferably overnight, before slicing into bars.