What is comfort food? I’m talking about that craving you get on a Sunday morning, that desire for something warm, sweet, and good. I’m very indulgent. If you’re anything like me, you have probably reached for the basic pancake mix more times than you reach for this recipe. What if I told you that you could take that pancake game to a whole new level? Think about the classic, but imagine swirling in creamy, dreamy Peanut Butter, making every bite a dream. What is a little piece of heaven? What are peanut butter pancakes? Is peanut butter a good substitute for rice? What are some of the best pancakes ever? They disappear in minutes at my house, and I can’t wait for you to try them.
What is peanut butter pancakes?
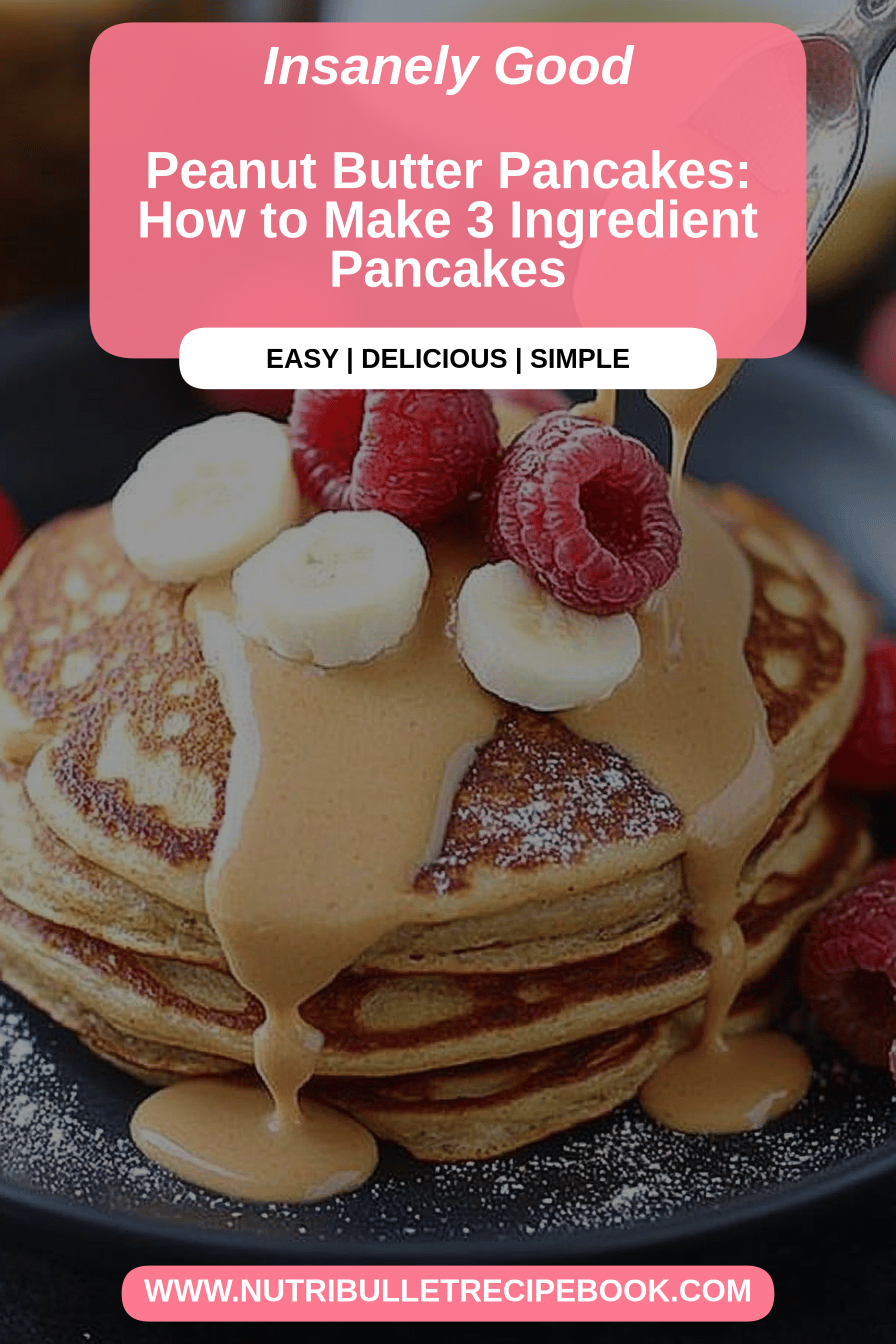
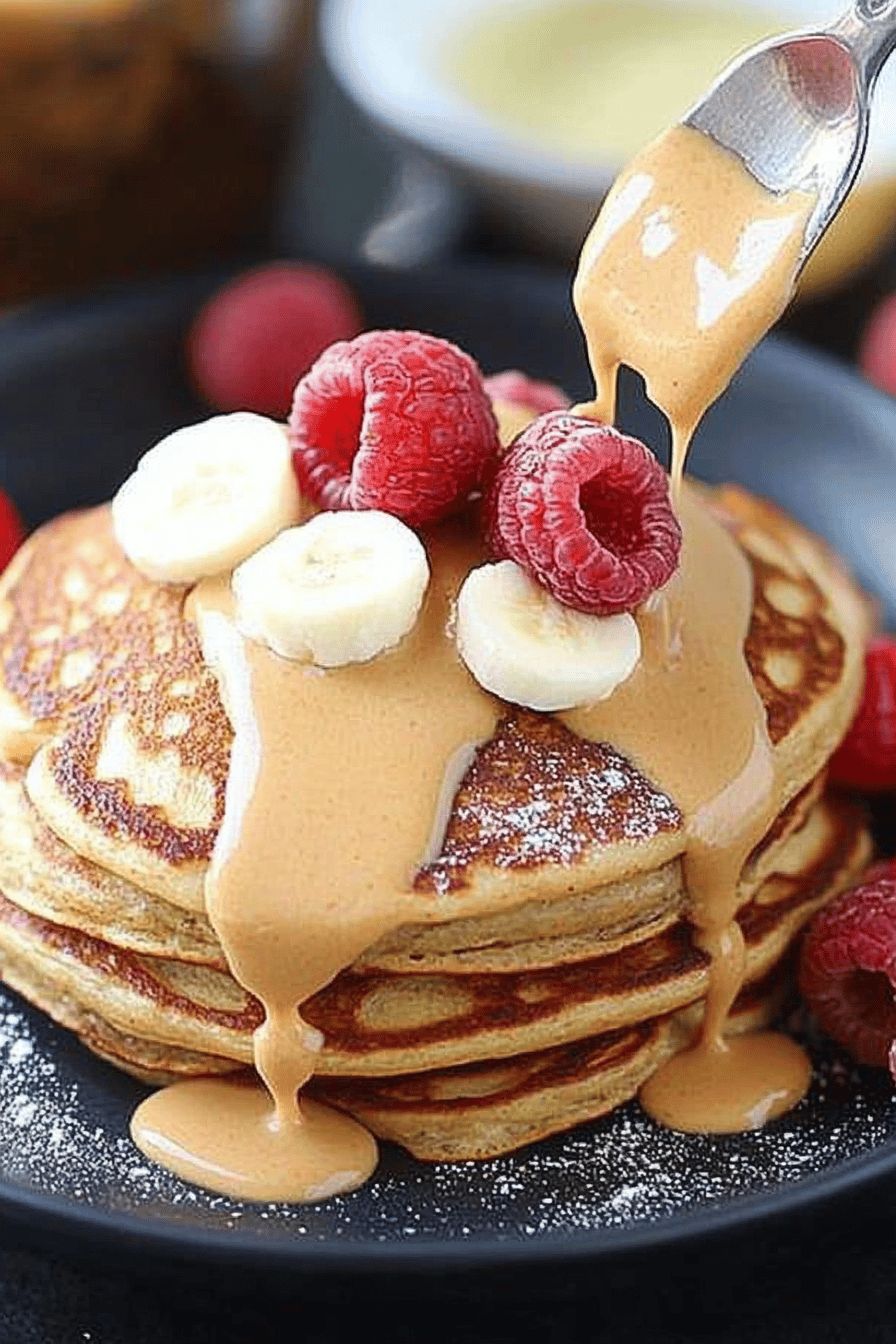
What is Peanut Butter pancake? What are your favorite fluffy pancakes? Think of it as a regular pancake batter infused with peanut butter right into the mix, and then topped with whipped cream. Isn’t that crazy? What’s better, peanut butter swirled with it for that extra indulgent experience? Is it like taking a bite of PB&J but in pancake form? The peanut butter adds a subtle nutty flavor and creates an extra moist and tender texture. Can you use any kind of peanut butter you like? What is the smoothest swirl and the most decadent flavor? What is a good breakfast recipe for kids?
Why you’ll love this recipe?
Oh, where do I even start? This recipe is a total game-changer. What I love most is how easy it is. You probably already have most of the ingredients in your pantry, and the whole thing comes together in under 30 minutes. No complicated steps or fancy equipment needed. Just a simple batter, a swirl of Peanut Butter, and boom – you’ve got the best peanut butter pancakes ever.
- Flavor:Is it the taste? What is the best combination of peanut butter and fluffy pancakes? Is it addictive? Is peanut butter overpowering pancakes?
- Simplicity:I’m not a master chef, but anyone can make these. I mean you can. How do I make this recipe? The steps are straightforward and the ingredients are easy to find. I need something quick and satisfying in the morning. This one is a lifesaver.
- Cost-What are pantry staples? What are some good alternatives to flour, sugar, eggs, milk, and peanut butter? What are some of the best ways to enjoy breakfast without spending a lot of money?
- Versatility: These peanut butter pancakes are amazing on their own, but you can totally customize them to your liking. Add chocolate chips, banana slices, or a drizzle of honey. You can even experiment with different types of peanut butter or add a sprinkle of sea salt for a sweet-and-salty kick. They are the perfect breakfast with a protein smoothie or some fresh fruit.
I used to make plain pancakes all the time, but once I tried this recipe, there was no going back. It’s like the grown-up version of my childhood favorite, and it always brings a smile to my face.
How do I make peanut butter pancakes?
Quick Overview
Making these peanut butter pancakes is surprisingly simple. You’ll start by whisking together your dry ingredients, then mixing in the wet ingredients. The secret is to not overmix – a few lumps are totally fine! Then, you’ll swirl in some creamy peanut butter into the batter and cook them up on a lightly greased griddle or pan. Seriously, it’s much easier than you think, and the end result is totally worth it. They are so easy that the kids love to help me in the kitchen.
Ingredients
For the Main Batter: What are some examples?
• 1 1/2 cups all-purpose flour: I always use unbleached for a cleaner taste, but either works!
• 3 1/2 teaspoons baking powder: Make sure it’s fresh for the fluffiest pancakes.
• 1/4 teaspoon salt: Just a pinch to balance the sweetness.
• 1 tablespoon granulated sugar: You can use brown sugar too for a slightly caramel-y flavor.
• 1 1/4 cups milk: I’ve tested this with almond milk and it actually made it even creamier!
• 1 egg: Large, and preferably room temperature.
• 3 tablespoons melted butter: Adds richness and helps with browning. You can also use melted coconut oil for a dairy-free option.
What is better with vanilla extract?
For the Peanut Butter Swirl: What is the recipe?
• 1/2 cup creamy peanut butter: Use your favorite brand! I always go with a natural peanut butter with no added sugar.
• 2 tablespoons milk: To thin out the peanut butter for easier swirling.
Step-by-Step Instructions
Step 1: Preheat & Prep Pan
First, preheat your griddle or large frying pan to medium heat (around 350°F or 175°C). Lightly grease it with butter or cooking spray to prevent sticking. I find that using a non-stick pan makes all the difference.
Step 2: Mix Dry Ingredients
In a large bowl, whisk together the flour, baking powder, salt, and sugar. Make sure there are no clumps. This step is important because it evenly distributes the baking powder, which is what makes the pancakes rise and get fluffy.
Step 3: Mix Wet Ingredients
In a separate bowl, whisk together the milk, egg, melted butter, and vanilla extract. The key here is to make sure your butter isn’t too hot, or it might cook the egg. You want everything to be well combined but not overly frothy.
Step 4: Combine
Pour the wet ingredients into the dry ingredients and gently stir until just combined. Don’t overmix! A few lumps are totally okay, and actually desirable. Overmixing develops the gluten in the flour, which can result in tough pancakes.
Step 5: Prepare Peanut Butter Swirl
In a small bowl, combine the creamy peanut butter and milk. Stir until smooth and slightly runny. If the peanut butter is too thick, add a little more milk until you reach the desired consistency. I always do this in the microwave to melt the peanut butter just a tiny bit.
Step 6: Layer & Swirl
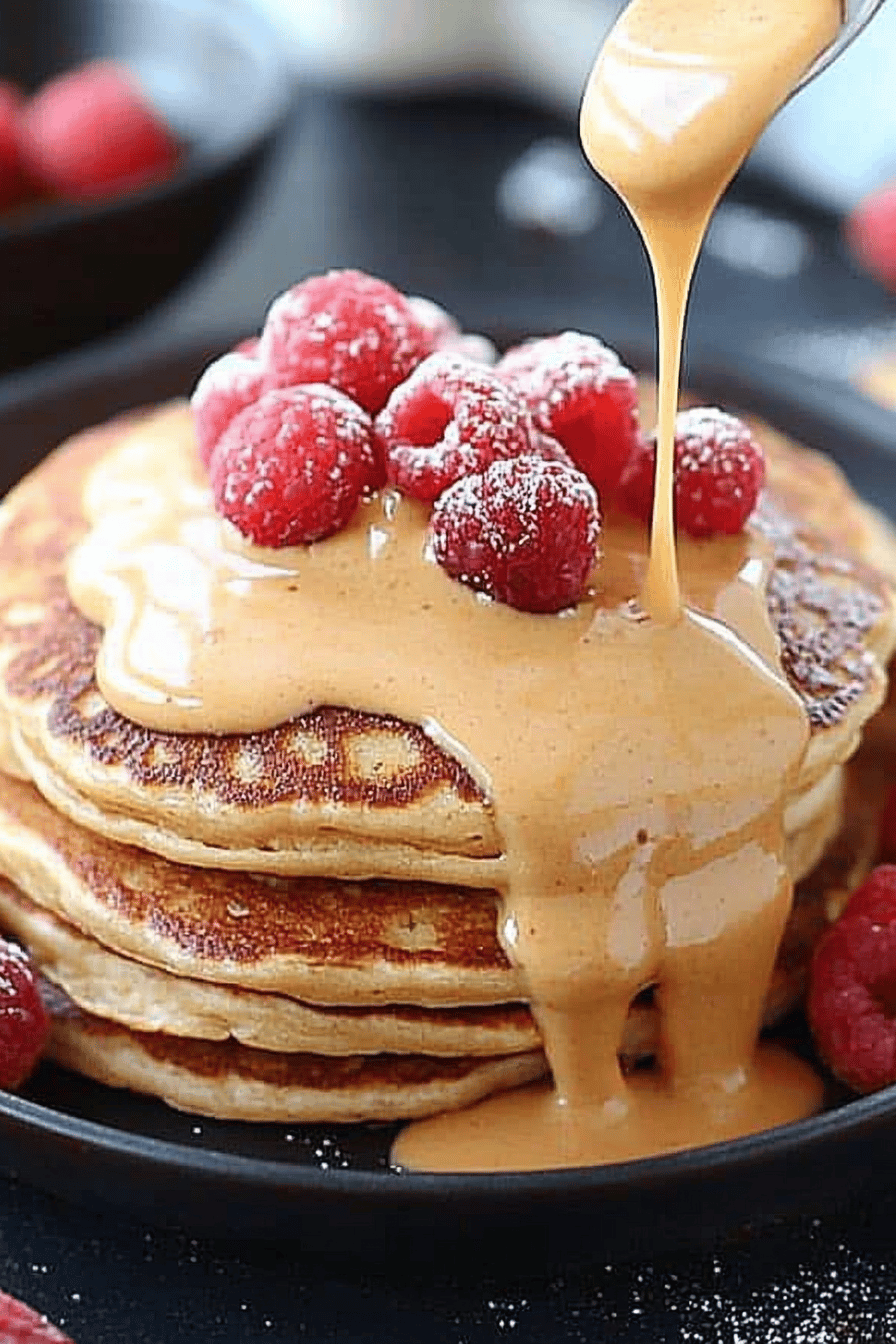
Pour 1/4 cup of batter onto the preheated griddle for each pancake. Immediately drizzle a spoonful of the peanut butter mixture over each pancake. Use a knife or toothpick to create a swirl pattern. I like to drag the knife in a circular motion for a pretty marbled effect.
Step 7: Cook
Cook the pancakes for 2-3 minutes per side, or until golden brown and cooked through. Flip them when bubbles start to form on the surface and the edges look set. Be careful not to burn them!
Step 8: Cool & Glaze
Transfer the cooked pancakes to a plate and let them cool slightly before adding any glaze or toppings. This prevents the toppings from melting too quickly.
Step 9: Slice & Serve
Serve the peanut butter pancakes warm with your favorite toppings, such as maple syrup, chocolate chips, or more peanut butter. I love adding a sprinkle of chopped peanuts for extra crunch.
What should I serve it with?
These peanut butter pancakes are pretty amazing on their own, but they can be even better with the right accompaniments. Here are a few ideas to get you started:
For Breakfast: Serve with a side of crispy bacon or sausage for a savory contrast. A cup of strong coffee or a latte is the perfect way to wash it all down. I sometimes add a dollop of whipped cream and a sprinkle of cinnamon for a fancy breakfast treat.
For Brunch: Dress them up with a drizzle of chocolate syrup, a handful of fresh berries, and a dusting of powdered sugar. A mimosa or a bellini would be a delicious brunch beverage pairing.
As Dessert: Warm the pancakes slightly and top with a scoop of vanilla ice cream, a drizzle of hot fudge sauce, and a sprinkle of chopped peanuts. Serve with a glass of cold milk or a cup of hot cocoa.
For Cozy Snacks: Enjoy them plain with a glass of milk or a cup of tea. They’re perfect for a cozy afternoon snack or a late-night craving. My kids ask for this all the time, especially on rainy days!
My family loves to drizzle a little honey over them. We also sometimes add sliced bananas or a sprinkle of chocolate chips. It really elevates the dish!
Top Tips for Perfecting Your Peanut Butter Pancakes
Over the years, I’ve learned a few tricks that can help you make the best peanut butter pancakes ever. Here are my top tips:
Mixing Advice: Be careful not to overmix the batter. Overmixing develops the gluten in the flour, which can result in tough pancakes. Mix until just combined, and don’t worry about a few lumps. Trust me on this one!
Swirl Customization: Get creative with your swirls! You can use a toothpick, a knife, or even a chopstick to create different patterns. Experiment with different colors and textures for a visually appealing result.
Ingredient Swaps: Feel free to substitute ingredients to suit your dietary needs or preferences. You can use gluten-free flour, dairy-free milk, or sugar-free sweeteners. Just keep in mind that the texture and flavor might be slightly different. I tried using coconut flour once, and the pancakes were a bit too dense.
Baking Tips: Use a preheated griddle or frying pan for even cooking. Cook the pancakes over medium heat to prevent burning. Flip them when bubbles start to form on the surface and the edges look set.
Glaze Variations: Get creative with your glaze! You can add different flavors, colors, and textures. Try adding a squeeze of lemon juice, a pinch of cinnamon, or a dash of vanilla extract. You can also use different types of sweeteners, such as honey or maple syrup.
Peanut Butter Quality: The quality of your peanut butter matters! Opt for natural peanut butter with no added sugar or preservatives. It tastes better and is better for you! I always look for peanut butter that’s just peanuts and salt.
These tips have helped me countless times, and they never fail!
Storing and Reheating Tips
If you happen to have any leftover peanut butter pancakes (which is rare in my house!), here’s how to store and reheat them:
Room Temperature: You can store cooked pancakes at room temperature for up to 2 hours. Just make sure to cover them to prevent them from drying out.
Refrigerator Storage: Store them in an airtight container in the refrigerator for up to 3 days. To prevent them from sticking together, place a piece of parchment paper between each pancake. This is perfect when you’re craving something sweet at 10pm but don’t want to bake a whole cake.
Freezer Instructions: For longer storage, you can freeze the pancakes. Wrap each pancake individually in plastic wrap and then place them in a freezer-safe bag or container. They can be stored in the freezer for up to 2 months. When ready to eat, thaw them in the refrigerator overnight or reheat them directly from frozen.
Reheating: You can reheat the pancakes in the microwave, in a toaster, or in a skillet. If using a microwave, heat them for 30-60 seconds. If using a toaster, toast them on a low setting. If using a skillet, heat them over medium heat until warmed through.
I always reheat mine in the toaster – it makes them nice and crispy!
Frequently Asked Questions
Final Thoughts
So, there you have it – my secret to the best peanut butter pancakes ever! This recipe is a total winner because it’s easy, delicious, and totally customizable. It’s perfect for a lazy weekend breakfast, a special occasion, or just a random Tuesday morning when you need a little pick-me-up. If you love this recipe, you might also enjoy my chocolate chip pancakes or my banana pancakes. Both are equally delicious and easy to make!
I really hope you try this recipe and love it as much as my family does. Don’t forget to leave a comment below and let me know how yours turn out! Happy baking!
Peanut butter pancakes
Ingredients
Main Ingredients
- 1 cup All-purpose flour
- 2 tablespoons Sugar
- 2 teaspoons Baking powder
- 0.5 teaspoon Salt
- 1 cup Milk
- 1 Egg
- 0.5 cup Peanut butter
Instructions
Preparation Steps
- In a large bowl, whisk together flour, sugar, baking powder, and salt.
- In a separate bowl, whisk together milk, egg, and peanut butter.
- Pour the wet ingredients into the dry ingredients and stir until just combined.
- Heat a lightly oiled griddle or frying pan over medium heat.
- Pour 1/4 cup of batter onto the hot griddle for each pancake.
- Cook for 2-3 minutes per side, or until golden brown.