You know those days? The ones where a craving hits you like a lightning bolt, a deep-seated need for something sweet, something comforting, something… peanut buttery? Yeah, I have those days way more often than I’d like to admit. And when that familiar pull takes hold, there’s one recipe that always answers the call: my ridiculously easy, utterly delicious peanut butter dessert bars. Forget complicated cakes or fussy cookies; these bars are my secret weapon. They’re the kind of treat that smells like pure happiness baking in the oven, filling the whole house with that irresistible aroma. Honestly, they’re way better than your average brownie, and I say that with the utmost respect for brownies! If you’ve ever loved a no-bake peanut butter bar but wished it had a little more substance, or a baked good that wasn’t a major production, then you are in for a treat. These are the peanut butter dessert bars you’ll be making on repeat.
What is peanut butter dessert bar?
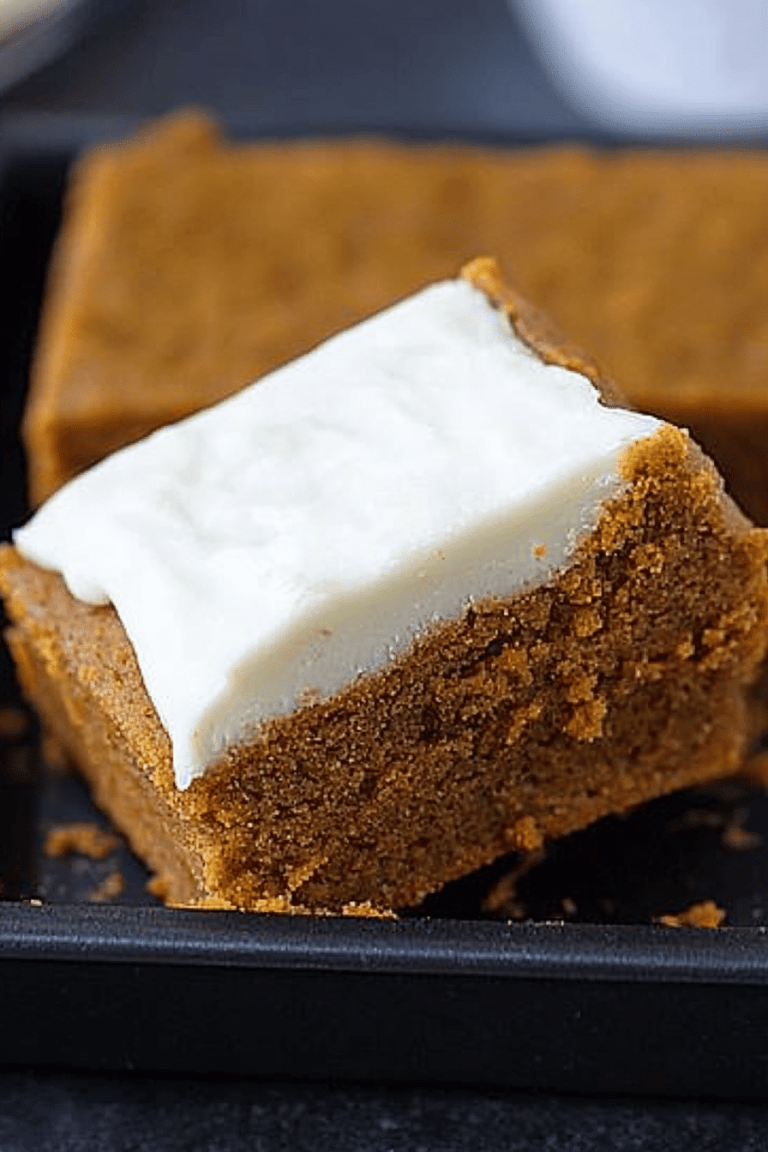
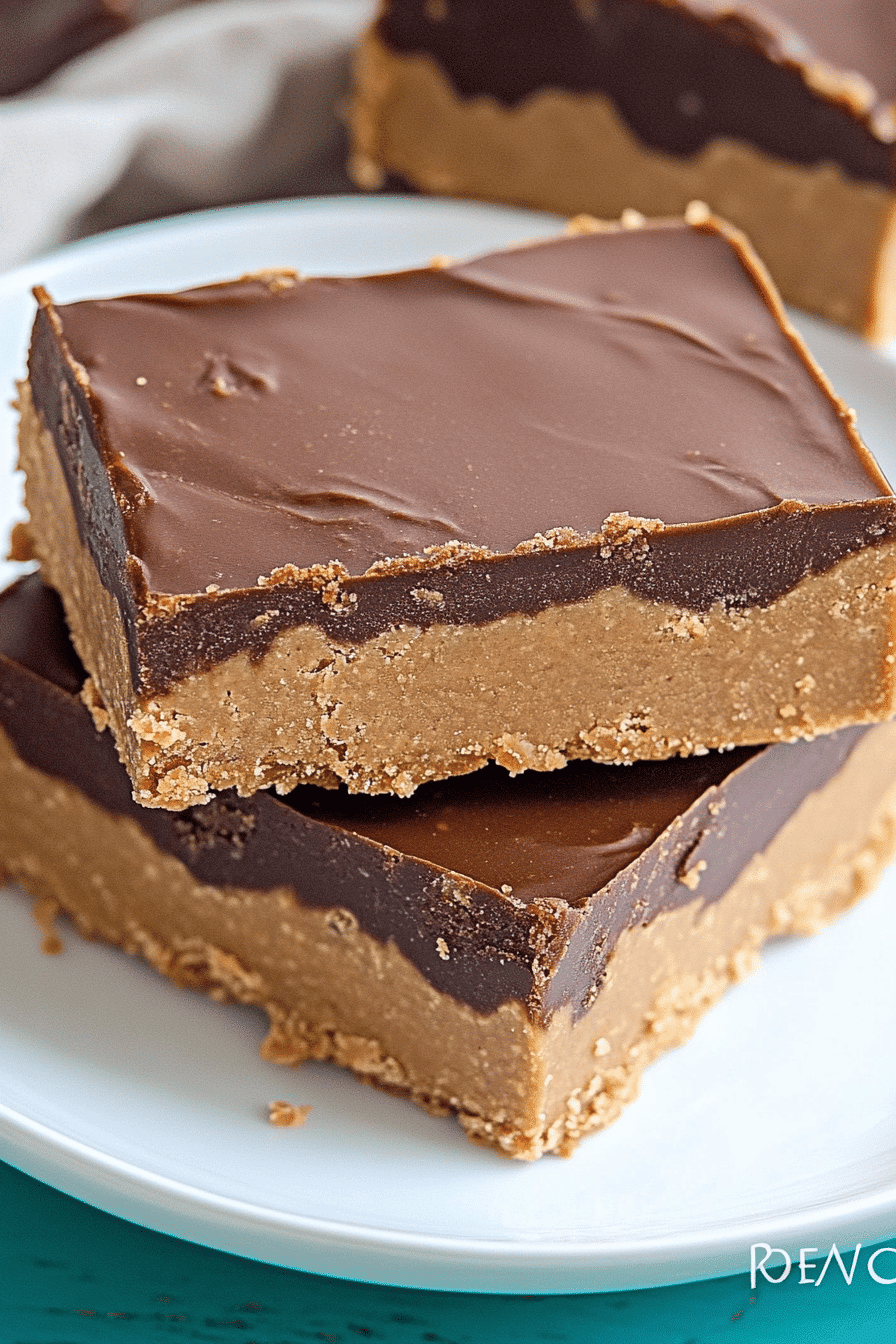
So, what exactly are these magical peanut butter dessert bars? Think of them as the ultimate crowd-pleaser, a harmonious blend of a rich, tender cake base and a decadent, creamy peanut butter swirl, all topped off with a drizzle of sweet, glossy glaze. It’s like a deconstructed peanut butter cup meets a blondie, but somehow even more satisfying. The name itself is pretty straightforward, right? It’s a bar, it’s meant for dessert, and it’s bursting with peanut butter flavor. But the magic is in the texture – a slightly dense, chewy base that’s not too cakey, not too fudgy, just perfectly right. The peanut butter swirl isn’t just dumped on top; it’s integrated in a way that gives you pockets of intense peanut butter goodness in every single bite. They’re not overly sweet, which I really appreciate, letting the nutty, savory notes of the peanut butter shine through. It’s essentially a hug in bar form, and that’s a concept I can always get behind.
Why you’ll love this recipe?
Where do I even begin with why you’ll absolutely adore these Peanut Butter dessert bars? First off, the flavor is just out of this world. It’s that perfect balance of sweet and salty, creamy and slightly crumbly. The peanut butter isn’t just a whisper; it’s a full-on declaration of deliciousness, especially with that gooey, molten swirl right in the middle. And let’s talk about simplicity, because who has time for complicated baking these days? This recipe is surprisingly straightforward. You’ll mix up a few things, layer them, bake, and voila! It’s one of those recipes that feels fancy but is secretly a breeze to whip up, making it a lifesaver on busy weeknights or when unexpected guests pop by. Plus, it’s wonderfully cost-effective. Most of the ingredients are pantry staples, making it an affordable indulgence. And the versatility? Oh, it’s incredibly versatile. You can play with the type of peanut butter, add chocolate chips, or even a sprinkle of flaky sea salt on top. It’s way more forgiving than a delicate cake. Honestly, what I love most about these peanut butter dessert bars is that they hit that sweet spot perfectly. They’re not so decadent that you feel guilty after one slice, but they’re definitely satisfying enough to curb any serious sweet tooth. They’re like the happy medium of dessert perfection, and that’s why they’ve earned a permanent spot in my recipe rotation.
How do I make peanut butter dessert bars?
Quick Overview
Making these incredible Peanut Butter dessert bars is surprisingly simple, and that’s part of their charm! You’ll basically mix up a tender batter, dollop a rich peanut butter mixture on top, swirl it all together for that beautiful marbling, and bake until golden. The whole process from start to finish, including baking time, takes under an hour, and much of that is hands-off oven time. It’s a foolproof method that guarantees delicious results, even if you’re not a seasoned baker. The key is not overmixing, which we’ll get into, but honestly, it’s pretty hard to mess these up.
Ingredients
For the Main Batter:
1 and 1/2 cups all-purpose flour: I always use unbleached all-purpose flour for the best texture. It just seems to bake up a little lighter.
1 teaspoon baking powder: This gives the bars just enough lift without making them too cakey.
1/2 teaspoon salt: Crucial for balancing the sweetness and enhancing that Peanut Butter flavor.
1 cup (2 sticks) unsalted butter, softened: Make sure your butter is truly softened, not melted! It should give slightly when you press it. This is key for a tender bar.
1 cup granulated sugar: For sweetness and structure.
1/4 cup packed light brown sugar: Adds a lovely hint of caramel depth and moisture.
2 large eggs: At room temperature, if possible, for better incorporation.
1 teaspoon vanilla extract: The backbone of most sweet baked goods, don’t skip it!
1/2 cup milk: Whole milk is my preference for richness, but any milk will work in a pinch. I’ve even tested this with almond milk and it actually made it even creamier!
For the Filling:
1 cup creamy peanut butter: Use your favorite brand! Natural peanut butter can sometimes be a bit oily, so give it a good stir before measuring.
1/4 cup packed light brown sugar: To sweeten the peanut butter swirl.
2 tablespoons unsalted butter, melted: Helps create that smooth, luscious texture.
1/2 teaspoon vanilla extract: To amp up the peanut butter flavor.
For the Glaze:
1 cup powdered sugar: For that perfectly smooth, sweet glaze. Sift it if you’re worried about lumps.
2-3 tablespoons milk: Start with 2 and add more as needed to reach your desired drizzling consistency.
1/2 teaspoon vanilla extract: Just a little bit to make the glaze extra yummy.
Step-by-Step Instructions
Step 1: Preheat & Prep Pan
First things first, let’s get that oven nice and toasty. Preheat your oven to 350°F (175°C). Now, grab an 8×8 inch baking pan. I like to line mine with parchment paper, leaving some overhang on the sides. This makes lifting the baked bars out so much easier later on, preventing any stuck-on messes. Just spray a little cooking spray or butter the pan, lay your parchment in, and press it down. Easy peasy!
Step 2: Mix Dry Ingredients
In a medium bowl, whisk together your flour, baking powder, and salt. Give it a good whisk for about 30 seconds to make sure everything is evenly distributed. This step might seem small, but it ensures that your leavening agent and salt are spread throughout the flour, leading to a more consistent bake. Nobody wants a bite that’s too salty or a bit flat!
Step 3: Mix Wet Ingredients
In a large bowl, beat the softened butter and both sugars together until light and fluffy. This usually takes about 2-3 minutes with an electric mixer. You want it to look pale and creamy. Then, beat in the eggs one at a time, mixing well after each addition. Finally, stir in the vanilla extract and the milk until just combined. Don’t overmix at this stage; we’re just bringing everything together.
Step 4: Combine
Now, it’s time to bring those wet and dry ingredients together. Gradually add the dry ingredients to the wet ingredients, mixing on low speed (or by hand) until just combined. Seriously, just until you don’t see any streaks of flour left. Overmixing at this point can develop the gluten too much, leading to tough bars. A few little lumps are totally fine!
Step 5: Prepare Filling
While your main batter is chilling for a moment, let’s whip up that irresistible peanut butter filling. In a separate small bowl, combine the creamy peanut butter, brown sugar, melted butter, and vanilla extract. Stir it all together until it’s smooth and well combined. It should be thick but spreadable. This is where that pure peanut butter magic starts!
Step 6: Layer & Swirl
Spoon about two-thirds of the main batter into your prepared baking pan and spread it out evenly. Don’t worry if it’s not perfectly smooth; it will bake up fine. Now, dollop spoonfuls of the peanut butter filling mixture all over the top of the batter. Don’t be shy! Then, take the remaining one-third of the main batter and drizzle it over the peanut butter filling. Use a knife or a skewer to gently swirl the layers together. You’re not trying to mix them completely, just create beautiful ribbons and pockets of peanut butter goodness. A few gentle swirls are all you need!
Step 7: Bake
Pop that pan into your preheated oven and bake for 25-30 minutes. You’ll know they’re done when the edges are golden brown and a toothpick inserted into the center comes out with moist crumbs attached, but no wet batter. Keep an eye on them towards the end, as ovens can vary. I usually start checking around the 23-minute mark.
Step 8: Cool & Glaze
Once they’re baked to perfection, remove the pan from the oven and let them cool completely in the pan on a wire rack. This is important! Trying to glaze them while they’re hot will just make the glaze melt and run off. Once they are completely cooled, whisk together the powdered sugar, 2 tablespoons of milk, and vanilla extract until smooth for the glaze. If it’s too thick, add a little more milk, a teaspoon at a time, until you reach a nice drizzling consistency. Drizzle the glaze all over the cooled bars.
Step 9: Slice & Serve
Once the glaze has set a bit (this usually takes about 15-20 minutes), you can lift the bars out of the pan using the parchment paper overhang. Place them on a cutting board and slice them into your desired bar size. I usually get about 9 or 12 bars from an 8×8 pan. For the cleanest cuts, you can even warm your knife slightly under hot water and wipe it dry between slices. Serve them at room temperature and enjoy the pure bliss!
What to Serve It With
These peanut butter dessert bars are so wonderfully versatile, they fit into almost any occasion! For breakfast, I love pairing a small square with a strong cup of coffee. The richness of the bar cuts through the bitterness of the coffee beautifully, and it feels like a little weekend treat even on a Tuesday. For a more leisurely brunch spread, these bars are fantastic alongside some fresh fruit salad and perhaps some yogurt parfaits. They add a lovely, comforting element without being too heavy. As a dessert, they’re obviously a winner. I often serve them with a tiny scoop of vanilla bean ice cream or a dollop of whipped cream. The contrast in temperature and texture is divine! For those cozy, late-night cravings or a casual afternoon snack, they are absolutely perfect on their own. My kids ask for these all the time when they’re looking for a “special snack,” and I usually have a batch ready to go. Honestly, the best pairing is usually a tall glass of cold milk – it’s a classic for a reason, and these bars make it even better. You can also never go wrong with a sprinkle of flaky sea salt on top just before serving, especially if you’ve used unsalted peanut butter.
Top Tips for Perfecting Your Peanut Butter Dessert Bars
I’ve made these peanut butter dessert bars so many times, and through those countless batches, I’ve picked up a few tricks that I swear by to make them absolutely perfect every single time. First, when it comes to your peanut butter for the swirl, using a standard creamy peanut butter (like Jif or Skippy) works beautifully and gives you that classic, smooth texture. If you opt for natural peanut butter, make sure it’s really well-stirred, as the oil separation can sometimes affect the consistency of the swirl. Also, don’t overwork your batter once you combine the wet and dry ingredients. Just mix until it’s *just* combined. A few little lumps are better than a tough bar! I learned this the hard way after a batch that was a bit chewy in the wrong way.
For that beautiful swirl effect, don’t go overboard with the swirling. Think gentle strokes with a knife or skewer. You want distinct ribbons of peanut butter, not a muddy mess. Aim for about 5-7 gentle passes through the batter. When it comes to baking, ovens can be finicky. Keep an eye on your bars. The edges should look set and slightly golden, and a toothpick should come out with moist crumbs. If you notice the top browning too quickly before the inside is done, you can always loosely tent the pan with aluminum foil for the last few minutes of baking. And for the glaze, consistency is key. You want it thin enough to drizzle easily but thick enough to set nicely. If it’s too thick, add milk a teaspoon at a time. If it’s too thin, whisk in a little more powdered sugar. My personal favorite variation is adding a tablespoon of melted dark chocolate to the swirl mixture – it’s pure decadence! Or, if you’re a chocolate lover, a few chocolate chips mixed into the main batter before spreading can be a delightful addition. Trust me, these little adjustments make all the difference!
Storing and Reheating Tips
One of the best things about these peanut butter dessert bars is how well they keep! If you happen to have any leftovers (which is rare in my house!), you can store them at room temperature in an airtight container for up to 3 days. They stay wonderfully soft and delicious. If you plan to keep them for longer, or if your kitchen is particularly warm, the refrigerator is your best bet. Store them in an airtight container in the fridge for up to a week. They’ll firm up a bit in the cold, but they’re still super tasty. I actually prefer them slightly chilled sometimes! When you’re ready to enjoy them from the fridge, you can either let them sit out for about 20-30 minutes to come back to room temperature, or you can gently reheat them in the microwave for about 10-15 seconds per bar – just enough to soften them up again. They freeze beautifully, too! Wrap individual bars tightly in plastic wrap, then place them in a freezer-safe bag or container for up to 2 months. Thaw them overnight in the refrigerator, then bring them to room temperature before serving. For the glaze, I generally recommend adding it just before serving if you plan to freeze the bars, or once they’ve cooled and are ready to be stored at room temperature or in the fridge. If you glaze them before freezing, the glaze might soften a bit too much upon thawing, although it’s still perfectly edible!
Frequently Asked Questions
Final Thoughts
So there you have it – my absolute favorite peanut butter dessert bars. I truly hope you give these a try because they’re more than just a recipe to me; they’re a little slice of comfort and happiness that’s easy enough for anyone to make. They’re proof that you don’t need a lot of fuss to create something truly spectacular. The way the peanut butter and sweet batter come together in every bite is just pure bliss. If you love these bars, you might also enjoy my chewy chocolate chip cookies or my easy no-bake oatmeal cookies for more simple, satisfying treats. I can’t wait to hear what you think! If you make them, please leave a comment below and tell me how they turned out, or share your own favorite variations. Happy baking, and I hope these peanut butter dessert bars bring as much joy to your kitchen as they do to mine!
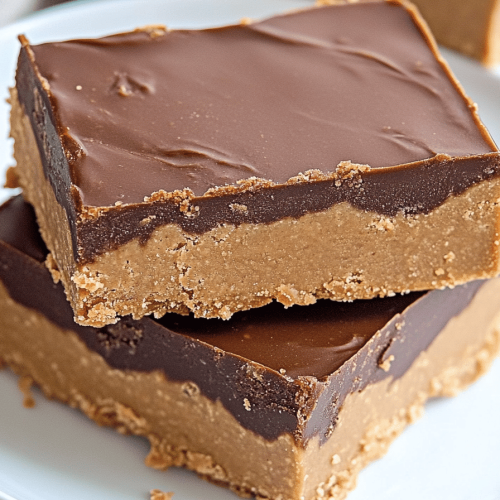
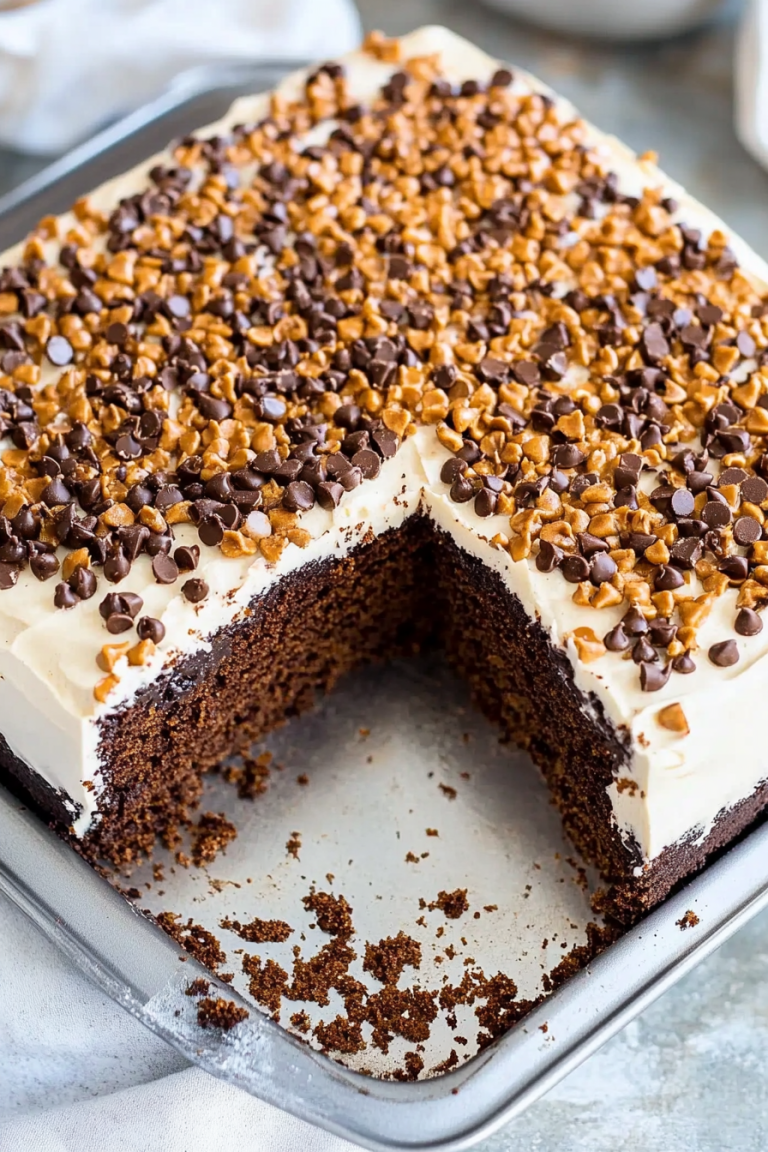
Peanut butter dessert bars
Ingredients
Cookie Base
- 2 cups all-purpose flour
- 2 cups quick oats
- 1 teaspoon baking soda
- 0.25 teaspoon salt
- 1 cup unsalted butter, softened
- 1.25 cups packed light-brown sugar
- 0.75 cup granulated sugar
- 2 large eggs
- 1 cup creamy peanut butter
- 1 teaspoon vanilla extract
Peanut Butter Layer
- 1 cup creamy peanut butter
Chocolate Frosting
- 0.5 cup unsalted butter, diced
- 0.25 cup unsweetened cocoa powder
- 0.25 cup milk
- 2 pinches salt
- 1 teaspoon vanilla extract
- 3 cups powdered sugar
Instructions
Preparation Steps
- Preheat oven to 350 degrees F (175 degrees C). Spray a rimmed 18 by 13-inch baking sheet with non-stick cooking spray.
- In a mixing bowl, whisk together the flour, oats, baking soda, and salt. Set aside.
- In the bowl of an electric stand mixer fitted with the paddle attachment, blend together the butter, brown sugar, and granulated sugar until creamy.
- Mix in the eggs one at a time. Then blend in 1 cup of peanut butter and the vanilla extract.
- Add the flour mixture and mix just until combined.
- Drop spoonfuls of cookie dough onto the prepared baking sheet. Spray your hands with non-stick cooking spray and spread the dough into an even layer.
- Bake in the preheated oven for 13-15 minutes, or until golden brown.
- Remove from the oven and let cool for 5 minutes. Then, dollop the remaining 1 cup of peanut butter by spoonfuls over the top. Let sit for 1 minute, then spread the peanut butter into an even layer to cover the top.
- Melt the butter in a medium saucepan over medium heat. Stir in the cocoa powder, milk, and salt, and bring the mixture just to a boil.
- Remove from heat and whisk in the vanilla extract. Then, stir in the powdered sugar and mix until well combined. If needed, you can add 1 tablespoon of hot water to thin the frosting.
- Immediately pour the frosting over the bars and spread into an even layer. Allow the frosting to set, then cut into squares. Store in an airtight container.