You know those nights? The ones where you’re absolutely craving something sweet, something decadent, something that tastes like a warm hug but you *really* don’t have the energy to whip up a full-blown cake from scratch? Yeah, I have those nights *all the time*. And that’s precisely why this peanut butter cup dump Cake Recipe is my absolute go-to. It’s the dessert equivalent of a cozy blanket and a good book – pure comfort, zero fuss. My family devours it, and honestly, it’s so ridiculously simple that I’m almost embarrassed to share it. Almost. It reminds me a little bit of those classic chocolate cakes we all grew up with, but with that irresistible peanut butter cup twist that makes it feel extra special. It’s the kind of magic you can pull off even if your baking skills are… let’s say, ‘developing’.
What is a peanut butter cupcake dump cake?
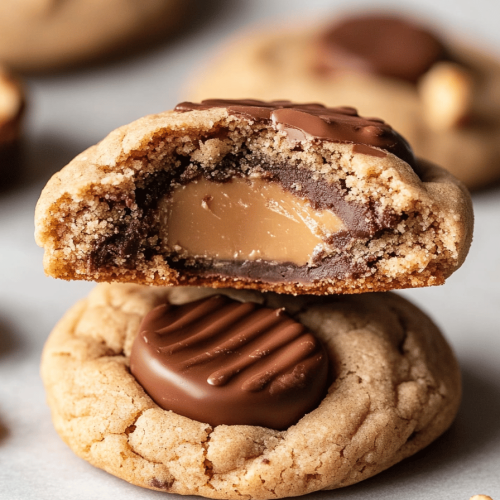
So, what exactly is this magical peanut butter cup dump cake? Well, the name kind of says it all, doesn’t it? It’s a “dump cake” because the majority of the ingredients get unceremoniously dumped right into the baking pan. No fancy creaming of butter and sugar, no meticulous layering (well, not much anyway!), just pure, unadulterated deliciousness coming together with minimal effort. It’s essentially a chocolate cake base, swirled generously with peanut butter and chunks of peanut butter cups, all topped with a buttery streusel-like topping that bakes into a golden crust. Think of it as a deconstructed, supereasy, incredibly forgiving Chocolate Peanut Butter cake that bakes up into a glorious, gooey, chocolate-peanut butter dream. It’s the perfect marriage of chocolate, peanut butter, and cake, all without the usual baking drama.
Why you’ll love this recipe?
Honestly, the list is pretty long, but if I had to pick the top reasons, it would be these: First and foremost, the flavor is just out of this world. You get that deep, rich chocolate combined with the creamy, salty-sweet goodness of Peanut Butter, all punctuated by those delightful pockets of actual peanut butter cups that melt into gooey perfection. It’s a flavor combination that simply can’t miss. Secondly, and this is a huge one for me, the simplicity. I’m talking about a recipe that takes about 10 minutes of active prep time. Seriously. You can have this in the oven before your oven even finishes preheating. It’s a lifesaver for busy weeknights or when unexpected guests pop over. Plus, it’s incredibly budget-friendly. Most of the ingredients are pantry staples, and the few that aren’t are well worth the small investment for the sheer joy this cake brings. And let’s not forget versatility! While it’s amazing as a dessert, I’ve shamelessly had slices for breakfast (don’t judge!), and it’s always a hit at potlucks and family gatherings. It’s so much more forgiving than a traditional cake, and it always comes out tasting fantastic, which is something I can’t always say for other dessert projects.
How do I make a peanut butter cupcake?
Quick Overview
Making this Peanut Butter cup dump cake is a breeze. You’ll simply whisk together some dry cake ingredients, then stir in your wet ingredients until just combined. Next, you’ll pour this lovely batter into your baking dish, then dollop spoonfuls of peanut butter and scatter chopped peanut butter cups over the top. Finally, you’ll sprinkle a simple streusel-like topping over everything and bake until golden brown and bubbly. It’s so straightforward, it feels like cheating!
Ingredients
For the Main Batter:
1 box (about 15.25 oz) chocolate cake mix (I prefer devil’s food for extra richness!)
1 can (14 oz) sweetened condensed milk (don’t substitute this, it’s key for texture!)
1/2 cup vegetable oil (or other neutral oil like canola)
2 large eggs
1 teaspoon vanilla extract
1/2 cup milk (any kind works, but I find whole milk gives the best texture)
For the Filling:
1 cup creamy peanut butter (name brand works best for consistent results)
1 cup chopped peanut butter cups (milk chocolate is classic, but feel free to experiment!)
For the Glaze:
1/2 cup powdered sugar
2-3 tablespoons milk (or heavy cream for extra richness)
1/2 teaspoon vanilla extract
Step-by-Step Instructions
Step 1: Preheat & Prep Pan
First things first, get that oven preheating to 350 degrees Fahrenheit (175 degrees Celsius). Grab a 9×13 inch baking dish – a greased one is best to ensure your cake comes out cleanly. I usually give it a good spray with non-stick cooking spray, but a little butter works too. Make sure you get into all the corners!
Step 2: Mix Dry Ingredients
In a large bowl, pour in your entire box of chocolate cake mix. Now, this is where the “dump” part really starts! You don’t need to add anything else from the box instructions – that’s the beauty of a dump cake. We’re using the mix as a base for flavor and structure.
Step 3: Mix Wet Ingredients
In a separate medium bowl, whisk together the sweetened condensed milk, vegetable oil, eggs, vanilla extract, and the 1/2 cup of milk. Give it a good whisk until everything is nicely combined and smooth. Don’t overmix, just get it all incorporated.
Step 4: Combine
Pour the wet ingredients into the bowl with the dry cake mix. Now, using a spatula or a wooden spoon, stir everything together until it’s *just* combined. It’s really important not to overmix here! You’ll see some lumps, and that’s perfectly fine. Overmixing can lead to a tougher cake, and we definitely don’t want that. Stop as soon as you don’t see any big dry patches of cake mix.
Step 5: Prepare Filling
Chop your peanut butter cups into bite-sized pieces. You want them small enough to distribute well but big enough to get a good hit of peanut butter goodness in each bite. Set these aside with your creamy peanut butter.
Step 6: Layer & Swirl
Spread the cake batter evenly into your prepared baking dish. It will be thick, that’s normal. Now, grab spoonfuls of the peanut butter and dollop them all over the batter. Don’t worry about making it neat. Then, scatter the chopped peanut butter cups over the peanut butter dollops. You can give it a very gentle swirl with a knife or a toothpick, but honestly, I usually skip this step and let the magic happen in the oven. The peanut butter and chocolate will naturally mingle as it bakes.
Step 7: Bake
Pop that dish into your preheated oven. Bake for about 35-45 minutes, or until the edges are golden brown and a toothpick inserted into the center comes out mostly clean (a few moist crumbs are okay, but no wet batter). The smell wafting from your oven at this point will be absolutely incredible – prepare for family members to gather!
Step 8: Cool & Glaze
Let the cake cool in the pan for at least 15-20 minutes before you even think about glazing or cutting it. This helps it set up. While it’s cooling, whisk together the powdered sugar, 2 tablespoons of milk, and vanilla extract in a small bowl until smooth. Add more milk, a teaspoon at a time, if you want a thinner glaze. Drizzle or spread this glaze over the slightly cooled cake. I like mine a little runny, so I usually add an extra splash of milk.
Step 9: Slice & Serve
Once the glaze has set a bit, slice into this warm, gooey masterpiece. It’s best served warm, straight from the pan, with a scoop of vanilla ice cream or a dollop of whipped cream. The contrast of the warm, melty cake with cold ice cream is pure bliss.
What to Serve It With
This peanut butter cup dump cake is so wonderfully versatile, you can pretty much serve it any time you need a little sweetness in your life!
For Breakfast: If you’re feeling extra indulgent on a weekend morning, a small slice warmed up is divine with a hot cup of coffee. Honestly, the chocolate and peanut butter combo just feels like a treat any time of day.
For Brunch: Serve it slightly cooled with a sprinkle of powdered sugar for a more elegant presentation. It pairs beautifully with a glass of orange juice or even a mimosa. It’s a guaranteed crowd-pleaser for any brunch gathering.
As Dessert: This is its natural habitat! Serve it warm, right out of the oven (after a brief cooling, of course), with a generous scoop of good quality vanilla ice cream. A dollop of whipped cream or a few fresh raspberries to cut through the richness are also lovely additions.
For Cozy Snacks: My kids absolutely love this as an after-school snack, especially on cooler days. I’ll often warm up a slice and serve it with a tall glass of cold milk. It’s the ultimate comfort food when you just need a little pick-me-up. I’ve also found it’s wonderful topped with a little sea salt for an extra flavor pop.
Top Tips for Perfecting Your Peanut Butter Cup Dump Cake
I’ve made this peanut butter cup dump cake more times than I can count, and over the years, I’ve picked up a few little tricks that really make it shine. Here are my absolute favorite tips:
Zucchini Prep: (Wait, what? I think there might be a mix-up here! This recipe doesn’t use zucchini. My apologies if you were expecting that! This recipe is all about the cake mix and peanut butter cups.)
Mixing Advice: Seriously, resist the urge to overmix the batter. Once the wet and dry ingredients are just incorporated, stop. A few lumps are your friend here. Overmixing develops the gluten in the cake mix too much, which can result in a dense, tough cake. Gentle is the name of the game for that perfect tender crumb.
Swirl Customization: While you don’t *have* to swirl, I sometimes like to do a very gentle swirl of the peanut butter into the batter before adding the peanut butter cups. It helps distribute that peanut butter flavor more evenly throughout. Don’t go crazy with it, though; you still want distinct pockets of peanut butter.
Ingredient Swaps: The chocolate cake mix is pretty essential for the base, but feel free to experiment with the peanut butter cups! Milk chocolate is classic, but dark chocolate peanut butter cups add a richer flavor, and white chocolate peanut butter cups give a different kind of sweetness. For the peanut butter, creamy is definitely the way to go for the smoothest swirl and melt. I haven’t tried chunky, but I imagine it would add a nice texture contrast.
Baking Tips: Ovens can be so finicky, can’t they? If you find your cake tends to brown too quickly on top before the center is cooked, you can loosely tent the pan with aluminum foil for the last 10-15 minutes of baking. Also, don’t be afraid to check it a few minutes before the suggested bake time. Every oven is different, and you want that perfect gooey center without it being raw.
Glaze Variations: If you’re not a fan of the powdered sugar glaze (though I highly recommend it!), you can skip it entirely. The cake is still delicious on its own. Alternatively, you could drizzle melted chocolate chips or even just a dusting of powdered sugar over the top. For an extra decadent treat, warm up some extra peanut butter and drizzle that over the top before serving.
Storing and Reheating Tips
This peanut butter cup dump cake is so good, it rarely lasts long in my house, but when it does, I know exactly how to store it to keep it tasting as fresh as possible.
Room Temperature: If you have any leftovers and plan to eat them within a day or two, you can cover the baking dish tightly with plastic wrap or foil and leave it at room temperature. It stays wonderfully moist this way for about 2-3 days. Just make sure it’s not in a super hot spot!
Refrigerator Storage: For longer storage, cover the baking dish tightly and pop it into the refrigerator. It will keep well in the fridge for up to 5 days. The texture might firm up a bit once chilled, but don’t worry, that’s where reheating comes in!
Freezer Instructions: Yes, you can absolutely freeze this! Let the cake cool completely, then cover it very well with plastic wrap, followed by a layer of aluminum foil. It freezes beautifully for up to 2-3 months. When you’re ready to eat it, you can thaw it in the refrigerator overnight, or reheat it directly from frozen (it will just take longer).
Glaze Timing Advice: If you’re planning on storing or freezing the cake, I often recommend glazing it *after* it’s been reheated. This way, the glaze stays fresh and doesn’t get too hard or sticky during storage. If you glaze it before refrigerating, it’s perfectly fine, but the glaze might seize up a bit. For freezing, it’s definitely best to glaze after thawing and reheating.
Frequently Asked Questions
Final Thoughts
So there you have it – my ridiculously easy, incredibly delicious peanut butter cup dump cake. It’s the kind of recipe that makes you feel like a baking superhero, even if you just followed a few simple steps. It’s perfect for those moments when you need a sweet fix, a quick dessert for company, or just a little something to brighten your day. I genuinely hope you give this a try; I have a feeling it’s going to become a staple in your kitchen, just like it has in mine. If you love this, you might also enjoy my other super simple chocolate desserts or my no-bake peanut butter treats! Let me know in the comments below how yours turns out, or if you have any fun variations you tried. Happy baking!
Peanut Butter Cup Dump Cake
Ingredients
Main Ingredients
- 1 box chocolate cake mix 15.25 oz
- 1 can evaporated milk 12 oz
- 1 bag peanut butter cups mini, unwrapped, 10 oz
- 0.5 cup butter melted
- 0.5 cup peanut butter creamy
Instructions
Preparation Steps
- Preheat your oven to 350°F (175°C).
- In a 9x13 inch baking dish, spread the unwrapped mini peanut butter cups evenly.
- In a medium bowl, whisk together the cake mix and evaporated milk until just combined. Do not overmix.
- Pour the cake batter evenly over the peanut butter cups in the baking dish.
- In a small bowl, combine the melted butter and creamy peanut butter. Stir until smooth.
- Drizzle the peanut butter mixture over the cake batter.
- Bake for 35-40 minutes, or until the cake is golden brown and a toothpick inserted into the center comes out clean.
- Let it cool slightly before serving. Serve warm, perhaps with ice cream!