Oh, my friends, let me tell you about a recipe that has single-handedly saved countless weekend mornings for me. You know those mornings, right? The ones where you want something utterly delicious, something that feels like a special treat, but the thought of actually *doing* a lot of work before your first cup of coffee feels like climbing Mount Everest? Yeah, those. Well, I’ve got your back. This Overnight French Toast Casserole is, hands down, one of my absolute favorites. It’s the kind of dish that makes your kitchen smell like pure happiness, and it’s so ridiculously easy, you’ll wonder how you ever lived without it. It’s like a warm hug in casserole form, and honestly, it’s a million times better than those complicated bread puddings that require hours of soaking and constant attention. If you love French toast but crave something you can prep ahead, this is for you!
What is a French Toast casserole?
So, what exactly is this magical dish I’m raving about? Think of it as the ultimate cheat code for amazing French Toast. Instead of standing at the stove, dipping each slice of bread into an egg mixture and frying it up individually (which, let’s be honest, is lovely but can be a bit of a production!), we’re doing something much smarter. We’re layering cubes of bread in a baking dish, drenching them in a rich, creamy custard, and letting it all soak overnight in the fridge. When morning rolls around, all you have to do is pop it in the oven. It’s essentially a baked French toast, but the overnight soak is the secret sauce that makes the bread incredibly tender and infused with all those wonderful flavors. It’s less fuss, more flavor, and way more relaxed mornings. It’s the lazy baker’s dream, but the result is pure gourmet!
Why you’ll love this recipe?
Honestly, where do I even begin with why this recipe is a winner? For starters, the FLAVOR. It’s just divine. The bread gets perfectly custardy and soft, with those wonderful crispy edges that are just everything. The hint of cinnamon and vanilla in the custard is classic, but it’s the way it all bakes up into this comforting, sweet, and satisfying dish that truly makes it special. And the SIMPLICITY? Unbeatable. You can literally put this together the night before in about 15 minutes. No early morning fuss, no stressed-out scrambling. It’s a lifesaver for busy weekdays that sneak up on you or for those leisurely weekend mornings when you’d rather be sipping coffee than slaving over a hot stove. Plus, it’s incredibly COST-EFFICIENT. We’re talking basic pantry staples: bread, eggs, milk, a little sugar, cinnamon. It’s a budget-friendly way to serve a crowd or just treat your family to something wonderful without breaking the bank. And let’s talk VERSATILITY. This isn’t a one-trick pony! You can customize it endlessly. Add berries, chocolate chips, nuts, a swirl of jam – the possibilities are truly endless. I’ve found that this recipe is a fantastic base for all sorts of flavor experiments. It’s also a recipe that appeals to everyone, from tiny picky eaters to discerning adults. My kids, bless their hearts, practically beg for this on Saturday mornings, and frankly, I’m always happy to oblige. It’s a win-win. What I love most about this is the sheer ease of it, combined with the absolutely gourmet-level deliciousness it delivers. It just feels special, without the effort.
How do I make a French Toast casserole?
Quick Overview
The beauty of this Overnight french toast Casserole is its effortless preparation. You’ll simply cube your favorite bread, whisk together a rich, creamy custard, and let it soak into the bread overnight. The next morning, a quick bake transforms it into a golden, delicious breakfast masterpiece. It’s designed to minimize your morning stress and maximize your enjoyment. You’re essentially doing all the heavy lifting the night before, leaving you free to relax and savor your morning.
Ingredients
For the Main Batter:
You’ll need about 8 cups of cubed bread. Day-old challah, brioche, or even a good quality white bread works wonders here. Avoid super fresh, soft bread as it can get too mushy. I usually just buy a loaf a day or two in advance. Make sure the cubes are roughly 1-inch in size. You’ll also need 6 large eggs, 2 cups of whole milk (or half-and-half for extra richness – I’ve even tested this with almond milk and it actually made it even creamier, though whole milk is my go-to!), 1/2 cup of granulated sugar, 2 teaspoons of ground cinnamon, and 1 teaspoon of vanilla extract. A pinch of salt is also key to balancing the sweetness. Oh, and don’t forget 1/2 cup of melted unsalted butter, which adds that essential richness and helps create those lovely crispy bits.
For the Filling:
This is where you can have some fun! I often use a simple mix of 1/2 cup of brown sugar and 1 teaspoon of cinnamon for a classic streusel-like topping. Sometimes, I’ll throw in 1/2 cup of chopped pecans or walnuts for a little crunch. If I’m feeling fancy, or if the kids are requesting it, I might add 1/2 cup of fresh berries (like blueberries or raspberries) or even some chocolate chips right into the bread mixture before pouring the custard over. Just remember to distribute them evenly!
For the Glaze:
This is optional, but highly recommended! A simple maple glaze is divine. You’ll need about 1/2 cup of powdered sugar, 2-3 tablespoons of maple syrup (real stuff, please!), and a splash of milk or cream to reach your desired drizzling consistency. Sometimes, I’ll just dust it with powdered sugar or serve it with a dollop of whipped cream. The key is to get it to a smooth, pourable consistency without being too thin or too thick.
Step-by-Step Instructions
Step 1: Preheat & Prep Pan
First things first, get your oven preheated to 350°F (175°C). You’ll want to grab a 9×13 inch baking dish. Give it a good buttering or greasing. This step is crucial to prevent any sticking and to help those edges get perfectly golden and slightly crisp. Don’t skip this, even if your pan is non-stick!
Step 2: Mix Dry Ingredients
In a large bowl, whisk together your granulated sugar, cinnamon, and that pinch of salt. This ensures the spices and sugar are evenly distributed throughout the custard, so you don’t get pockets of pure cinnamon or sugar. It’s a small step, but it makes a difference in the final flavor.
Step 3: Mix Wet Ingredients
In a separate medium bowl, whisk the eggs until they’re well combined and slightly frothy. Then, whisk in the milk (or your milk of choice) and the vanilla extract. Make sure everything is thoroughly incorporated. The mixture should look smooth and homogenous.
Step 4: Combine
Pour the wet ingredients into the dry ingredients and whisk everything together until just combined. Be careful not to overmix here! You want to incorporate everything, but don’t beat it relentlessly. Overmixing can lead to a tougher texture. Then, gradually whisk in the melted butter until it’s fully incorporated. This forms your luscious custard base.
Step 5: Prepare Filling
If you’re using a brown sugar and cinnamon filling, simply combine them in a small bowl. If you’re adding nuts or chocolate chips, have them ready. If you’re adding fruit, make sure it’s not overly wet; you might even want to pat it dry if using frozen berries.
Step 6: Layer & Swirl
Place your cubed bread into the prepared baking dish. Pour the custard mixture evenly over the bread, gently pressing down with a spatula or your hands to ensure all the bread pieces are soaking up the goodness. If you’re adding a filling like berries or chocolate chips, scatter them evenly over the bread at this stage. For a streusel topping, sprinkle the brown sugar and cinnamon mixture over the top. Don’t worry if some bread pieces are floating a bit; they’ll settle down.
Step 7: Bake
Cover the baking dish tightly with plastic wrap or foil and refrigerate for at least 4 hours, but preferably overnight. This is the “overnight” part that makes it so special! When you’re ready to bake, preheat your oven as mentioned in Step 1. Remove the plastic wrap and bake for 40-50 minutes, or until the casserole is golden brown, puffed up, and a knife inserted into the center comes out clean. The edges should be slightly set and caramelized.
Step 8: Cool & Glaze
Once it’s out of the oven, let it cool for about 10-15 minutes. This allows it to set up a bit. While it’s cooling, whisk together the powdered sugar, maple syrup, and a splash of milk for your glaze. Drizzle it generously over the warm casserole. It’s so tempting to dig in right away, but a little patience makes for a better slice!
Step 9: Slice & Serve
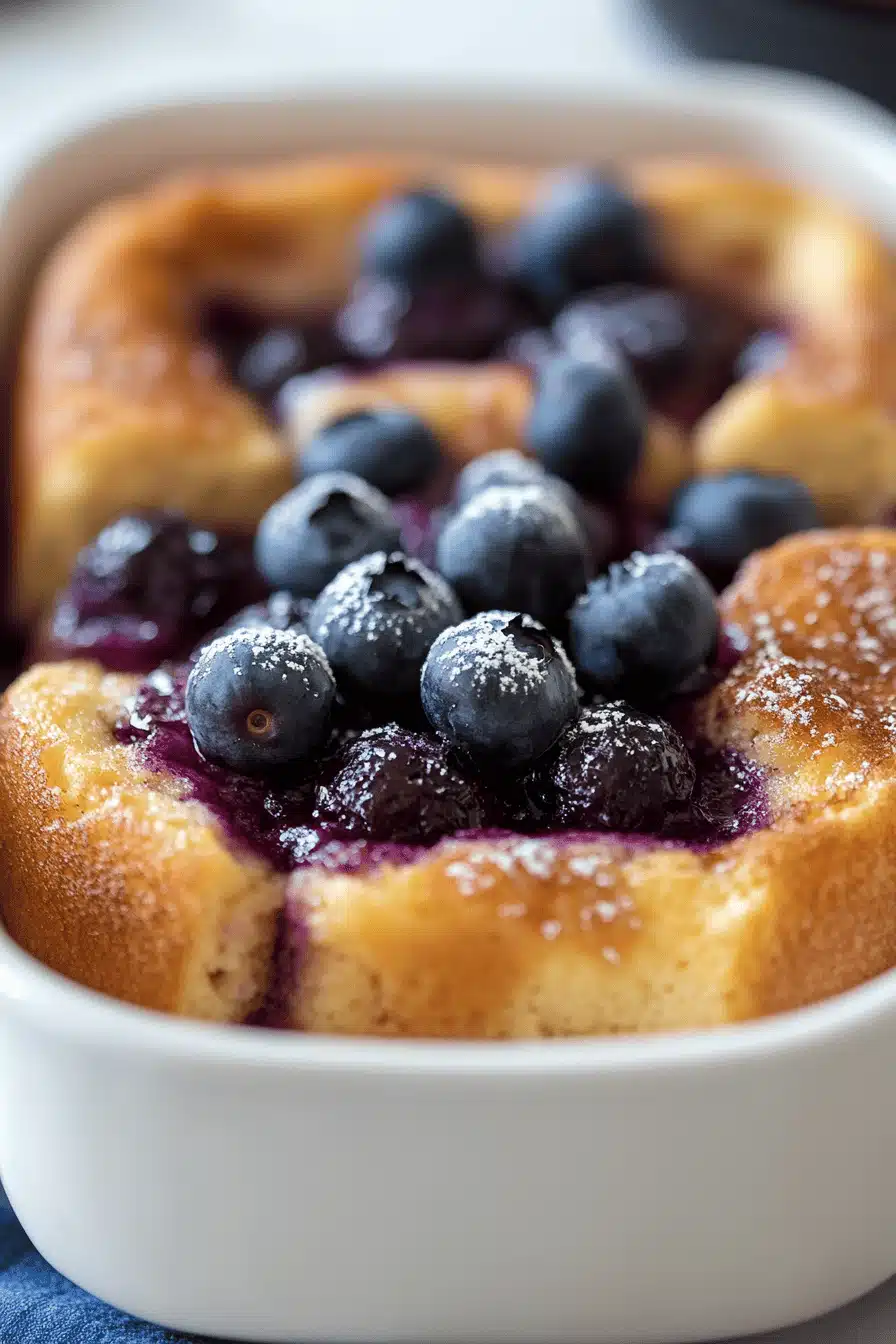
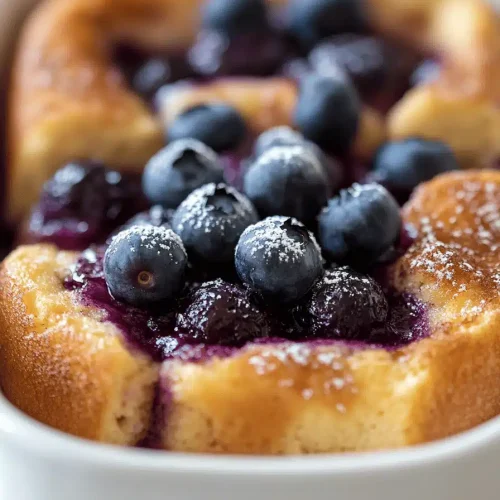
Use a sharp knife to cut the casserole into generous squares. Serve warm with extra syrup, a dusting of powdered sugar, or a dollop of whipped cream. The texture should be tender on the inside with delightful crispy edges. It’s pure morning bliss!
What to Serve It With
This Overnight French Toast Casserole is incredibly versatile and pairs beautifully with a wide range of accompaniments, making it suitable for any meal of the day. For a classic **Breakfast** setting, a simple cup of freshly brewed coffee or a glass of orange juice is perfect. You can serve it with a side of crispy bacon or sausage for a more substantial meal. When we’re going for a **Brunch** vibe, I love to elevate it with some fresh Fruit Salad – think melon, berries, and grapes. A mimosa or a bellini would be a fantastic beverage choice to complement the celebratory feel. If you’re thinking of serving this as **Dessert**, which is surprisingly wonderful, a scoop of vanilla bean ice cream or a warm berry compote would be absolutely divine. A dusting of powdered sugar and maybe a sprig of mint can make it look quite elegant. And for those **Cozy Snacks** or late-night cravings, a simple drizzle of honey or a warm glass of milk is all you need. I’ve found that my family also loves it with a side of Greek yogurt for a bit of tang. It’s the kind of dish that welcomes all sorts of pairings, so don’t be afraid to get creative!
Top Tips for Perfecting Your Overnight French Toast Casserole
Over the years, I’ve learned a thing or two about making this Overnight French Toast Casserole absolutely perfect, and I’m happy to share these little gems with you! First, regarding the bread: use bread that’s a day or two old. It needs to be sturdy enough to soak up all that custard without disintegrating. If your bread is too fresh, you can even lightly toast the cubes in the oven for about 10 minutes before assembling. For the MIXING ADVICE, the key is gentle incorporation. You don’t want to overwork the batter, as this can develop the gluten and make your casserole tough. Just whisk until everything is combined. When you’re layering, ensure the bread cubes are evenly distributed in the pan, and then pour the custard over them. Gently press down with a spatula to help everything get submerged. For SWIRL CUSTOMIZATION, if you want to add jam or fruit filling, dollop it on top of the bread layer before pouring the custard. You can then gently swirl it with a knife for a marbled effect, but don’t overdo it, or you’ll end up with a uniform color. If you’re aiming for a streusel topping, make sure the brown sugar and cinnamon mixture is crumbly and sprinkled evenly across the top. For INGREDIENT SWAPS, you can absolutely use different types of milk. I’ve found that heavier creams like half-and-half make it extra rich, while plant-based milks like almond or oat milk work well, though they might slightly alter the final texture. If you’re out of cinnamon, nutmeg or a pumpkin pie spice blend can be a lovely substitute. For BAKING TIPS, always bake on the center rack of your oven. If you notice the top is browning too quickly before the inside is cooked, you can loosely tent it with foil for the last 15-20 minutes of baking. A digital thermometer is your best friend here; the internal temperature should reach around 160-165°F (71-74°C). For GLAZE VARIATIONS, the classic maple glaze is amazing, but you can also try a lemon glaze for a citrusy twist, or even a chocolate glaze if you’re a chocoholic! Adjust the liquid in your glaze to achieve your desired drizzling consistency – thicker for drizzling, thinner for pouring.
Storing and Reheating Tips
This Overnight French Toast Casserole is a fantastic make-ahead dish, and luckily, it stores and reheats beautifully. If you have any leftovers (which is rare in my house!), you can store them at ROOM TEMPERATURE for up to 2 hours after baking, but honestly, it’s best to refrigerate them promptly. For REFRIGERATOR STORAGE, once the casserole has cooled completely, cover the baking dish tightly with plastic wrap or aluminum foil, or transfer individual portions into airtight containers. It should stay fresh in the refrigerator for 2-3 days. The quality remains surprisingly good! If you want to freeze it, let it cool completely, then either wrap the entire casserole tightly in plastic wrap followed by a layer of aluminum foil, or cut it into individual portions, wrap them tightly, and place them in a freezer-safe bag or container. It will keep well in the freezer for up to 2-3 months. When it’s time to reheat, you have a few options. For individual portions, you can microwave them for 30-60 seconds, or for a crispier result, reheat them in a toaster oven or a regular oven at 350°F (175°C) for about 10-15 minutes, or until heated through. For a larger portion, reheat the whole casserole in a preheated oven at 350°F (175°C) for about 20-25 minutes, or until warmed through. If you’re reheating from frozen, you’ll need to thaw it in the refrigerator overnight first, or add extra time to your reheating process. For the GLAZE TIMING ADVICE, it’s best to add the glaze right before serving the freshly baked casserole. If you’ve stored leftovers, you might want to make a fresh batch of glaze or simply dust with powdered sugar after reheating for the best texture and appearance.
Frequently Asked Questions
Final Thoughts
So there you have it, my friends – the secret to stress-free, ridiculously delicious mornings. This Overnight French Toast Casserole isn’t just a recipe; it’s a little piece of culinary magic that brings joy and comfort to any table. It’s the perfect example of how a little planning the night before can lead to an incredibly rewarding breakfast experience. I truly hope you give this a try, and I can’t wait to hear how it turns out for you. If you’re someone who loves comforting, easy recipes, you might also want to check out my recipe for [Link to another related recipe, e.g., Fluffy Blueberry Pancakes] or my guide to [Link to another related recipe, e.g., The Easiest Homemade Granola]. Happy baking, and may your mornings be ever so delicious!
Overnight French Toast Casserole
Ingredients
Main Ingredients
- 1 loaf French bread day-old, cut into 1-inch cubes
- 6 large eggs
- 2 cups milk whole milk recommended
- 0.5 cup granulated sugar
- 2 teaspoons ground cinnamon
- 0.5 teaspoon ground nutmeg
- 1 teaspoon vanilla extract
- 0.25 cup butter melted, for greasing
Instructions
Preparation Steps
- Grease a 9x13 inch baking dish with melted butter.
- Spread the cubed French bread evenly in the prepared baking dish.
- In a large bowl, whisk together the eggs, milk, granulated sugar, cinnamon, nutmeg, and vanilla extract until well combined.
- Pour the egg mixture evenly over the bread cubes in the baking dish.
- Cover the dish with plastic wrap and refrigerate for at least 4 hours, or preferably overnight.
- Preheat your oven to 350°F (175°C).
- Remove the plastic wrap and bake for 40-50 minutes, or until the casserole is golden brown and set in the center.
- Let it cool slightly before serving. Serve warm with your favorite toppings like maple syrup, fruit, or whipped cream.