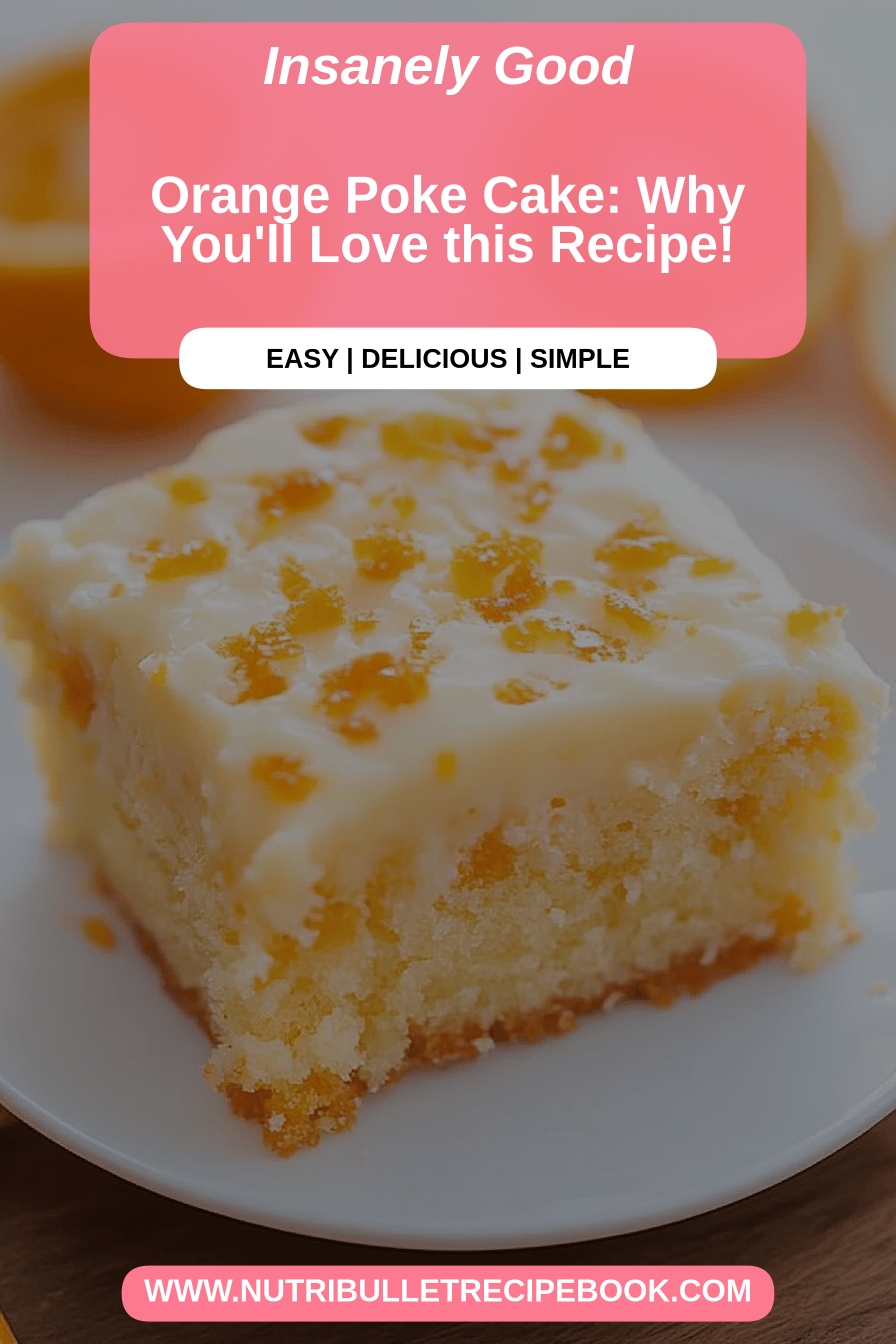
You know those desserts that just feel like a warm hug? The ones that instantly transport you back to childhood kitchen smells or the excitement of a birthday party? Well, this orange poke cake is exactly that for me. It’s not just a cake; it’s a memory. Every time I make it, especially when that bright citrus scent fills the air, I’m reminded of lazy summer afternoons and my Grandma’s kitchen, where the magic always seemed to happen. This isn’t a fussy, complicated affair. It’s the kind of recipe that’s a lifesaver on busy weeknights when you’re craving something sweet but don’t have hours to spend baking. It’s surprisingly simple, and the result? Pure sunshine on a plate. Forget those intimidating layer cakes for a moment; this orange poke cake is your new go-to for pure, unadulterated joy. It’s got that tender crumb and a creamy, zesty filling that just melts in your mouth. Honestly, it rivals any fancy bakery treat, and the best part is, you can whip it up with ingredients you probably already have!
What is orange poke cake?
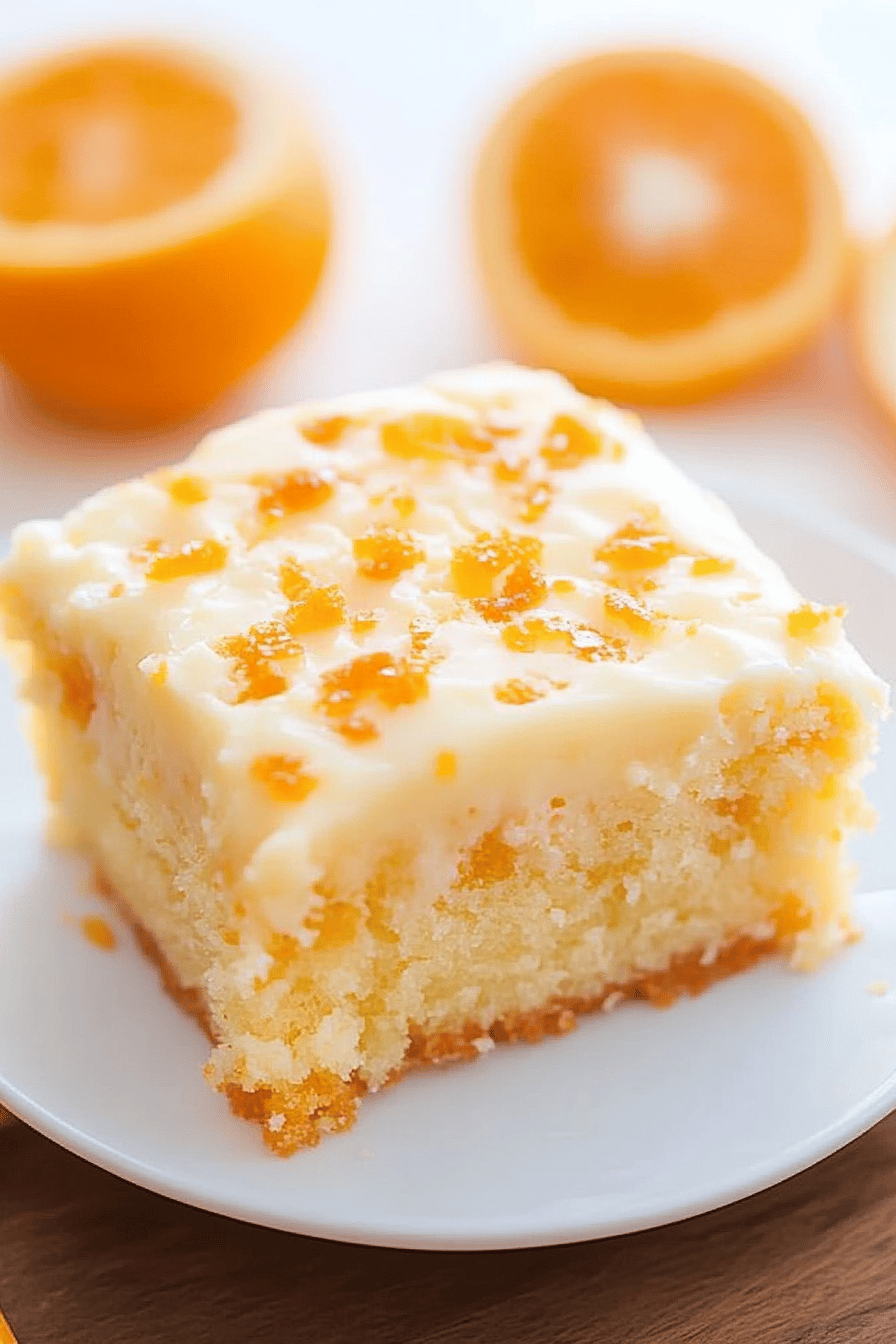
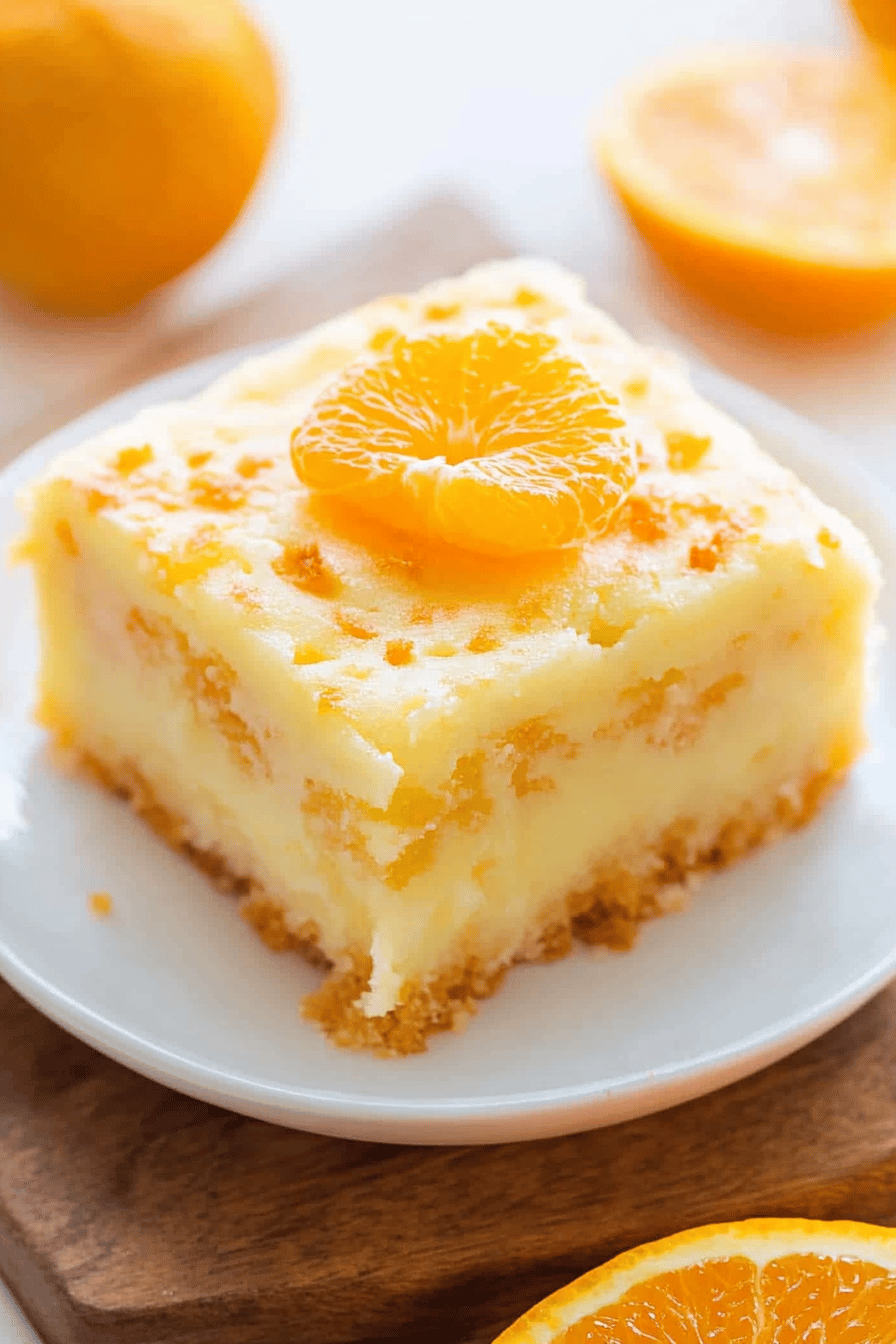
So, what exactly is this delightful orange poke cake? Think of it as a wonderfully moist, tender cake that’s been “poked” with little holes (hence the name!) and then flooded with a luscious, creamy mixture that seeps down into every nook and cranny. It’s not your typical frosted cake; instead, the filling becomes an integral part of the cake itself, creating an unbelievably moist and flavorful experience. The “orange” part comes from the vibrant zest and juice that infuses both the cake batter and the creamy filling, giving it that bright, cheerful citrus punch. It’s essentially a shortcut to incredible flavor and texture. Instead of stacking layers and dealing with frosting slides, you bake one cake, make a simple filling, and let them do their magical work together. It’s approachable, forgiving, and always a crowd-pleaser. If you’ve ever had a “poke cake” before, you know the magic I’m talking about – it’s that irresistible moistness and flavor infusion that makes them so special.
Why you’ll love this recipe?
Why is this orange poke cake in my recipe binder?flavor is just out of this world. It’s not just sweet; it’s got this bright, tangy orange essence that’s incredibly refreshing. It’s like sunshine in every bite, perfect for cheering up any day. Then there’s the simplicity. Seriously, this cake is so forgiving and straightforward. If you can mix a few ingredients and bake a cake from a mix, you can make this. It’s genuinely one of those recipes that feels impressive but is secretly super easy. My kids actually think I’m a baking wizard when I pull this out, and they have no idea how little effort it really takes! It’s also wonderfully cost-efficient. Using a cake mix as a base means you’re already starting with affordable staples. Plus, the filling and glaze ingredients are basic pantry items. This is perfect for when you want a showstopper dessert without breaking the bank. And talk about versatility! While I adore this orange version, you can easily play with the flavors. It’s also fantastic served chilled, making it a great make-ahead option for parties or potlucks. What I love most about this particular orange poke cake is that it hits all the right notes: it’s moist, it’s flavorful, it’s beautiful, and it’s ridiculously easy to make. It’s the kind of dessert that makes people ask for the recipe, and you get to smile and say, “Oh, it’s nothing!” It truly is a wonderful alternative to a traditional Sheet Cake or even a basic bundt cake when you want something a little more special but still incredibly easy.
How do I make an orange poke cake?
Quick Overview
Making this orange poke cake is a breeze, truly! You’ll simply bake a fluffy cake, poke holes all over it, and then pour a dreamy orange-infused cream filling right into those holes. Once that sinks in and makes the cake wonderfully moist, you’ll top it all off with a simple, tangy glaze. It’s a three-step process that results in pure dessert magic. The beauty of this method is that the filling and glaze work together to create a cake that’s incredibly tender and packed with flavor, without needing any complicated frosting techniques. It’s the definition of easy elegance.
Ingredients
For the Main Batter:
Here’s what you’ll need to get that perfect cake base going. I always opt for a good quality white or yellow cake mix – they just seem to provide the ideal canvas for the orange flavor. Make sure to grab the ingredients listed on the box for the cake mix, usually eggs, oil, and water. For an extra boost of citrusy goodness, I love adding a tablespoon or two of fresh orange zest directly into the dry mix. It’s a little step that makes a big difference!
For the Filling:
This is where the magic really starts to happen! You’ll need sweetened condensed milk, which gives it that luscious, creamy texture and sweetness. Then, for that irresistible orange flavor, we’ll use fresh orange juice – the real stuff, not from concentrate, makes a world of difference! And of course, more fresh orange zest. I always grate mine right into the bowl; the aroma is incredible. Sometimes, if I’m feeling extra decadent, I’ll even stir in a touch of Cream Cheese to make it even richer, but it’s fantastic just as it is. Just whisk these together until smooth and dreamy.
For the Glaze:
The final flourish! This glaze is super simple: powdered sugar, a little bit of fresh orange juice, and a touch more orange zest for that visual pop and extra zing. You want it to be pourable but not too thin, so you can drizzle it beautifully over the top. I like to get the consistency just right so it cascades down the sides slightly, looking absolutely irresistible.
Step-by-Step Instructions
Step 1: Preheat & Prep Pan
First things first, get your oven preheated to the temperature specified on your cake mix box, usually around 350°F (175°C). Then, grab a 9×13 inch baking pan. I like to give mine a good grease and flour, or you can use baking spray. This ensures that beautiful cake comes out cleanly every single time. No one wants a cake stuck to the pan!
Step 2: Mix Dry Ingredients
In a large bowl, whisk together the dry ingredients from your cake mix. If you’re adding orange zest to the batter (and I highly recommend you do!), stir it in now. This ensures it’s evenly distributed throughout the cake, giving you those lovely bursts of citrus in every bite.
Step 3: Mix Wet Ingredients
In a separate, medium-sized bowl, whisk together the eggs, oil, and water (or whatever liquids your cake mix calls for). Whisk them until they’re well combined and the mixture is smooth.
Step 4: Combine
Now, pour the wet ingredients into the bowl with the dry ingredients. Using a whisk or an electric mixer on low speed, mix just until everything is combined. Be careful not to overmix! Overmixing can lead to a tough cake, and we want ours to be wonderfully tender. A few small lumps are perfectly fine.
Step 5: Prepare Filling
While the cake is baking, let’s get that glorious filling ready. In a medium bowl, whisk together the sweetened condensed milk, fresh orange juice, and a good amount of fresh orange zest. Keep whisking until it’s smooth and creamy. This filling is what’s going to soak into the cake and make it incredibly moist and flavorful. Trust me, it smells amazing!
Step 6: Layer & Swirl
Once the cake is baked and still warm in the pan, grab a fork or a wooden skewer. Start poking holes all over the top of the cake. Don’t be shy; you want plenty of them! Make them fairly deep, going almost all the way to the bottom. Then, slowly and evenly pour the prepared orange filling over the warm cake, letting it seep down into all those little holes. You can gently tilt the pan to help distribute it if needed. Let the cake sit and absorb all that deliciousness for about 15-20 minutes.
Step 7: Bake
If you prepared the filling while the cake was baking, you’ve already done this step! If not, now’s the time. Bake the cake according to your cake mix box instructions. A toothpick inserted into the center should come out clean when it’s done. The baking time will vary slightly depending on your oven, so keep an eye on it towards the end.
Step 8: Cool & Glaze
After pouring the filling, let the cake cool in the pan for about 20 minutes. While it’s cooling, whisk together the powdered sugar, a tablespoon or two of orange juice, and a bit more zest for the glaze. You want a pourable consistency – add more juice for thinner, more powdered sugar for thicker. Drizzle this glaze over the slightly warm or room-temperature cake. It’s okay if some drips down the sides; that’s part of its charm!
Step 9: Slice & Serve
Let the cake cool completely before slicing and serving. This allows the filling to set up a bit more and makes for cleaner slices. I love to serve this cake chilled. It’s absolutely divine cold! You can also serve it at room temperature, but I find the flavors are even more vibrant when it’s a little cool. Enjoy every single bite!
What to Serve It With
This orange poke cake is so versatile, it works for almost any occasion. For breakfast, it’s a delightful treat with a strong cup of coffee. The citrus cuts through the richness of the coffee beautifully. I like to serve a small slice alongside scrambled eggs for a sweet and savory brunch experience. For brunch itself, imagine this: a beautiful slice of orange poke cake with a fresh fruit salad on the side and a glass of sparkling mimosa. It adds a lovely sweet note without being too heavy. The vibrant color also looks gorgeous on a brunch spread! As a dessert, it’s a winner. It pairs wonderfully with a scoop of vanilla bean ice cream or a dollop of fresh whipped cream. If you want something a bit more sophisticated, a drizzle of raspberry coulis can add a lovely color contrast and complementary tartness. For cozy snacks, this cake is pure comfort. I love having a slice with a glass of cold milk in the afternoon. It’s that perfect pick-me-up. My family also loves having a small piece after dinner when we’re craving something sweet but don’t want a heavy dessert. It’s the perfect balance of sweet and tart, making it satisfying without being overwhelming. It’s become our go-to for Sunday afternoon treats.
Top Tips for Perfecting Your Orange Poke Cake
I’ve made this orange poke cake more times than I can count, and over the years, I’ve picked up a few tricks that I think really make it shine. For the zucchini prep (oops, I mean cake prep!), the most important thing is using fresh ingredients, especially for the zest and juice. Grate your zest right before you need it; that’s where all the essential oils are. When it comes to mixing advice, remember that overmixing is the enemy of tender cakes. Just combine until you don’t see dry flour streaks anymore. For the swirl customization, while this recipe is for an orange glaze, don’t be afraid to get creative! You can add a tiny drop of food coloring for a more intense orange hue, or even swirl in a bit of raspberry jam for a marbled effect. For the ingredient swaps, I’ve experimented with different cake mixes. While white or yellow work best for the orange flavor, a vanilla cake mix is also a good substitute. If you don’t have sweetened condensed milk, a mixture of heavy cream and sugar can work, but it won’t have quite the same melt-in-your-mouth quality. The key to perfect baking tips is knowing your oven. If your oven tends to run hot, you might need to reduce the temperature slightly or check for doneness a few minutes earlier. Always use the toothpick test – it’s your best friend. And for the glaze variations, if you want a thicker glaze, just add more powdered sugar. If you want it thinner, add a tiny bit more orange juice. You can also add a teaspoon of orange extract for an even more intense orange flavor, but fresh is always my preference for its bright, natural taste. I learned the hard way that letting the cake cool slightly before pouring the filling is crucial; too hot and the filling might just melt away, too cold and it won’t absorb as well. This little bit of patience makes all the difference.
Storing and Reheating Tips
One of the best things about this orange poke cake is how well it stores. For room temperature storage, I usually cover the pan tightly with plastic wrap or foil. It stays delicious like this for about 2-3 days, especially if your kitchen isn’t too warm. The filling helps keep it moist. If you live in a warmer climate or need it to last longer, refrigerator storage is your best bet. Store it covered in the fridge for up to 5 days. I find it actually tastes even better on the second or third day as the flavors meld together. Make sure it’s well-covered so it doesn’t dry out. For longer storage, freezer instructions are a lifesaver. You can freeze the unfrosted cake (or even frosted, if you use a buttercream-style frosting that freezes well) by wrapping it tightly in a couple of layers of plastic wrap, then a layer of foil. It can stay frozen for up to 2-3 months. To thaw, simply remove it from the freezer and let it come to room temperature overnight in the refrigerator. For the glaze timing advice, I generally add the glaze once the cake has cooled down a bit but is still slightly warm, or once it’s at room temperature. If you plan to freeze it unfrosted, you can add the glaze once it’s thawed. Freezing with the glaze on can sometimes make it a bit soft upon thawing, so I prefer to glaze it after thawing if freezing for an extended period.
Frequently Asked Questions
Final Thoughts
Honestly, this orange poke cake is more than just a dessert; it’s an experience. It’s the taste of pure joy, the convenience of a simple recipe, and the satisfaction of creating something truly delightful that everyone will love. The moist cake, infused with that bright citrus flavor, combined with the creamy, dreamy filling, is a combination that’s hard to beat. It’s perfect for birthdays, potlucks, family gatherings, or just when you need a little bit of sunshine in your day. If you love this recipe, you might also enjoy my lemon blueberry loaf or my classic chocolate chip cookies – they’re all about simple ingredients and big flavor! So, don’t hesitate, give this orange poke cake a try. I promise, it’s a keeper. I can’t wait to hear how yours turns out and what your family thinks! Let me know in the comments below if you’ve tried it or if you have any fun variations to share!

Orange Poke Cake
Ingredients
Cake Ingredients
- 1 box yellow cake mix
- 4 large eggs
- 0.5 cup vegetable oil
- 1 cup orange soda
Poke Filling
- 1 box orange gelatin mix
- 1 cup boiling water
Orange Glaze
- 0.5 cup butter, softened
- 3 cup powdered sugar
- 0.25 cup orange juice
- 1 teaspoon orange zest
Instructions
Preparation Steps
- Preheat oven to 350°F (175°C). Grease and flour a 9x13 inch baking pan.
- In a large bowl, combine cake mix, eggs, vegetable oil, and orange soda. Beat with an electric mixer on medium speed for 2 minutes.
- Pour batter into the prepared baking pan and bake for 30-35 minutes, or until a wooden skewer inserted into the center comes out clean.
- While the cake is baking, prepare the poke filling. In a small bowl, whisk together the orange gelatin mix and boiling water until dissolved.
- Once the cake is out of the oven, immediately poke holes all over the top with a fork or the handle of a wooden spoon.
- Pour the gelatin mixture evenly over the hot cake, allowing it to soak in.
- Let the cake cool completely in the pan.
- While the cake cools, prepare the orange glaze. In a medium bowl, cream together the softened butter and powdered sugar until smooth.
- Stir in the orange juice and orange zest until the glaze is smooth and pourable. Add more orange juice if needed to reach desired consistency.
- Spread the orange glaze evenly over the cooled cake.
- Chill the cake for at least 1 hour before serving to allow the glaze to set.