Okay, so the name might be a little… unconventional, but trust me on this one. The first time my Aunt Carol told me about her “Moose Farts” recipe, I’ll admit I raised an eyebrow. It sounded like something out of a quirky children’s book, not a delicious treat. But then I tasted it, and oh my goodness, my world changed. This isn’t just *any* dessert; it’s a revelation. It’s that perfect balance of sweet, slightly tart, and incredibly moist that just melts in your mouth. If you’ve ever loved a really good zucchini bread or a dense, flavorful loaf cake, you’re going to adore this. It’s got that same comforting, homemade feel, but with a little extra something that makes it totally unique. I’ve tried countless variations of baked goods over the years, from fancy patisserie creations to simple cookies, but this moose farts recipe has a special place in my heart. It’s honestly one of those recipes that, once you make it, you’ll find yourself coming back to again and again, especially when you need a little hug in food form. It’s so much more than just a name; it’s a promise of pure deliciousness that lives up to the hype, and then some!

What is the recipe for Moose Farts?
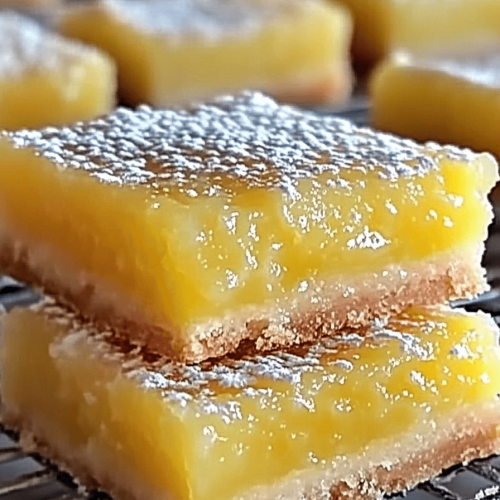
So, let’s talk about the name, because it’s definitely the elephant in the room… or, well, the moose! Aunt Carol, bless her heart, was always one for playful names. She said this recipe reminds her of those little bursts of surprise flavor you get, like a little puff of deliciousness. And honestly, once you taste it, you’ll understand. It’s essentially a wonderfully moist and flavorful cake or quick bread that’s studded with pockets of sweet, jammy goodness and often topped with a tangy, creamy glaze. Think of it like a really elevated zucchini bread meets a coffee cake, but with a texture that’s almost impossibly tender. The “moose farts” part comes from the way the filling can sometimes peek through and create little colorful bursts, almost like little “farts” of flavor and color escaping. It’s playful, memorable, and once you get past the initial giggle, it perfectly captures the essence of this delightful treat. It’s not heavy, it’s not dense, and it’s certainly not what you’d expect from such a silly name. It’s pure baking joy!
Why you’ll love this recipe?
Honestly, where do I even begin? This moose farts recipe has earned its spot as a go-to in my kitchen for so many reasons, and I have a feeling it will for you too. First off, the flavor is just out of this world. You get that comforting warmth from the spices and the incredibly moist crumb, and then you hit those pockets of fruit filling – it’s like a little flavor explosion with every bite. It’s not overly sweet, which I really appreciate. My kids actually ask for this all the time, and that’s saying something! Beyond the taste, it’s surprisingly simple to whip up, even on a busy weeknight. I’ve made this when I’ve had unexpected guests pop over, and it’s always a huge hit. It’s also wonderfully cost-effective. The main ingredients are pantry staples, and you can use whatever fruit filling or jam you have on hand. That’s another thing I love about it – its versatility! You can switch up the fruit filling depending on the season or your mood. It’s fantastic on its own, but I also love it served warm with a dollop of whipped cream or a scoop of vanilla Ice Cream. Compared to other treats that require fancy techniques or expensive ingredients, this moose farts recipe is a genuine lifesaver. It’s the kind of dessert that feels special without requiring you to spend hours in the kitchen. What I love most about this is how forgiving it is. Even if you’re not a seasoned baker, you can make this and feel incredibly proud of the result. It’s the perfect recipe for those moments when you’re craving something homemade and delicious, but don’t want to undertake a complicated baking project.
How do you make Moose Farts?
Quick Overview
Making this moose farts recipe is a straightforward process that yields a surprisingly sophisticated result. You’ll be mixing a simple, tender batter, preparing a delightful fruit filling, and then artfully combining them before baking to golden perfection. The beauty of this method is that it allows for a lot of customization, and it’s truly as easy as stir, swirl, and bake. It’s the kind of recipe that builds confidence in the kitchen, and the aroma that fills your home while it bakes is simply divine. You’ll find yourself reaching for this recipe time and time again because it’s just so wonderfully approachable and always delivers.
Ingredients
For the Main Batter:
2 cups all-purpose flour – I always use a good quality all-purpose flour. Make sure it’s spooned and leveled, not scooped, to avoid a dense cake.
1 ½ teaspoons baking soda – This is what gives it that lovely rise and tenderness.
½ teaspoon salt – Balances out the sweetness beautifully.
1 teaspoon ground cinnamon – Adds that cozy, comforting spice note.
½ teaspoon ground nutmeg – Just a hint of nutmeg really elevates the flavor.
½ teaspoon ground cloves (optional, but recommended!) – This is my secret ingredient for depth of flavor.
1 ½ cups granulated sugar – You can reduce this slightly if you prefer it less sweet, but it helps with moisture.
¾ cup vegetable oil (or other neutral oil like canola or avocado oil) – Oil makes for an incredibly moist cake that stays tender for days. Butter works too, but oil is my preferred route here.
3 large eggs, at room temperature – Room temperature eggs incorporate much better into the batter.
1 teaspoon vanilla extract – Don’t skip the good quality vanilla; it makes a difference!
1 ½ cups finely grated zucchini, well-drained – This is crucial! Squeeze out as much moisture as you possibly can. It adds incredible moisture without making the cake soggy.
For the Filling:
1 cup of your favorite fruit jam or preserves (raspberry, strawberry, apricot, or even blueberry work wonderfully!) – I love using a good quality jam with some visible fruit pieces for texture.
1 tablespoon cornstarch (if your jam is very thin) – This helps thicken the jam slightly so it doesn’t just run everywhere.
For the Glaze:
1 cup powdered sugar – Sifted for a smooth glaze.
2-3 tablespoons milk (or water, or lemon juice for a tangier glaze) – Start with 2 tablespoons and add more until you reach your desired consistency.
½ teaspoon vanilla extract (optional)

Step-by-Step Instructions
Step 1: Preheat & Prep Pan
First things first, let’s get our oven preheated to 350°F (175°C). I like to use a standard 9×13 inch baking pan for this. Grease it really well and then lightly flour it, or you can line it with parchment paper for easy cleanup. A little extra prep here means no sticking later, and we want a beautiful cake to come out easily!
Step 2: Mix Dry Ingredients
In a large bowl, whisk together the flour, baking soda, salt, cinnamon, nutmeg, and cloves (if you’re using them). Give it a good whisk until everything is nicely combined. This ensures your leavening agents and spices are evenly distributed throughout the batter, which is key for an even bake and consistent flavor.
Step 3: Mix Wet Ingredients
In a separate, medium-sized bowl, whisk together the granulated sugar, vegetable oil, eggs, and vanilla extract until it’s all smooth and well combined. Don’t overmix here, just get everything incorporated.
Step 4: Combine
Now, pour the wet ingredients into the bowl with the dry ingredients. Mix them together with a spatula or wooden spoon until *just* combined. It’s really important not to overmix at this stage. A few lumps are perfectly fine! Overmixing can develop the gluten too much, leading to a tough cake, and nobody wants that. Then, gently fold in your well-drained, grated zucchini. Make sure it’s distributed evenly.
Step 5: Prepare Filling
If your jam is particularly thick or chunky, you might want to give it a quick stir. If it seems a little loose, stir in the tablespoon of cornstarch. This is just to prevent it from making the cake too wet. You want it spreadable but not runny.
Step 6: Layer & Swirl
Pour about half of the batter into your prepared baking pan and spread it out evenly. Then, dollop spoonfuls of your jam mixture all over the top of this batter layer. Don’t worry about being neat; we want those lovely pockets! Now, carefully pour the remaining batter over the jam. You can use a spatula to gently spread it, but try not to disturb the jam too much. For that signature “moose fart” look, you can take a butter knife or a skewer and gently swirl it through the batter, creating little patterns and marble effects. Don’t over-swirl, or you’ll just mix it all together!
Step 7: Bake
Pop the pan into your preheated oven. Bake for about 30-40 minutes, or until a toothpick inserted into the center comes out clean (or with just a few moist crumbs attached, but no wet batter). The top should be golden brown and slightly puffed.
Step 8: Cool & Glaze
Let the cake cool in the pan on a wire rack for about 15-20 minutes before you even think about glazing. While it’s cooling, whisk together the powdered sugar, 2 tablespoons of milk (or your chosen liquid), and vanilla extract (if using) until you have a smooth, pourable glaze. Add more liquid, a teaspoon at a time, if it’s too thick. Once the cake has cooled slightly, drizzle the glaze all over the top. It will set up a bit as it cools completely.
Step 9: Slice & Serve
Let the cake cool completely in the pan before slicing. This is important for the glaze to set properly and for the cake to hold its shape. Once cooled, slice it into squares or rectangles and serve. Enjoy the incredible moistness and bursts of flavor!
What to Serve It With
This moose farts recipe is so versatile, it’s truly a chameleon in the dessert world! For a cozy breakfast, I love serving it warm with a good cup of coffee or a glass of cold milk. The spices in the cake are just the perfect wake-up call. You can even warm up a slice and add a tiny dollop of Greek yogurt for a protein boost. For a more elegant brunch spread, I’ll often cut it into smaller, bite-sized squares and arrange them on a tiered stand. It looks so pretty, and people are always intrigued by the name! It pairs wonderfully with fresh Fruit Salad and mimosas. As a dessert, this is where it really shines. A warm slice with a scoop of good quality vanilla bean ice cream is pure heaven. Or, for a richer experience, a drizzle of warm caramel sauce over the top takes it to a whole new level. And for those late-night cravings, when you just need a little something sweet but don’t want to bake a whole pie, this is my absolute go-to for a cozy snack. I’ll just cut a small piece, maybe warm it up for a few seconds in the microwave, and savor it with a hot cup of herbal tea. My family has a tradition of having this on the first chilly day of fall, and it just feels like home. It’s also fantastic for potlucks because it travels so well and always disappears in minutes!
Top Tips for Perfecting Your “Moose Farts”
I’ve been making this moose farts recipe for years, and I’ve picked up a few tricks along the way that I think will really help you achieve the best results. First, and I can’t stress this enough, for the zucchini prep: make sure you’re squeezing out as much moisture as humanly possible. I usually grate my zucchini into a colander set over a bowl and then use my hands to really press out the water. A damp cake is not a good cake! When it comes to mixing the batter, remember that rule: don’t overmix. As soon as you don’t see streaks of dry flour, stop. A few lumps are better than a tough texture. For the swirl customization, I find that less is more. You just want to create subtle ripples of flavor, not completely homogenize the batter. A gentle back-and-forth with a knife is perfect. For ingredient swaps, if you don’t have zucchini, you can try finely grated carrots or even pureed sweet potato, but you’ll need to adjust the moisture content accordingly – extra squeezing is key! I’ve also experimented with different flours. For a gluten-free version, I’ve had success with a good 1-to-1 gluten-free baking flour blend, though the texture might be slightly different. Baking tips: always preheat your oven properly, and know your oven. If it tends to run hot, you might need to reduce the temperature slightly or bake for a shorter time. A toothpick test is your best friend here. For the glaze, consistency is key. You want it thick enough to coat the cake but thin enough to drizzle. If it’s too thick, add milk drop by drop. If it’s too thin, whisk in a bit more powdered sugar. I’ve also found that adding a little lemon juice instead of milk to the glaze gives it a lovely tangy counterpoint to the sweetness of the cake. My biggest lesson learned? Don’t be afraid to experiment with the filling! If you have some leftover Cranberry Sauce from Thanksgiving, that makes for a wonderfully festive variation. The more you make it, the more you’ll discover your own perfect way to make this recipe.
Storing and Reheating Tips
One of the best things about this moose farts recipe is how well it stores. If you’re lucky enough to have any leftovers (which is rare in my house!), you can keep it at room temperature for up to 2 days. Just make sure it’s covered tightly with plastic wrap or stored in an airtight container to prevent it from drying out. I usually let it cool completely before covering it. If you need it to last a bit longer, or if your kitchen is particularly warm, the refrigerator is your best bet. It will stay fresh in the fridge for about 4-5 days. Again, an airtight container is crucial for maintaining moisture. When you’re ready to enjoy a slice from the fridge, I find it’s best to let it come to room temperature for about 15-20 minutes before serving. If you want to reheat it, a few seconds in the microwave (around 10-15 seconds) can bring back some of that fresh-baked warmth, especially if you plan to serve it with ice cream. For longer storage, this cake freezes beautifully! Once it’s completely cooled (and I mean *completely* cooled), wrap it tightly in plastic wrap, then in a layer of aluminum foil, or place it in a freezer-safe container. It should keep well in the freezer for up to 3 months. When you’re ready to thaw, simply unwrap it and let it thaw in the refrigerator overnight. Regarding the glaze, I prefer to glaze the cake *after* it has cooled completely, just before serving, or after it’s been thawed from frozen. If you glaze it before freezing, the glaze can sometimes become a bit brittle or crack during the freezing and thawing process. However, if you’re storing it for just a couple of days at room temperature, glazing it before storing is perfectly fine!
Frequently Asked Questions
Final Thoughts
So there you have it – my beloved “Moose Farts” recipe! I hope you’ve enjoyed this little journey into my kitchen and that you’re feeling inspired to give this wonderfully moist and flavorful cake a try. It’s more than just a recipe; it’s a reminder that the most delicious things often come in the most unexpected packages, and that a playful name can hide something truly special. It’s the perfect example of how simple ingredients can transform into something utterly delightful, and I honestly can’t think of a better treat for cozy mornings, cheerful brunches, or satisfying those sweet cravings. If you love comforting bakes with a burst of fruity goodness, this recipe is a must-try. I truly believe that once you taste it, you’ll understand why it holds such a special place in my heart and in my family’s recipe box. It’s a keeper, for sure! I can’t wait to hear what you think, and I’d absolutely love to see your creations! Please feel free to leave a comment below with your thoughts, any variations you tried, or how it turned out for you. Happy baking, my friends!

Moose Farts Delight
Ingredients
Main Ingredients
- 1 lb Ground Venison
- 0.5 cup Finely Chopped Mushrooms Cremini or shiitake recommended
- 0.25 cup Minced Onion
- 1 clove Garlic, minced
- 0.5 tsp Dried Thyme
- 0.25 tsp Salt
- 0.125 tsp Black Pepper
Instructions
Preparation Steps
- In a large bowl, combine the ground venison, chopped mushrooms, minced onion, minced garlic, dried thyme, salt, and black pepper.
- Gently mix all the ingredients together with your hands until just combined. Do not overmix.
- Form the mixture into small, patty-like shapes, resembling large marbles.
- Heat a lightly oiled skillet over medium heat.
- Carefully place the "farts" into the hot skillet and cook for about 5-7 minutes per side, or until browned and cooked through.
- Remove from skillet and serve warm.