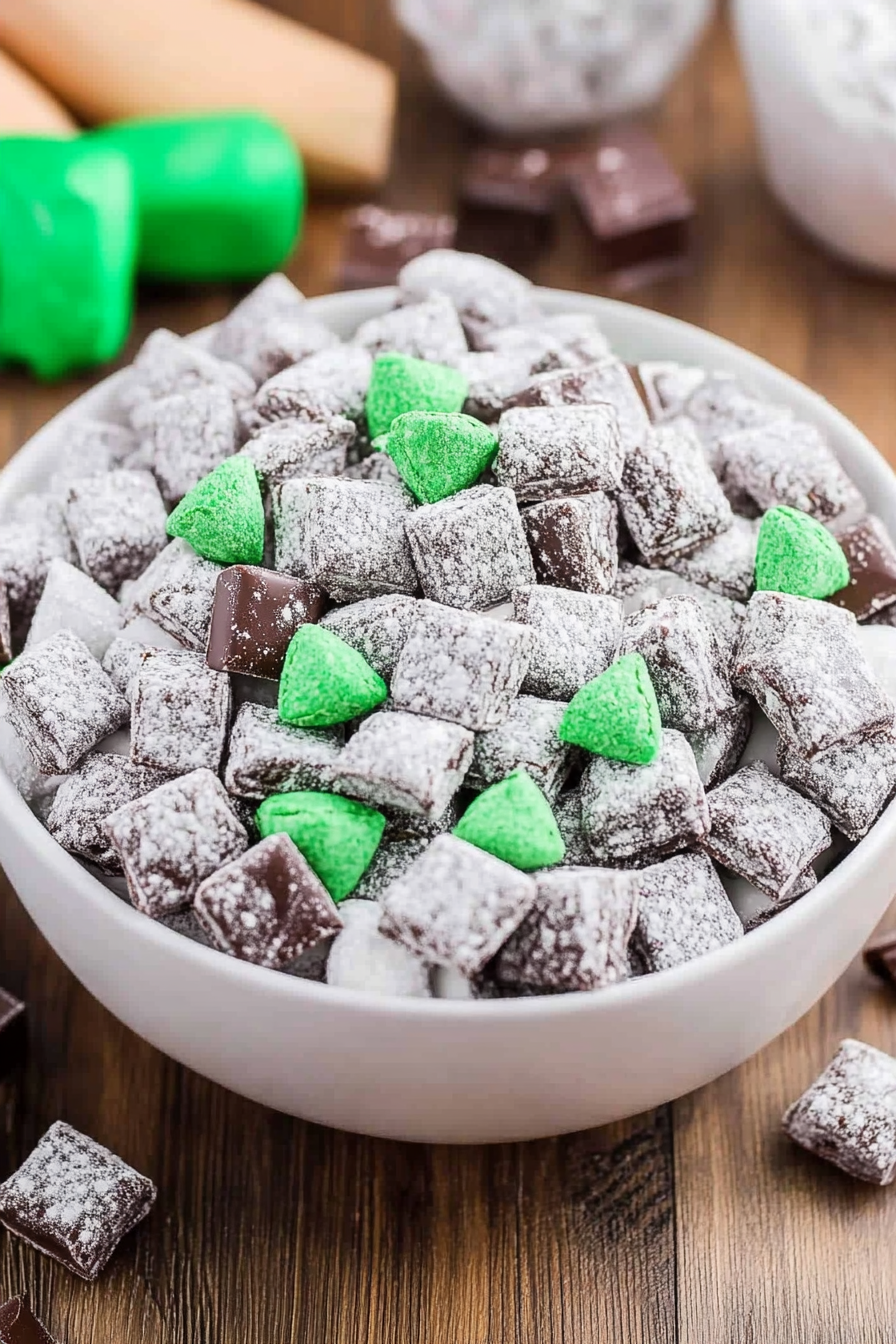
You know those recipes that just *feel* like home? The ones that bring a flood of happy memories and always, *always* turn out perfectly? Well, today I’m sharing one of those with you. It’s my absolute favorite mint chocolate puppy chow, and honestly, it’s a game-changer. Forget those basic versions you might have tried; this one has a little something extra that makes it totally irresistible. It’s the kind of treat that vanishes from the snack bowl in minutes, no matter how much I make. I’ve been making this for years, and it’s become my secret weapon for parties, potlucks, or even just those moments when I need a serious chocolate-mint fix. It’s like a hug in a bowl, and I can’t wait for you to try it!
What is Mint Chocolate Puppy Chow?
So, what exactly is this delightful concoction we call mint chocolate puppy chow? Think of it as a super-charged, flavor-packed upgrade to the classic muddy buddies or puppy chow you might remember from childhood. It starts with crispy cereal squares, then gets coated in a rich, velvety chocolate mixture, and finally gets tossed with powdered sugar until it’s light and airy. The magic in *my* version, though, is the perfect whisper of cool mint that cuts through the sweetness of the chocolate, making every bite incredibly refreshing and utterly addictive. It’s not overly sweet, and that minty zing is what really sets it apart. It’s essentially a no-bake, incredibly easy-to-make sweet treat that’s perfect for sharing… or not sharing, I won’t judge!
Why you’ll love this recipe?
There are so many reasons why this mint chocolate puppy chow has earned a permanent spot in my recipe binder, and I’m convinced you’ll fall in love with it too! First off, let’s talk about the flavor. The combination of rich, dark chocolate with that cool, crisp mint is just divine. It’s not a toothpaste flavor at all, it’s that perfect sweet mint that makes you want to go back for more. It reminds me a little of those decadent mint chocolate candies, but in snack form! And the simplicity? Oh my goodness, it’s a lifesaver. You don’t need any fancy equipment or baking skills. I can whip this up in less than 15 minutes (plus cooling time, of course), which is fantastic for those busy weeknights when the sweet tooth strikes hard. It’s also incredibly budget-friendly; the ingredients are pantry staples, and you get a huge batch for a fraction of the cost of store-bought candy. Plus, it’s so versatile! It’s perfect for kids’ parties, holiday goodie bags, or just a movie night snack. I’ve also found that this is a fantastic way to use up a big bag of cereal if you happen to have one lying around. What I love most about this is that it’s a guaranteed crowd-pleaser. Everyone, from my picky eaters to my adult friends, devours it. It’s that special something that feels indulgent but is ridiculously easy to make.
How do I make Mint Chocolate Puppy Chow?
Quick Overview
The process is wonderfully straightforward: we’ll melt some chocolate and butter, toss it with crispy cereal, add a hint of mint, and then coat everything in powdered sugar. It’s a no-bake wonder that comes together in a flash. The key is in the quality of the chocolate and that touch of mint to really elevate the flavor. You really can’t mess this up, and the results are always spectacular. It’s a recipe designed to make you feel like a kitchen wizard without breaking a sweat!
Ingredients
For the Main Batter:
6 cups Chex cereal (I prefer Rice Chex for its neutral flavor, but Corn Chex works beautifully too. Just make sure it’s fresh and crispy!)
1 cup semi-sweet chocolate chips (good quality chocolate makes a difference here! Ghirardelli or Guittard are my go-to’s)
1/2 cup (1 stick) unsalted butter, cut into pieces
1 teaspoon peppermint extract (this is where the magic happens! Start with 1 tsp and you can add a tiny bit more if you love a strong mint flavor, but be careful not to overdo it, or it can taste like toothpaste)
For the Coating:
1 1/2 cups powdered sugar (also known as confectioners’ sugar. Make sure it’s sifted if you tend to get lumps in yours)
Step-by-Step Instructions
Step 1: Preheat & Prep Pan
First things first, grab a really big bowl. I mean, the biggest one you have. You’ll want plenty of room to toss everything around without making a huge mess. Set aside your large bowl and make sure your cereal is ready to go. No oven preheating needed for this one, which is part of its charm!
Step 2: Mix Dry Ingredients
Pour your 6 cups of Chex cereal into that giant bowl. That’s it for this step! We’ll add the powdered sugar later.
Step 3: Mix Wet Ingredients
In a microwave-safe bowl (or a double boiler if you prefer), combine your chocolate chips and butter. Microwave in 30-second intervals, stirring well between each interval, until the chocolate is completely melted and smooth. This usually takes about 1.5 to 2 minutes total. Once it’s smooth and glossy, stir in the peppermint extract. Give it a really good mix to ensure the flavor is evenly distributed. The smell at this point is already amazing!
Step 4: Combine
Now for the fun part! Pour the melted chocolate mixture over the cereal in your big bowl. Using a spatula or a large spoon, gently stir and fold the cereal until every single piece is coated in the chocolatey goodness. You want to be thorough but also gentle so you don’t crush the cereal. Make sure you get all those nooks and crannies!
Step 5: Prepare Coating
In a separate, medium-sized zip-top bag or bowl, place your 1 1/2 cups of sifted powdered sugar. If you’re using a bag, make sure it’s a sturdy one! This is where the coating gets its signature powdery finish.
Step 6: Toss & Coat
Add about half of the chocolate-coated cereal to the bag with the powdered sugar. Seal the bag tightly, making sure to push out as much air as possible. Now, shake, shake, shake! You can also gently toss the cereal in the bowl with the powdered sugar using your spatula, but shaking it in a bag is usually more effective and way more fun (especially if you have kids helping!). Continue until the cereal is completely covered in a light, powdery coating. Repeat with the remaining chocolate-coated cereal. This step is crucial for getting that classic puppy chow texture and look.
Step 7: Cool & Set
Once everything is coated, spread the mint chocolate puppy chow out in a single layer on parchment paper or wax paper laid out on a baking sheet or your countertop. Let it cool and set for at least 20-30 minutes. This helps the coating stick and prevents it from becoming clumpy.
Step 8: Portion & Enjoy!
Once cooled and set, break up any large clumps, and that’s it! Your delicious mint chocolate puppy chow is ready to be devoured. I like to store it in an airtight container, but honestly, it rarely lasts long enough to need serious storage!
What to Serve It With
This mint chocolate puppy chow is truly a standalone star, but it also plays wonderfully with other treats and beverages. For breakfast, while I wouldn’t typically serve this *as* breakfast (though no judgment if you do!), it’s a delightful addition to a brunch spread. Imagine a vibrant Fruit Salad alongside it, or maybe some mini muffins. It’s perfect for those leisurely weekend mornings where you’re looking for something a little special. For a more formal brunch, I love presenting it in small, pretty bowls alongside a platter of mini quiches or scones. It adds a fun, sweet contrast. As a dessert, it’s incredible on its own, of course. But for an after-dinner treat, it’s fantastic paired with a strong cup of coffee or a glass of cold milk. For a truly decadent experience, try it with a scoop of vanilla bean ice cream – the mint and chocolate are a dream team! And for cozy snacks? This is the ultimate companion to a good book and a warm blanket. I often serve it in a big bowl for family movie nights, or pack small bags for picnics. My family also loves it after dinner when we’re craving something sweet but don’t want to bake a whole cake. It’s just perfect for those casual moments when you want a little bit of indulgence without a lot of fuss. One of my favorite traditions is to have this ready when my kids get home from school on a Friday – it’s their favorite reward!
Top Tips for Perfecting Your Mint Chocolate Puppy Chow
Over the years, I’ve definitely picked up a few tricks that take this mint chocolate puppy chow from good to absolutely phenomenal. For the cereal, always make sure it’s fresh. Stale cereal can make the whole batch a bit chewy, and we want that satisfying crunch! When melting your chocolate and butter, low and slow is the way to go. If you microwave too fast, you risk scorching the chocolate, which is a flavor disaster. Stirring frequently ensures even melting and a silky-smooth texture. Now, about that peppermint extract: this is where you can really customize. I personally love a pronounced mint flavor, so I stick to one teaspoon. However, some people prefer a subtler hint. Start with 3/4 teaspoon and taste a coated piece (carefully, it’s hot!). You can always add a tiny bit more, but you can’t take it away. Too much peppermint extract can quickly turn it into a mouthwash experience, and nobody wants that! For the powdered sugar coating, make sure you’re not shy with it. You want a good, even layer. If you’re using a zip-top bag, don’t overcrowd it. Work in batches if necessary. This ensures every piece gets thoroughly coated. I’ve learned this lesson the hard way – trying to cram too much in means you end up with un-coated patches and a less delightful final product. Another thing: spreading it out on parchment paper to cool is key. Don’t leave it in a big pile, or it will clump together and become difficult to break apart. A single layer allows each piece to set nicely. If you’re feeling adventurous, you can even add a few drops of green food coloring to the chocolate mixture for a festive look, though I usually keep it simple. For a richer chocolate flavor, you can also use a mix of semi-sweet and dark chocolate chips. Trust me, it makes a difference! I once tried using milk chocolate, and while it was still good, the semi-sweet provides that perfect balance without being overly sweet. And if you’re out of peppermint extract, a tiny splash of mint liqueur can work in a pinch for an adult version, but always use it sparingly!
Storing and Reheating Tips
Proper storage is key to keeping your mint chocolate puppy chow tasting its best. At room temperature, it’s best enjoyed within 2-3 days. I store mine in an airtight container, making sure it’s not packed too tightly. If you notice it getting a little clumpy, you can gently break them apart with your fingers. Refrigeration is a good option if you want it to last a bit longer, up to a week. However, I’ve found that refrigeration can sometimes make it a bit harder, so I usually let it come to room temperature for about 15-20 minutes before serving if it’s been chilled. For longer storage, freezing is your best bet. I like to spread it out on a baking sheet to freeze initially until solid, then transfer it to freezer-safe bags or containers. It can last in the freezer for up to 2-3 months. When you’re ready to eat it from frozen, the best method is to thaw it overnight in the refrigerator and then let it sit at room temperature for a bit. I usually add the glaze after it’s cooled completely and is ready to be stored, rather than adding it too early, which can sometimes make the coating slightly sticky. If for some reason your puppy chow seems a bit dry or less flavorful after storage, you can sometimes revive it by giving it a very light dusting of extra powdered sugar and gently tossing it. It’s amazing how a little extra powder can make it feel fresh again!
Frequently Asked Questions
Final Thoughts
So there you have it – my tried-and-true recipe for the most delightful mint chocolate puppy chow. It’s honestly one of those recipes that brings me so much joy every time I make it, and seeing the smiles it brings to everyone’s faces is the best part. It’s proof that you don’t need complicated steps or fancy ingredients to create something truly special. The combination of crunchy cereal, rich chocolate, and that refreshing minty kick is simply unbeatable. If you’re a fan of mint chocolate, or just looking for an easy, crowd-pleasing treat, you’ve got to give this a go. It’s perfect for parties, holidays, or just because you deserve a little sweet moment. I really hope you love it as much as my family and I do. Don’t forget to tell me how yours turns out in the comments below, and I’d be thrilled if you share your own variations or any funny kitchen mishaps you encounter along the way! Happy baking… or rather, happy no-baking!
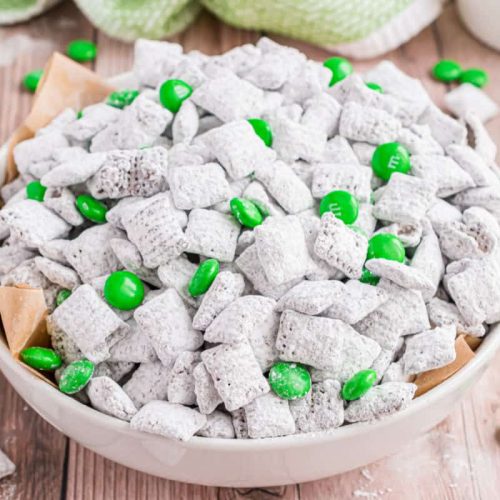
Mint Chocolate Puppy Chow
Ingredients
Main Ingredients
- 16 ounces Ghirardelli chocolate wafers
- 0.5 cup chopped Andes mint candy (or Andes baking bits)
- 2 cups powdered sugar
- 10 cups Rice Chex cereal
- 1 bag Mint M&M candies (8 ounce)
Instructions
Preparation Steps
- In the microwave, melt chocolate wafers with mint candy together for one minute. Stir and continue melting in 30-second intervals until smooth. This should take approximately 2 minutes total.
- In a large mixing bowl, combine the cereal with the melted chocolate. Fold gently with a large wooden spoon until all cereal pieces are coated.
- In a large, gallon-sized ziploc bag, add the powdered sugar. Spoon in the chocolate-coated cereal mixture. Seal the bag and shake until all the cereal is completely coated in powdered sugar. Pour onto a large piece of wax paper and allow the chocolate to set (about 20 minutes). Combine the M&M candies with the chex mixture and store in an airtight container. Enjoy!

