Little Debbie Christmas Cake Balls
Oh, I just *have* to share this little slice of holiday magic with you—because when the craving hits for something sweet, nostalgic, and totally festive, these Little Debbie Christmas Cake Balls are my go-to. They’re not fancy, they don’t take forever to make (hello, 3-ingredient wonder?), and honestly? They taste like childhood joy wrapped in chocolate and sprinkled with sugar. I made a batch last week while watching Christmas movies with my niece, and we couldn’t stop snacking on them. The best part? No baking required—just crumble, roll, dip, and decorate. It’s basically dessert therapy in edible form.
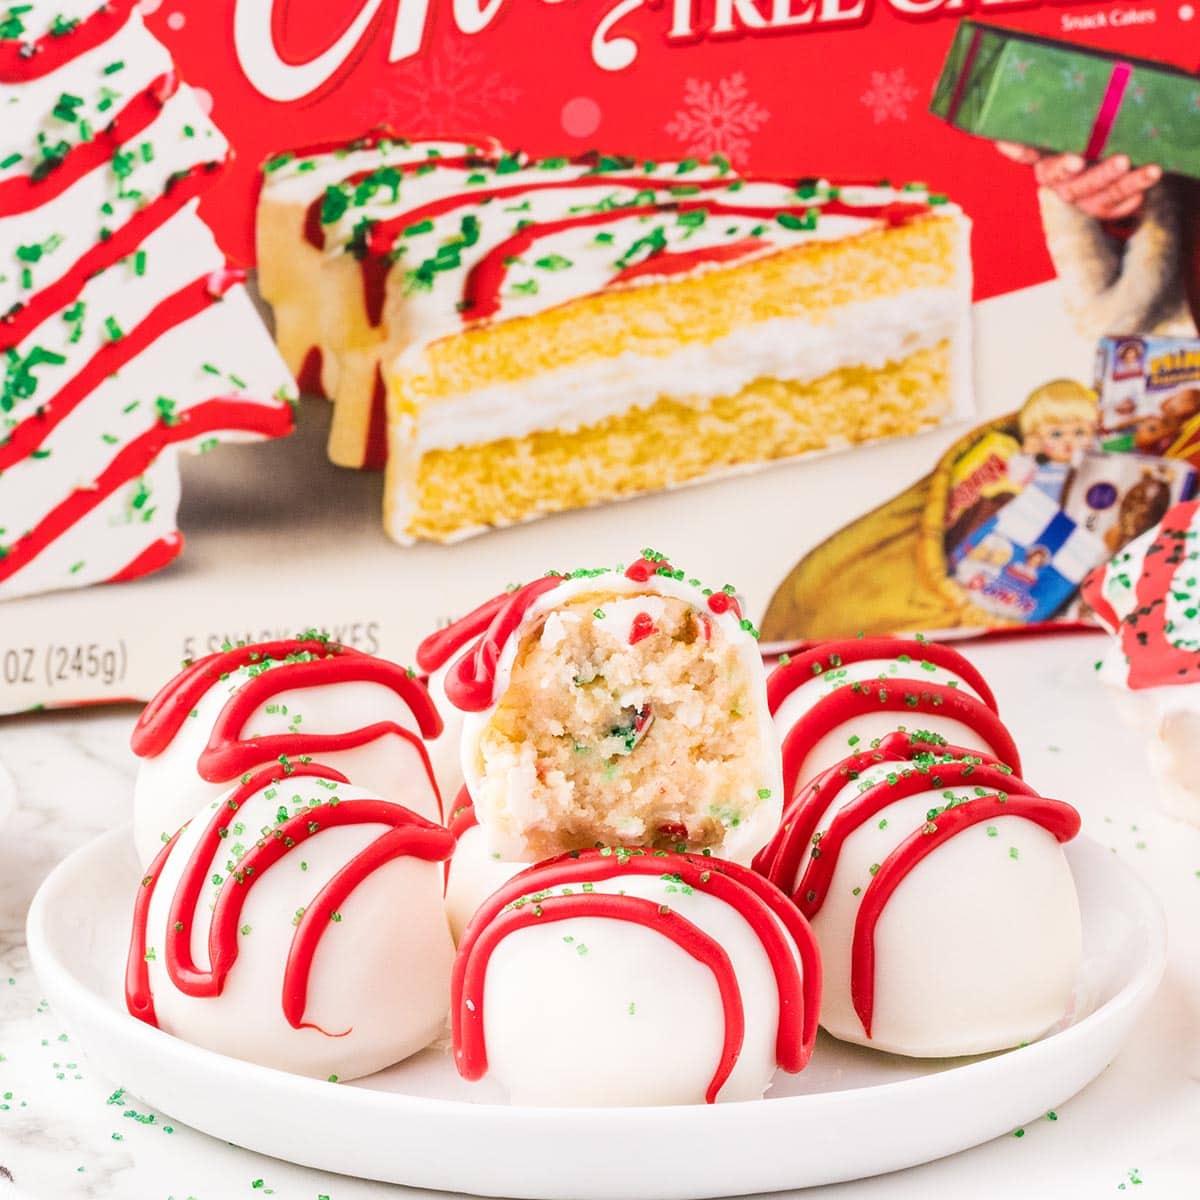
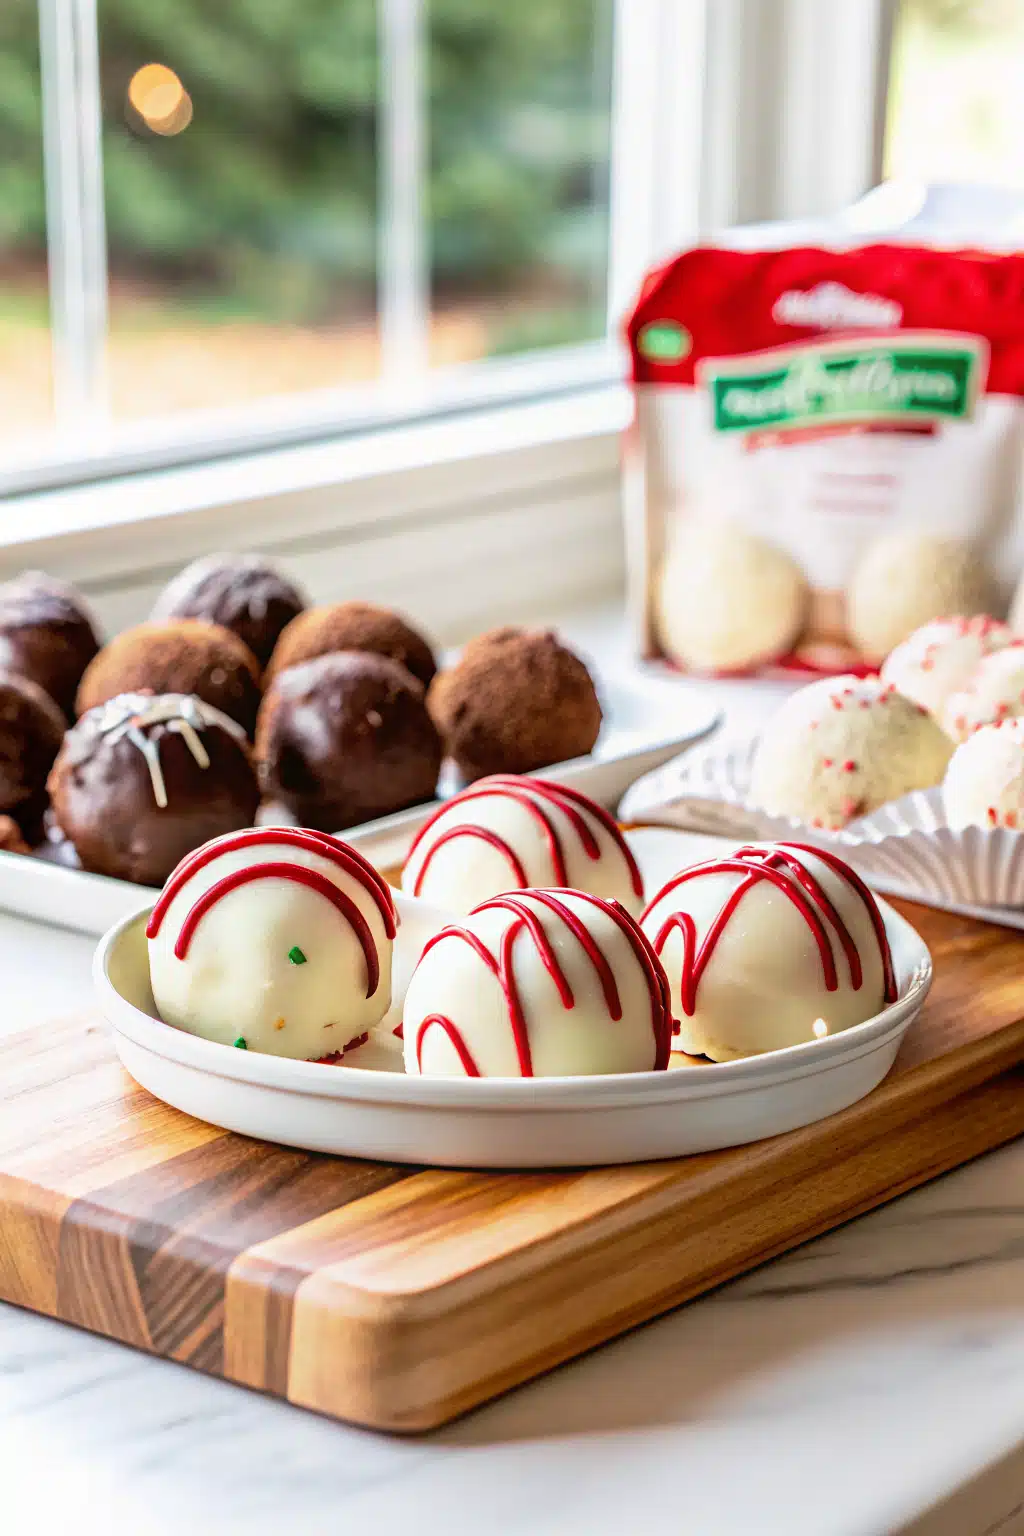
What Is Little Debbie Christmas Cake Balls?
If you grew up snacking on those iconic tree-shaped cakes from Little Debbie—you know the ones with the green sprinkles and red ribbon—then you’re going to fall hard for these cake balls. These treats take that same nostalgic flavor and transform it into bite-sized truffles coated in white chocolate and topped with a festive red zigzag and crunchy green sugar. Think of them as grown-up candy disguised as dessert. They’re soft and creamy on the inside thanks to softened cream cheese mashed together with crumbled snack cakes, then frozen so they hold their shape before being dipped in smooth white chocolate. And yes—they look almost too pretty to eat… but please, don’t wait. They’re perfect for cookie trays, gift baskets, or just because.
Why You’ll Love This Recipe
This recipe is pure holiday magic for anyone who loves easy desserts that still feel special. First off—it’s ridiculously simple. You only need three main ingredients: crumbled Little Debbie Christmas Tree Cakes, softened cream cheese, and melting wafers (white and red). There’s no mixer cleaning, no complicated piping, and no oven involved. Just grab your spatula, roll some balls, freeze them briefly, then coat and decorate. That’s it! Plus, they’re naturally gluten-friendly if you use gluten-free versions of the cakes (though most people don’t even notice the difference).
Another reason to adore these? They travel like champs. Whether you’re packing them into tins for neighbors, bringing them to a potluck, or gifting them in cellophane bags tied with ribbon, they always disappear fast. My sister once brought them to her office holiday party and came back empty-handed—she said they were “too good to leave behind.” And let’s be real—who doesn’t love a dessert that brings back memories of simpler times? These aren’t just sweets; they’re emotional comfort food with sprinkles on top.
Plus, customization is easy. Swap the red candy melts for gold if you’re doing Hanukkah vibes, or use rainbow sprinkles instead of green sugar for a fun twist. You can even stick them onto lollipop sticks and call them cake pops for extra whimsy. Seriously, once you try making these, you’ll find yourself reaching for that box of snack cakes every time December rolls around. Trust me—you’ll want to keep a stash in the back of the pantry just in case.
How to Make Little Debbie Christmas Cake Balls
Quick Overview
Making these festive bites takes less than an hour total, including chilling time. Start by mashing softened cream cheese with crumbled Little Debbie cakes until smooth. Scoop tablespoon-sized portions, roll into balls, and pop them in the freezer for about 30 minutes. Meanwhile, melt white chocolate and red candy melts separately. Dip each frozen ball in white chocolate, pipe a zigzag with red melts, sprinkle with green sanding sugar, and let set. Boom—festive truffles ready in under 60 minutes!
Ingredients
- 10 Little Debbie vanilla Christmas tree snack cakes (about 2–8.62 oz boxes), unwrapped
- 8 ounces block cream cheese, softened to room temperature
- 20 ounces white chocolate melting wafers (Ghirardelli recommended)
- 6 ounces red vanilla-flavored melting candy wafers (Wilton brand works well)
- 1 tablespoon green sanding sugar sprinkles
Step-by-Step Instructions
- Line two large baking sheets with parchment paper or silicone mats. Set aside.
- In a large mixing bowl, beat the softened cream cheese on medium speed for 1–2 minutes until fluffy and smooth.
- Break the Little Debbie cakes into small pieces and add them to the cream cheese. Mix on low speed just until combined. The mixture should be mostly smooth, though tiny bits of cake coating may remain—that’s totally fine.
- Using a small cookie scoop, portion out tablespoon-sized amounts of the mixture. Roll each into a smooth ball between your palms, then place on one of the prepared baking sheets.
- Freeze the balls for 30–45 minutes, or until completely solid. This step is key—it helps the chocolate coating stick properly.
- Melt the white chocolate according to package directions, stirring until smooth. In a separate small bowl, melt the red candy wafers until glossy and pourable.
- Transfer the red candy melts into a small piping bag fitted with a tip cut off at the bottom.
- Working one at a time, dip each frozen cake ball into the melted white chocolate, ensuring full coverage. Lift with a fork, tap gently against the bowl to remove excess, then place upright on the second baking sheet.
- Pipe a decorative zigzag pattern across the top using the red candy melts, mimicking the look of the original cakes. Immediately sprinkle with green sanding sugar.
- Let the cake balls set for 15–20 minutes until the chocolate is firm. Serve at room temperature or chilled—your choice!
What to Serve It With
These cake balls shine brightest when paired with warm drinks and cozy moments. Serve them alongside a mug of hot cocoa spiked with peppermint extract, a glass of eggnog (homemade or store-bought), or even a spiced apple cider during winter gatherings. They’re fantastic at cookie exchanges, holiday parties, or as part of a dessert charcuterie board alongside brownies, gingerbread, and fruit tarts. For a non-alcoholic adult twist, pair them with spiked hot chocolate or mulled wine. And honestly—they’re just as delicious on their own while curled up with a Hallmark movie. Don’t overthink it—sometimes simplicity is the best kind of celebration.
Top Tips for Perfecting Your Little Debbie Christmas Cake Balls
- Keep cream cheese cold but soft: If your fridge is chilly, microwave the cream cheese in 15-second bursts until pliable but not liquid. Never use cold cream cheese—it won’t blend smoothly and will make the mixture grainy.
- Work fast after dipping: White chocolate hardens quickly when exposed to air, so have your red melts ready and your sprinkles nearby. Complete 1–2 cake balls at a time to keep everything fresh.
- Don’t skip the freeze: Skipping this step leads to messy chocolate drips and uneven coatings. Patience here pays off big time.
- Use quality melting wafers: Cheap brands often seize or burn. Ghirardelli and Wilton are reliable, but follow package instructions closely for best results.
- Get creative with colors: Swap green sugar for rainbow confetti, or use edible glitter for extra sparkle. Leftover white chocolate? Add a drop or two of gel food coloring for custom shades.
Storing and Reheating Tips
These cake balls stay fresh and delicious in the refrigerator for up to one week when stored in an airtight container. Layer them with parchment paper to prevent sticking. For longer storage, freeze them for up to 3 months—just thaw at room temperature for 30 minutes before serving. Note: Freezing may soften the chocolate slightly, but the flavor remains intact. Avoid microwaving unless you’re warming up a drink—these are best enjoyed cold or at room temperature. Pro tip: Store them in a single layer if possible to maintain their shape and presentation.
Frequently Asked Questions
Final Thoughts

There you have it—a dessert so effortless, joyful, and utterly satisfying that it feels like magic without the hassle. These Little Debbie Christmas Cake Balls prove that sometimes the simplest ideas yield the sweetest results. Whether you’re hosting guests, surprising loved ones, or treating yourself (no judgment!), this recipe delivers on every front: flavor, nostalgia, and ease. I’ve made them for family gatherings, office parties, and even as midnight snacks straight from the fridge. Each bite tastes like a hug in your mouth, complete with that familiar sweetness you remember from childhood. So go ahead—grab a box of those iconic cakes, whip up a batch, and let the holidays begin with a smile and a sprinkle. You deserve it.

Little Debbie Christmas Cake Balls
Ingredients
Main Ingredients
- 10 pieces Little Debbie vanilla Christmas tree snack cakes (unwrapped from 2 - 8.62 oz. boxes)
- 8 ounce cream cheese (softened to room temperature)
- 20 ounce white chocolate melting wafers Ghirardelli brand used
- 6 ounce red vanilla flavored melting candy wafers Wilton brand used
- 1 tablespoon green sanding sugar sprinkles
Instructions
Preparation Steps
- Line two large baking sheets with parchment paper or a silicone mat and set aside.
- To a large mixing bowl, add the softened cream cheese and beat on medium speed, using a handheld mixer, for 1-2 minutes or until fluffy and smooth.
- Break the Little Debbie vanilla Christmas tree Snack Cakes into smaller pieces and add to the bowl of beaten cream cheese. Mix on low speed just until fully combined. You may still have some small pieces of the vanilla coating from the snack cakes remaining in the mixture however the mixture should be relatively smooth.
- Using a small cookie scoop, scoop out a 1 tablespoon sized portion of cake ball mixture and place into the palm of your hand. Gently roll to form a smooth ball.
- Place the Little Debbie Christmas tree cake ball onto one of the prepared baking sheets. Repeat with the remaining mixture until all the cake balls have been formed and placed onto the prepared baking sheet.
- Freeze the cake balls for 30-45 minutes, or until completely solid. This will make it easier to coat the cake balls in the melted white chocolate.
- Melt the white chocolate wafers in a medium bowl according to package directions and stir to a smooth consistency.
- In a separate small bowl, melt the red vanilla flavored candy wafers according to package directions and stir until smooth. Transfer the melted red candy wafers into a small piping bag with the tip cut off.
- Place a single cake ball into the melted white chocolate, being sure to coat all sides. Using a fork, lift the coated cake ball out of the melted white chocolate and gently tap the fork on the side of the bowl allowing the excess melted white chocolate to drip back into the bowl.
- Place the white chocolate coated Little Debbie Christmas tree cake ball onto the second prepared baking sheet. Pipe a decorative ziz-zag pattern across the top of the white chocolate coated cake ball and sprinkle with a pinch of the green sanding sugar sprinkles. Try to mimic the look of the original Little Debbie Christmas tree snack cakes. Repeat until all the cake balls have been coated and decorated.
- Let the Little Debbie Christmas tree cake balls set for 15-20 minutes until the white chocolate coating is completely firm before plating and serving.