I’ll be honest: the first time I tasted honey garlic chicken thighs, I whispered to myself, “This is what dinner should feel like.” It wasn’t fancy, just honest comfort—the kind of dish that makes the kitchen smell like Sunday morning even on a Tuesday. The sweet warmth of honey meets garlic’s bite in a way that’s somehow both cozy and bright. I grew up cooking with my mom, who swore by simple, pantry-friendly flavors, and this recipe feels like a gentler, more sultry cousin to the classic fried chicken she loved to coax from the skillet. It’s incredibly easy for weeknights, but it’s also the kind of dish you can pull out for a weekend crowd without missing a beat. If you’re comparing it to a boring, dry chicken quickly roasted in the oven, you’ll be surprised how honey garlic chicken thighs stay irresistibly juicy and glossy—this one’s a lifesaver on busy nights. My kids actually ask for seconds, and yes, I keep a jar of rice for this exact moment so we can scoop every last drop of glaze off the pan.
What is honey garlic chicken thigh?
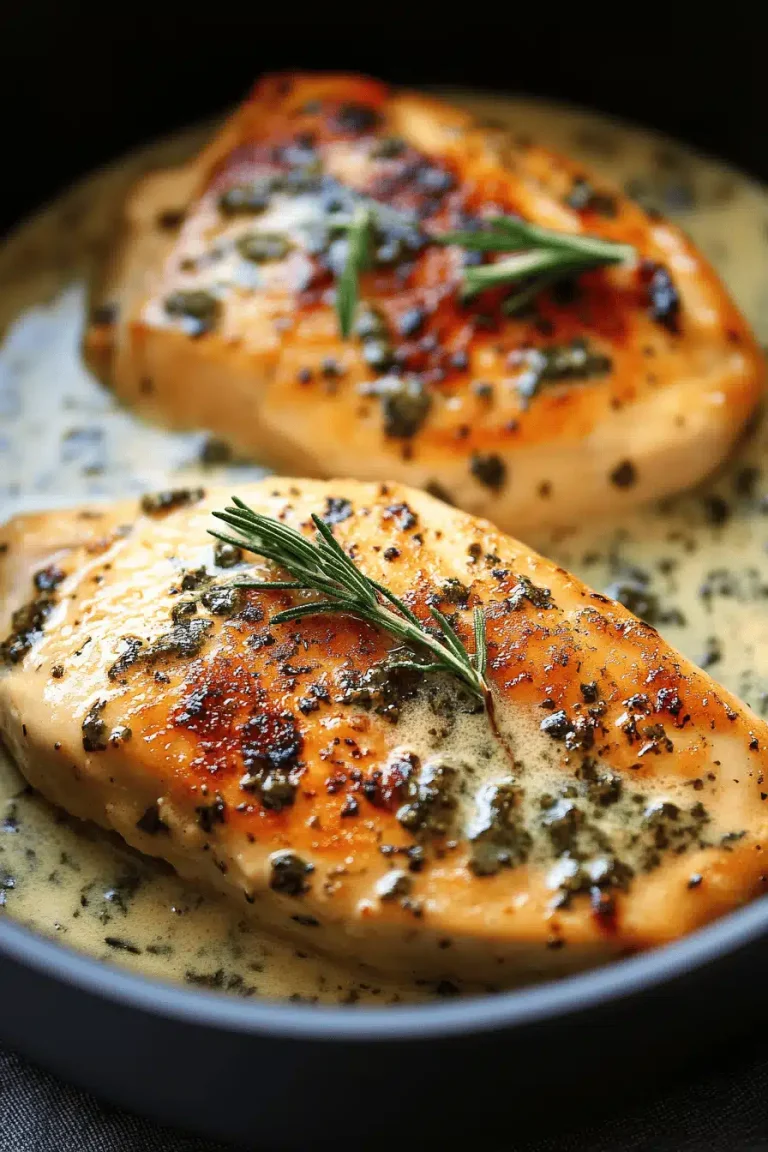
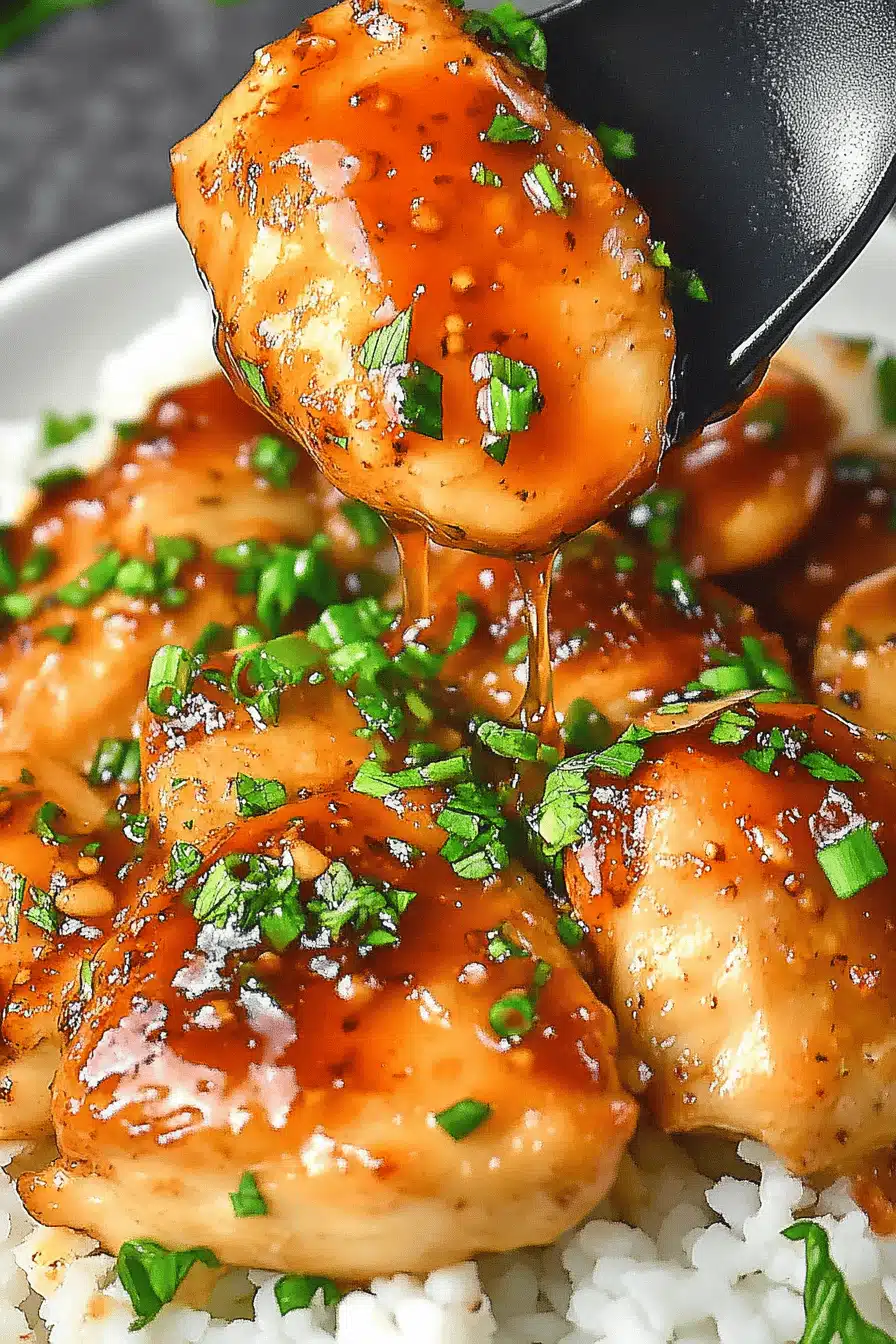
Think of honey garlic chicken thighs as a straightforward, deeply satisfying weeknight staple that’s equal parts pantry-friendly and family-pleasing. It’s essentially chicken thighs (bone-in, skin-on for maximum flavor and moisture) bathed in a glossy honey-garlic glaze that caramelizes as it cooks. The name says it all: a harmonious duo—sweet honey and savory garlic—licked with a touch of soy and a little tang from rice vinegar or lemon juice. This dish isn’t a complicated fusion; it’s a well-loved classic repackaged for modern weeknights. I love that the glaze clings to the meat as it finishes, creating a lacquered, sticky crust that’s as beautiful to look at as it is delicious to eat. If you’ve got a hungry crew, this is the recipe you reach for—clean ingredients, big flavor, and minimal fuss.
Why you’ll love this recipe?
What I love most about this honey garlic Chicken Thighs is how simply it comes together without sacrificing flavor. First, the flavor is knockout: the honey caramelizes into a glaze that’s both glossy and deeply savory, while garlic adds that comforting punch you crave in a cozy dinner. It’s not cloying or fake-sweet; the acidity from a splash of vinegar and a dash of soy cuts through the sweetness for balance you can taste in every bite. Second, the method is forgiving. You can sear the thighs to render fat and crisp the skin, then braise/finish with the glaze so the meat stays juicy even if you’re juggling kids and homework. Third, it’s budget-friendly. Chicken thighs are typically cheaper than breasts, and you don’t need fancy ingredients to make this sing. Finally, it’s endlessly versatile. Serve it over rice, alongside roasted vegetables, or tucked into warm tortillas for a quick weeknight taco night. This is one of those dishes that feels like a hug from the inside out—the kitchen smells amazing, and everyone in the house starts wandering in for a taste before the plate is even plated.
How do I make Honey Garlic Chicken Thighs?
Quick Overview
In a nutshell, you pat the chicken dry, season well, and sear it in a hot skillet to render the fat and crisp the skin. Then you whisk together a glaze of honey, garlic, soy, and a touch of vinegar, pour it over the chicken, and finish with a quick bake or a short simmer until the sauce thickens and clings to every surface. The result is succulent, caramelized chicken with a glossy, sticky glaze that tastes like it took longer than it did. The beauty of this method is that you don’t need fancy equipment or long marinating times—just a hot pan, a good glaze, and a little patience as the sauce reduces. Trust me, this is a lifesaver on busy nights and a surefire crowd-pleaser for weeknights at home.
Ingredients
For the main ingredients:
- 8 bone-in, skin-on Chicken Thighs
- 1-2 tablespoons olive oil (or neutral oil) for searing
- Salt and freshly ground black pepper
- Optional: a pinch of smoked paprika for extra depth
For the Marinade & Glaze:
- 3 tablespoons honey (preferably local and thick)
- 2 tablespoons soy sauce or tamari for gluten-free option
- 3 cloves garlic, minced
- 1 tablespoon rice vinegar or fresh lemon juice
- 1 teaspoon sesame oil (optional, for that toasty aroma)
- ¼ teaspoon red pepper flakes (optional, for a gentle kick)
- 2-3 tablespoons water or chicken stock, to loosen as needed
For Finishing & Garnish:
- Chopped fresh parsley or scallions for brightness
- Sesame seeds (optional) for a little crunch
Step-by-Step Instructions
Step 1: Preheat & Prep Pan
Heat your oven to 375°F (190°C) if you’re finishing the glaze in the oven, or keep things on the stovetop if you prefer. Pat the chicken thighs dry with paper towels—wet skin won’t crisp. Season generously with salt, pepper, and a light dusting of paprika if you like a smoky hue. A dry surface makes for that beautiful, crackly skin and ensures the glaze sticks instead of sliding off. I always tell myself: dry skin, happy skin. If you have time, you can let the thighs rest out of the fridge for 15 minutes to come closer to room temperature before searing; it helps them cook evenly.
Step 2: Sear the Chicken
In a large, ovenproof skillet, heat the oil over medium-high heat until it’s shimmering. Place the thighs skin-side down and don’t disturb them for 5-6 minutes—let the fat render and the skin crisp. If you hear a steady sizzle and see the edges turning a rich bronze, you’re doing it right. Flip them over and cook for another 2-3 minutes on the other side. You don’t need to cook them all the way through at this stage; you’re finishing in the glaze and/or oven later, so this step is about flavor and texture development, not the final doneness.
Step 3: Make the Marinade & Glaze
While the chicken sears, whisk together honey, soy sauce, minced garlic, vinegar, sesame oil, and red pepper flakes if you’re using them. The aroma should be sweet and garlicky with a hint of tang. If your glaze seems a touch thick, whisk in a tablespoon or two of water or chicken stock to loosen it to a spoonable consistency. You’re aiming for a glaze that will cling to the chicken and hiss a little as it hits the hot pan in the next step.
Step 4: Combine
Pour the glaze over the seared chicken, turning the thighs to coat them in the luscious mixture. Let the mixture come to a gentle simmer. The goal is to reduce the glaze until it becomes syrupy and glossy, coating the chicken with a mahogany sheen. If your pan is too hot and the glaze seems to burn, reduce the heat a touch and keep it moving—you want that glossy coat, not a charred edge.
Step 5: Finish in the Oven or on the Stovetop
If you’re finishing in the oven, transfer the skillet to the 375°F oven and bake for 10-15 minutes, or until the chicken reaches 165°F (74°C) and the glaze is thick and sticky. If you’re keeping it on the stovetop, simmer gently until the thickened glaze coats the thighs evenly and the meat is cooked through. Either way, you’ll notice the glaze bubbling and clinging to the chicken, which signals that you’re almost ready to plate.
Step 6: Rest & Baste
Remove the pan from heat and let the chicken rest for about 5 minutes. This is the moment your juices redistribute, and the glaze sets a little more—don’t rush this part. If you want a final glossy finish, spoon a little extra glaze over the thighs and give them a quick rest. The resting stage makes a big difference in how juicy each bite feels.
Step 7: Glaze & Plate
If you like an extra glaze, brush on a final coat and sprinkle sesame seeds and chopped parsley for color. The glaze should look like a lacquer—shiny and inviting—without being pooly or runny. The aroma should be sweet, garlicky, and just a touch of caramelized smoke. These are the moments I savor—the way the kitchen fills with warmth and that first bite proves this weeknight supper was worth waiting for.
Step 8: Slice & Serve
Plate the thighs with a generous spoonful of glaze, then finish with a sprinkle of fresh herbs. Slice into one to check the juices: they should run slightly pinkish in the very center if you’re using thighs with a bit of pink meat near the bone, but fully cooked through is perfectly fine and safe. Serve over steamed rice, alongside sautéed greens, or with roasted veggies. The sauce will cling to the grains or greens beautifully, making every scoop a little winner.
Step 9: Serve & Enjoy
Family-tested, kid-approved, and pantry-friendly—this Honey garlic chicken thighs dish shines on weeknights and still feels special enough for guests. The real magic isn’t in a long marinade or an exotic ingredient; it’s in the way the glaze and the roasted skin lock in moisture and deliver a balanced flavor with every bite. I still remember the first time my youngest asked for “just one more spoonful of that sauce” before finishing the last bite. That moment is why I come back to this recipe again and again.
What to Serve It With
This honey garlic chicken thighs loves company. It’s equally happy tucked into a busy weeknight as it is framed as a comforting weekend meal. Here are a few tried-and-true pairings and ideas that feel just right.
For Dinner: Serve over fluffy jasmine rice or brown rice soaks up every drop of glaze. Add a side of roasted broccoli tossed with a little sesame oil and lemon zest for brightness. A simple cucumber salad with rice vinegar adds a crisp, refreshing contrast to the sweetness.
For Brunch or a Weekend Lunch: Slice the thighs and heap them into warm baguette rolls with a light slaw for a honey-garlic chicken sandwich that’s somehow fancy and homey at the same time. A quick dill yogurt sauce or herbed aioli makes it special without extra work.
As Dessert? Just Kidding—But This Is Great as a Glaze Topper: If you’ve got leftovers, drizzling a touch of glaze over roasted sweet potatoes or a simple vanilla yogurt parfait can be a surprising but welcome finish for a brighter, more playful meal.
For Cozy Snacks: Turn leftovers into little bites by shredding the chicken and tossing with a bit more glaze, then serving on mini sliders or repurposing into a quick ramen topping for a savory-sweet kick. The glaze doubles as a versatile sauce that brightens leftovers and makes a quick bite feel special.
All told, this is the kind of dish that’s become a weekday standard in my house. The kids love the sweet-savory balance, and I love how quickly we can get something on the table that feels both comforting and a touch bright. It’s a little nostalgic, a little modern, and entirely satisfying with minimal fuss.
Top Tips for Perfecting Your Honey Garlic Chicken Thighs
These tips are the tiny tweaks I learned after cooking this dish dozens of times. They’re the little things that push this from good to memorable.
Chicken Prep: Always pat the thighs dry. Excess moisture on the skin makes it harder to crisp. If you have a few extra minutes, let the chilled thighs rest on a rack for 10-15 minutes after drying so the surface dries out again, which helps with browning.
Marinade Balance: If you’re using a low-sodium soy, you might want to adjust salt by a pinch. The glaze should taste balanced—sweet, salty, and a touch tangy. If you prefer more garlic, add an extra clove; for less heat, skip the red pepper flakes.
Sauce Consistency: The glaze should coat the back of a spoon and cling to the meat. If it’s too thin, simmer a bit longer; if it’s too thick, whisk in a splash of water or stock.
Ingredient Swaps: Tamari or coconut aminos make this naturally gluten-free without sacrificing flavor. If you don’t have honey, maple syrup works in a pinch, but you’ll lose some of the floral notes. A splash of lemon juice brightens the glaze just a touch.
Baking Tips: If you prefer extra-crispy skin, finish under the broiler for 1-2 minutes at the end, watching closely to prevent burning. The broiler helps the glaze set into a glossy, almost lacquered finish.
Glaze Variations: Add a whisper of ginger with the garlic for an extra zing, or finish with sesame seeds and sliced scallions for color and crunch. For a smoky note, a drop of smoked paprika in the glaze is lovely.
Lessons Learned: Don’t rush the sear. A patient, steady hand yields skin you can bite through with a satisfying crackle. And trust the glaze—when it thickens and clings, you know you’ve achieved the right moment to pull the pan from heat or slide it into the oven.
Storing and Reheating Tips
Whether you’re meal-prepping or saving leftovers for the next day, these tips keep honey garlic chicken thighs tasty and safe to eat.
Room Temperature: It’s best to enjoy leftovers within 2 hours at room temperature. If you’ve cooked in advance, refrigerate promptly to maintain texture and flavor.
Refrigerator Storage: Store in an airtight container for up to 3 days. Keep the glaze with the chicken rather than storing it separately to preserve that glossy finish when you reheat.
Freezer Instructions: Freeze cooked chicken thighs in a freezer-safe container for up to 2 months. Thaw overnight in the fridge before reheating. The glaze may separate slightly; warm gently and stir to re-emulsify.
Reheating & Glaze Timing: Reheat in a skillet over medium-low heat, adding a splash of water if needed to loosen the glaze. You can also reheat in a 300–325°F oven for 12–15 minutes. If you’re freezing leftovers, you can re-glaze during reheating to restore that lacquered finish.
In my experience, these leftovers are surprisingly forgiving: the glaze tightens up again, the chicken stays moist, and the garlic still delivers that comforting punch. It’s a small victory to open the fridge and know you’ve got something that tastes almost as good as fresh, with nearly no extra effort.
Frequently Asked Questions
Final Thoughts
This honey garlic chicken thighs is one of those recipes that feels like a trusted friend in the kitchen: reliable, warm, and wildly satisfying. It proves you don’t need a long list of ingredients to create something that tastes deeply comforting. It’s a dish I return to when I want dinner that feels like a hug but comes together without drama. The glaze is the real star—shiny, aromatic, and just sticky enough to make every bite feel special, whether you’re feeding a full house or a quiet evening for two. If you’re ever unsure what to cook on a busy night, start with this. It scales up beautifully for guests, travels well for potlucks, and the leftovers absolutely hold their own in a quick midday lunch. I hope you love making this as much as I do, and I can’t wait to hear which tweaks you try—share your variations in the comments or snap a photo for the community. Happy baking and even happier eating!
honey garlic chicken thighs
Ingredients
Main Ingredients
- 2 lb bone-in skin-on chicken thighs
- 2 tbsp olive oil
- 3 cloves garlic, minced
- 0.25 cup honey
- 0.25 cup soy sauce low-sodium
- 1 tbsp apple cider vinegar
- 0.5 tsp black pepper
- 0.5 tsp salt
Instructions
Preparation Steps
- Pat the chicken thighs dry and season with salt and pepper.
- In a large skillet, heat olive oil over medium heat. Add chicken thighs, skin-side down, and sear until golden brown, about 5 minutes per side.
- Add minced garlic and sauté for 30 seconds until fragrant.
- Pour in honey, soy sauce, and vinegar. Bring to a simmer and cook until the sauce thickens and coats the chicken, about 8 to 10 minutes.
- Remove from heat and serve hot. Optional: garnish with sesame seeds or chopped green onions.