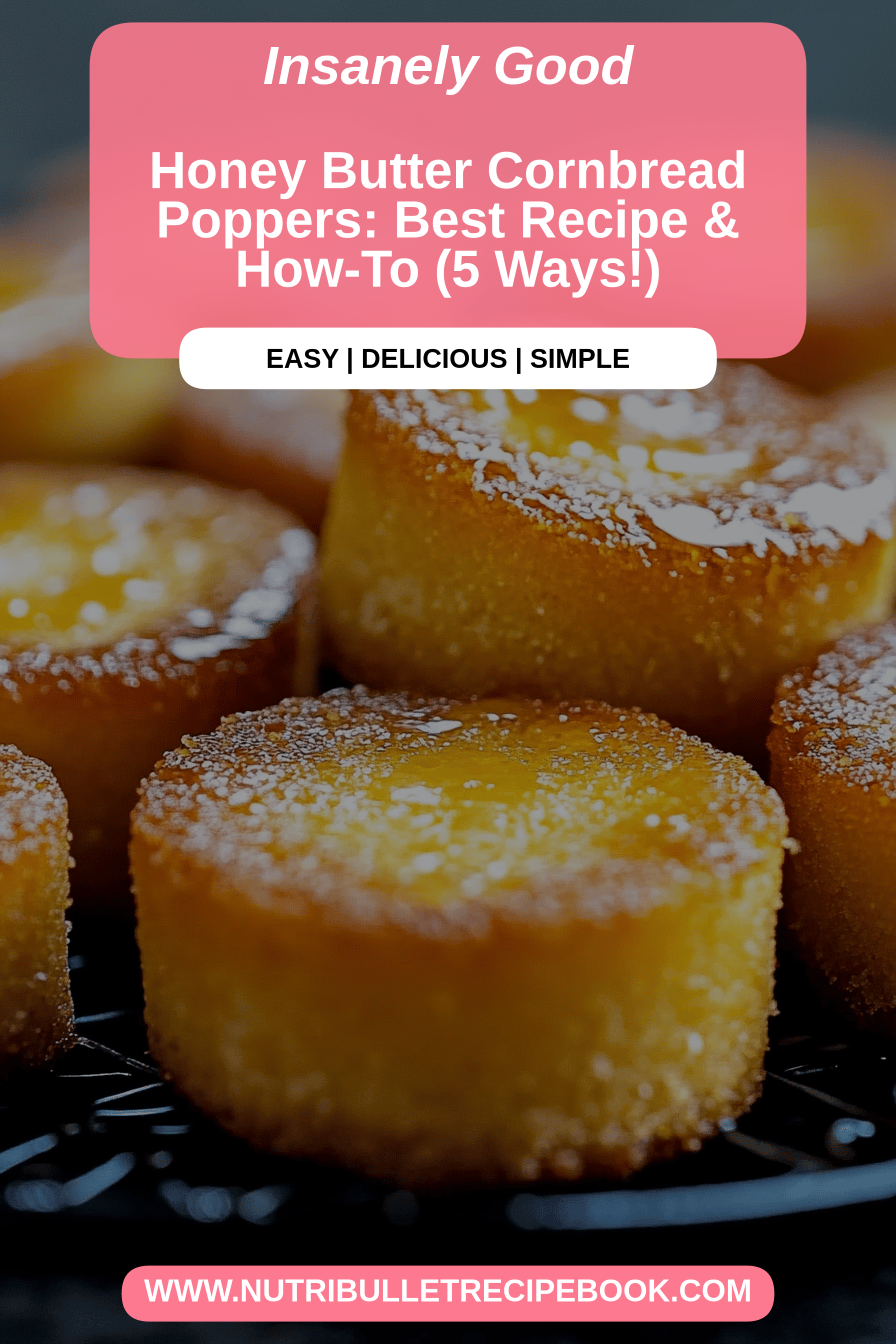
There are some recipes that just feel like a warm hug, you know? The kind that instantly transport you back to cozy kitchens, family gatherings, and the absolute joy of simple, delicious food. For me, that recipe is my Honey Butter cornbread. It’s not just any cornbread; it’s *the* honey butter cornbread, the one I’ve tweaked and perfected over years, the one that disappears in minutes whenever I bring it to a potluck. Forget those dry, crumbly disappointments you might have encountered elsewhere. This one is wonderfully moist, slightly sweet, and has this incredible depth of flavor from the honey and butter that just sings. It’s the perfect companion to chili, a barbecue spread, or even just a simple breakfast. If you’re looking for that quintessential, comforting cornbread experience, you’ve found it. It’s a lifesaver on busy nights and always a crowd-pleaser, especially with my little ones who practically beg for it!
What is honey butter cornbread?
So, what exactly makes this honey butter cornbread so special? Think of it as your classic, beloved cornbread, but elevated. It’s essentially a delicious quick bread made with cornmeal, flour, leavening agents, and usually eggs and milk or buttermilk. But the “honey butter” part? That’s where the magic happens. We’re infusing that rich, comforting sweetness of honey and the decadent flavor of butter right into the batter, and then often, we take it a step further with a luscious honey butter glaze or topping. It’s not overly sweet, mind you, but that subtle, warm sweetness combined with the slight grit and earthy flavor of cornmeal creates a symphony of textures and tastes. It’s the kind of bread that’s hearty enough to be a meal in itself but delicate enough to complement any dish. It’s familiar, yet excitingly new with every bite.
Why you’ll love this recipe?
There are so many reasons why I absolutely adore this honey butter cornbread, and I just know you will too. First off, the flavor is simply divine. It’s that perfect balance – not too sweet, not too savory, with a gorgeous golden crust and a tender, moist crumb. The honey adds a subtle floral note that just makes everything sing, and the butter? Well, butter makes everything better, doesn’t it? What I love most about this recipe is its sheer simplicity. Even if you’re not a seasoned baker, you can whip this up with minimal fuss. The ingredients are all pantry staples, making it incredibly cost-efficient to make a batch whenever the craving strikes. And the versatility! This isn’t a one-trick pony. It’s fantastic served warm with a dollop of butter for breakfast, alongside a hearty bowl of chili or stew for dinner, or even as a sweet treat on its own. I’ve even jazzed it up with a sprinkle of cinnamon or a pinch of nutmeg for a festive twist. It’s honestly the best all-around cornbread I’ve ever made, surpassing even some of the fancier recipes I’ve tried, all because it just hits that perfect sweet spot of flavor and ease.
How do I make honey butter cornbread?
Quick Overview
Making this delightful honey butter cornbread is surprisingly straightforward. You’ll whisk together your dry ingredients, mix your wet ingredients separately, then gently combine them. The key is not to overmix! We’ll then bake it until it’s golden brown and wonderfully fragrant. The final flourish often involves a simple, luscious honey butter glaze that seeps into the warm cornbread, taking it to a whole new level of deliciousness. It’s a process that’s both forgiving and rewarding, ensuring a fantastic result every single time, even for beginners.
Ingredients
For the Main Batter:
1 ½ cups yellow cornmeal (I prefer a medium grind for a nice texture, but fine works too!)
1 ½ cups all-purpose flour (you can experiment with a bit of whole wheat for nuttiness)
¾ cup granulated sugar (adjust slightly to your sweetness preference)
2 teaspoons baking powder (don’t skip this, it’s key for that fluffy lift!)
½ teaspoon baking soda
½ teaspoon salt (enhances all those lovely flavors)
2 large eggs, at room temperature (helps with even mixing and richness)
1 ½ cups buttermilk, at room temperature (this is my secret weapon for moisture and tenderness! If you don’t have it, see my tips below!)
½ cup unsalted butter, melted and slightly cooled (the heart of that glorious flavor)
For the Honey Butter Glaze (Optional, but highly recommended!):
¼ cup unsalted butter, softened
¼ cup honey (local honey is amazing if you can get it!)
1 tablespoon milk or cream (for a smoother consistency)

Step-by-Step Instructions
Step 1: Preheat & Prep Pan
First things first, let’s get your oven ready. Preheat it to 375°F (190°C). While it’s warming up, grab a 9×13 inch baking pan or a 10-inch cast-iron skillet. Grease it really well with butter or cooking spray. I often like to melt a tablespoon or two of butter right in the pan and swirl it around to coat the bottom and sides evenly – it gives the cornbread a wonderfully golden, slightly crisp edge.
Step 2: Mix Dry Ingredients
In a large mixing bowl, whisk together the cornmeal, all-purpose flour, granulated sugar, baking powder, baking soda, and salt. Whisking them well ensures that all the leavening agents and salt are distributed evenly, which is super important for a consistent rise and flavor throughout your cornbread. You want to see a nice, uniform mixture with no lumps.
Step 3: Mix Wet Ingredients
In a separate medium bowl, whisk together the eggs until they’re lightly beaten. Then, pour in the buttermilk and the melted butter. Whisk everything together until it’s well combined. Make sure your butter isn’t too hot when you add it to the eggs, or it might scramble them slightly – just slightly cooled is perfect.
Step 4: Combine
Now, pour the wet ingredients into the bowl with the dry ingredients. Using a spatula or a wooden spoon, gently fold the ingredients together until *just* combined. Seriously, don’t overmix! A few streaks of flour are totally fine. Overmixing will develop the gluten too much, resulting in a tougher cornbread. We’re going for tender and moist here, so stop mixing as soon as you don’t see large dry patches.
Step 5: Prepare Filling
If you’re making the optional honey butter glaze, now’s the time. In a small bowl, combine the softened butter and honey. Use a fork or a small whisk to mix them until they’re smooth and creamy. Add the milk or cream and mix again until you have a pourable, glossy glaze. You can adjust the consistency by adding a tiny bit more milk if it’s too thick, or a bit more softened butter if it’s too thin.
Step 6: Layer & Swirl
Pour the cornbread batter into your prepared pan or skillet. Spread it out evenly. If you’re adding the glaze now, you can carefully drizzle it over the top of the batter. Some people like to swirl it in slightly with a toothpick, but I often just let it bake on top for a lovely golden finish. If you’re not glazing before baking, you’ll do it right after it comes out of the oven.
Step 7: Bake
Bake for 20-25 minutes for a 9×13 pan, or about 25-30 minutes for a cast-iron skillet. You’ll know it’s done when the edges are golden brown and a toothpick inserted into the center comes out clean or with a few moist crumbs attached (not wet batter!). The smell that wafts from your oven at this stage? Pure heaven. It’s that sweet, corny aroma that instantly makes you feel cozy.
Step 8: Cool & Glaze
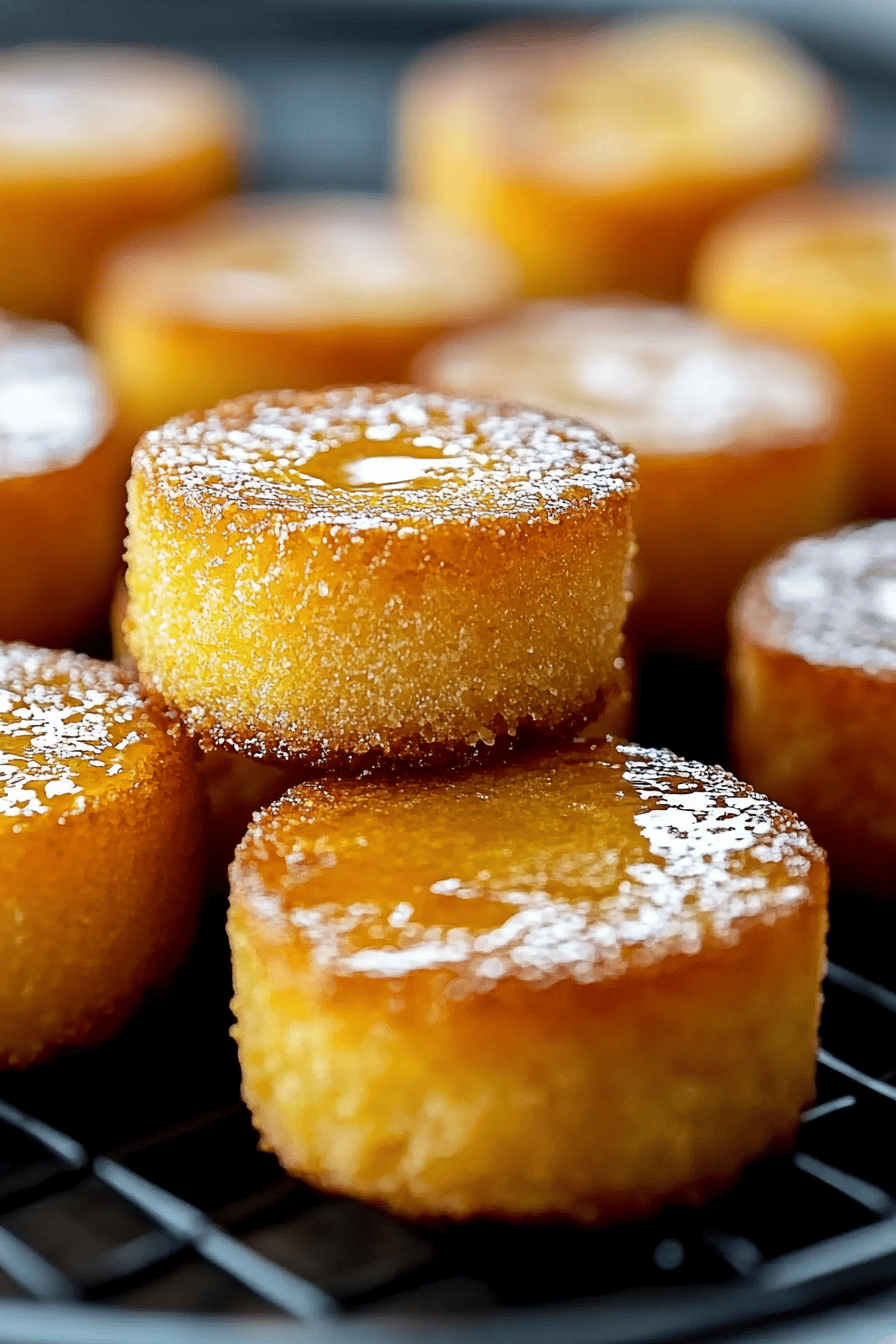
Once baked, remove the cornbread from the oven. If you didn’t glaze it before baking, now is the perfect time! While the cornbread is still hot, brush or drizzle the honey butter glaze evenly over the top. The heat of the cornbread will melt the glaze and allow it to seep in beautifully. Let it cool in the pan for at least 10-15 minutes before slicing. This helps it set up and makes it much easier to cut without crumbling.
Step 9: Slice & Serve
Once it’s cooled slightly, slice your beautiful honey butter cornbread into squares. Serve it warm, and watch it disappear! It’s absolutely wonderful on its own, but even better with a little extra pat of butter melting on top. The texture is perfectly tender, the flavor is just right, and that hint of honey and butter makes it truly irresistible.
What to Serve It With
This honey butter cornbread is so versatile, it can be the star of the show or a delightful supporting player. For breakfast, it’s phenomenal served warm with a smear of butter and a drizzle of extra honey. It’s also a lovely change from toast alongside scrambled eggs or bacon. At brunch, imagine it as part of a spread with fresh fruit, yogurt, and maybe some savory breakfast meats. For a truly comforting meal, it’s the absolute best accompaniment to chili, stews, or slow-cooked Pulled Pork. The slightly sweet cornbread cuts through the richness of savory dishes beautifully. And for a dessert option? Oh, it’s surprisingly good! Serve a warm slice with a scoop of vanilla ice cream and a drizzle of caramel sauce – it’s like a deconstructed pie! My family loves it with my homemade chili, and I always make sure to have extra because it’s gone in minutes. It’s also fantastic with a simple side salad and grilled chicken for a lighter meal.
Top Tips for Perfecting Your Honey Butter Cornbread
After making this countless times, I’ve picked up a few tricks that really help ensure perfect results every single time. These are the little things that make a big difference!
Zucchini Prep: Wait, zucchini? Oh, you might be thinking of a different recipe! For *this* honey butter cornbread, there’s no zucchini involved. My apologies if that caused any confusion! Let’s stick to perfecting the cornbread itself.
Mixing Advice: The absolute biggest tip I can give you is to NOT overmix the batter. Once the wet and dry ingredients are combined, mix just until you no longer see big pockets of dry flour. A few small streaks are perfectly fine. Overmixing develops the gluten in the flour, which leads to a tough, dense cornbread. We want it tender and crumbly, not chewy!
Swirl Customization: If you decide to swirl the honey butter glaze before baking, use a knife or a toothpick and make gentle, swirling motions. Don’t overdo it, or you’ll just end up with a uniformly colored batter. A few distinct swirls are all you need for visual appeal and to get those lovely pockets of honeyed goodness.
Ingredient Swaps: If you’re out of buttermilk, don’t fret! You can make a quick substitute by pouring 1 ½ tablespoons of white vinegar or lemon juice into a measuring cup and then filling it up to the 1 ½ cup line with regular milk. Let it sit for 5-10 minutes until it looks slightly curdled. It works just as well for adding that necessary acidity and tenderness. For the cornmeal, while yellow is traditional and gives that classic color, white cornmeal works too, it just yields a lighter colored bread.
Baking Tips: Every oven is a little different, so keep an eye on your cornbread. If it’s browning too quickly on top but isn’t cooked through, you can loosely tent it with aluminum foil. For a cast-iron skillet, make sure it’s preheated; a hot skillet helps create a beautiful, crisp bottom crust.
Glaze Variations: The honey butter glaze is fantastic, but you can get creative! Add a pinch of cinnamon for warmth, or a tiny dash of cayenne pepper for a subtle kick that contrasts beautifully with the sweetness. If you prefer a less sweet glaze, reduce the honey slightly. For an even richer glaze, use cream instead of milk.
Storing and Reheating Tips
This honey butter cornbread is honestly best enjoyed fresh, but it stores surprisingly well, and reheating is a breeze. If you have any leftovers (which is rare in my house!), you can store them at room temperature, tightly covered with plastic wrap or in an airtight container, for up to two days. The honey butter glaze helps keep it moist. For longer storage, pop it in the refrigerator. It will keep well in the fridge for about 4-5 days. Just make sure it’s well-covered to prevent it from drying out.
If you’re looking to freeze it, this cornbread freezes beautifully! Let it cool completely first. You can freeze the whole pan, or slice it into individual portions. Wrap each portion tightly in plastic wrap, then in aluminum foil, or place them in a freezer-safe bag. It will last for up to 2-3 months in the freezer. When you’re ready to enjoy it, thaw overnight in the refrigerator. For reheating, I find the best way is to warm it gently in a low oven (around 300°F or 150°C) for about 10-15 minutes until warmed through. This helps restore some of that lovely texture. You can also microwave individual slices for about 20-30 seconds, but be careful not to overheat, or it can become tough. If you glazed before baking, that glaze will hold up well to storage and reheating. If you plan to glaze after reheating, do so just before serving.
Frequently Asked Questions
Final Thoughts
Honestly, this honey butter cornbread is more than just a recipe to me; it’s a little slice of happiness. It’s the kind of bake that brings people together, sparking conversations and creating sweet memories. The aroma that fills your kitchen as it bakes is just incredible, and that first bite of warm, moist cornbread with that hint of honey and butter is pure bliss. It’s proof that sometimes, the simplest ingredients and methods yield the most extraordinary results. If you’re looking for a recipe that’s comforting, delicious, and surprisingly easy to master, you absolutely have to give this one a try. I promise, it will quickly become a staple in your baking repertoire, just as it has in mine. I’d love to hear how yours turns out, or if you have any fun twists you’ve tried! Don’t be shy about sharing your experience in the comments below. Happy baking, everyone!
Honey Butter Cornbread
Ingredients
Cornbread Ingredients
- 1.5 cups all-purpose flour
- 1.5 cups yellow cornmeal
- 0.5 cup granulated sugar
- 2 teaspoons baking powder
- 0.5 teaspoon baking soda
- 0.5 teaspoon salt
- 2 large eggs
- 1.5 cups buttermilk
- 0.33 cup vegetable oil
Honey Butter Glaze
- 0.5 cup unsalted butter, melted
- 0.25 cup honey
Instructions
Preparation Steps
- Preheat oven to 400°F (200°C). Grease and flour a 9x13 inch baking pan.
- In a large bowl, whisk together the flour, cornmeal, sugar, baking powder, baking soda, and salt.
- In a separate medium bowl, whisk together the eggs, buttermilk, and vegetable oil.
- Pour the wet ingredients into the dry ingredients and stir until just combined. Do not overmix.
- Pour the batter into the prepared baking pan and spread evenly.
- Bake for 20-25 minutes, or until a toothpick inserted into the center comes out clean.
- While the cornbread is baking, prepare the honey butter glaze by whisking together the melted butter and honey in a small bowl.
- Once the cornbread is out of the oven, immediately brush the warm glaze over the top.
- Let it cool slightly before slicing and serving warm.